Account Setup - Overview
Once you create an account in Bigin, you can add the details about your organization, add roles that your organization follows like CEO, COO, Manager, etc. and create profiles allowing users to access the functions that are assigned to them.
Go through these four stages to finish setting up your account:
Roles
Normally every company follows an organizational hierarchy and every member in that organization has a specific role to perform. For example, Zylker Feeds is a restaurant and has the organizational hierarchy as follows:
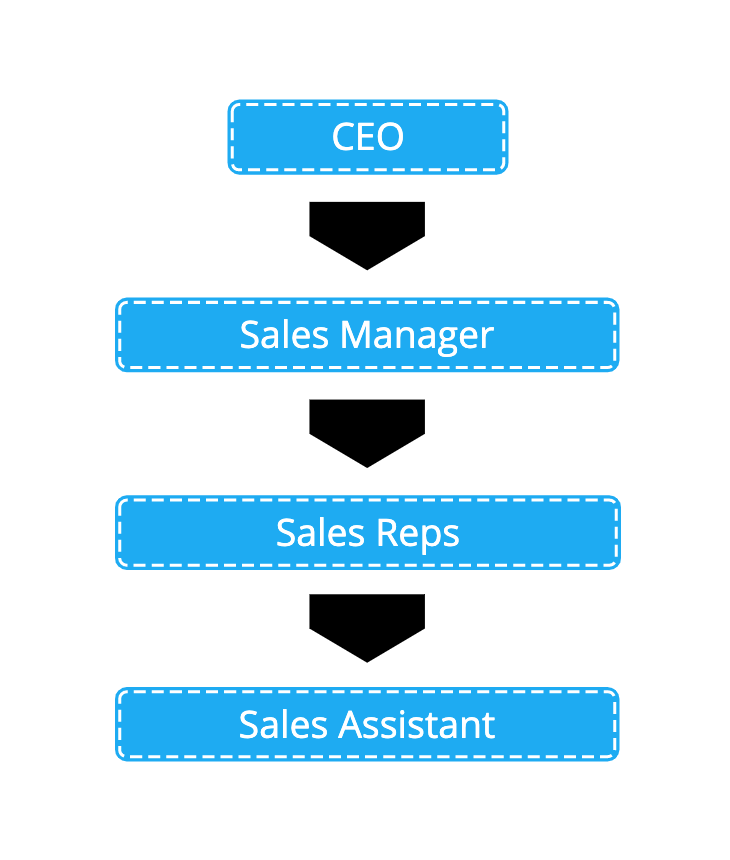
This hierarchy can be implemented in your Bigin account allowing users in the higher level of hierarchy to access the data of the users in the lower level of the hierarchy. The CEO can access the data of the Sales Manager and the Sales Manager can in-turn access the data of both Sales Reps and the Sales Assistant.
Profiles
The duties and responsibilities of users in your CRM account differs from one person to another and hence they don't need access to everything.
Consider this analogy, you are the dessert chef at Zylker Feeds and you specialize in making Apple Pie, Lemon Tart and Chocolate truffle. The ingredients you need access to includes apple, lemon, chocolate, flour, sugar and other essentials whereas, things like green chilli, ginger, onion, meat, etc. are not needed. It doesn't make a difference even if they are provided to you, you are not going to use it anyway.
Likewise, in any business scenario, profiles in Bigin helps you give access to certain functions that the user needs access to accomplish his task and prevents access to functions that the user can live without.
Users
The employees in your organization can be added as users in your Bigin account.
Let's say John H. Watson is your Restaurant Manager and you want to add him in your Bigin account. You can do so by selecting the role and choosing the appropriate Profile. Now an invite will be sent to John H. Watson allowing him to join your Bigin account. Once added, he can perform the actions that he has the permission to do so thus fulfilling his role.
Organization
The information about your organization can be specified. Add basic information, address, locale, choose time zone and currency. This data is helpful for your users to add as merge fields in email templates.
Related Articles
Client Portal - An Overview
As a recruiter, having a great relationship with your clients is critical for financial success. It's equally important to cut down lengthy email conversations and to ensure smooth collaboration. In Zoho Recruit's client portal, your clients can ...Zia - An Overview
In today's world, businesses deal with mammoth sizes of data that come from multiple sources. It could be a simple phone enquiry that you just had, a new follower on your Facebook page or a bounced email in your marketing campaign. Making sense of ...Tagging records - An Overview
Tags are unique identifiers that can be associated to your CRM records to search, sort, categorize, filter, and segment records in a more efficient way. It is usually like adding keywords or any additional information to any record in CRM. For ...Tagging records - An Overview
Tags are unique identifiers that can be associated to your CRM records to search, sort, categorize, filter, and segment records in a more efficient way. It is usually like adding keywords or any additional information to any record in CRM. For ...Setup
The user info widget enables you to manage departments, user accounts, and plan details. There are quick access links to various sections, and links to download the mobile apps right from within the widget. You can configure your survey's live form ...