Adding Resource Services

Super admins and admins can view and edit this information. Managers can only view this information. Staff members will not have access to this information.
Resource booking refers to asset booking services—for example, renting a vehicle or a banquet hall. The resource is priced by time, and customers pay based on the time for which they book the resource.
To add a resource booking,
- Click
in the top right corner, click Services > Add New Service.
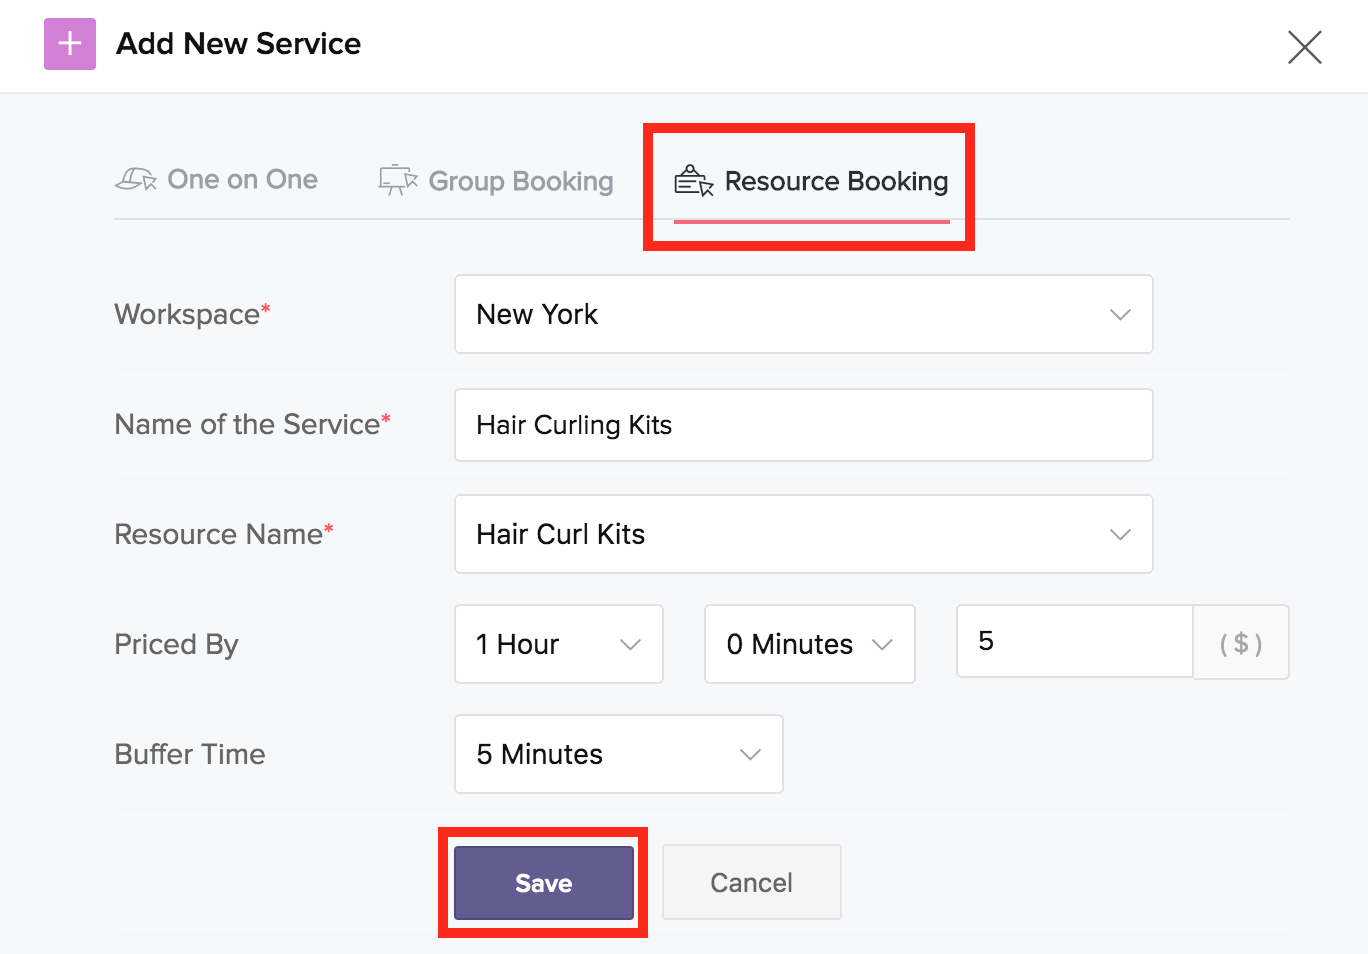
- 'One on One' is selected by default. Select Resource Booking and enter the following details:
- Workspace - The name of the workspace to which the service will be associated. Settings of the selected workspace will be applied to the service.
- Name of the Service - Provide a name for this service. This field accepts a maximum of 50 characters.
- Resource Name - Click Add Resource in the drop-down to add a resource that can be offered for bookings.
- Specify a name and description for the resource. Click Save.
Resources can be added from the Resources section as well, which will get listed in the drop-down by default.
- Priced by - Select a time period and the amount chargeable for that time period.
The time period does not indicate that the resource can be booked only for the given time period. It is simply priced by a specified amount for the specified time. For example, $1 for 1 hour would mean that customers can use the resource for as long as they need, say for 30 hours, and will be charged for the period of time, in this case, $30.
- Buffer Time - Time gap between each booking.
3. Click Save.
The service gets created, and you will be taken to the Services pages. All the services you add will be listed here in the Services section.
Resource booking can also be created from other places in your account as listed below:
- Navigate to the Services section and click the + icon in the top-right corner.
- Navigate to Workspaces, select the required workspace, then click Services. Next, click Add New Service in the top-right corner.
- On the home page, click the + icon in the top-right corner and then select Service from the drop-down.
Related Articles
Manage Services
Update: Accounts created on or after 17th January 2020 come with industry specific default labels for "staff" and "services". The ability to customize the labels is kept intact. The Manage Business icon in the top menu bar is your go-to for managing ...Adding Group Booking services
Super admins and admins can view and edit this information. Managers can only view this information. Staff members will not have access to this information. Group booking refers to services that can accommodate multiple customers (up to the specified ...Adding a resource
Super admins and admins can view and edit this information. Managers can only view this information. Staff members will not have access to this information. Resources are physical assets that can be rented out as a service. For example, renting a ...Adding One-on-One services
Super admins and admins can view and edit this information. Managers can only view this information. Staff members will not have access to this information. A one-on-one service refers to appointments for a fixed amount of time, such as an ...Resource Properties
Super admins and admins can view and edit this information. Managers can only view this information. Staff members will not have access to this information. Resource details such as information, availability, the Booking URL to book the resource, ...