Approval Process
Introduction
As a recruiter, you may encounter several instances in your organization’s hiring process where certain actions need the approval of one or more senior decision-makers. For instance, recruiters may need the hiring manager’s approval for creating job openings that fall under certain criteria. Handling this outside your recruitment software can be tiring as you’d have to handle certain tasks within the system and the others offline.
Moreover, in your recruitment database when there are loads of decisions to be approved, it becomes a tiresome task to sort through records and send them for someone’s approval.
Zoho Recruit’s Approval Process feature makes this easier by automating these monotonous tasks.
Users with the Manage Workflow profile permission can set up approval processes by specifying criteria based on which records will be sent for approval. You can also include a set of actions that will be performed on approval and rejection
Availability

Permission Required:
- View access: Users with the Manage Workflow permission.
- Create/Edit/Delete Access: Users with the Administrator profile. The approvals tab will be available for all users
Edition Required: This feature is available for Enterprise/Enterprise Trial plans of the Corporate Hiring edition of Zoho Recruit.
Add an Approval Process
Each approval process is associated with a rule that defines the process. You need to specify the rule criteria, the approval authority and also actions that need to be carried out on approval or rejection.

Note:
- When a record has been submitted for approval, all actions will be locked until it is approved.
- When a record is rejected in an approval process, the user can either resubmit the record after making the necessary changes or delete it.
To add an approval process
- Go to Setup > Automation > Approval Process
- Click on Add Approval Process.
- In the New Approval Process page, do the following:
- Select the Module to which you want to apply the approval process.
- Specify a Name and Description for the approval process.
- Select the following option(s) based on which the approval process will be executed.
- Record Creation – The approval process will be triggered when a record is created.
- Record Edit – The approval process will be triggered when a record is edited.
- Click on Add Rule to this Process.
- Specify the Rule Criteria. Approval process will be applicable to the records that meet the criteria.
Adding criteria is mandatory. You can edit the criteria pattern manually, if required. - Under Who should Approve, select Users, Roles, Groups or Levels from the drop-down lists.
Levels are listed based on the number of levels defined in your organization's role hierarchy. When you select levels, the approving authority is applied for the record based on its owner's level in the role hierarchy.
For example: Consider a case where the record's owner has four superior roles, the approval process can be configured for a maximum of three levels of approval. Which means, the record submitted for approval needs to be reviewed by three users, each from the immediate three superior roles. - Click on the Add icon to include more users who need to approve. On adding more than one entry for approval, you will get the following options:
- Anyone - Select this option if you want any one of the members to approve.
- Everyone - Select this if you want all the members to approve. You can either set the multiple approvals to be parallel or sequential.
- Sequential - All the users need to approve in a sequence. Only after first user approves will the second user be able to approve.
The user mentioned first, on the top of the list, will be the first person to approve the record followed by the next user and so on. - Parallel - All the users need to approve. They can approve simultaneously. There is no sequence in which they need to approve.
- If your process requires multiple managers approve, you can set up approval levels with Reporting Managers too.
- Under Who Should Approve, select Reporting Manager.
- Click on the '+' icon to add levels to your approval process.
- Once you've added all the approvers, you can choose between Sequential and Parallel approvals.
- Specify the Action on Approval that includes adding a task, updating fields, sending email alerts, calling web hooks and custom functions.
- Specify the Action on Reject that includes updating fields, sending email alerts, calling web hooks and custom functions.
- Click on Done and then Save.
Note:
- You may create multiple rule entries for an approval process. Make sure you reorder the rule entries based on its priority. The first rule entry that matches the record will be applied to the record.
- For each module, a maximum of 10 approval processes can be active. In each approval process, you can add up to 5 rule entries.
- Under Who should Approve, you can select 10 entries. You can either select users, roles, groups or levels. If you select a role with no users associated to it, the record will be automatically marked as approved in that particular level.
- When a role is selected as the approval authority, the manager of the role is the one who can approve the record. In case there is no manager assigned to the role, the record can be approved by the first user listed in that role. For Groups, the case is similar. The first user listed in the group needs to approve the record.
- Users with the Administrator profile can view all the records that are waiting for approval in the organization. The Administrator can also approve or reject the records at anytime.
- You can create a set of actions on approval and rejection. These actions include sending email alert, updating field, assigning task, calling webhooks and calling custom function.
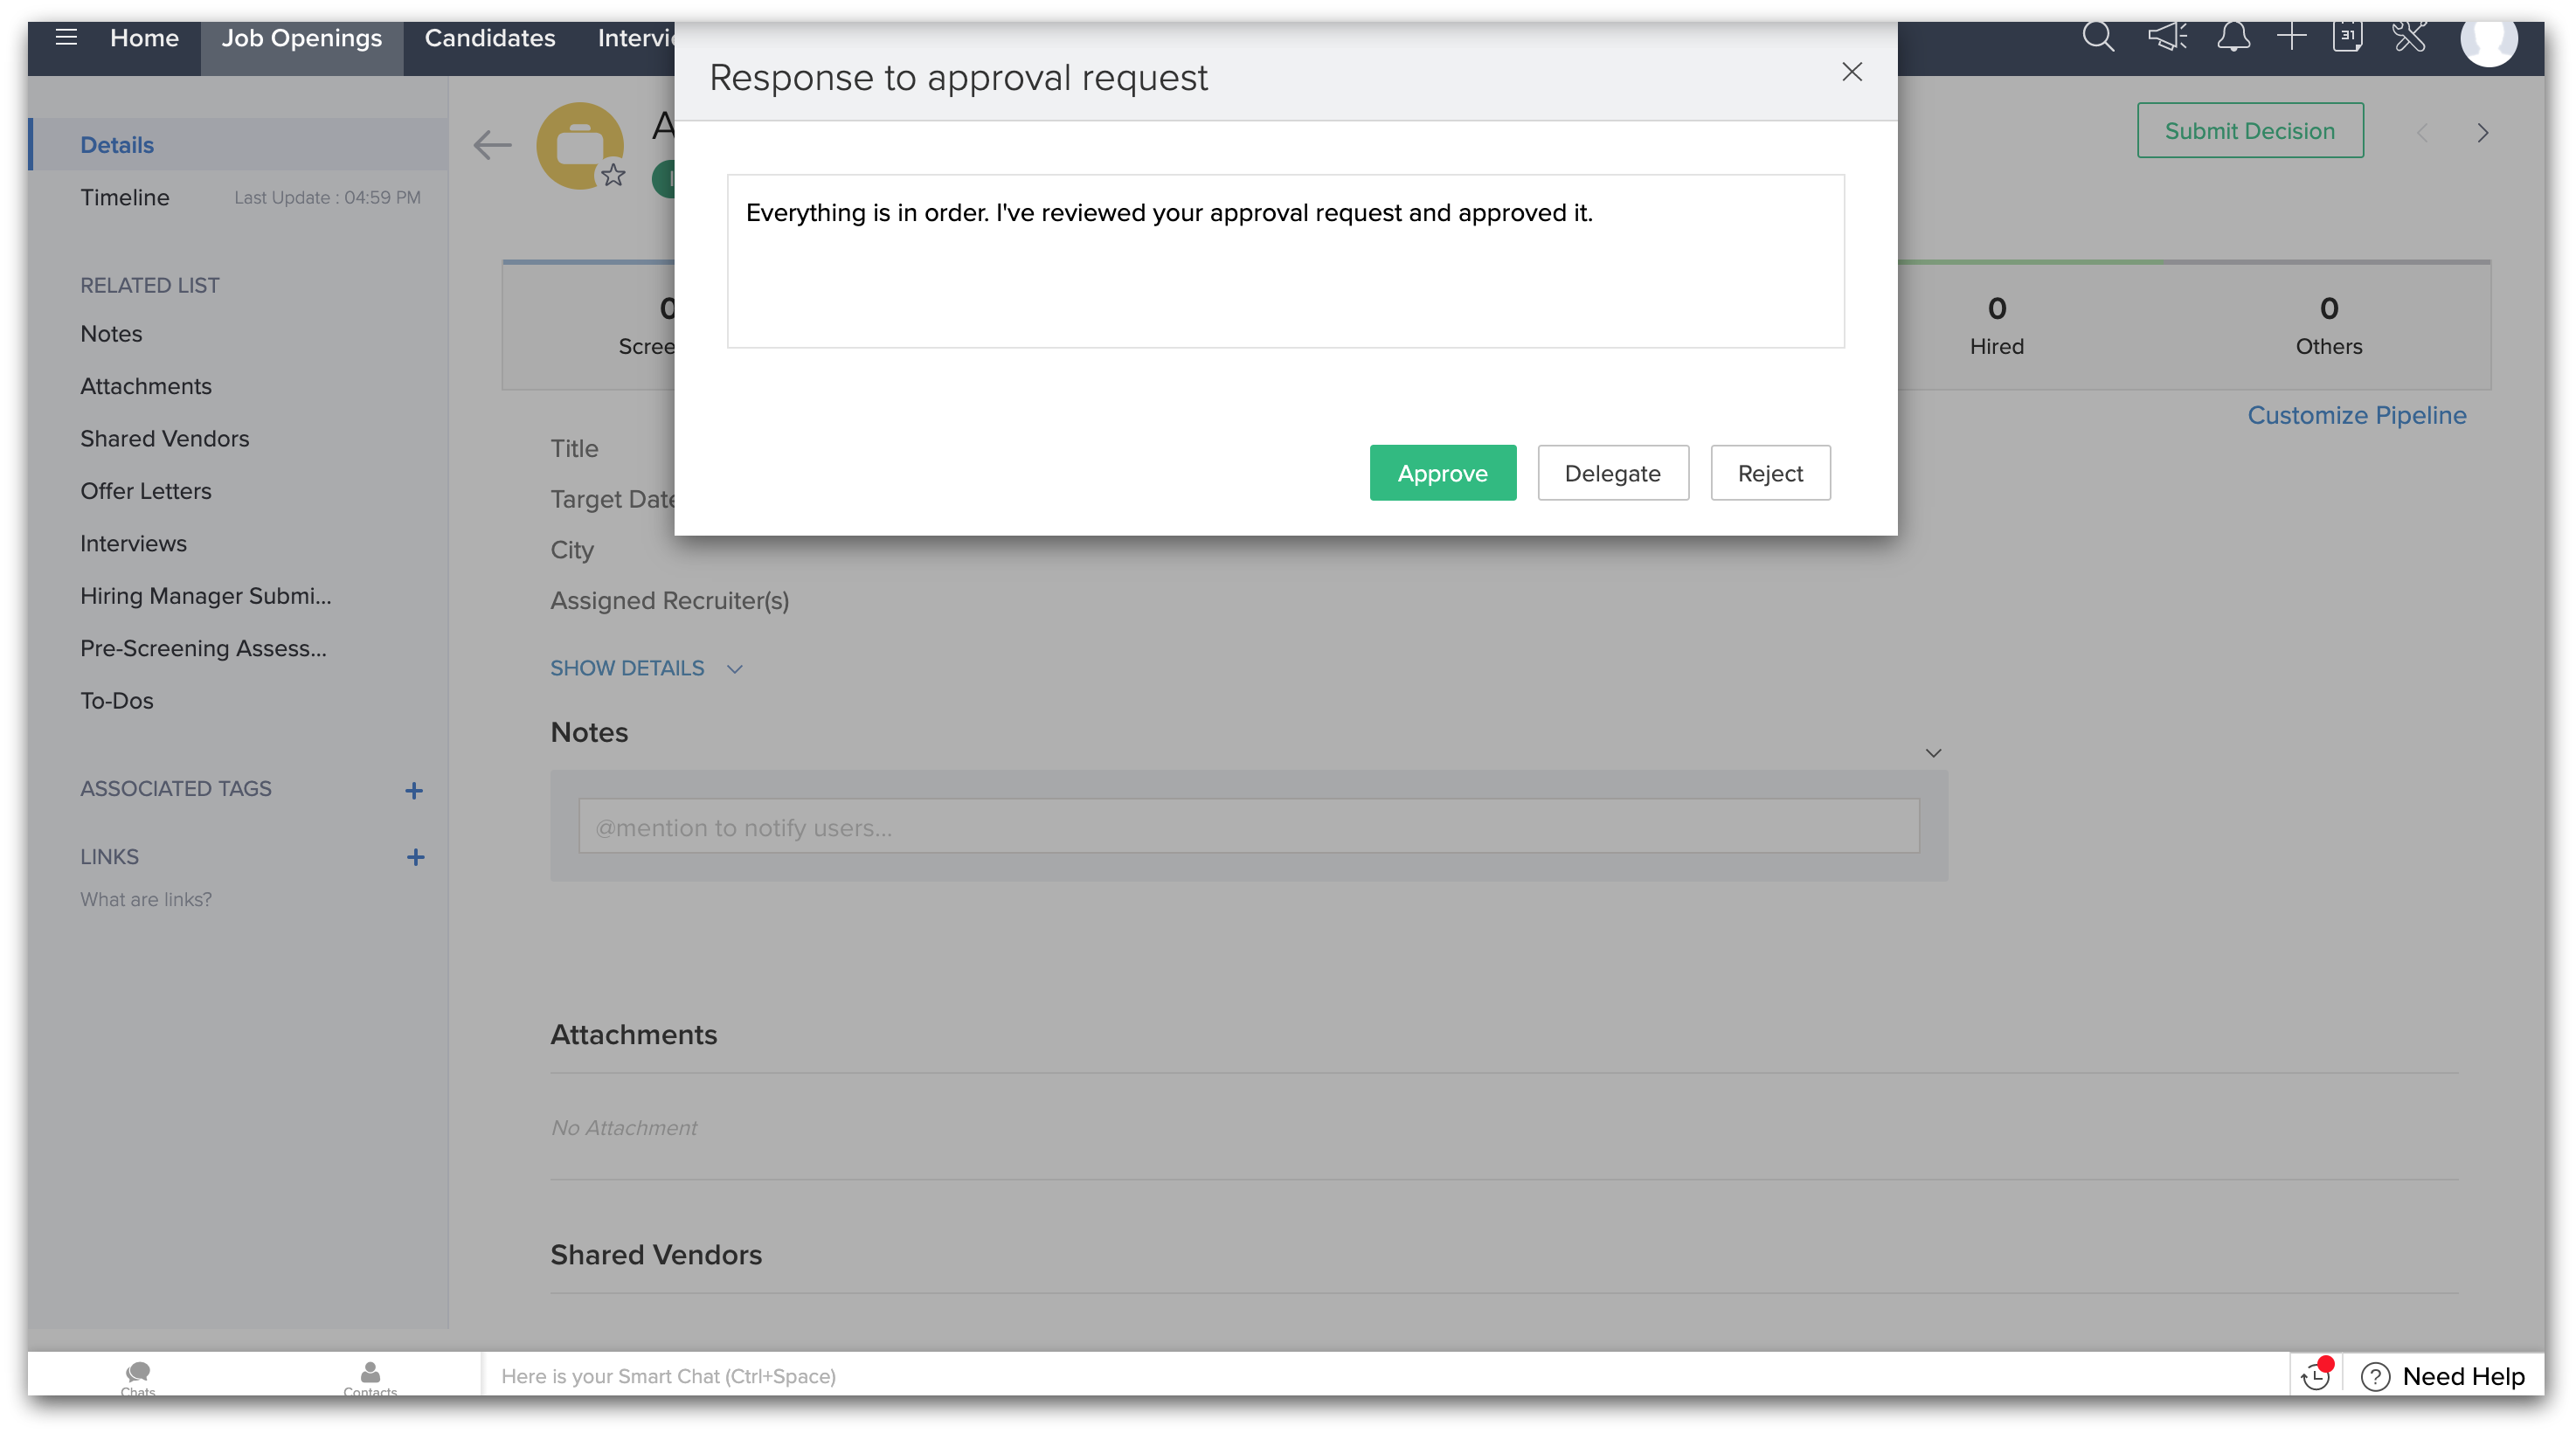
- When a record is waiting for approval, the Convert, Delete and Edit options are disabled. The record will be marked as Waiting for approval and an option to respond (Approve, Delegate or Reject) will be available in the record's details page.
- When a couple of records are waiting for approval, and the approval process is modified -- the changes made to the process along with its actions will not be applicable to those records that were already in the approval process before it was modified.
- If records are already awaiting approval, you cannot delete the associated approval process. If required, you can deactivate the process.
- If a record meets more than one rule entry, it will be submitted for approval based on the first rule entry that it matches in the given approval process.
- Records that are rejected can be submitted again for approval from the record details page.
Associate Actions on Approval/Rejection
With each approval process, you can associate some actions such as adding a task, updating fields, sending email alerts, calling web hooks, etc. that will be executed on approval or rejection of a record. When you set multiple stages of approval that involves more than one user to approve the record, you can assign a task and also update a field after each approval. Whereas, email alerts, web hooks and custom functions can be added only to be triggered after the final approval.
Actions on rejection do not include all the 5 of them. You cannot associate a task on rejection. The Assign Task option is to set a task for the next user who needs to approve the record. The task ideally is to check the records waiting for their approval. In case of a record being rejected, assigning a task is not required.
Assign Tasks
- While creating an approval process, under Actions on Approval, click on Assign Tasks.
Tasks that you've already created will be displayed here. You can select one to associate it and skip to the last step. - Click on New Task.
You can also select existing tasks and associate them to the process. - In the Assign Task pop-up, do the following:
- Enter a Subject for the task.
- Select the number of days from the drop-down list to set the Due Date for task.
- Select the Status and Priority of the task from the respective drop-down lists.
- Select the Notify Assignee checkbox, if required.
A notification email, informing the user about the task, will be sent only to active and confirmed user. - Specify a Description for the task.
- Click Save & Associate.
Update Fields
- While creating an approval process, under Actions on Approval/Rejection, click on Update Fields.
- In the Update Fields popup, do the following:
- Choose a field to update from the drop-down list.
- Specify the Value that you want to update on each level on approval.
- Click on Done.
Send Alerts
- While creating an approval process, under Actions on Approval/Reject, click on Send Alerts.
Alerts that you've already created will be displayed here. You can associate an existing alert and skip to the last step. - Click on New Alert.
- In the Send Alert popup, do the following:
- Enter a Name for the alert.
- Select the Email Recipients for the alert email from the drop-down list.
You can select persons associated with the record, users, roles, subordinates and groups. - Specify Additional Recipients for the email alert in the text box.
Use commas to separate more than one email address. - Select the Email Template that you want to use for the alert or create a template.
After selecting the template, you have to enter the From and Reply to email addresses. Here you can choose from - Your email address
- Your organization email address
- Current user email address
- Record owner's email address
- Other user's email address
- For Rejection: The Email Template will be automatically sent as a notification from the email address notifications@zohorecruit.com.
- Click on Save & Associate.
These alerts will also be listed under Setup > Automation > Workflow > Alerts.
Note:
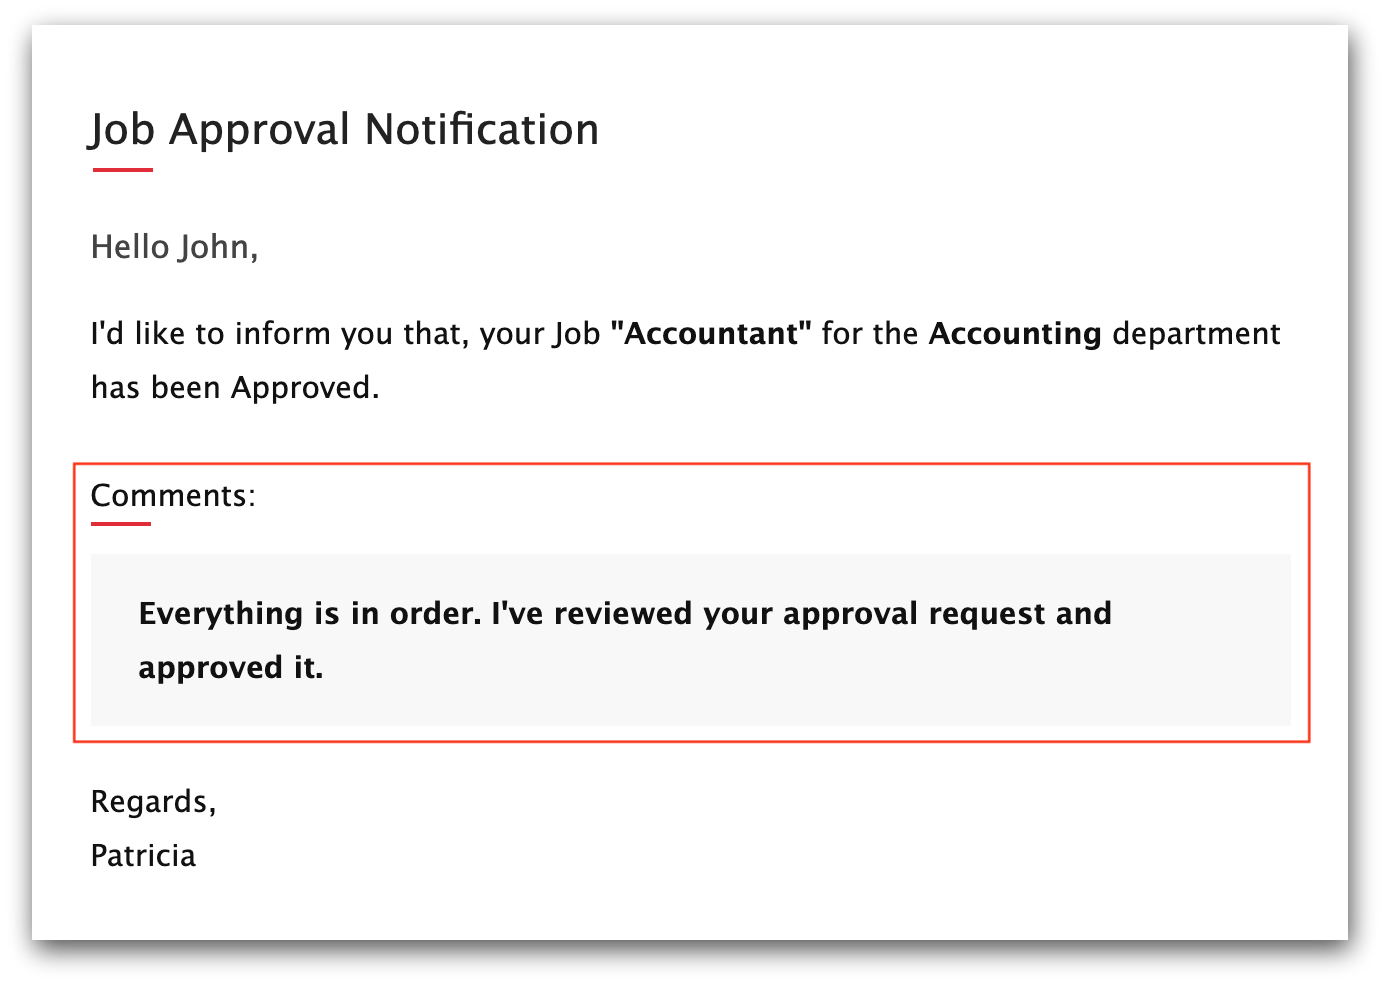
You can choose to include the comments provided during the approval process to the email by using the Include Approval Comments checkbox while editing the email template.
You can choose to include the comments provided during the approval process to the email by using the Include Approval Comments checkbox while editing the email template.
Once you've enabled this, your comments will be attached to the notification email.
Call Web hooks
- While creating an approval process, under Actions on Approval/Reject, click on Call Web hooks.
Already created web hooks, if any, will be listed. You can select one to associate it and skip to the last step. - Click on New Web hook.
- In the Call Web hook popup, do the following:
- Enter a Name and Description for the web hook.
- In the URL to Notify text box, specify the REST API URL of the third-party application.
- Select POST or GET as the type of API Method.
- Under URL Parameters > Append Entry Parameters, do the following:
- For Parameters in Standard Format, specify the Parameter Name and the corresponding Parameter Value.
This is the request parameter sent while triggering the web hook notification to third-party application. - For Parameters in User Defined Format, specify the Parameter Name and the corresponding Value Description.
- Under URL Parameters - Append Custom Parameters, do the following:
- Specify the Parameter Name and the corresponding Parameter Value.
- Check the Preview URL.
- Click on Save & Associate.
These web hooks are also listed under Setup > Automation > Workflow > Web hooks.
Call Custom Function
- While creating an approval process, under Actions on Approval/Reject, click on the Call Custom Functions section.
Custom functions that you've already created will be listed here. You can also associate one from the list displayed. - These custom functions will also be listed under Setup > Automation > Workflow > Custom Functions.
Note:
- Once a record has been submitted for approval, a system generated notification email will be sent to the user who has to approve the record(s).
- On the approval of the record, the record owner (the user who submitted the record for approval) will receive an email as per the email alert configuration in the approval process. In the absence of an email alert for the record owner, a system generated email regarding the record approval will be sent to the record owner.
- In case of multiple stages of approval, you can assign a task and also update a field after each approval.
- You can associate one email alert, web hook and custom function each. It will be triggered only after the final approval, if there are multiple approval stages.
- While adding alerts, web hooks or custom functions, those created for Workflow Rules will also be listed and vice versa. You can associate them with the approval process.
Approve/Reject from the Approval Tab
Records that are lined for approval can be viewed in the Approvals tab. From this tab, you can approve or reject the records that are waiting for your approval. If needed, you can also delegate the record's approval to another user. Only after the approval, you can convert, edit or delete the record.
Users with the Administrator profile can view all the records that are waiting for approval in the organization. The Administrator can also approve or reject the records at anytime.
To approve/reject from the Approvals Tab
- Click on the Approvals Tab.
You will be able to see the list of records that are waiting for your approval. - Click on a record to view the following details:
- Details of the record - You can view the details of the user who owns the record that is waiting for approval, the criteria based on which the record was sent for approval and the users who need to approve.
- History of the user's requests - This section provides the history of all the approval requests for records owned by a user.
- Click on Approve, Delegate or Reject.
- If you click on Delegate, select a user to whom you want to transfer the record for approval and then click on Delegate.
Note:
- If the user who needs to approve a record does not have access to the record, the user will still be able to approve the record.
- The tab will also list the last 5 approvals or rejections under the Recent Activities section.
- There is no set time frame within which the users need to approve/reject the record.
Reorder Approval Processes and Process Rules
When there are multiple approval processes for a module, the system checks if a record matches the criteria in an approval process in the same order in which it is listed. By default, the approval processes are listed in a chronological order with the first process created, on the top of the list. If a record meets the criteria of more than one rule entry, it will be submitted for approval based on the first rule entry that it matches in the given approval process. So based on your requirements, you can reorder the approval processes. The same is the case with the Rules in an approval process.
To reorder approval processes
- Go to Setup > Automation > Approval Process.
- In the Approval Process List page, approval processes for all modules will be listed.
- Click on the Module header and select the module whose approval processes you want to reorder.
- Click on Reorder Processes.
- Drag and drop the approval processes according to your requirements and click on Save.
To reorder rules in an approval process
- Go to Setup > Automation > Approval Process.
- In the Approval Process List page, select an approval process.
- Click Reorder Rules.
This option will be available only when you have multiple rules for the approval process. - In the pop-up, drag and drop the rules according to your requirements and click on Save New Order.
View Approval History
Approval History gives you a list of records that were submitted for approval.
To view the Approval History
- In your Zoho Recruit account, click on the Approvals tab.
- In the Awaiting your Approval page, click Approval History.
The Approval History page displays all the approval-related records in a chronological order.
Related Articles
Approval process
Define Approval Process for records Help guide Approval Process: an Overview Adding an Approval Process Associating Actions for Approval or RejectionCan I skip the content approval process?
No. Users who have been marked to go through the content approval process cannot send out campaigns unless the campaign content has been reviewed and approved by an administrator.What are the consequences of deactivating an approval process?
If you deactivate an approval process, the records that were created/modified and match the rule criteria of the approval process before deactivation will be pending approval. They can be approved by the users selected to approve them. Once ...Some records do match an approval process but they have not been submitted for approval. Why?
Records that are created/modified and match rule criteria of a process after creation of a approval process are the ones that will be submitted for approval. If you find that records that match the criteria set but are not submitted for approval, it ...How do I enable the approval process for timesheet?
Here are the steps that will help you enable the approval process for your timesheet: In Settings, select the Org Settings. Enable the Submit with approval in the Timesheet approval process tab. It is available both in the Premium and Enterprise plan