Articles in Chat Window
The Articles tab helps you draft and attach the content, frequently wanted by the customers right on the chat window. This eases your work as the visitors would look for suitable articles in the Articles tab before approaching you for help.
You can also categorize the articles as the visitors can then reach out to suitable topics instantly. This reduces the complexity of browsing through all the articles in search of one.
How to add an article in the chat window?
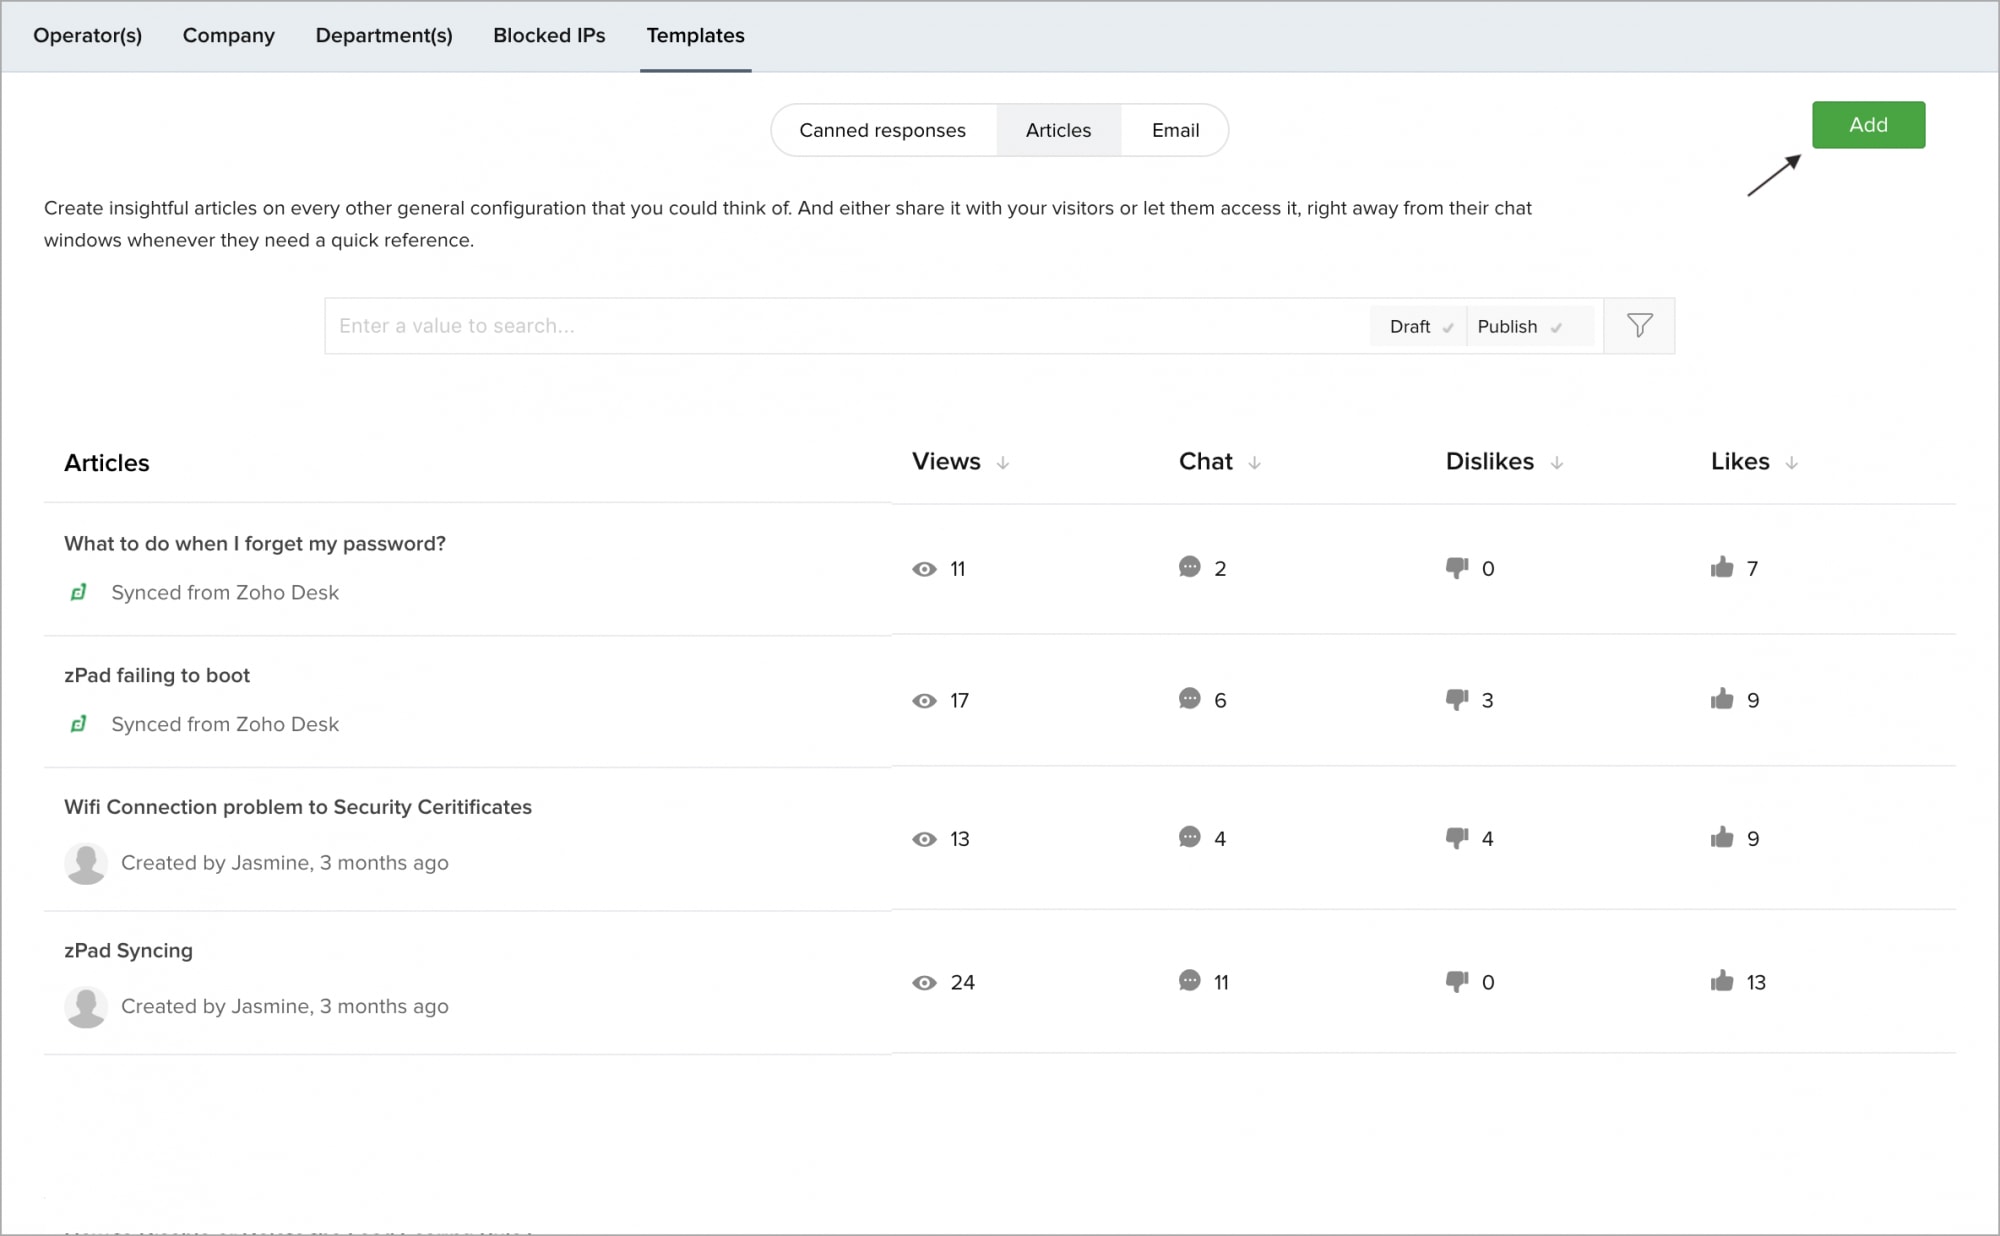
- Navigate to Settings > Templates > Articles, click Add.
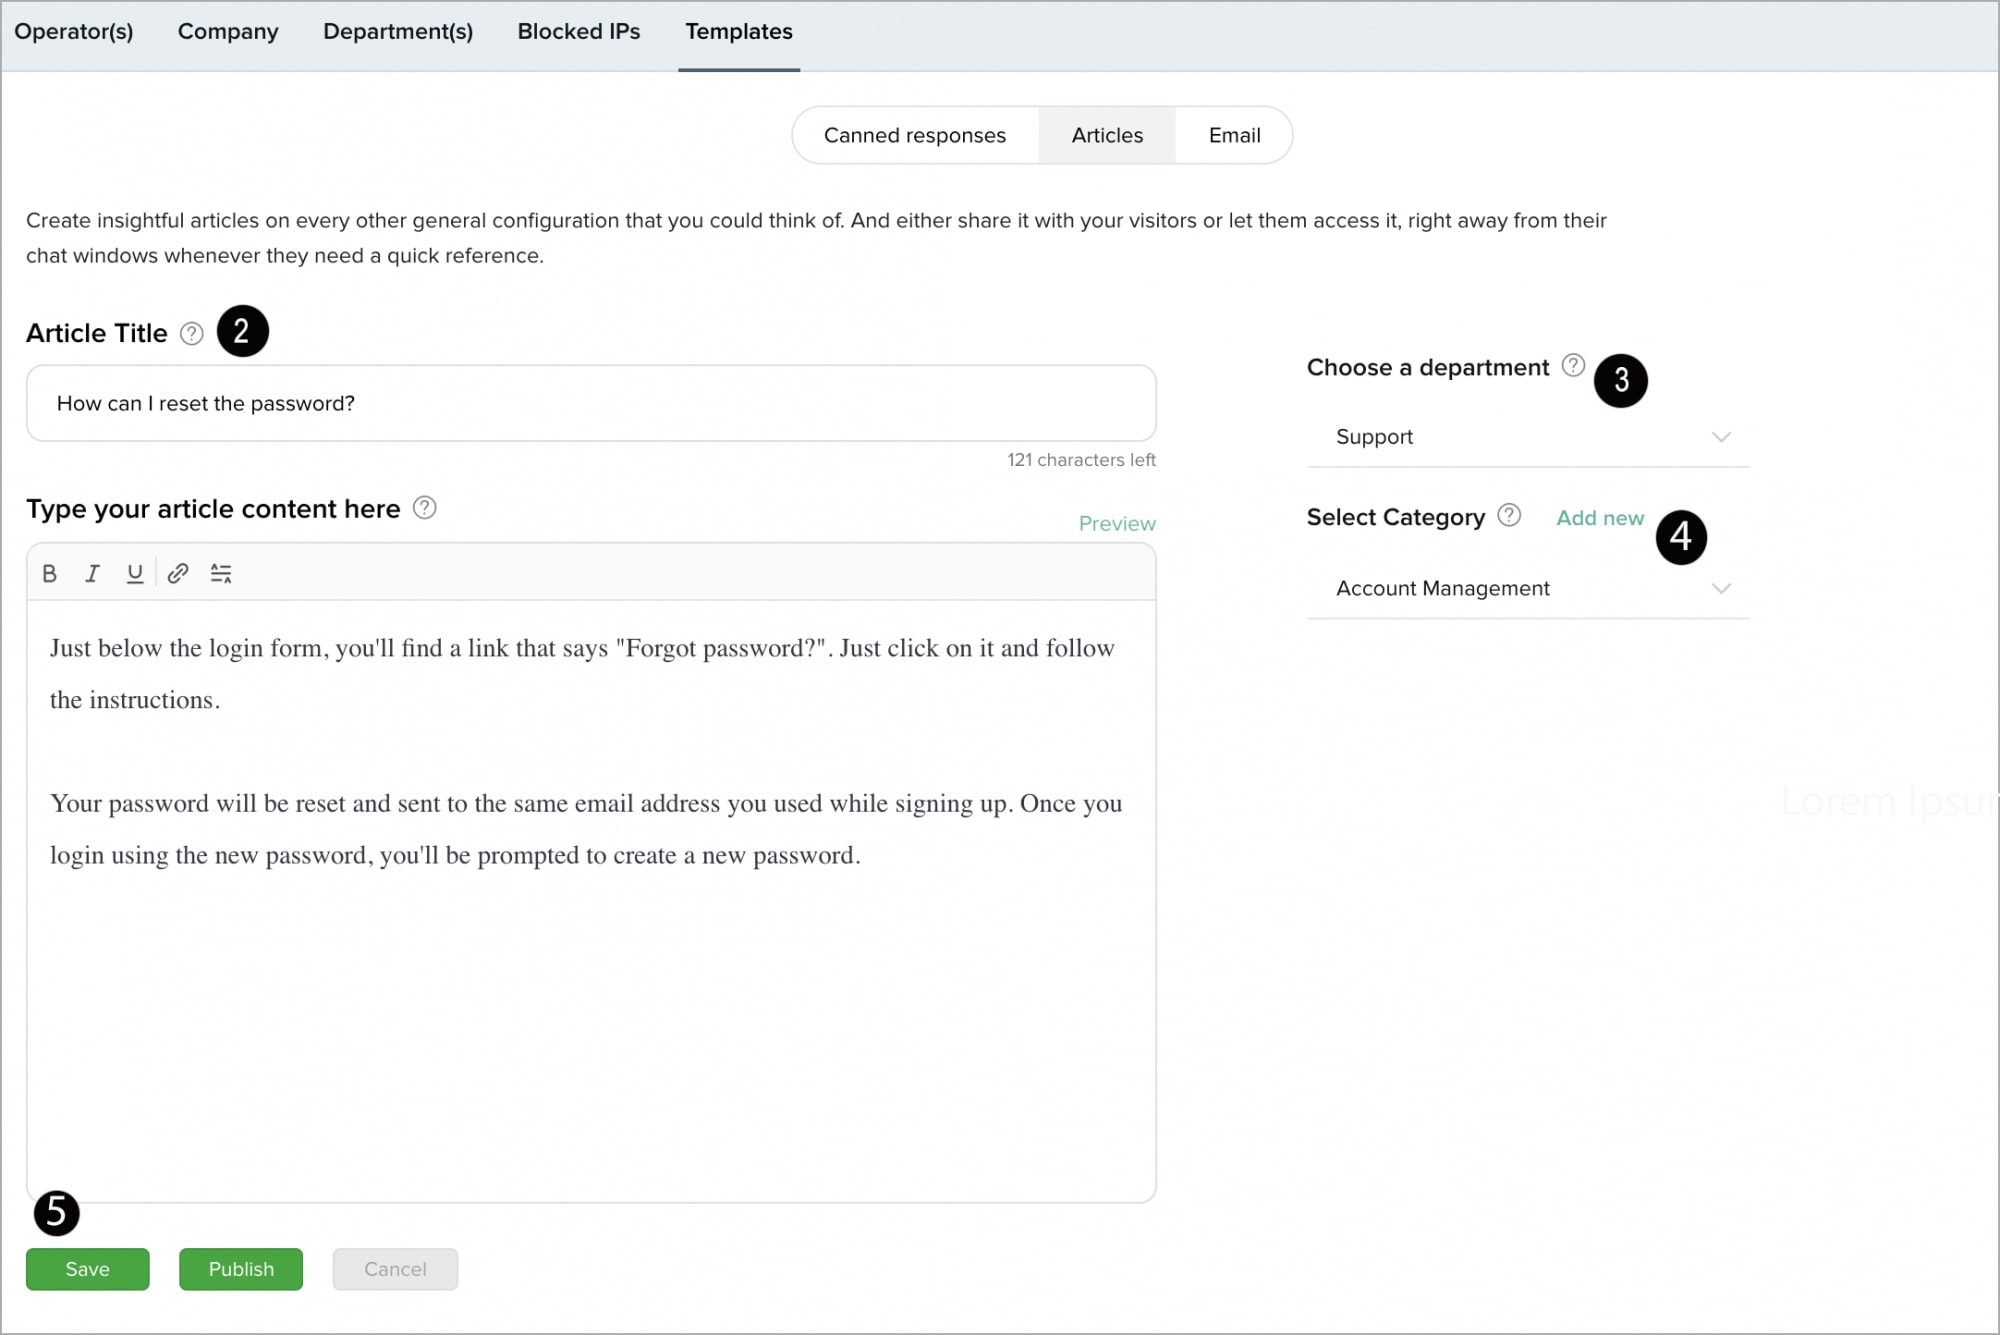
- Get a title for your article, and type the desired content in the Write your content box. You can use the preview option to view how the drafted content will be displayed in the visitor's chat window.
- Then, choose which department you want to associate the article with or choose All Departments for a general content that isn't department specific.
- Now, choose a category for your article.
- Finally, you can Save the article to draft or Publish directly on the website.
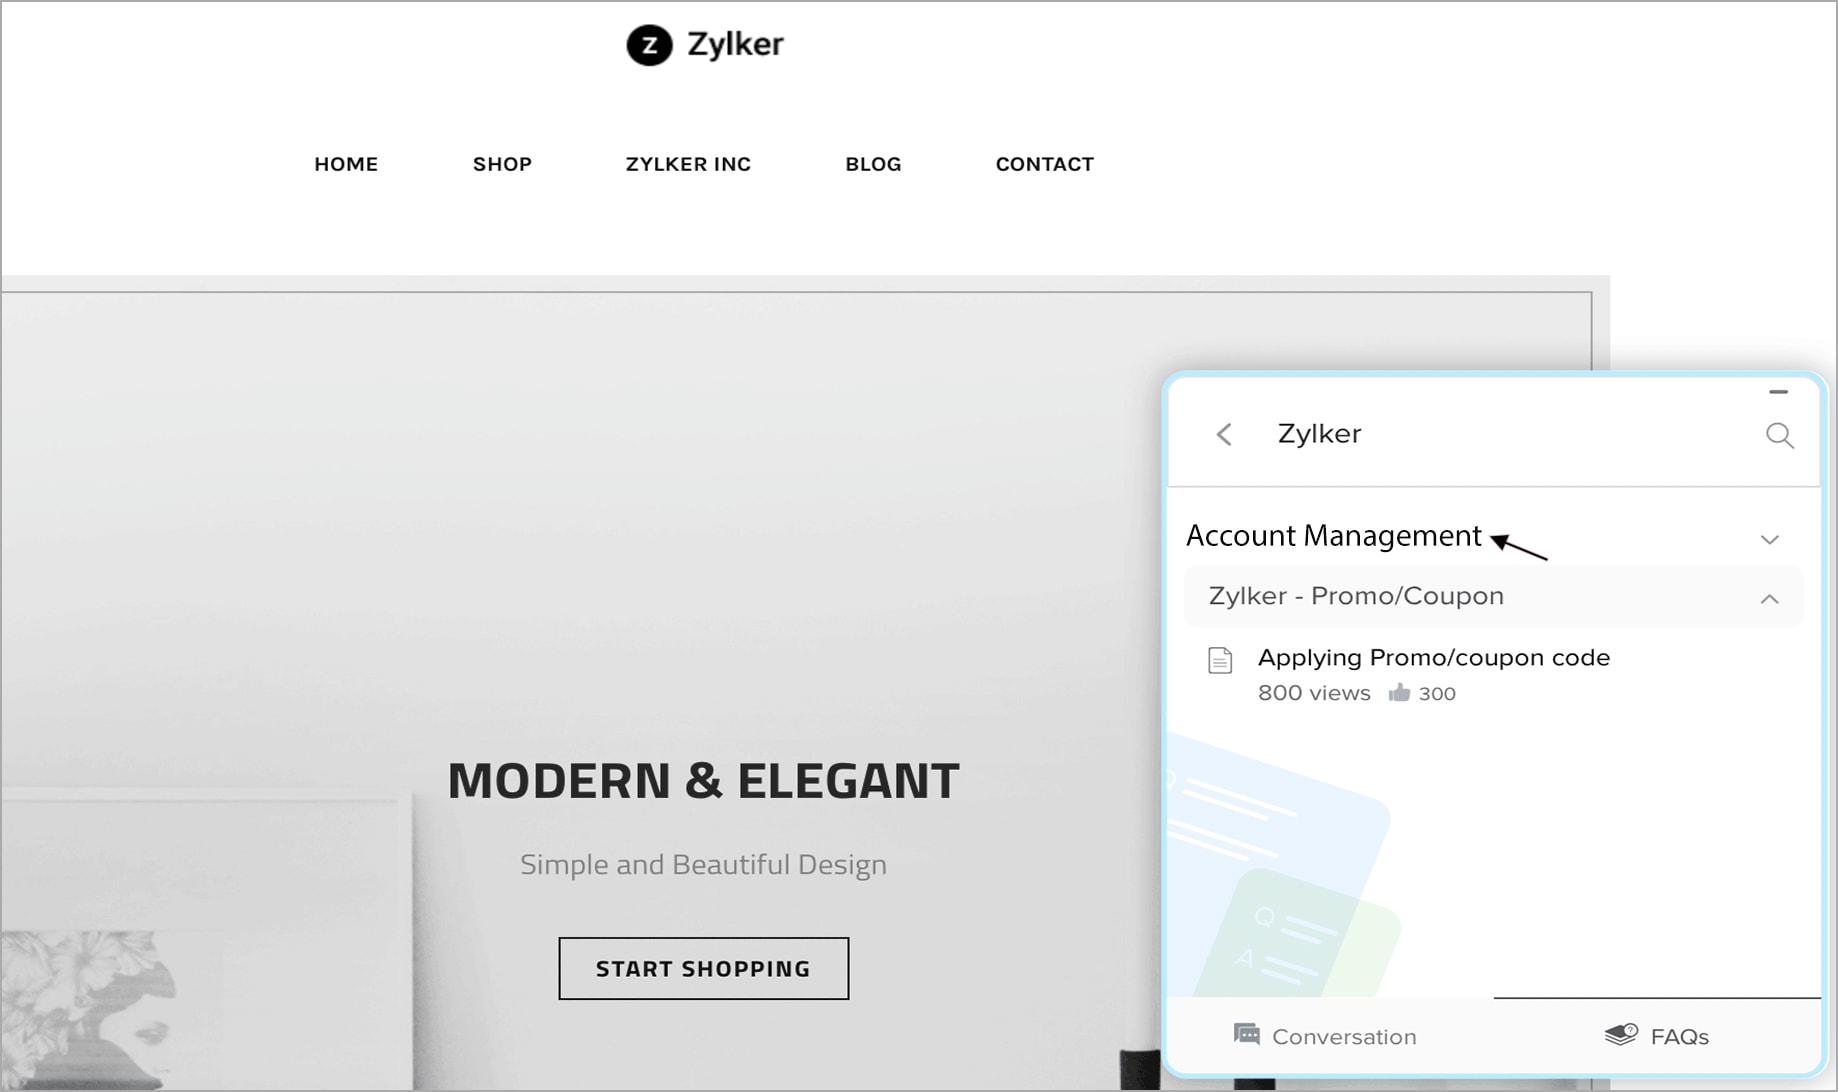
You can now view the article added in your Chat Window in the category you have provided.
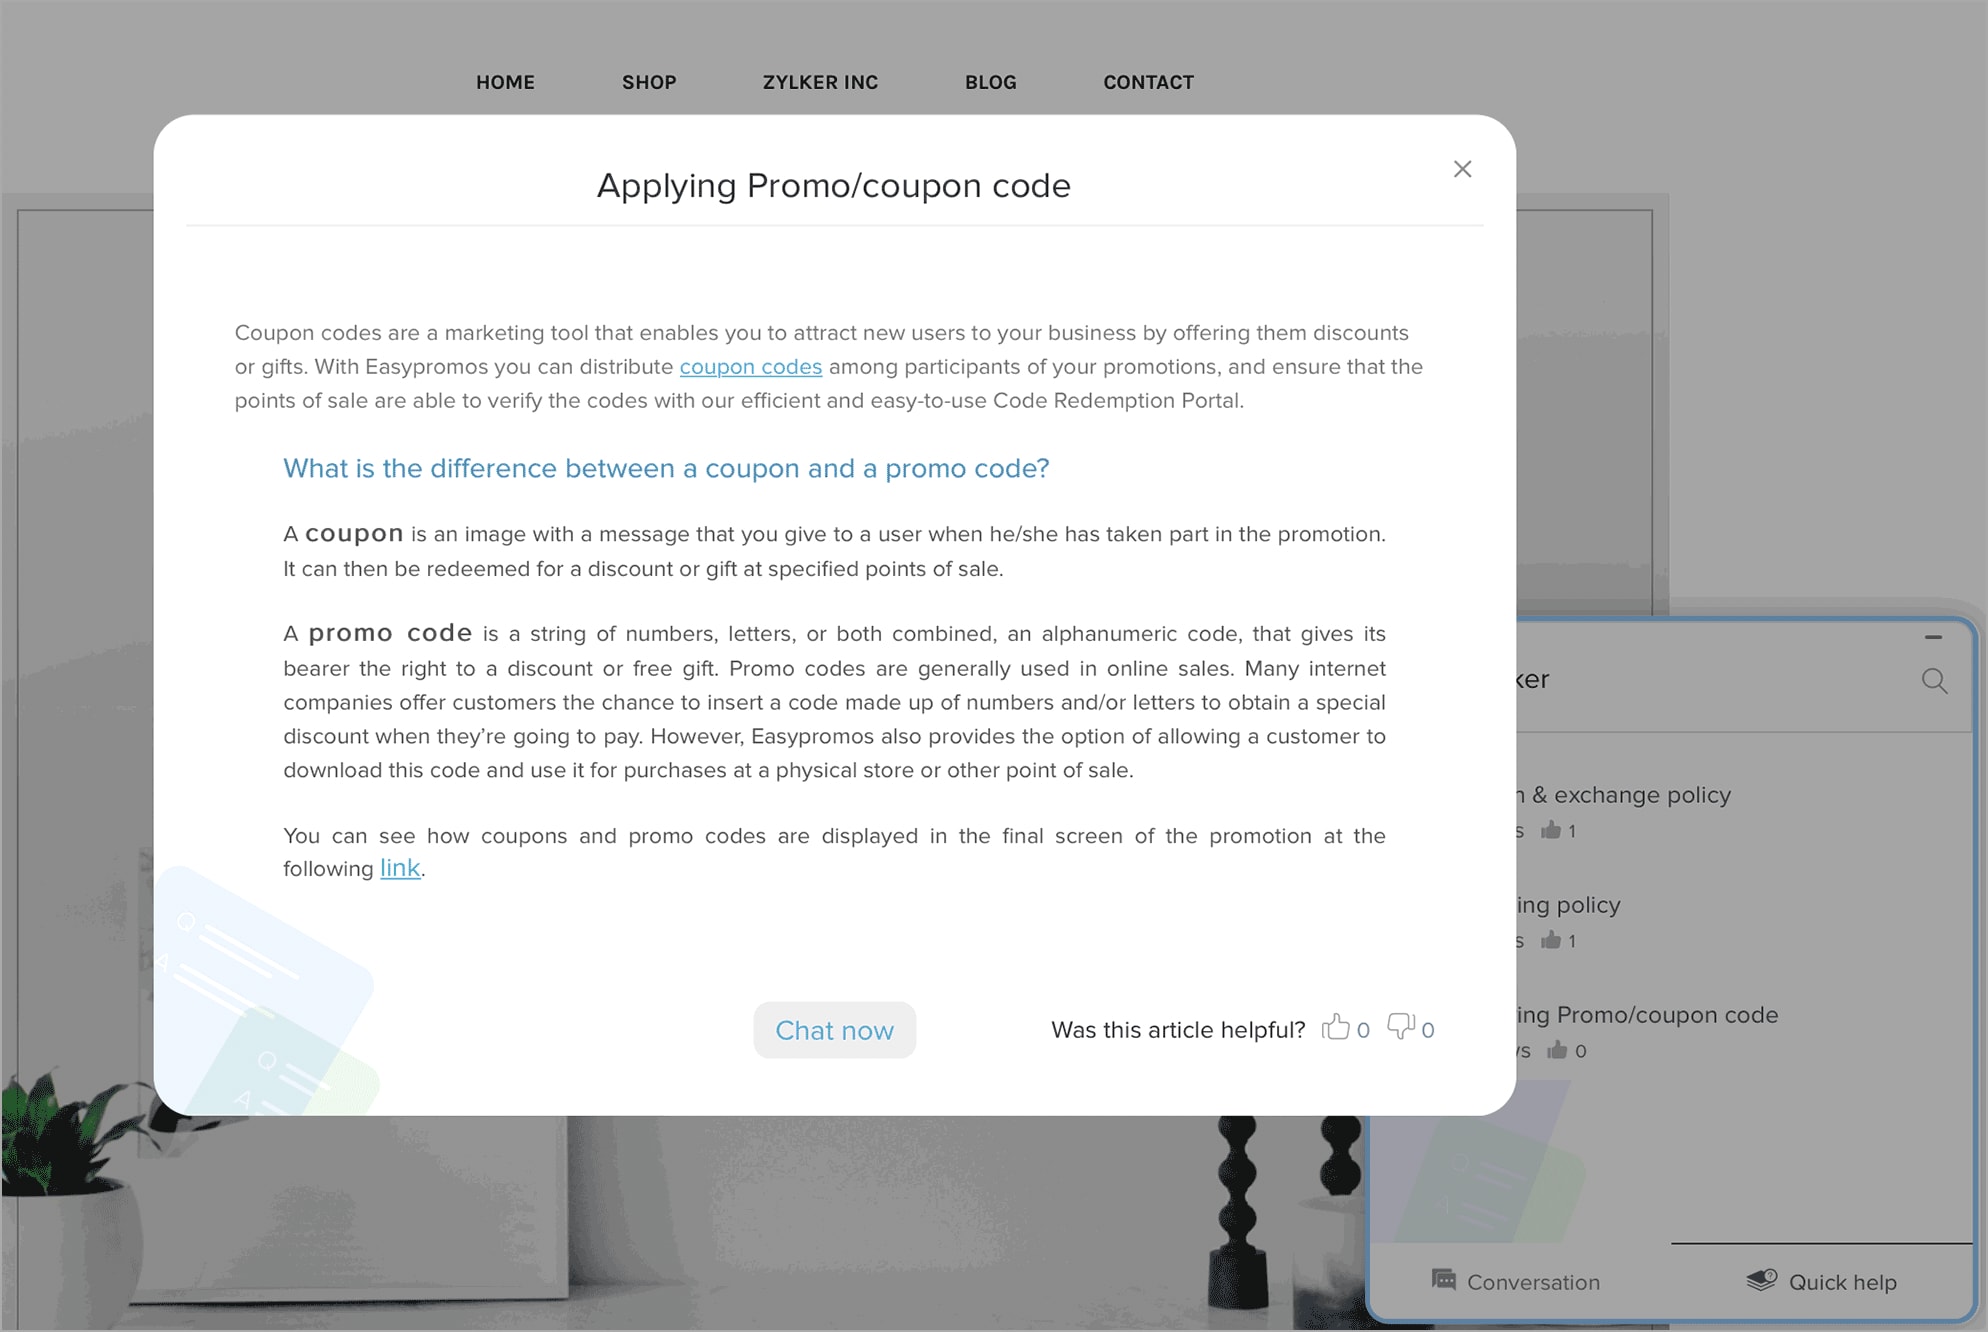

- Adding an article in the tab and publishing will directly get reflected on the chat window, so please check before clicking the Publish option.
- If you are still in the process of updating your content and don’t want to display it to the customers, then use Save option.
- Once an article has been published, you cannot edit or delete it.
- You can only view articles of a department if you are a part of that department.
Categorizing the Articles
You can create categories in your Articles, so when you have multiple articles, your customers can navigate and find the article they need more quickly.
How do I categorize the articles?
- Click the particular article you would like to categorize from the article list.
- In the right side you can find the Choose a Category option, choose one from the drop-down.
- You can also create a new category by clicking Add New and entering a name.
- Finally, click Publish.
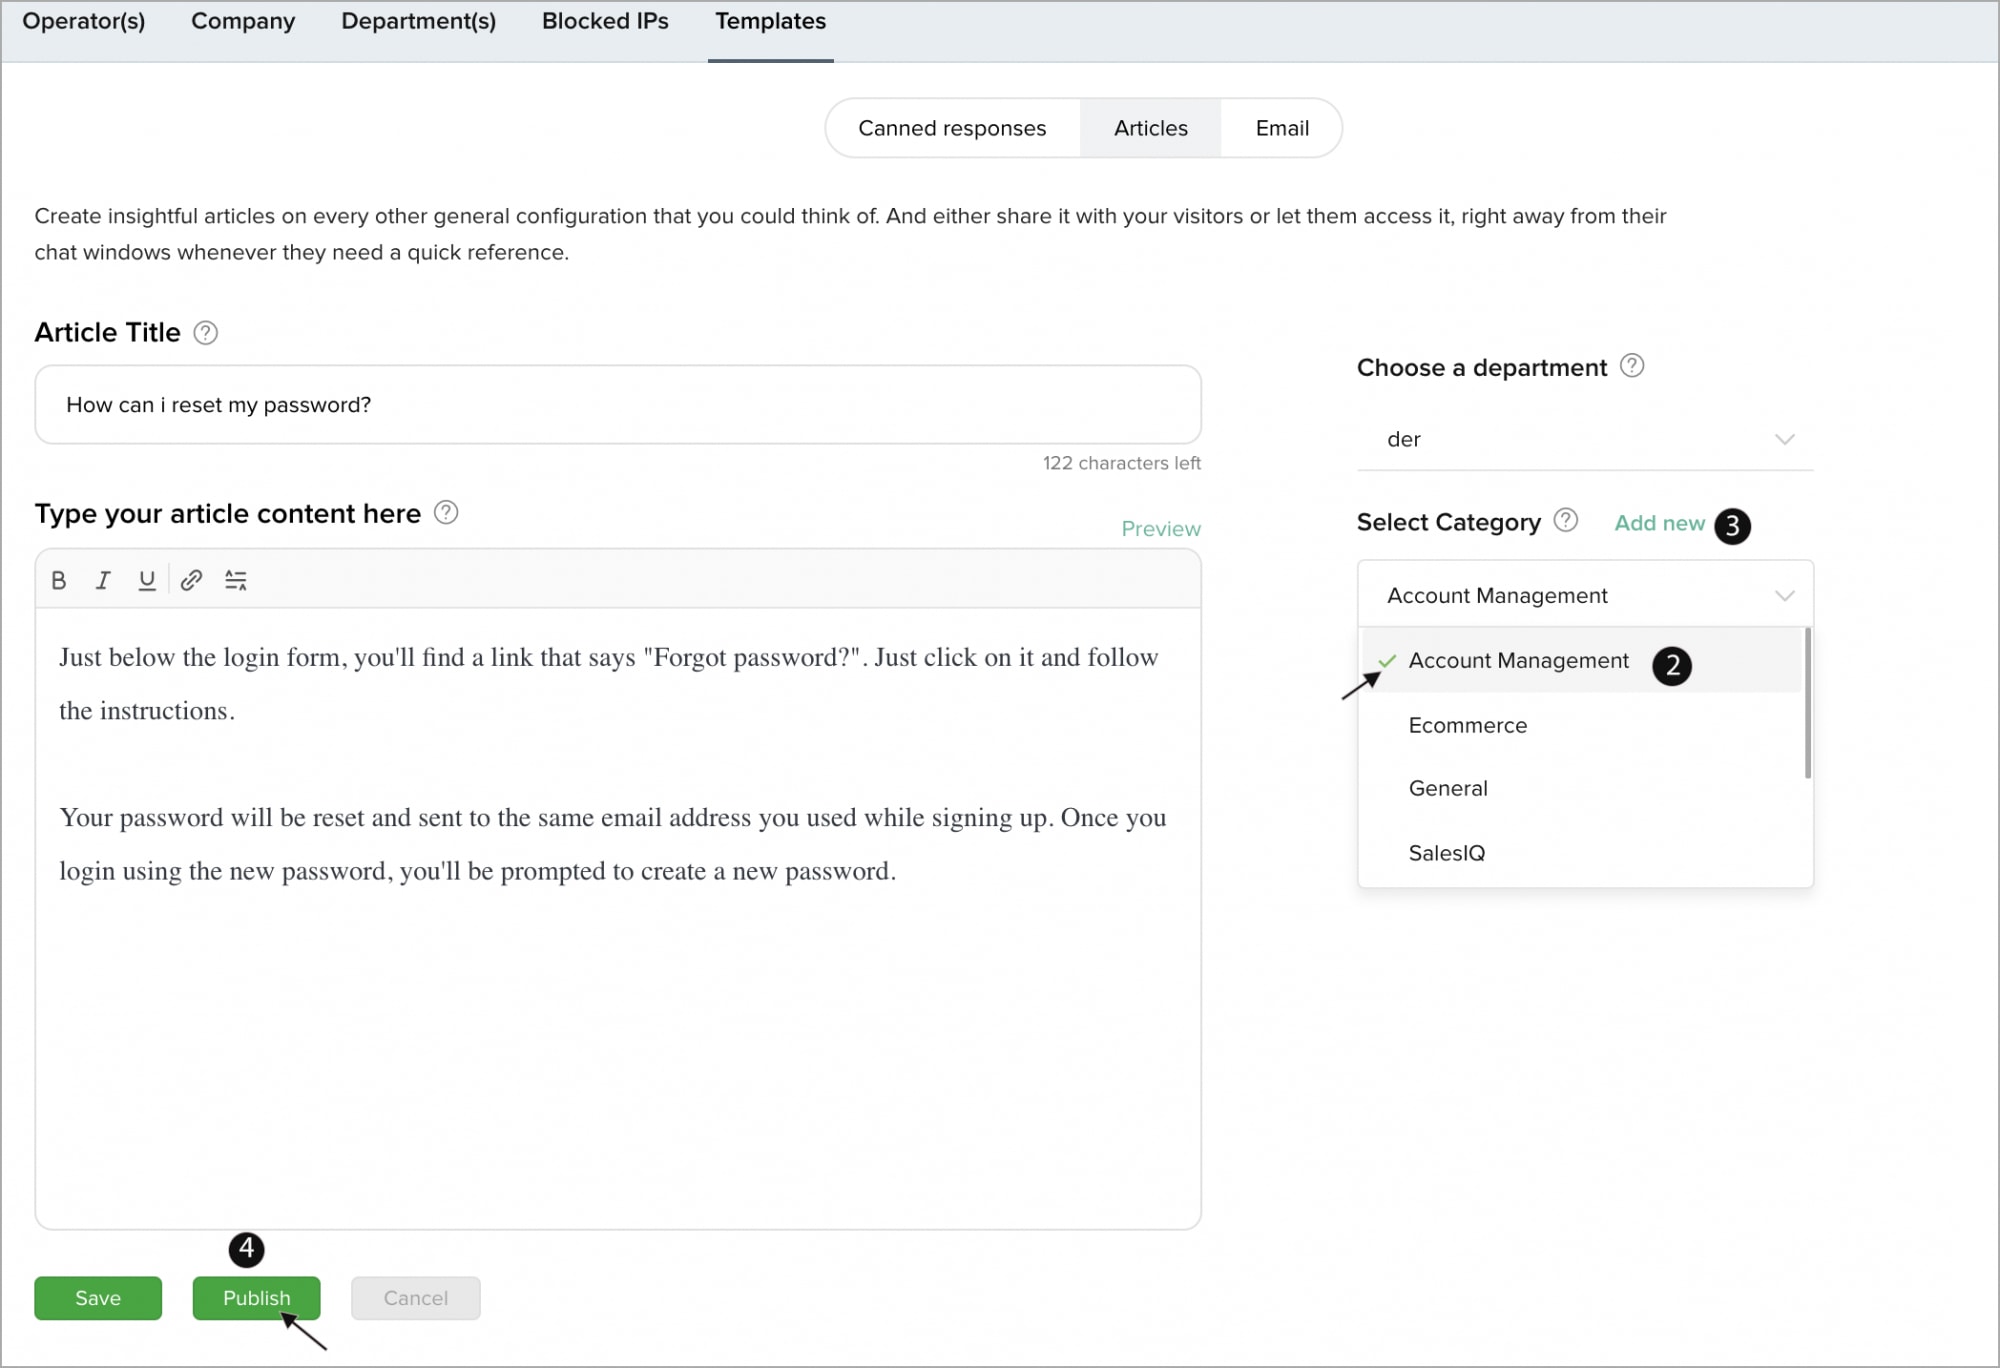
You can view the articles displayed under the new category in the chat window.
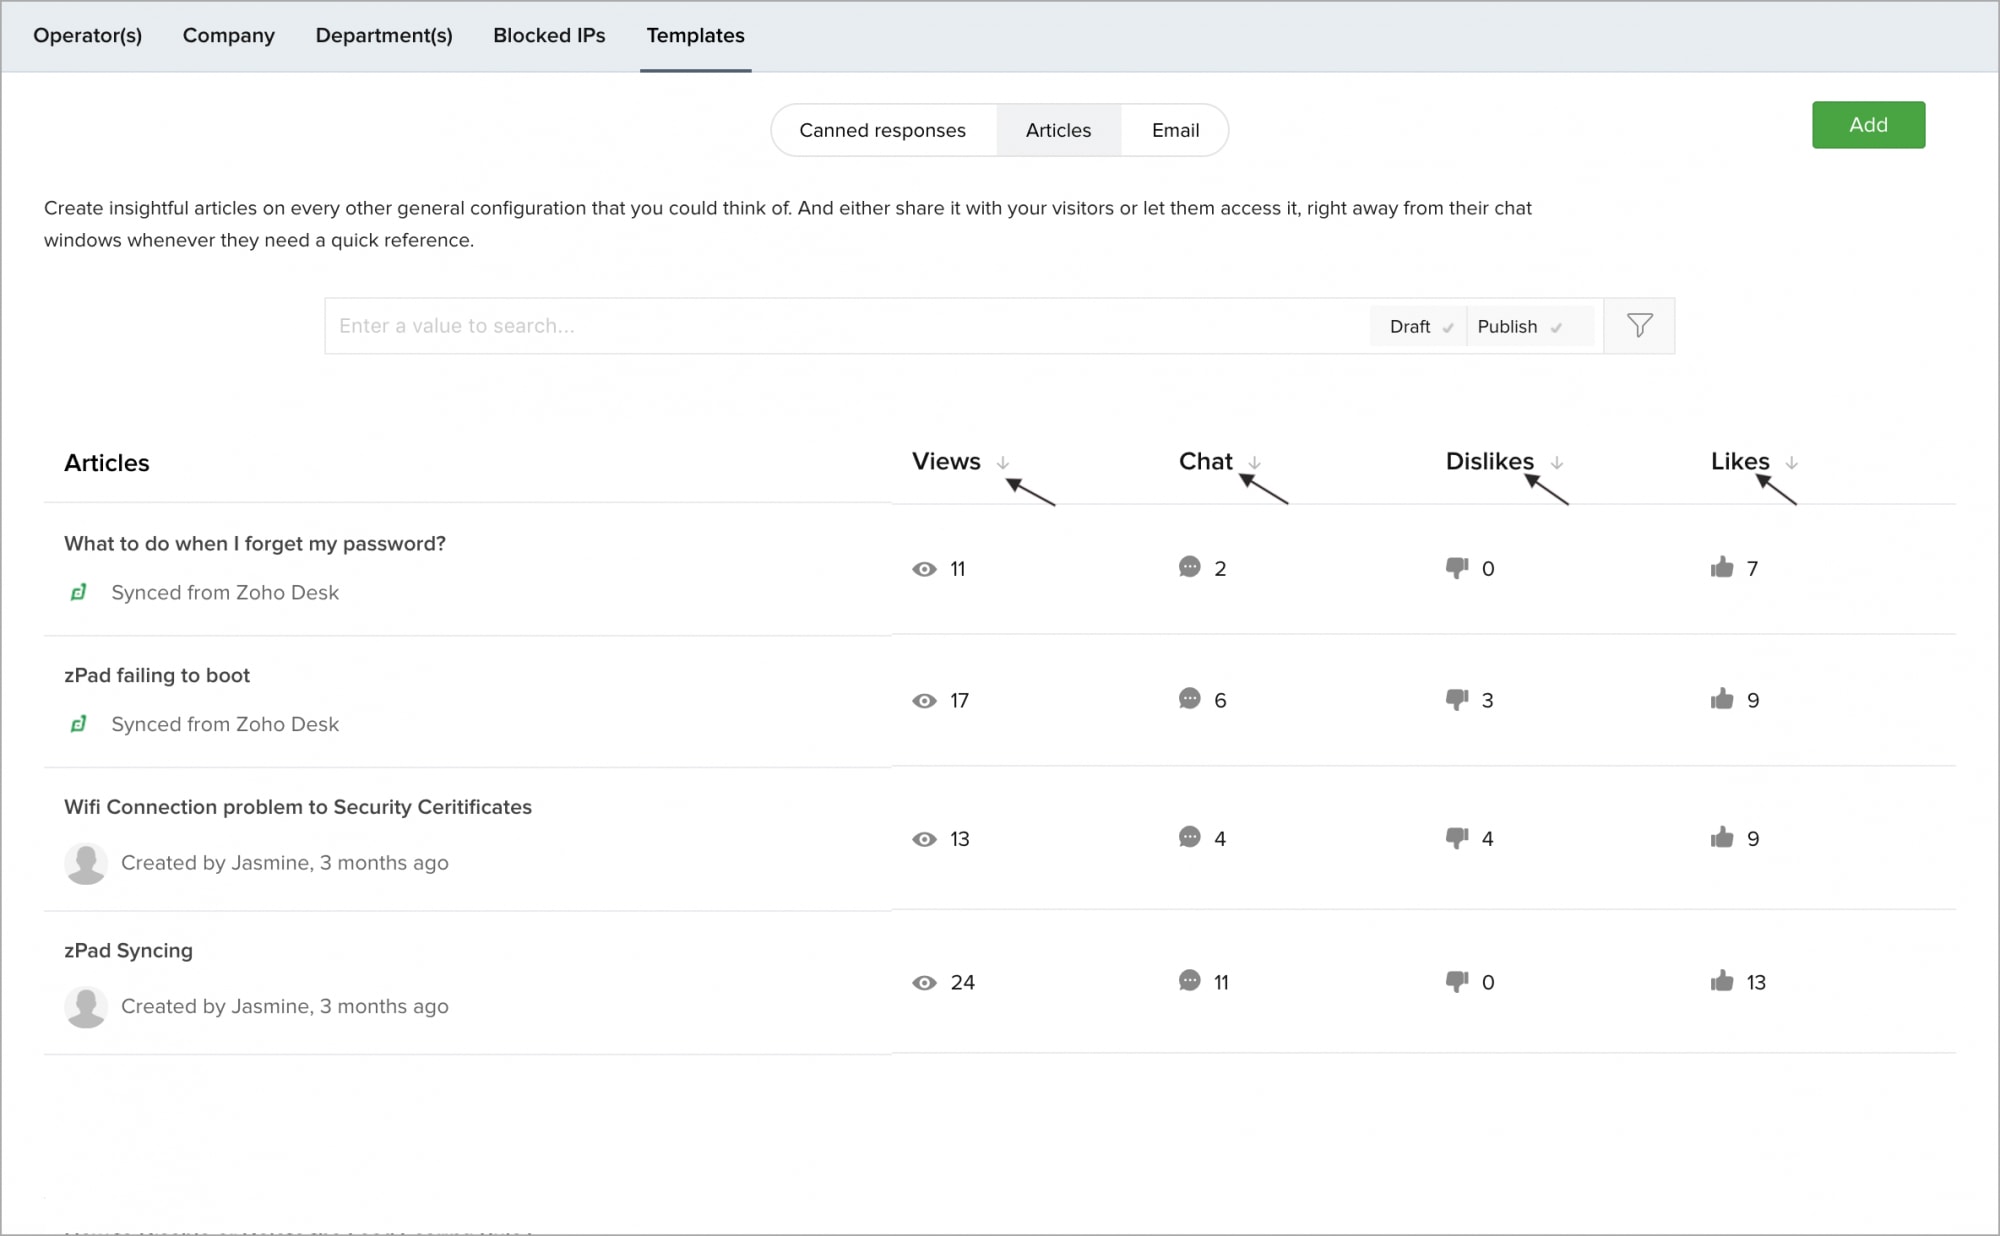
View how your article perform in the chat window
You can view the numbers of views the article got, chats initiated from the article, likes and dislikes of the article.
Related Articles
Customize Chat window
What is a Proactive Chat? Is it possible to trigger a chat if only the visitor tracking is enabled on the website? With proactive chat, you(operator) can deliberately initiate a chat to the visitors visiting the website from the Visitor Online ...The Operator Chat Window Settings
Here, you can configure what information you would like to show in the operator chat window. Navigate to Settings > Portal Settings > Operator Chat Window Configuration. You can enable/disable the following settings in the operator chat window. Show ...Clearbit info in the proactive chat window
In the Visitor Online tab, click on a visitor whose details you would like to view. You can view the Company Info from the Clearbit listed on the right-hand side of the proactive chat window.Clearbit info in the proactive chat window
You can view the visitor data that is pushed from Clearbit right on the proactive chat window. In the Visitor Online tab, click on a visitor whose details you would like to view. You can view the Visitor Info and Company Info from Clearbit listed on ...Screen Share/Remote Assistance in chat window
You can provide your customers with on-demand support through remote assistance and screen sharing in the live chat window. Request your visitors for a remote assistance session and take control of their screen, and fix the issues in seconds. Also, ...