Associate check-in to an event
If your business largely requires you to travel and constantly be on the move, then check-in is for you.
In Zoho CRM, sales managers and sales reps can manage their work-related visits easily with the help of check-ins from the Zoho CRM mobile app.
A check-in from the Zoho CRM mobile app is always associated to an event. When you check-in from a location, the app prompts you to associate the check-in with an existing event. You can click the desired event and record the check-in for that event. In case there are no events for the record, you will be prompted to create a new event.
Consider the following scenario to understand how you can organize and monitor check-ins in Zoho CRM.
- A sales manager creates events, (client visits) to be made by his/her sales rep.
- The sales rep visits the client offices and checks-in from each location.
- Each check-in is associated to the respective event in Zoho CRM. This tells the sales manager that the sales rep has visited the client.
- Also, the check-in is recorded as a note associated to the lead/contact in Zoho CRM.
- The sales manager can then create reports based on the check-ins to draw inferences. For example, he/she can create a report to see all check-ins made by location or by a particular sales rep.
Note that a check-in can only be made from the mobile app and not from the web version, as it is a feature meant for people on the move. When a check-in is made, the location from which it was made is recorded in CRM; therefore this is a fool-proof method to keep a track of client visits.
Associate a check-in to an event
When you have reached a client's office, you can check-in to the location using the Zoho CRM mobile app. When you check-in, you will associate it to an existing event.
To associate a check-in to an event
- Go to Leads/Contacts/Accounts modules.
- Tap the Check-in icon to create a check-in.
- If there is already an event associated to the contact, the exisiting event(s) show up.
Select an event. The check-in is associated as a note for the event. - If there is no event, the app prompts you to create a new event for the check-in.
Create a new event and associate the check-in to the event.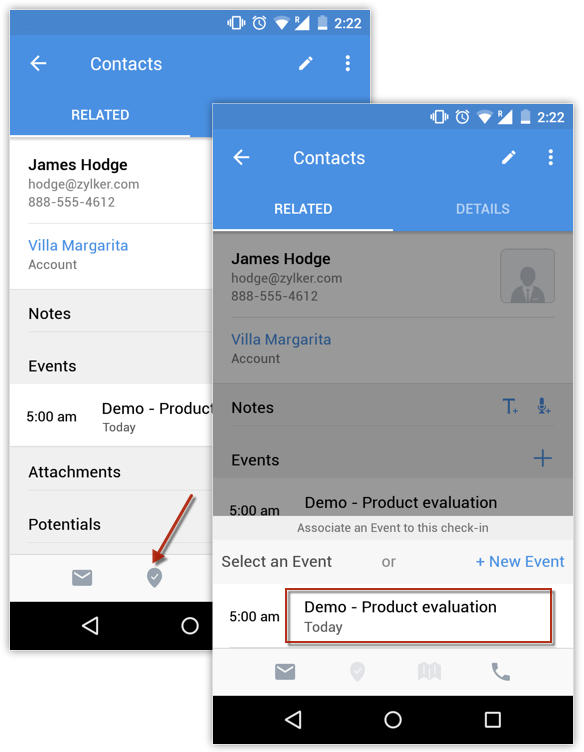

- When a check-in is made, an update regarding the check-in is posted to Feeds automatically.
View details of a check-in
Once a check-in has been associated to an event, the details of the check-in can be seen in the details page of the event it is associated with as well as the related lead/contact'account details page.
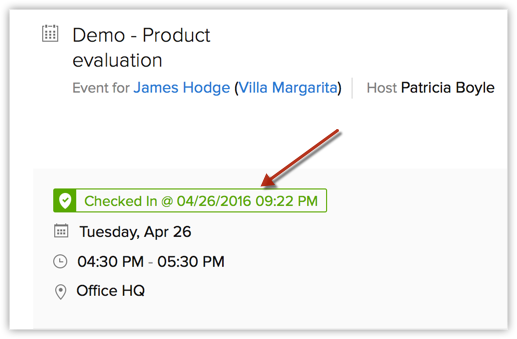
To view check-in details in the Event's details page
- Go to the Activities module.
- Click the desired event.
- The associated check-in details are displayed.

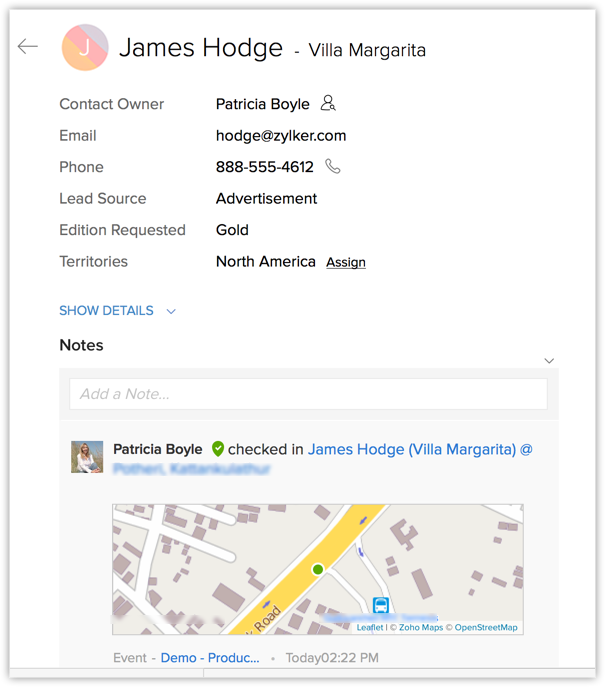
To view check-in details in the Lead/Contact/Account details page
- Go to the Leads/Contacts/Accounts module.
Check-ins can also be associated to any other module in which events can be associated. - Click the desired record.
- The details of the check-in associated to the record are displayed as a note for the record.
Create check-in reports
Sales managers can create check-in reports to make inferences regarding the field visits assigned to their sales reps. Zoho CRM provides a suite of default reports for check-ins.
To access check-in reports
- Go to the Reports module.
- Click Event Reports.
The default reports are listed. You can also create new reports based on check-ins.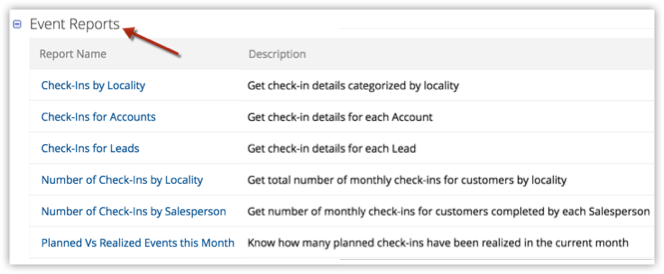
Related Articles
Cloning an event
Create a copy of an existing event in Backstage if you are hosting a series of similar events. During these instances, cloning an event saves you time, as you do not have to create an event from scratch. Just modify the necessary details and go live ...Check feed
Check Feed Across Projects Navigate to the Feed tab in the top band to check the feed across projects in your company. By default, the feed will be loaded with the latest activities. You can find them under the Feed section in the main body of the ...Check Scorecards
Scorecards provide an overview of target status at a glance and make it easy to identify targets in need of attention. At the top navigation bar, click TARGETS to check the following: Scorecard: Targets/scorecards which are assigned to you. Personal: ...How can other members be invited to an event?
You can invite members for an event by following these steps: Go to the Activities tab. In the Activities Home page, select the event for which you want to invite members. In the Event Details page, under the Related List items, click Add ...How to add attendees while creating an event?
When you are creating an event, you can also add attendees to it. On the right side of the "Create Event" screen, you can enter the email address of the attendees. When the event is saved, an invitation is sent to the attendee's email. Note : While ...