Basics Of SalesIQ
SalesIQ serves as a business platform between you and your website visitors. Tracking and engaging the website visitors plays a key role in Online business. SalesIQ can help you to convert your website visitors into customers in few simple steps. In this section, you can learn the basic functions of SalesIQ like, how to track your website visitors, interact with them in real time and to gather the visitor information.
How do I track my website visitors on SalesIQ dashboard?
Getting the SalesIQ code on your website will enable the visitor tracking. You can now track all the visitors visiting your website in your SalesIQ Dashboard.
The SalesIQ dashboard consist of two different views, they are:
- Rings View
- List View
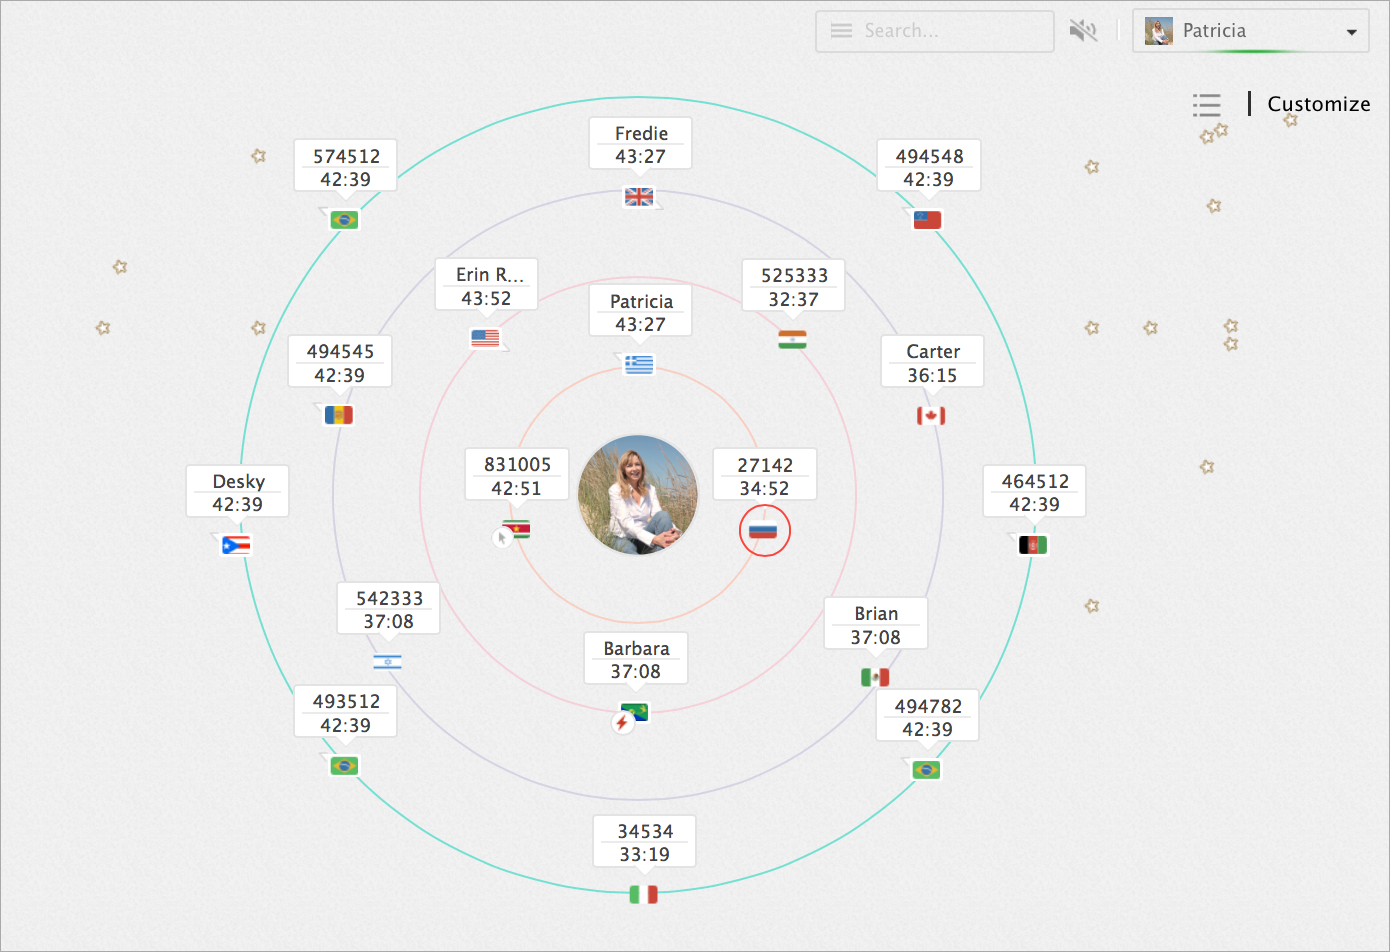
Rings View
You can view your website visitors country flag, Name/Random ID, Action and time in the Rings of your SalesIq dashboard.
If the website visitors don't fall into the customized category, then they will appear as stars outside the rings.
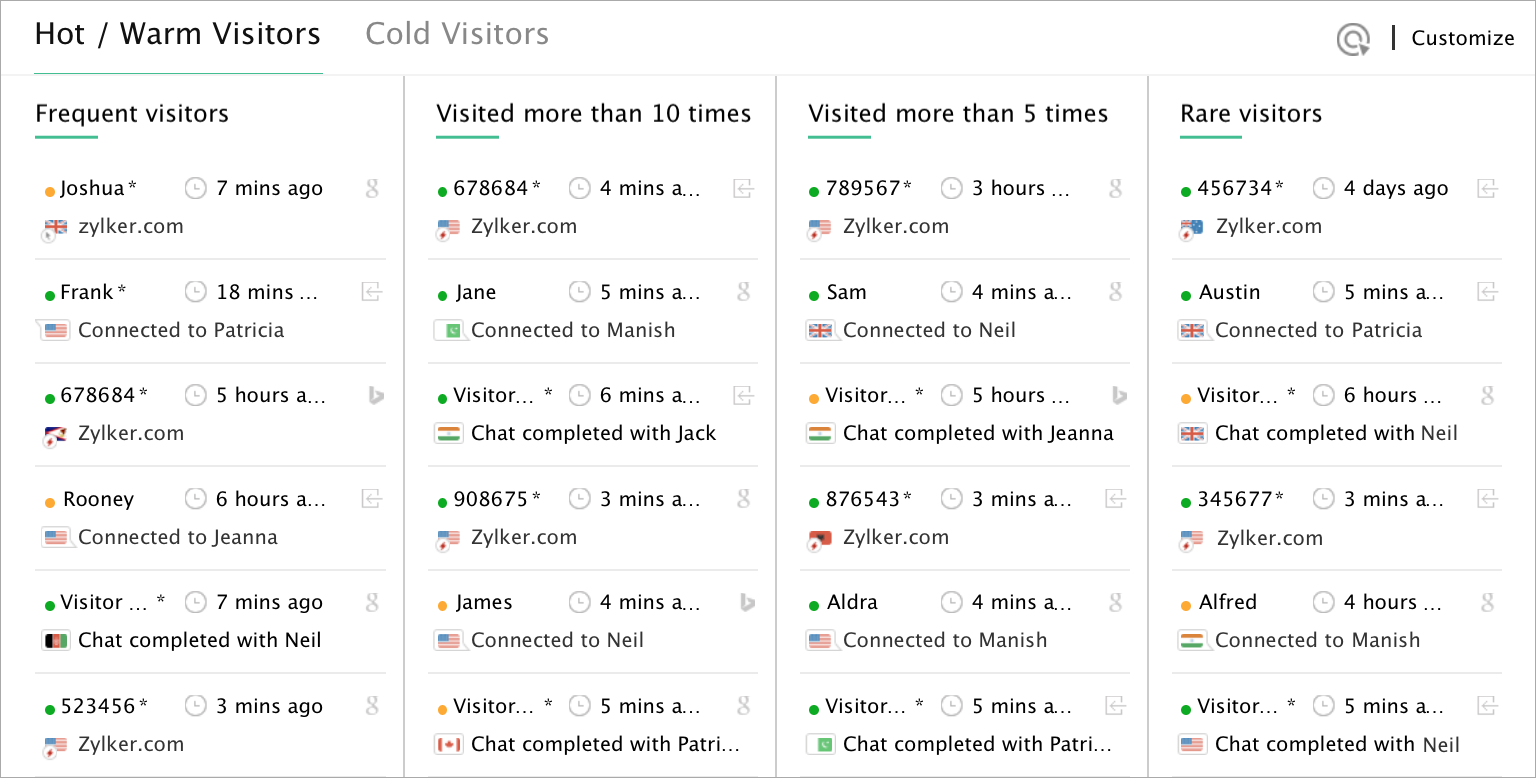
List View
- In list view, the visitors will be listed based on the customized rule.
- You can view the visitors Name/RandomID, Flag, Time Spent on website, Source to visit the website and Landing page/Chat status.
- The Cold visitors tab lists the visitors who don't fall into the customized category.
How do I answer a chat from the visitor?
When the visitor initiates a chat, the chat request will pop-up mentioning the visitors Name/Random ID and Question. Click on the Accept button to answer the chat.

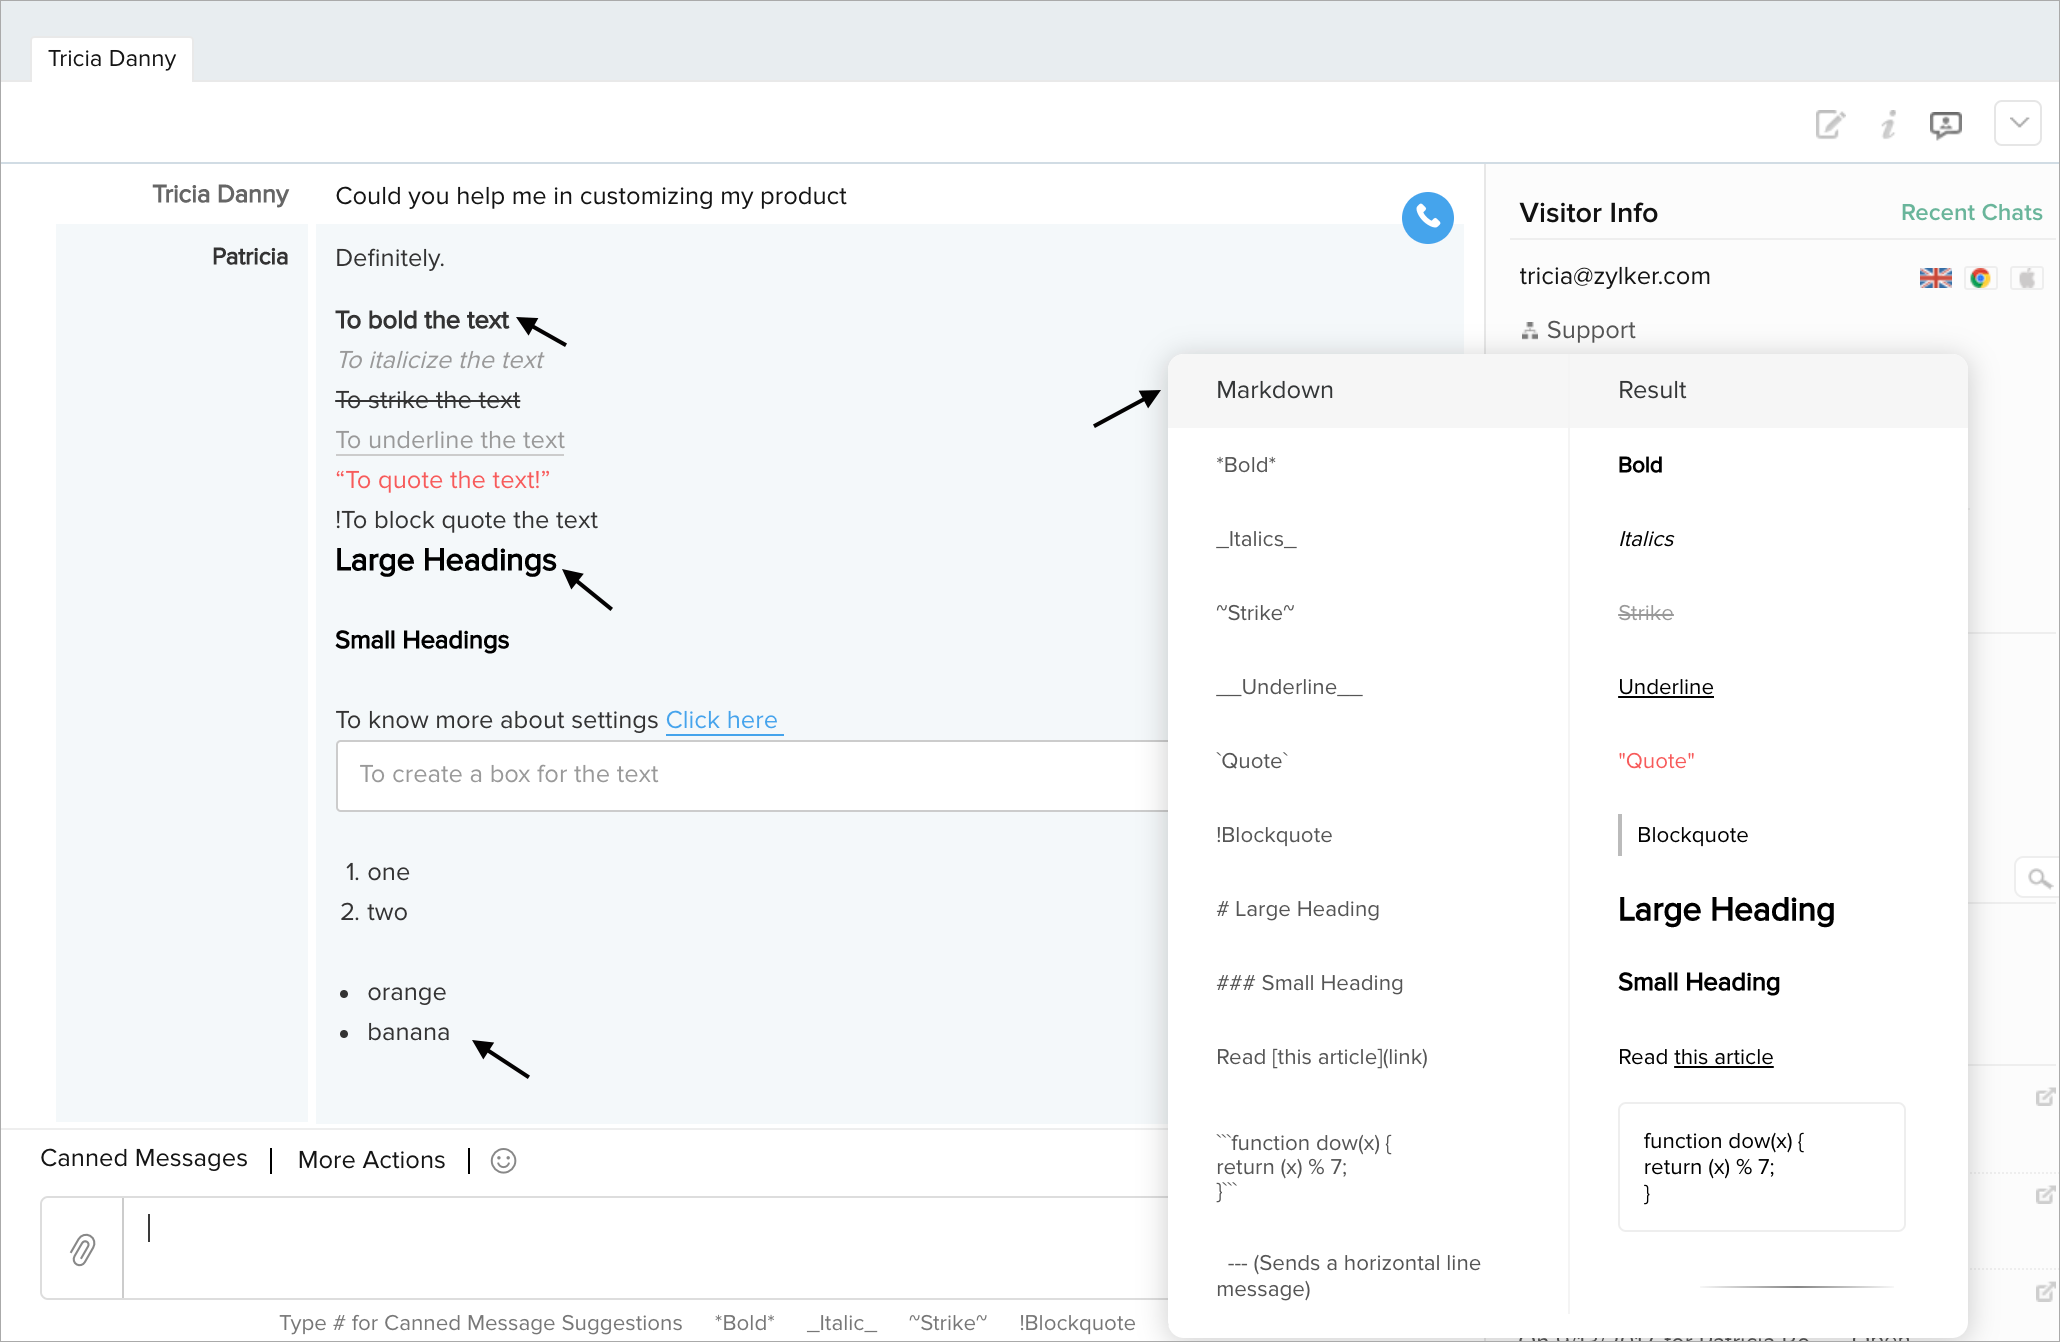
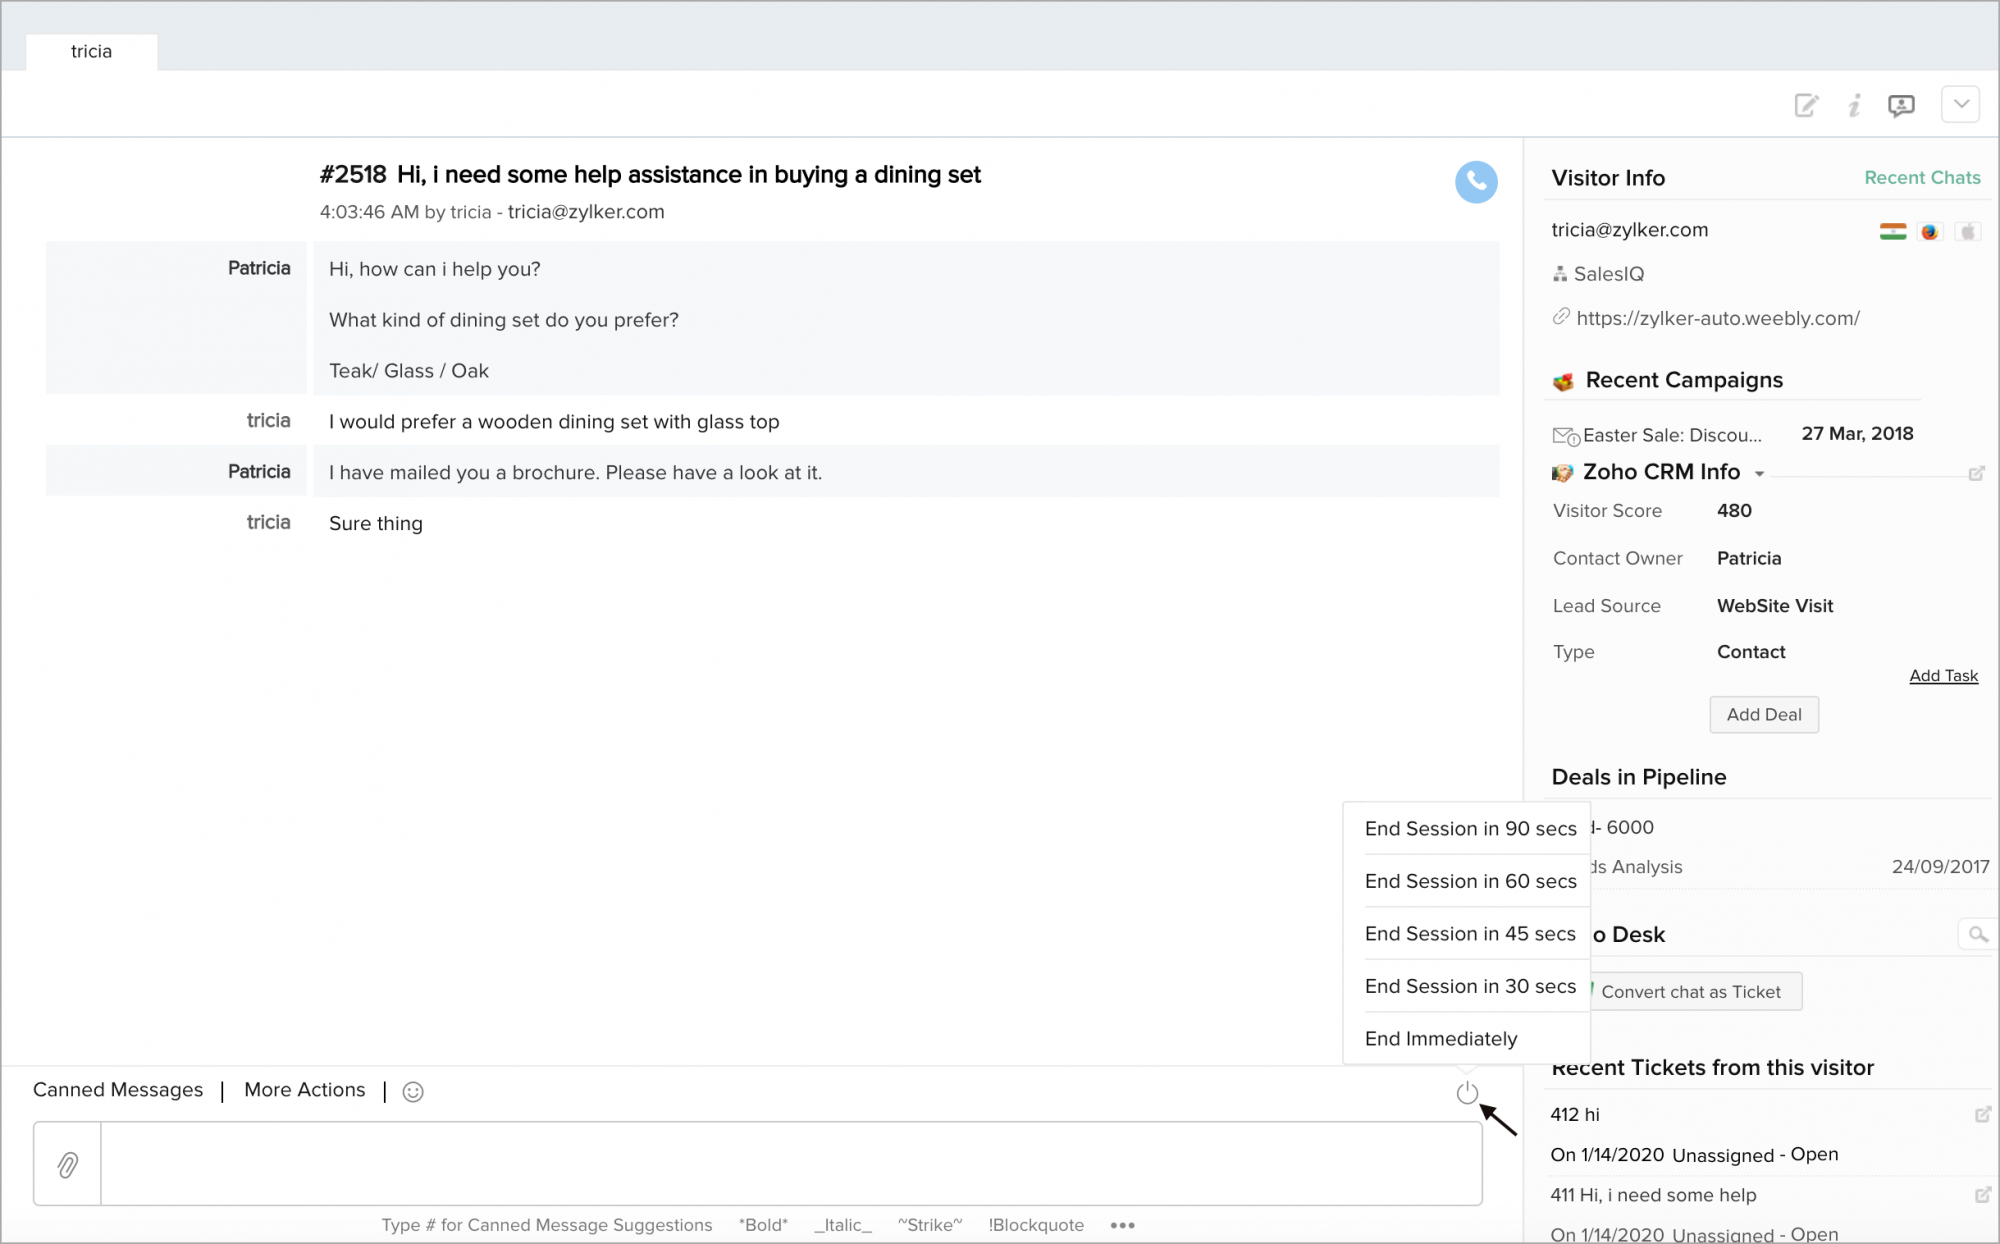
The Chat Window
- Now that you have answered your test-incoming request, we want you to take this time to familiarize yourself with the Zoho SalesIQ chat window within the dashboard, and the powerful tools you can use during live chats with your customers.
- At the top of the dashboard, you will see the visitor's name displayed if the visitor's name is not identified then the visitors random ID will be displayed. Chat window is designed to allow you to chat with multiple visitors at once, in one organized placed, with separate chats popping into tabs.
- Below you will see the chat area, which displays the visitors question as the heading, with the time the chat started, the visitors' Name and E-mail displayed below. As the chat continues, the conversation between you and the visitor will be displayed in this window, alongside their display name.
- To begin chatting or reply to your visitor, simply start typing. Navigate below the chat window to see your messages as you type in the editing box, where you can format your text. When you have readied your message to your visitor, hit enter, and the message will be sent directly to your customer and displayed above in the chat window.
- The Visitor's Info opens on the right side of the tab.
- If the visitor has a chat history, then the visitor's Recent Chats will be available under the Recent Chat tab.
- You can view what the visitor is typing in the messaging window even before the visitor sends the message to you.
- SalesIQ supports markdown which is used to format the text in the operator's chat window. These markdowns can be viewed by hovering on the (...) icon at the bottom right corner of the operator chat window. You can use typographical emphasis like bold, italics, increase font size, quote a text etc.
- Bold: Enclose desired portion of the text with asterisk (*) or (**) to bold a section of the text Example: *To bold the text* or **To bold the text**
- Italics: Enclose desired portion of the text with underscore (_) to italicize a section of the text Example: _To italicize the text_
- Strike: Enclose desired portion of the text with tilde symbol (~) to strike a section of the text Example: ~To strike the text~
- Underline: Enclose desired portion of the text with two underscores (__) to underline a section of the text Example: __To underline the text__
- Quote: Enclose desired portion of the text with back tick to quote a section of the text Example: `To quote the text!`
- Blockquote: Use exclamatory (!) before the desired portion of the text to block quote a section of the text Note: This can be used only at the beginning of a sentence Example: !To block quote the text
- Headers: Use hashtag (#) followed by space and then the header text. Example: # Large Headings, ### Small Headings. Note: This can be used only at the beginning of a sentence The maximum number of headings is 6 and a space is must between the hashtag and header text
- Links: Enclose desired portion of the text with the square bracket and the link with parentheses to insert a link into display text. Example: [Text to be displayed as link](enter your link here)
- Syntax Hightlighting: Enclose desired portion of the text with 3 back ticks (```) to create a box that displays text inside. Example: ```To create a box for the text```
- Horizontal Rule: Use 3 hyphens (---) to insert a horizontal space Note: This cannot be used inbetween sentences. Tip: You could also press the enter key twice to insert a horizontal space
- Lists: Use numerical character (1.) followed by space and then the header text to create a ordered list. For Example: 1. one 2. two
- Use asterisk (*) followed by space and then the header text to create a bullet list. For Example: * orange * banana
- A space is must between the numerical character and header text for ordered list and between asterisk and header text for bullet list This can be used only at the beginning of a sentence.
How do I end a visitor chat?
Once the chat conversation is wrapped up, you can hit End Session icon on the chat window and then End Immediate or select any of your required End timer to End the current chat.
Basic info available in the visitor history tab
You can view more information about the visitors visiting your website on the Visitor History tab. You can also see visitor's Info like Name, Email, Contact No., Visit history, Visitor's Action on your website, Interested pages in the visitor history tab.
The visitor info like Name, Email, etc. can be viewed if the visitor registers the details. If not, the visitor will be listed using the random ID.
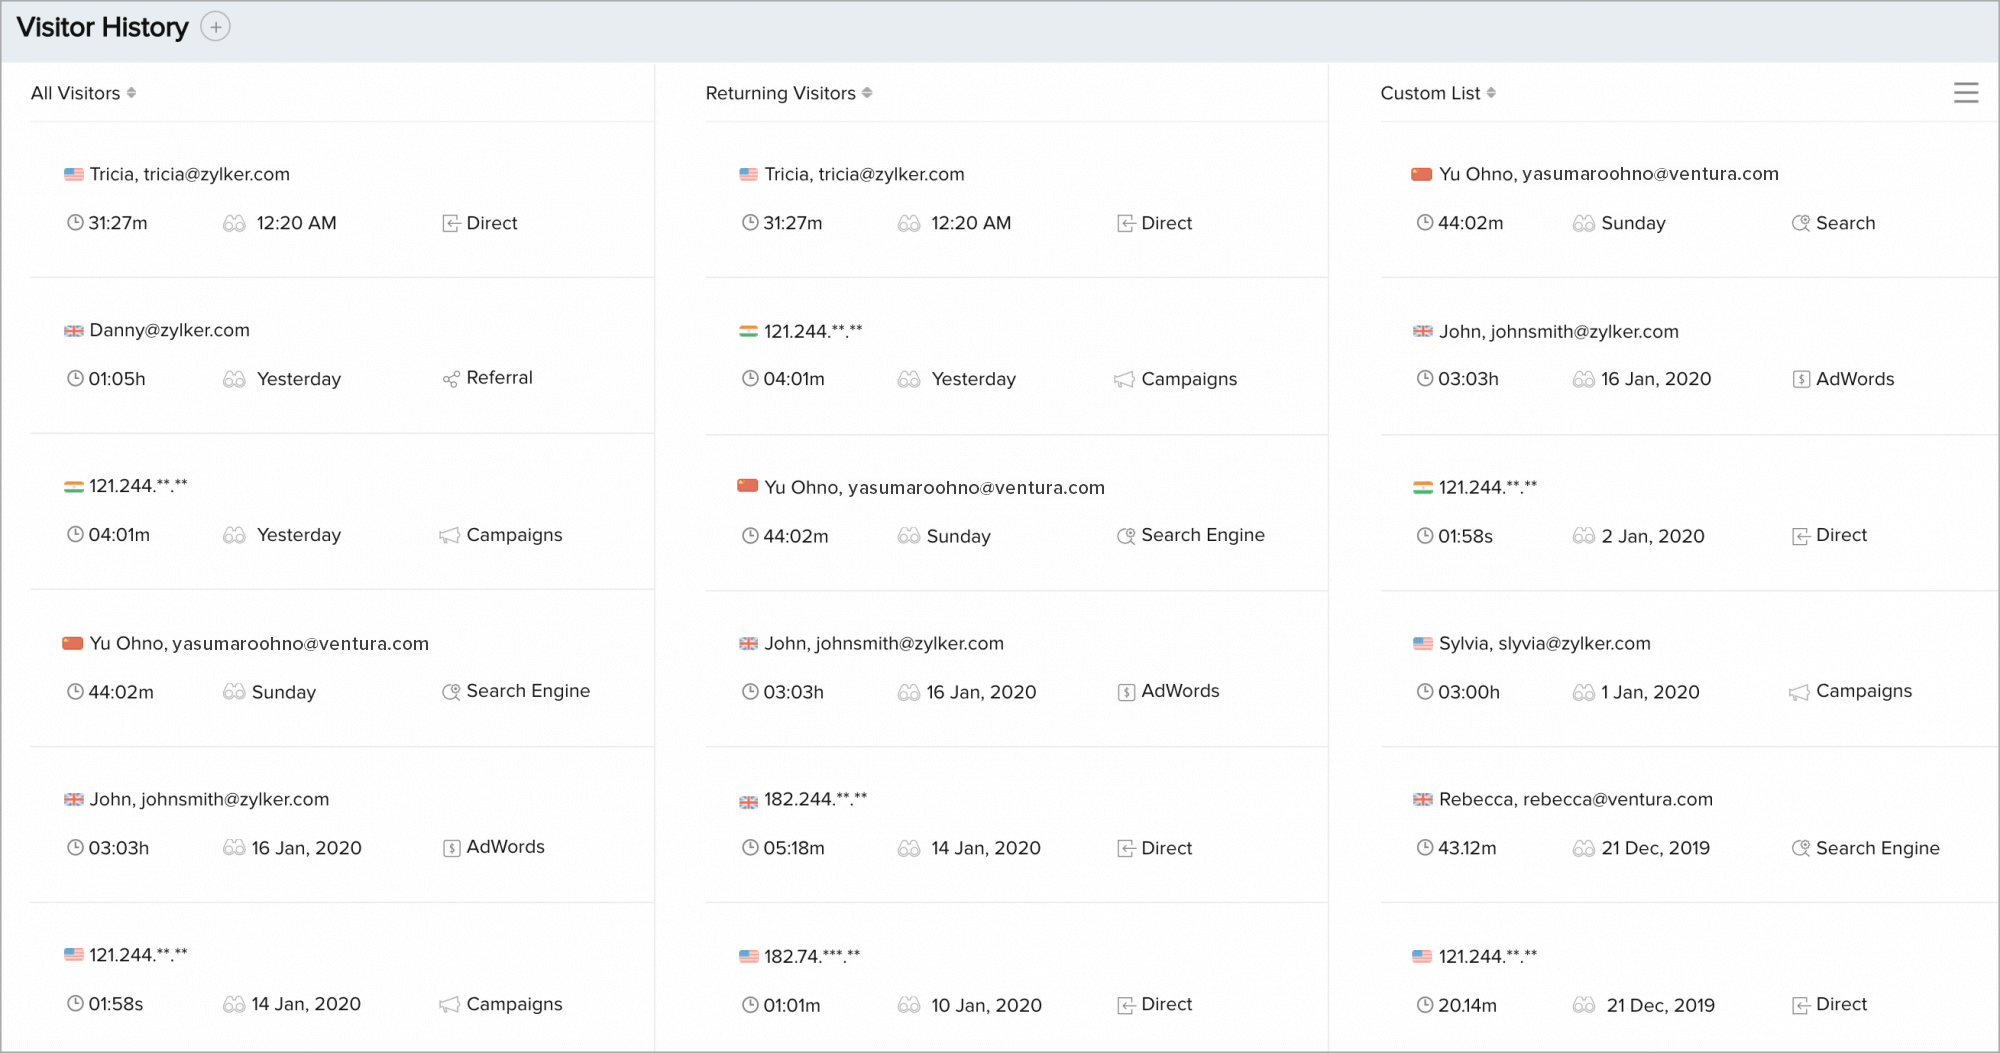
To view more in-depth information about a particular visitor, click on the Visitor Name. The visitor details page will then appear. The expanded view will give you the insight of each visitor.

Related Articles
Questions Basics
Questions Basics After you enter the builder, the first thing you need to do is to find the right question types for your questionnaire. We'll help you choose the right question type so that you can start asking right away. Rich text editor: You can ...SalesIQ Data in SalesIQ
Viewing SalesIQ data inside your Salesforce CRM account To view the pushed SalesIQ data inside your Salesforce account it is necessary that you follow the below-given steps, Click on the Setup icon which you can find in the top right corner ...Zoho SalesIQ
By integrating with Zoho SalesIQ, you can track visitors returning to your website by their name and email addresses. This helps you understand how visitors navigate in real time and connect with them using live chat support. Just map the Zoho Survey ...Zoho SalesIQ
The smooth integration of Zoho Assist with Zoho SalesIQ empowers you to start a remote support session from your live chat console. Your customers also can raise a remote support request right from the chat. Not only remote support but also share ...Zoho SalesIQ Configurations
Status of missed visitors in your Zoho SalesIQ account If you are planning on pushing your missed visitor base into Salesforce CRM, you get to decide whether you would like to handle the missed visitor chats either in your Zoho SalesIQ account itself ...