Booking, canceling, and rescheduling appointments through customer portal
Customers can book appointments as guests or they can register themselves and book appointments as portal users.
Customer portal enables your customers to maintain individual accounts for themselves. Each account captures all their appointment details in one place and allows them to view, reschedule, or cancel their appointments. This is similar to an ecommerce account where you can see your details and your orders, which you can also cancel or modify.
For this example, we'll use the Workspace Booking URL to make a booking as a portal user. The Workspace booking page lists all the services available in a workspace.
Book appointment by signing up for customer portal:
- When customers land on a Workspace Booking URL, they'll click Select for the service they want to book.
- They'll then be navigated to the next section, where they can select the required date, time, and staff.
- Next, they'll be asked to enter their information, such as their name and phone number, so they can be sent a confirmation and, later on, reminders. This example is about making an appointment by signing up for a customer portal, so customers will click Sign Up and enter the required details to create a portal account for themselves.
Note: Following the signup, an email will be sent to the specified email address for verification. The verification is not immediately mandatory for the successful booking of the current appointment. The verification is only to be able to log in and view all your appointments and their details in one place. So we'll proceed with the booking for now. - On the next page, customers will click Confirm to finalize the appointment.
- On clicking Confirm, an appointment will be booked for them. The booking summary will be displayed so they can view the appointment details. Here they will also have options to cancel or reschedule the appointment depending on the defined cancelation and rescheduling window.
- The customer will receive an appointment confirmation email along with links to reschedule or cancel the appointment.
Verification of the customer portal
- Let's see how the confirmation email for the customer portal looks. Customers will find an email asking them to confirm the account. To confirm, click Confirm your account.
- Next, they will be taken to a page where they can set a password for their account.
- After setting a password, they will be taken to their account where their information and appointment history can be viewed.
Canceling or rescheduling appointments from the customer portal
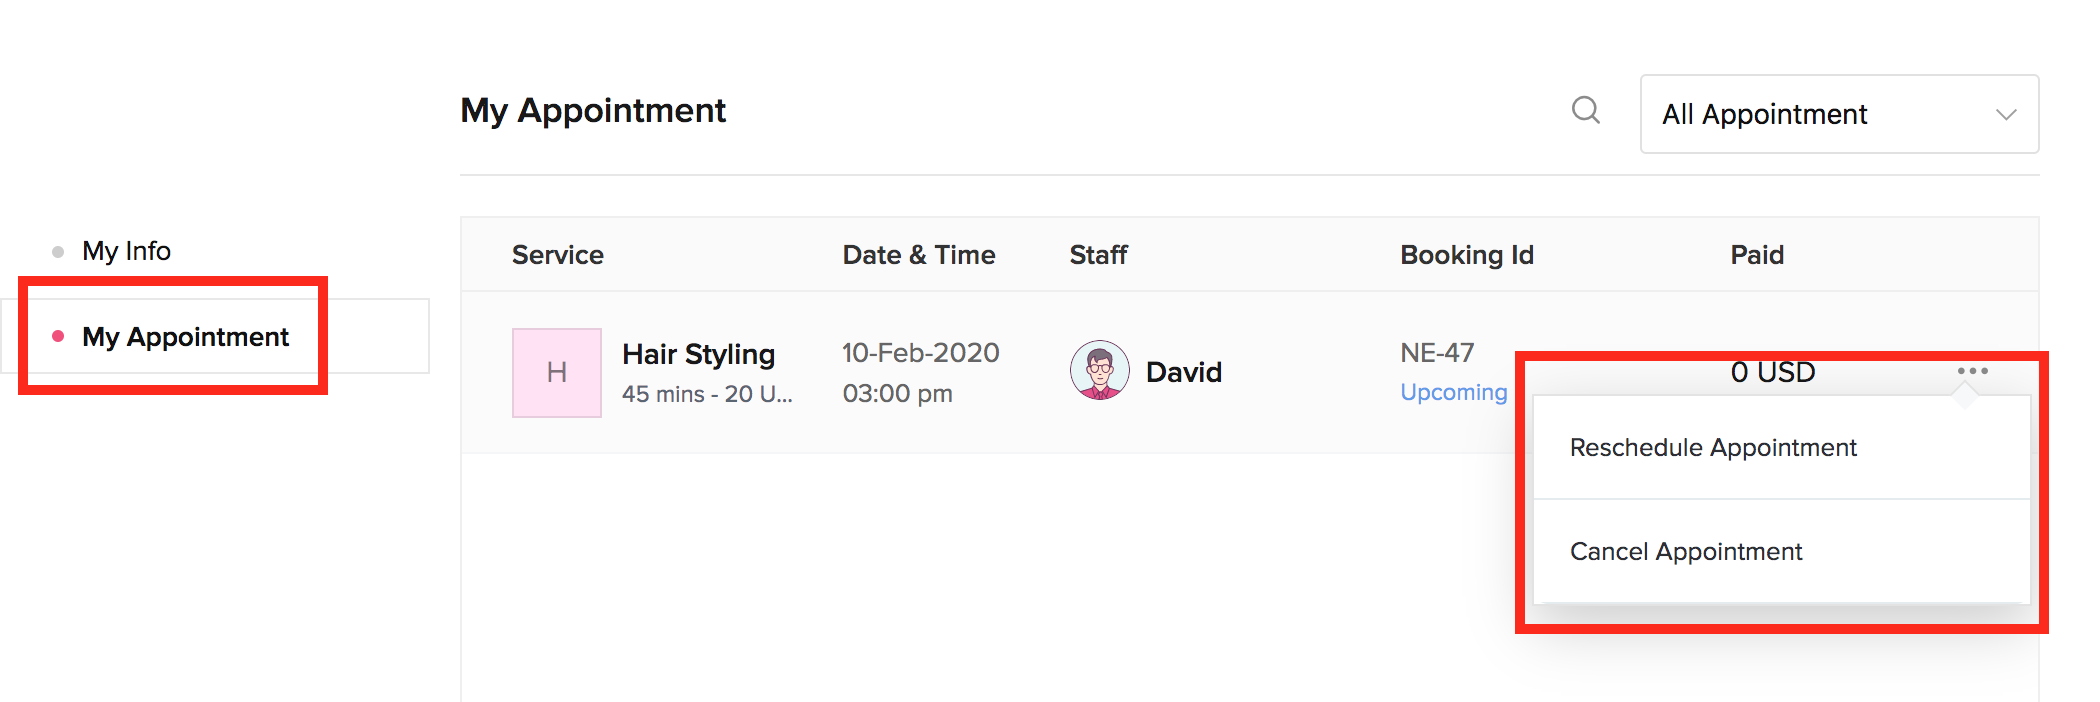
Customers can cancel or reschedule appointments by navigating to My Appointments and clicking the three-dotted icon. The options to cancel or reschedule the appointment will be available depending on the defined cancelation and rescheduling window.
Related Articles
Taking online meeting appointments through booking forms
Enable calendar booking for leads and customers Create booking links to let your leads book online appointments with you at their convenience. This way, your leads will be better prepared to learn from you and ask questions about the topics that ...Booking as a Guest
Customers can book appointments as guests or they can register themselves and book appointments as portal users. For this example, we'll use the "Workspace Booking URL," to make a booking as a guest. The Workspace booking page will list all the ...Manage Service Appointments
Scheduling Service Appointments All the service appointments in the Dispatch Console are initially scheduled by assigning it to a field technician or crew. The appointments can be scheduled from the Work Order Details page as mentioned here. It can ...Booking page
The booking page is the web page where customers can book services, resources, or appointments with particular staff. Types of Booking Page URLs It can be presented to customers in one of four ways: Workspace Booking URL - All services in the ...Registration Form for Guest Users and Customer Portal Users
Super admins and admins can view and edit this information. Managers can only view this information. Staff members will not have access to this information. When customers book appointments, they are required to specify details like their name, ...