Calendar View
Calendar View displays your customer appointments on a calendar layout. Navigate to the required day, week, or month, to find appointments labeled on the corresponding date or time, and associated to the respective staff.
Calendar view can be viewed in:
Day View
- The Day view displays all appointments that fall on the selected date. The appointments are marked according to the appointment time, and are listed corresponding to the associated staff or resource.
- Navigate to the required date using the arrows.
- Display appointments from all your workspaces or from a particular workspace by selecting an option from the dropdown.
- The Reorder Calendars option lets you rearrange the order of the staff columns in the calendar view.
- Drag and drop the staff or resource names in the required order.
- Additionally, you can hide the staff or the resource so that their appointments won't get listed in the calendar.
- The settings icon in the top-right corner lets you you set a time interval of 5, 10, 15, or 30 minutes.
- Depending on whether the customer arrives to the appointment, appointments can be marked as Completed or No Show by clicking on the appointment. For upcoming appointments, you will have Reschedule and Cancel as the options. The View Details option will redirect you to the List View, where more details about the appointment can be viewed.
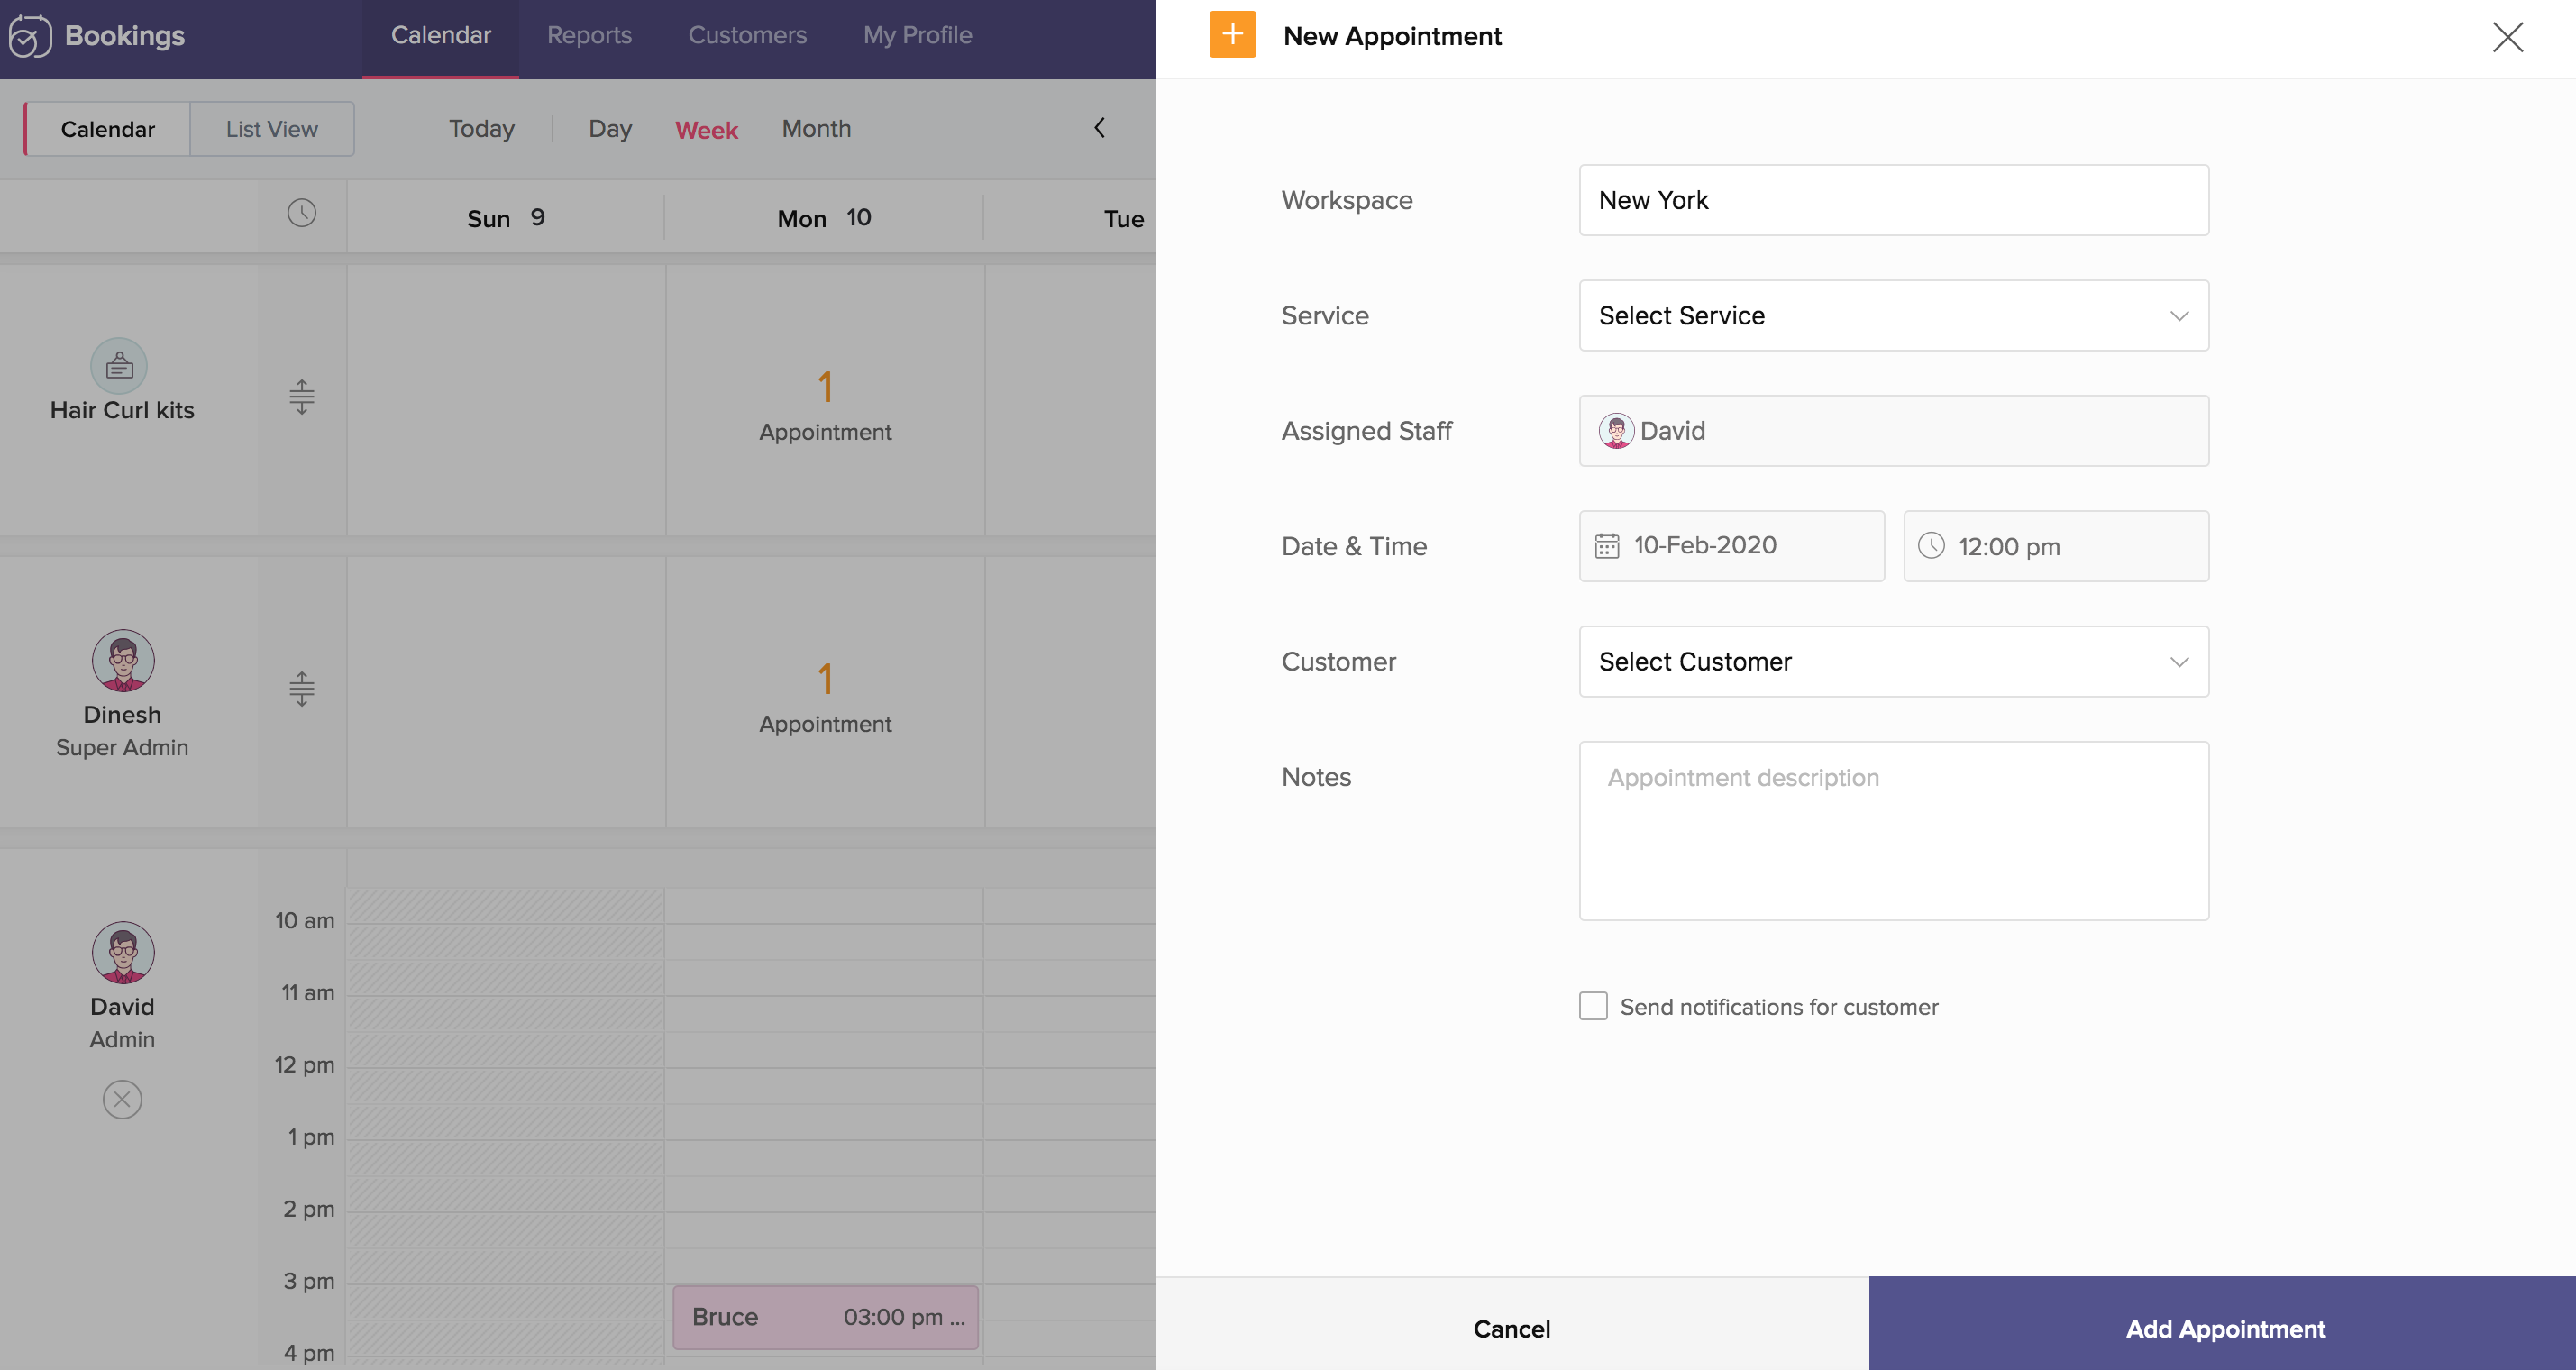
- You can also take offline appointments and mark them in the calendar. For example, when customers call up or send an email requesting an appointment, you can create appointments from the calendar view on the customer's behalf. This can be done by clicking on the time slot corresponding to the required stylist.
- Let's say a customer calls in asking for an appointment for hair styling at 12 pm. To add this booking, click on the 12:00 pm time slot.
- On the New Appointment page, enter the details, then click Add Appointment.
Week View
- The Week view displays all appointments that fall in the selected week. Each day in the week is displayed with the number of appointments that fall on that day, and are listed corresponding to the associated staff or resource.
- Navigate to the required week using the arrows.
- The staff or resource cell can be expanded for time-based view.
- It will list the start and end times of the appointments.
- From here, you can also take appointments offline and mark them in the calendar. For example, when customers call up or send an email requesting an appointment, you can create appointments from the calendar view on the customer's behalf. This can be done by clicking on the time slot corresponding to the required stylist.
Let's say a customer calls in asking for an appointment for hair styling at 12 pm. To add this booking, click on the 12:00 pm time slot.- On the New Appointment page, enter the details and click Add Appointment.
- The settings icon in the top-right corner lets you you set a time interval of 5, 10, 15, or 30 minutes.
- To view the appointments list, click on the appointment day. To view the details of an appointment in the appointments list, click on the required appointment.
In the Detail view, there are options to mark the appointment as Completed or No Show. For upcoming appointments, you will have Reschedule and Cancel as the options. The View Details option will redirect you to the List View, where more details about the appointment can be viewed.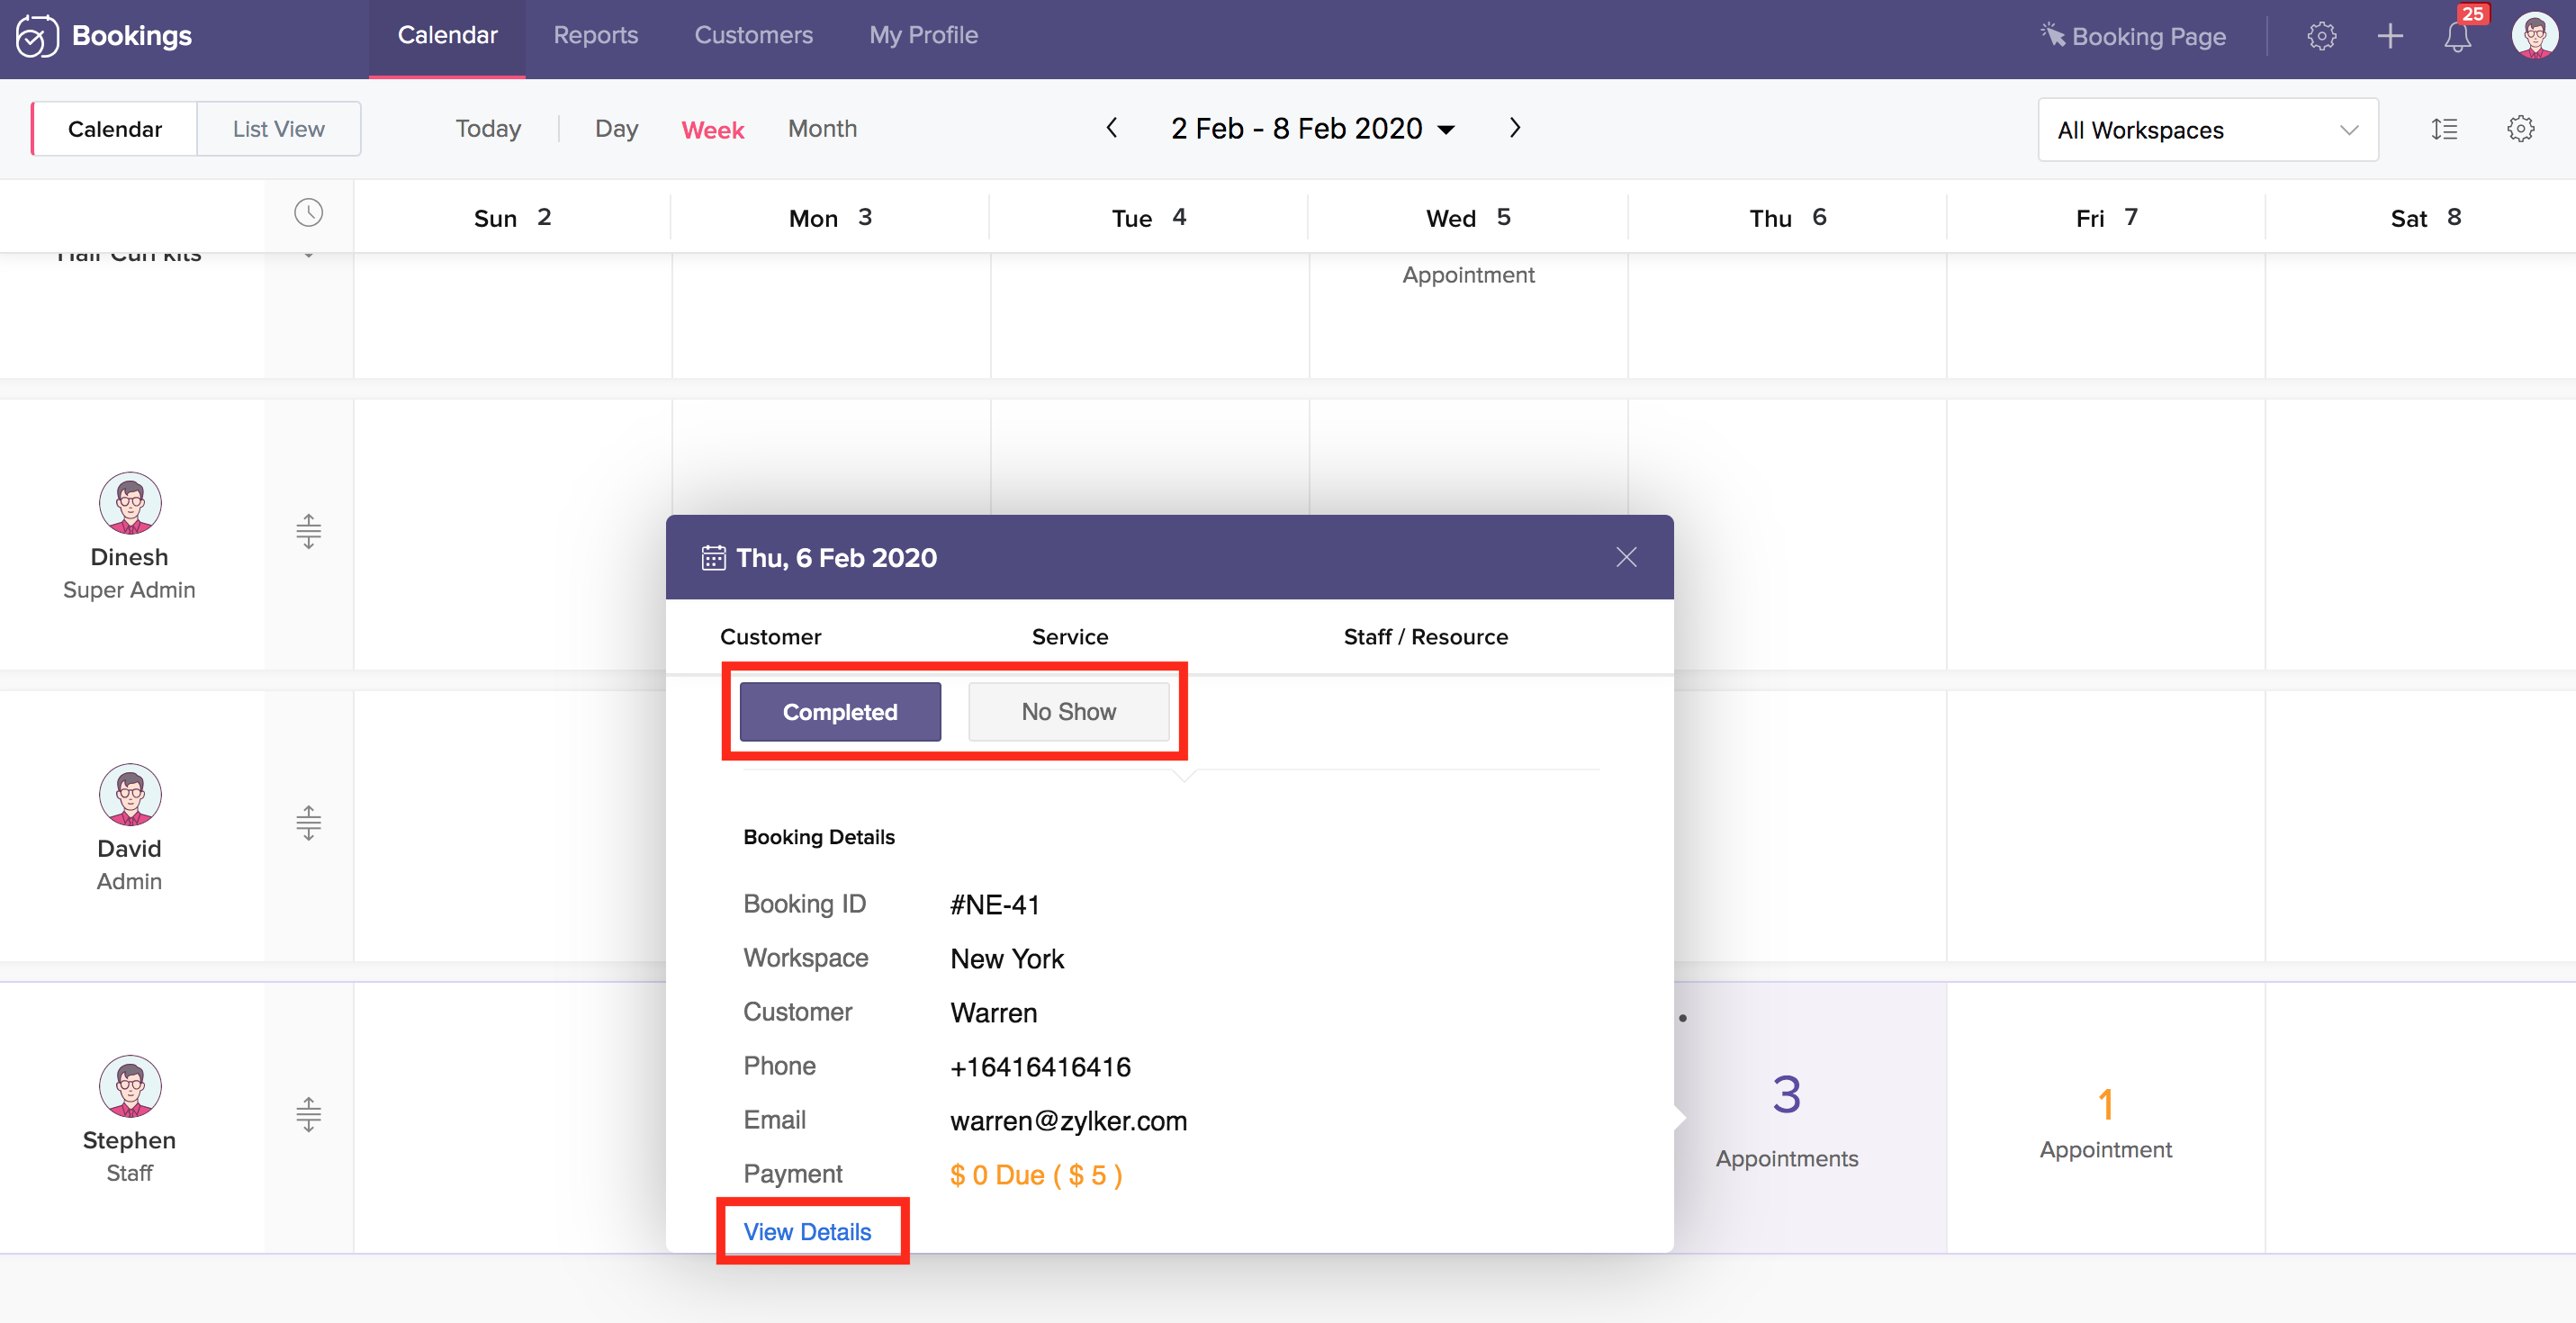
- The three-dotted icon will give you options to add a new appointment for that day, along with options to add time-off and special working hours.
Month View
- The Month view displays all appointments that fall in the selected month. Each day in the month is displayed with the number of appointments that fall on that particular day.
- Navigate to the required month using the arrows.
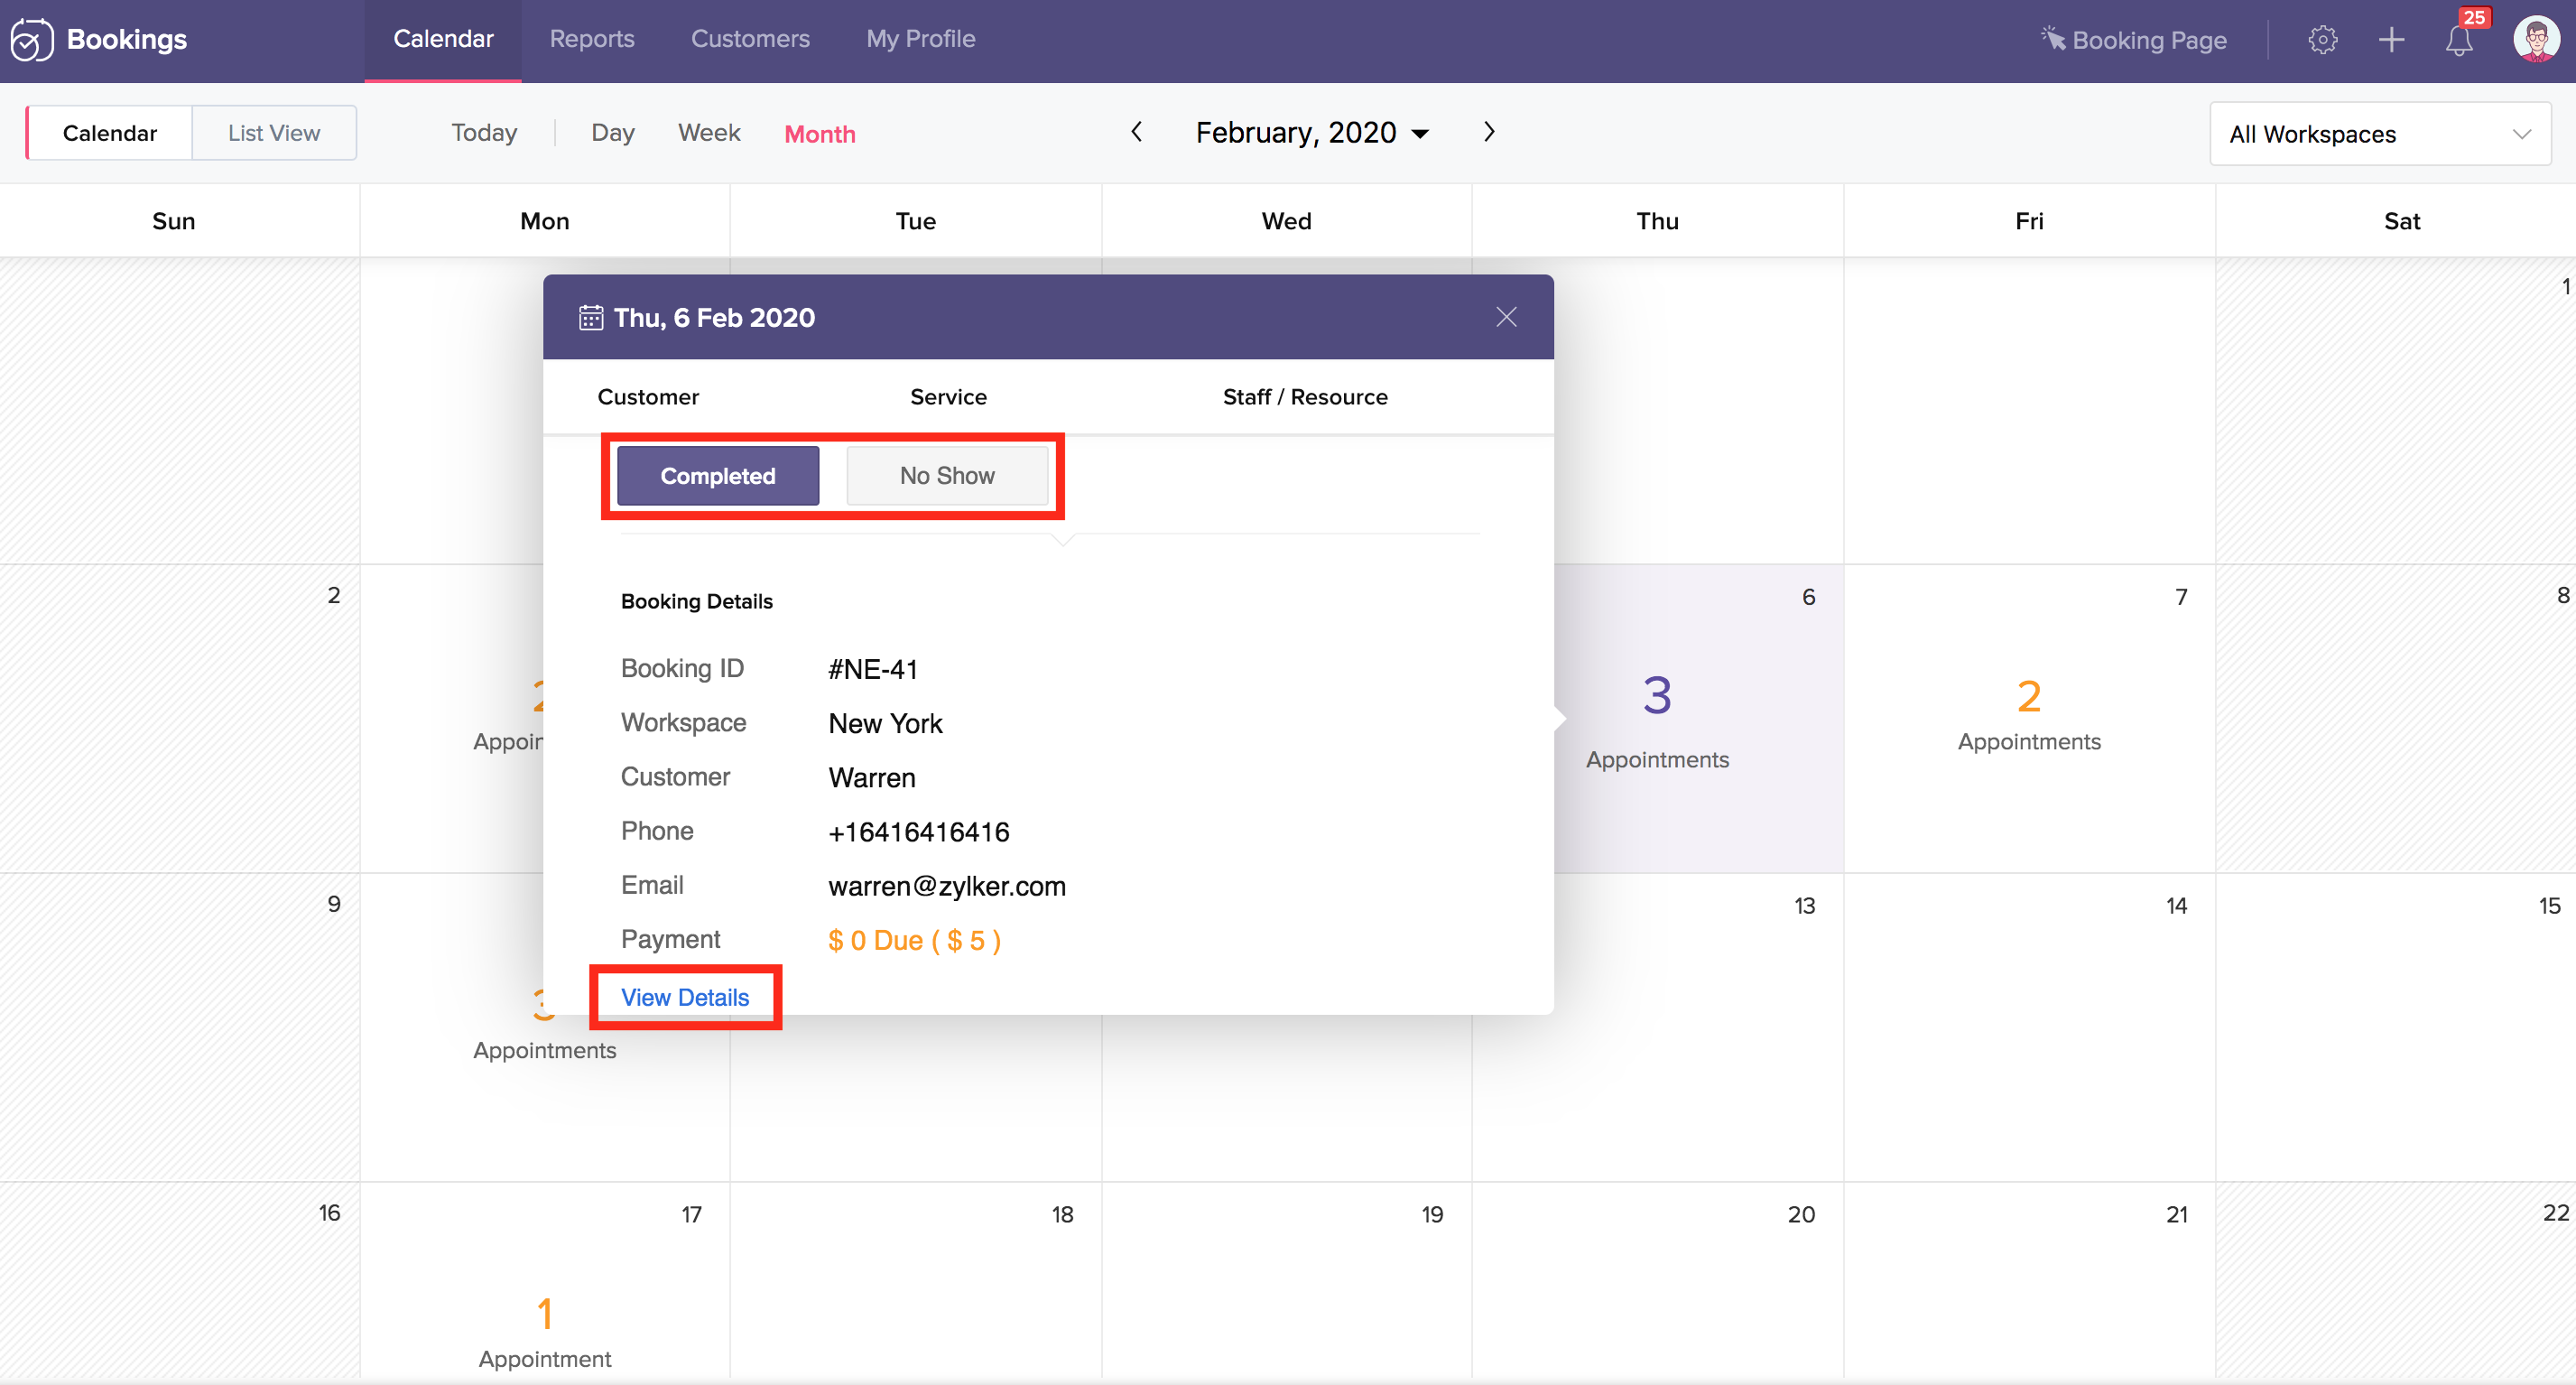
- To view the appointments list, click on the appointment day. To view the details of an appointment in the appointments list, click on the required appointment.
- In the Detail view, there are options to mark the appointment as Completed or No Show. For upcoming appointments, you will have Reschedule and Cancel as the options. The View Details option will redirect you to the List View, where more details about the appointment can be viewed.
- The three-dotted icon will give you options to add a new appointment for that day, along with options to add time-off and special working hours.
Related Articles
View events in calendar
You can filter calendar views based on Tasks, Milestones, Bugs or Events for any time period. In addition, you can also delete the created project events. View all Project Activities To view all the project activities like the task, milestone, bugs, ...Switching between the list and calendar view
You can switch between the list and the calendar view ay time you like. To do this: Click Events in the left. Click List in the top-right part of the page.What campaigns will I see in the calendar view?
Sent, paused, cancelled, AB testing, and scheduled campaigns are shown in calendar view. You can use the Campaign filter and Holiday filter to customize your calendar view.Project calendar
Get all your project activities embedded in one place and view how engaged you're using our Calendar module. Projects calendar is an easy way to securely and quickly organize meetings, events, schedule appointments, manage deadlines and more - all ...How to create project activities within the calendar view?
To create your project activities right from your calendar view, you can just click on the required date and create a task, milestone or bug.