A company or organization for whom the projects are done, is called a client company E.g., Bowman Furniture's is a client company. A user who can view the progress of the client company project, Eg: paul@bowman.com is the client user of that project.
Add a client company in your portal (across projects)
- Click
 in the top band.
 - Navigate to the Manage Users section and click Client Users.
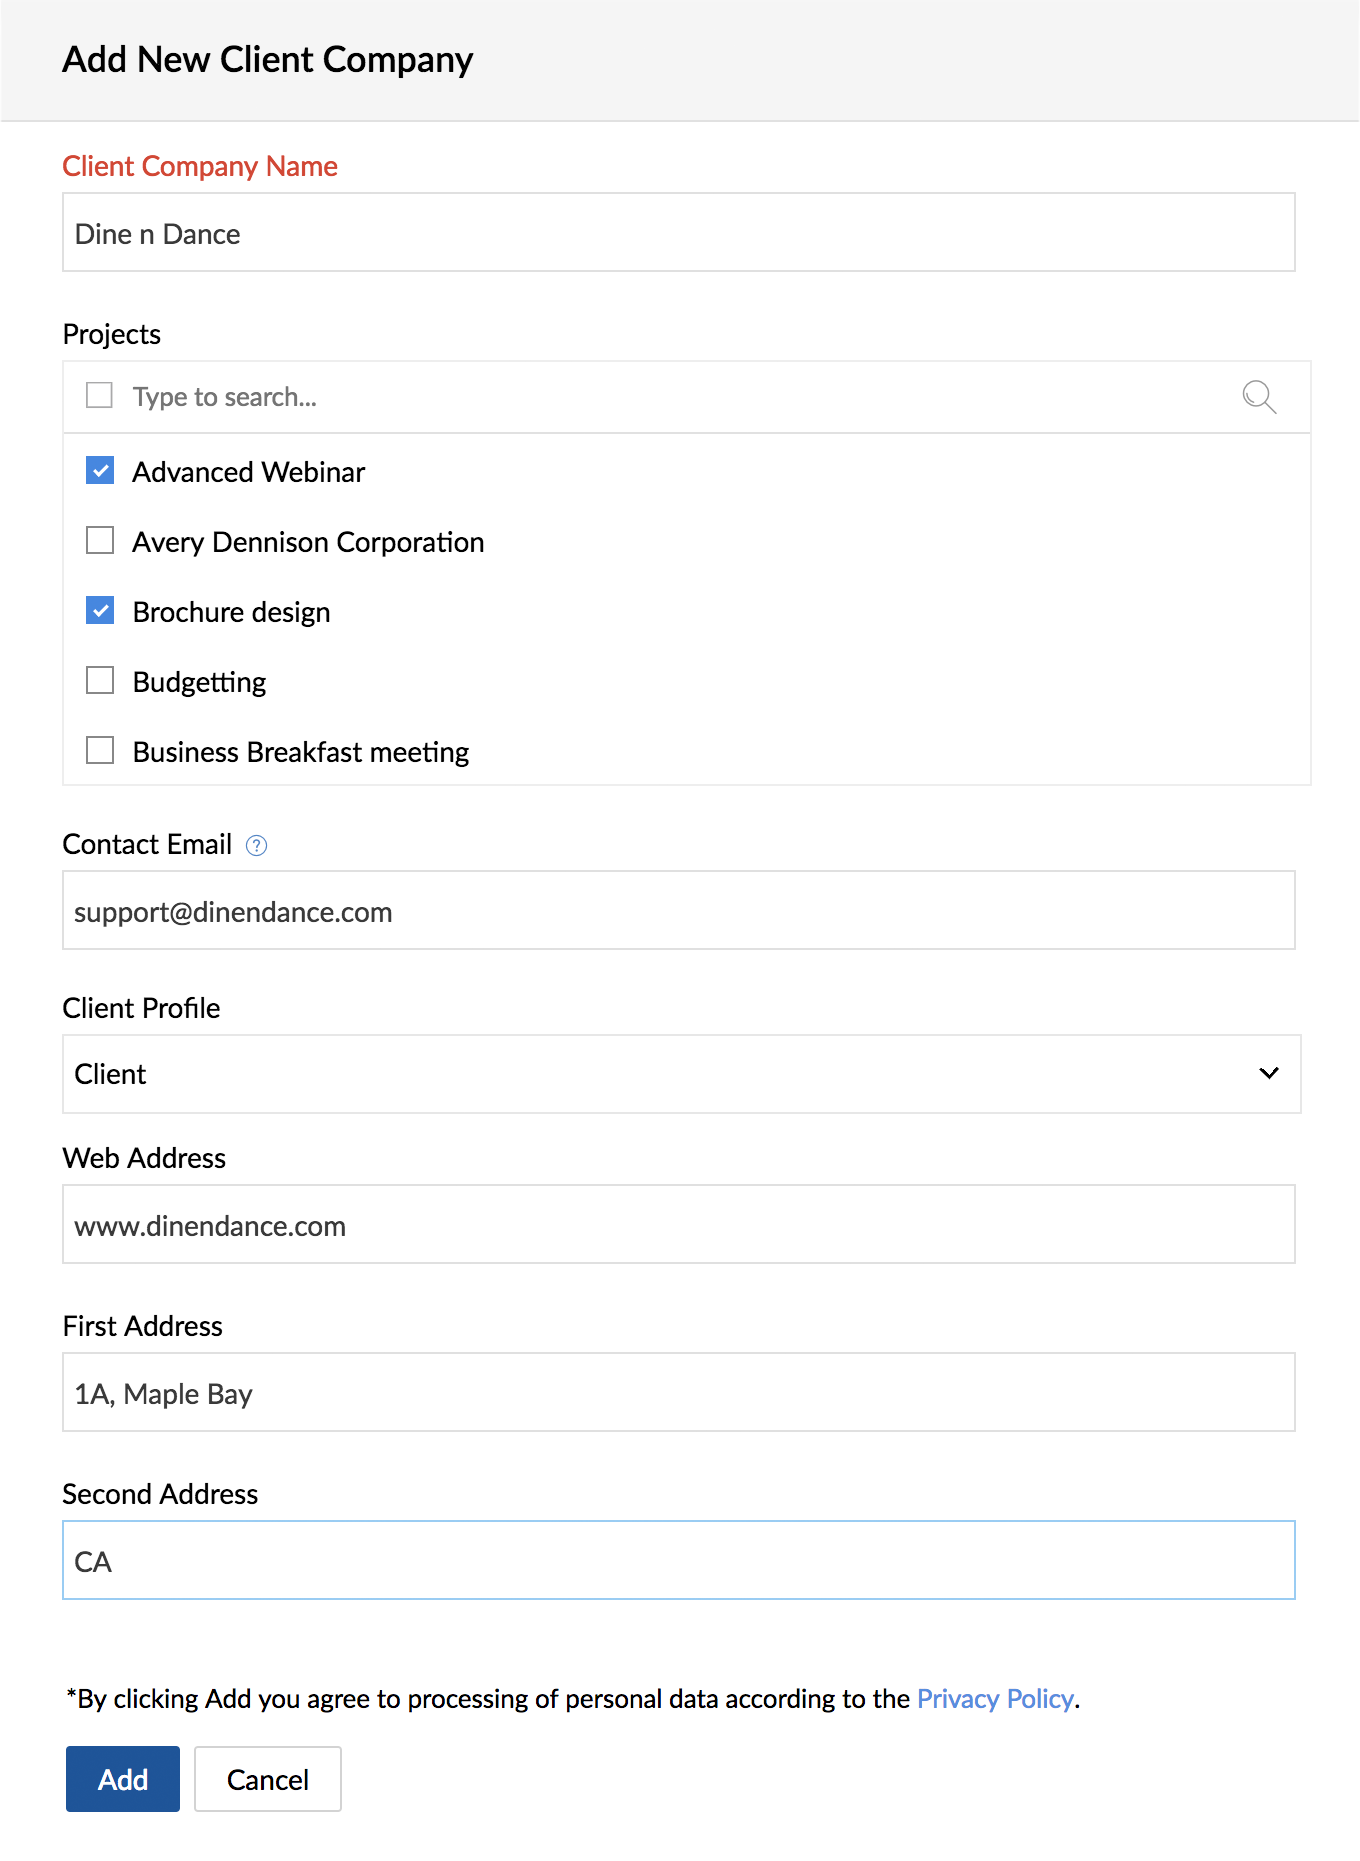
- Click Add Client Company in the upper-right corner.
- Enter a Client Company Name and select the projects you want to associate with this company.
- Enter the Contact Email address, the Web Address, and the other postal address details respectively.
- Click Add.
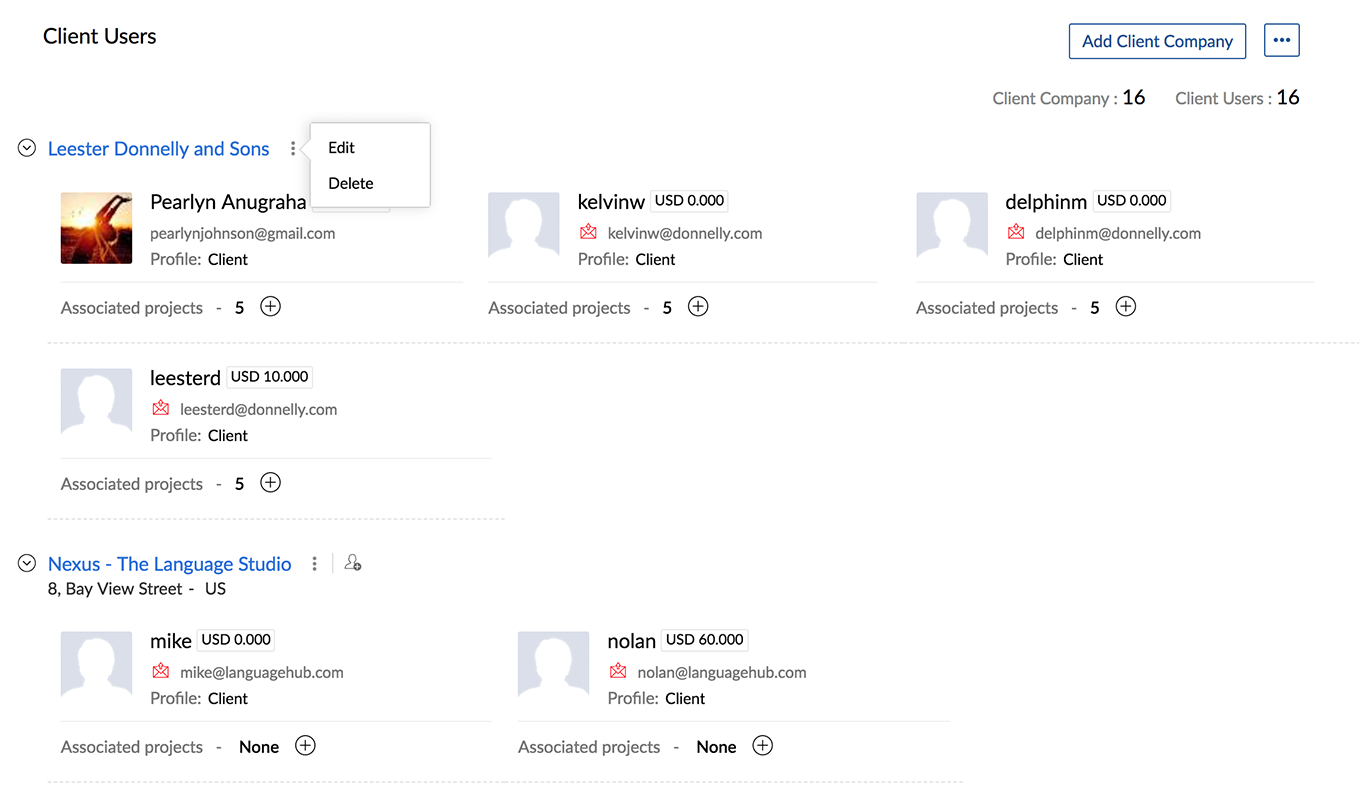
Edit / Delete a client company in your portal (across projects)
- Click in the top band.
- Navigate to the Manage Users section and click Client Users.
- Navigate to your client company and then click
 .
. - Click Edit to make changes or Delete to remove the client company.
Add a client user in your portal (across projects)
- Click in the top band.
- Navigate to the Manage Users section and click Client Users.
- Navigate to a client company to view available actions.
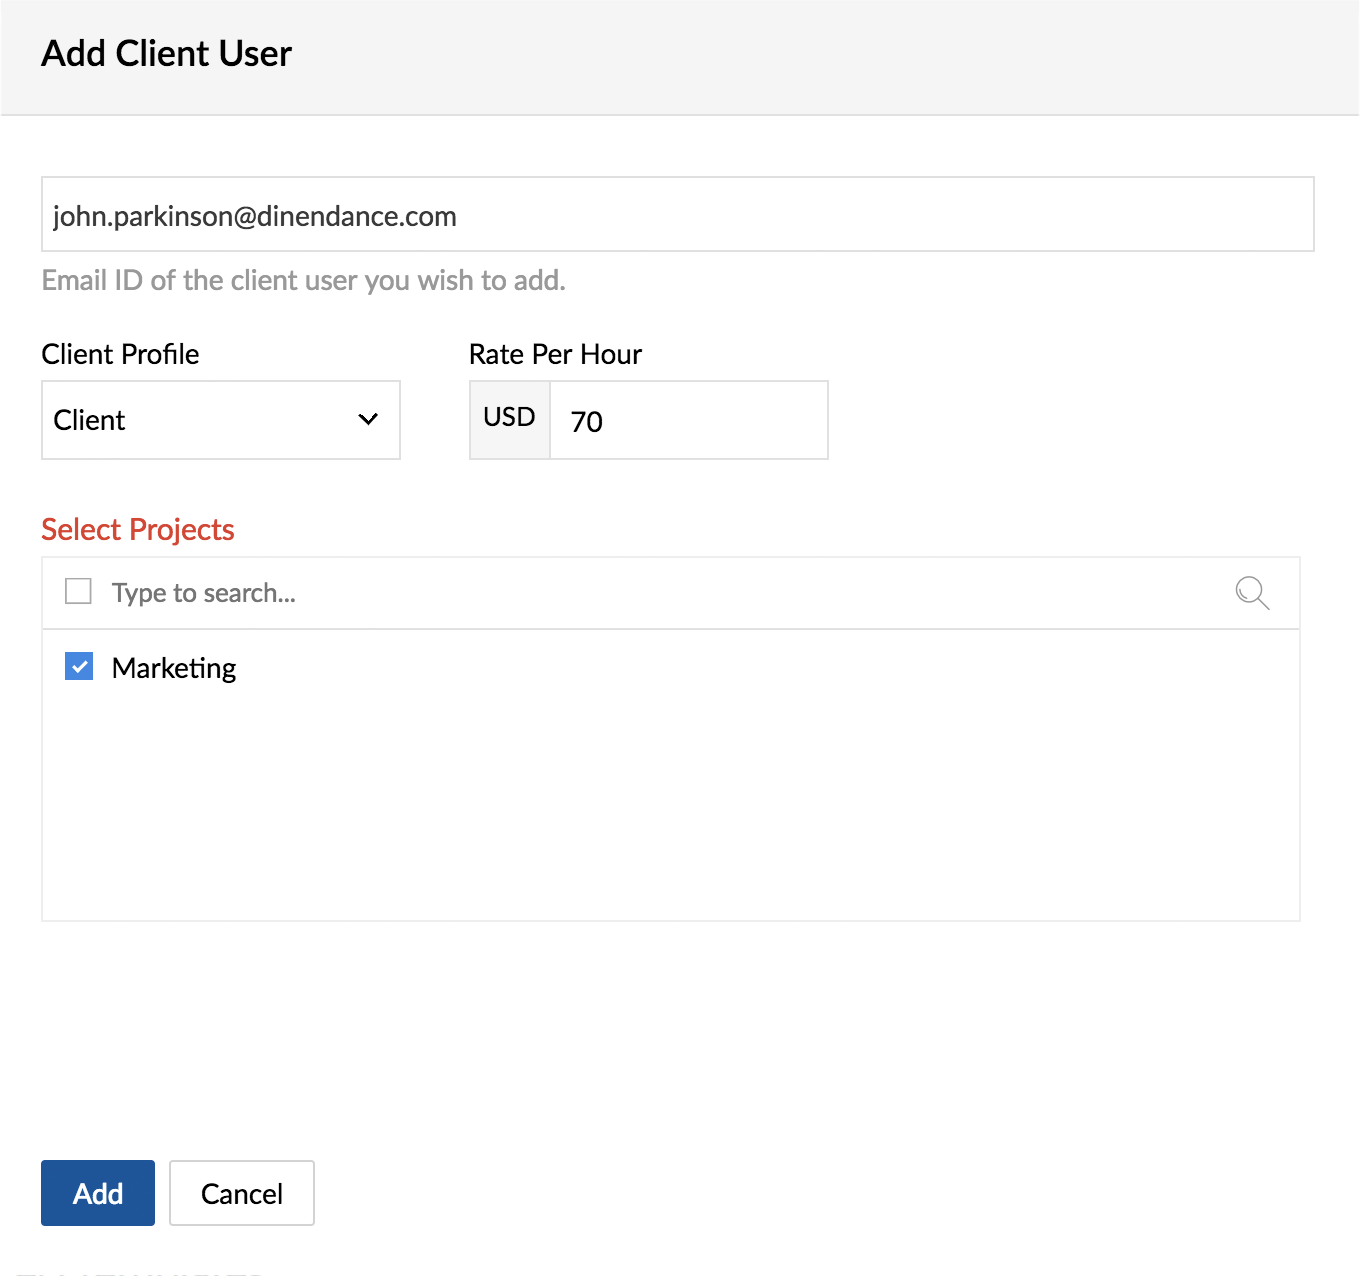
- Click
 .
. - Enter an Email address and a Rate Per Hour for the user (you'll only see the Rate Per Hour field if your portal is integrated with Zoho Invoice ).
- Client Profile is selected by default.
- Client Profile is selected by default.
- Select the projects you want to add this client to.
- Click Add.
An
email invite is sent to the client user's along with a link to access
the portal. You can re-invite client users by clicking on  icon in their profile card after 24 hours if they have not accessed the link in the invitation email.
Edit a client portal user
- Click in the top band.
- Navigate to the Manage Users section and click Client Users.
- Hover over a user profile to display available actions.
- Click
 .
. - Modify the Portal Rate of the user and the Rate Per Hour for their associated projects, if necessary.
- Assign the client user to more projects if you wish.
- Click Update.
Delete a client portal user
- Click in the top band.
- Navigate to the Manage Users section and click Client Users.
- Hover over a user profile to display available actions.
- Click
 .
. - Check the box if you want to let the user know they've been removed.
- Click Delete User.
Add client company in your project
- Navigate to Projects.
- Select a project from the list.
- Click Users in the left-hand panel.
- Click the Client Users tab.
- Click Add Client Company in the upper right.
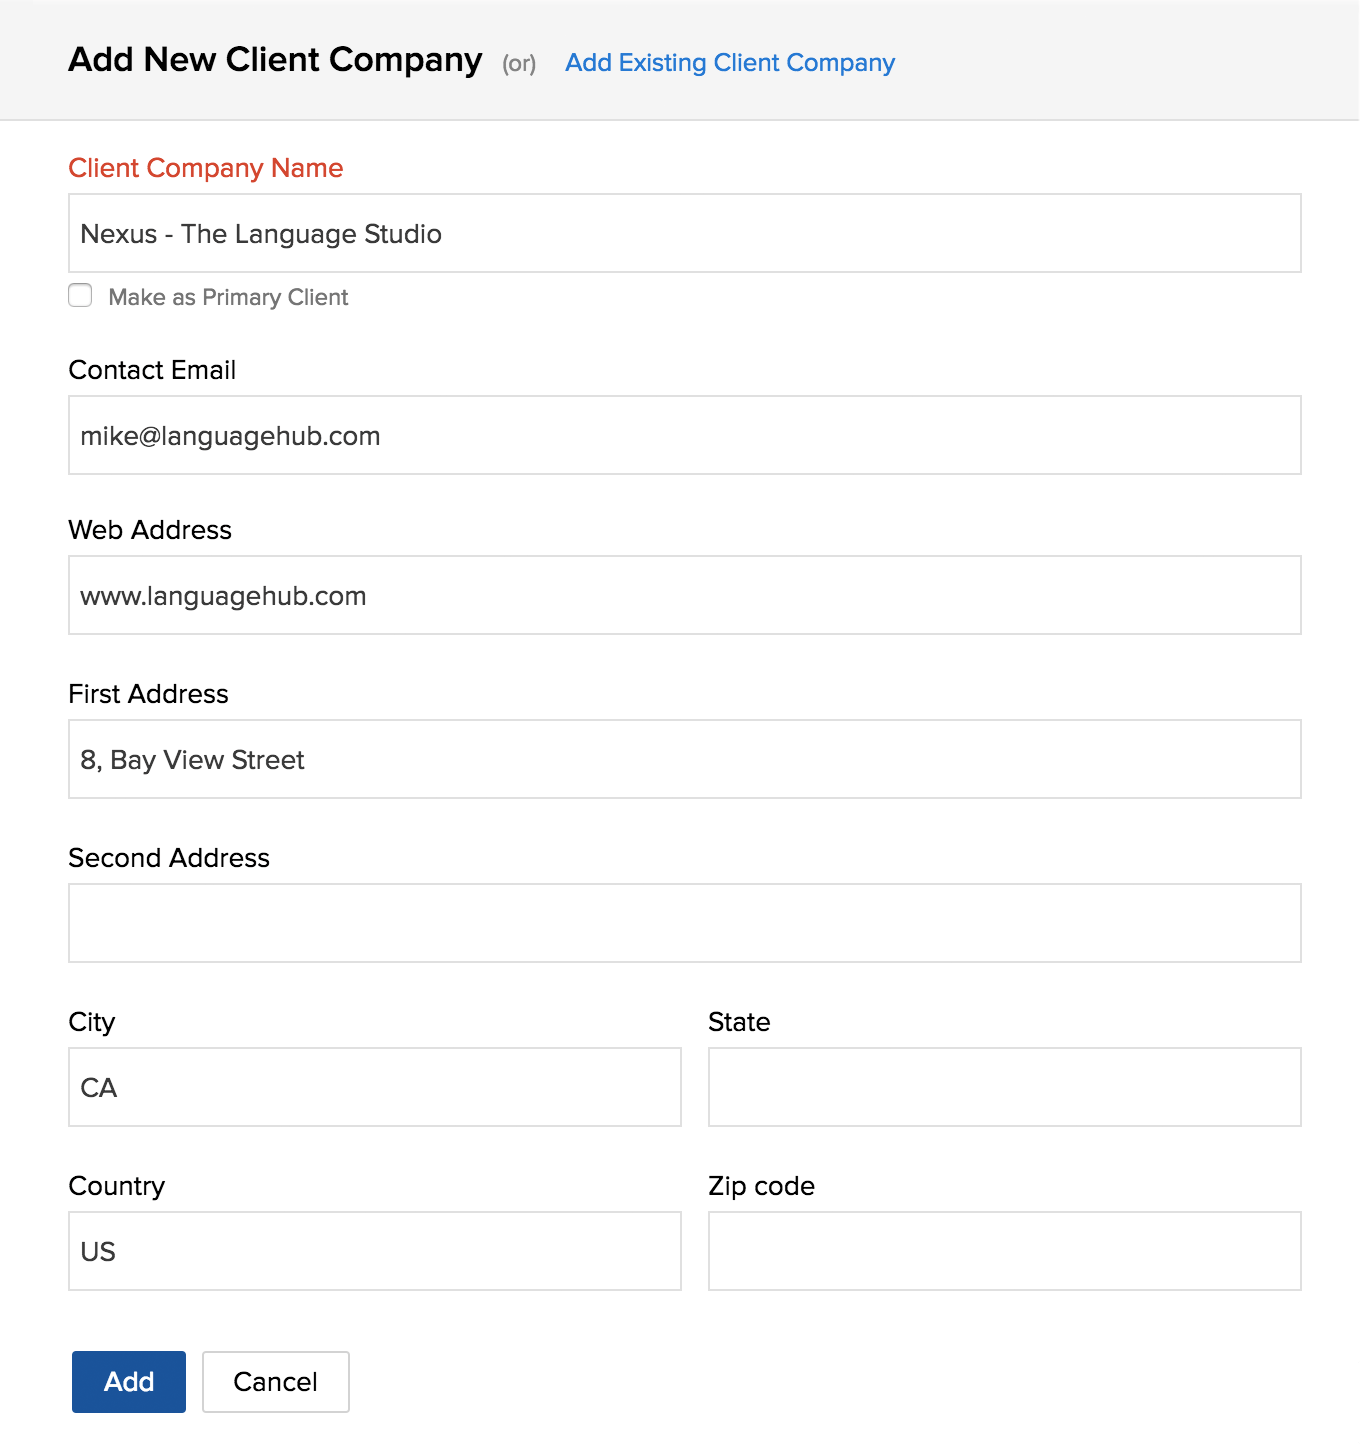
- You can Add Existing Client Company or Add New Client Company.
- You can Add Existing Client Company or Add New Client Company.
- Enter a Client Company Name.
- Select Make as Primary Client if you want to invoice your work to this customer. You will not be able to generate invoices if you don't have a primary client in your project.
- Enter the Contact Email address, the Web Address, and the other postal address details respectively.
- Click Add.
- You can also add other existing client companies available in that portal.
Delete Client Company in your project
- Click in the top band.
- Navigate to a project and click Users.
- Click Client Users from the top panel.
- Navigate to your client company and then click.
- Click Delete to remove the client company.
Add client user in your project
- Navigate to Projects.
- Select a project from the list.
- Click Users in the left-hand panel.
- Click the Client Users tab.
- Navigate to a client company to display available actions.
- Click.
- You can Search Existing Users and add them to the project or you can Add New User.
- You can Search Existing Users and add them to the project or you can Add New User.
- Enter an Email Address and Rate Per Hour for the new user (you'll only see the Rate Per Hour field if you've selected staff-based billing for this project) and then click Add to List.
- Select users from the list and then click Add.
Edit a client project user
- Navigate to Projects.
- Select a project from the list.
- Click Users in the left-hand panel.
- Click the Client Users tab.
- Hover over a client company to display available actions.
- Click to edit.
- When you edit, modify the user's Rate if needed and click Update.
- When you edit, modify the user's Rate if needed and click Update.
Customize client permissions
When you edit a user within a project you can also customize their permissions.
- Click Projects in the top band.
- Select a project from the list.
- Select Users from the left-hand panel.
- Click Client Users from the top panel.
- Hover over a client user and then click .
- Click Customize permissions for this user.
- Edit permissions as needed and then click Update.
Clone Customized Permissions
Customized permissions can be cloned from one user and applied to other users.
- Click Projects in the top band.
- Select a project from the list.
- Select Users from the left-hand panel.
- Click Client Users from the top panel.
- Hover over a client user and then click .
- Click
 and then click Clone Customization.
 - Select client users from the dialog box and then click Copy Permissions.
- Permission set is copied to the selected users.
Remove Customization
Customized permissions can be removed and the permissions will revert to portal level client permissions.
- Click Projects in the top band.
- Select a project from the list.
- Select Users from the left-hand panel.
- Hover over a user and then click .
- Click and then click Remove Customization.
- Permissions will reset to portal level client user permissions.
Delete a client project user
- Navigate to Projects.
- Select a project from the list.
- Click Users in the left-hand panel.
- Click the Client Users tab.
- Hover over a client company to display available actions.
- Click .
- Check the box if you want to let the user know they've been removed.
- Click Delete User.

- If you have integrated Zoho Projects and Zoho CRM, you can view the CRM details such as CRM Account Information and CRM Potential Information along with the Client Information in Zoho Projects itself. However, the CRM information can be viewed only by the portal Admin. You can also import users from Zoho CRM.
- The Rate field shows up only if the project's billing is based on the staff hours.
