Configure Settings for Zoho CRM (Android)
Change Theme
To change the color theme for your Zoho CRM app on your Android device
- In your Zoho CRM app, go to Settings.
- On the Settings page, under Themes, select the desired colour theme.
The chosen theme is applied across the app.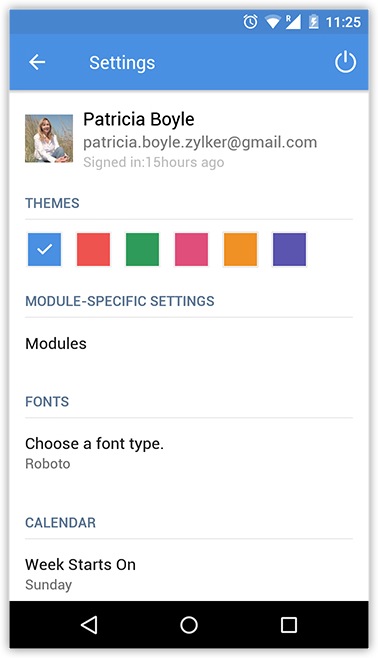
Configure Module-specific Settings
The module specific settings decide the order in which records are displayed in a selected module's list view. Module specific settings also influence other aspects of a module such as module search, synchronization with Desktop settings and so on.
To configure Module-specific Settings
- In your Zoho CRM app, go to Settings.
- Under Module-specific Settings, tap Modules.
- Select the required module.
Alternatively, Module Settings can also be accessed from the respective module page by tapping on the Settings icon.
- In the [Module] Settings page, the following sections are available.
- Grouping
- Sort
- Search
- Display Fields
- Records
- Sync Desktop Settings
- Name Display (Available only for Leads and Contacts)
- Task Status (Available only for Tasks)
Module List View Display Settings
The order in which the records of a module appear in the Module's List View is decided by the settings configured under Grouping, Sort and DisplayFields sections.
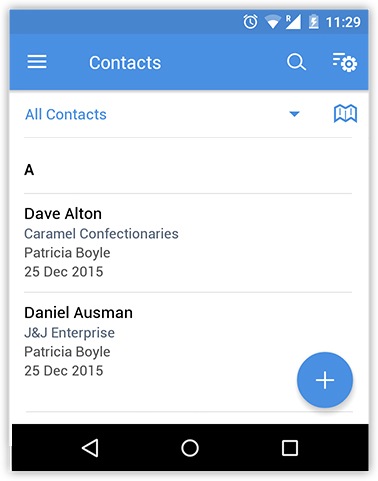
In the example above,
- A is the group, displayed as per the Grouping settings.
- Dave Alton and Daniel Ausman are records sorted under the group A, listed as per Primary and Secondary sorting.
- The details you see under each of these records are displayed as per the Display Fields settings.
Therefore, while Grouping and Sort decide the order of records, Display Settings decide the order of fields displayed under a record.
Grouping
The first level of organizing records under a module is by classifying them into groups. The basis in which they are grouped is specified under Grouping.
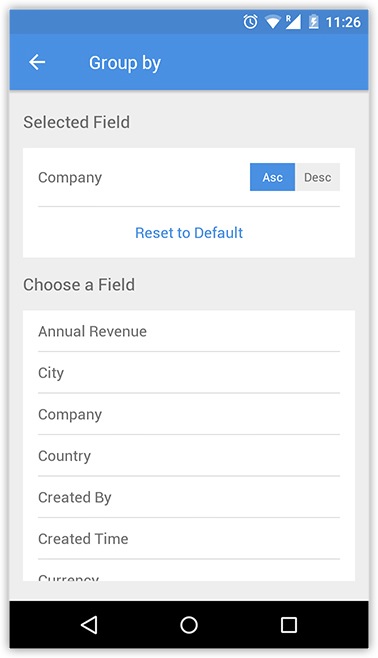
For example, according to the settings in the screenshot above, the records will be grouped by the ascending order of the Company Name.
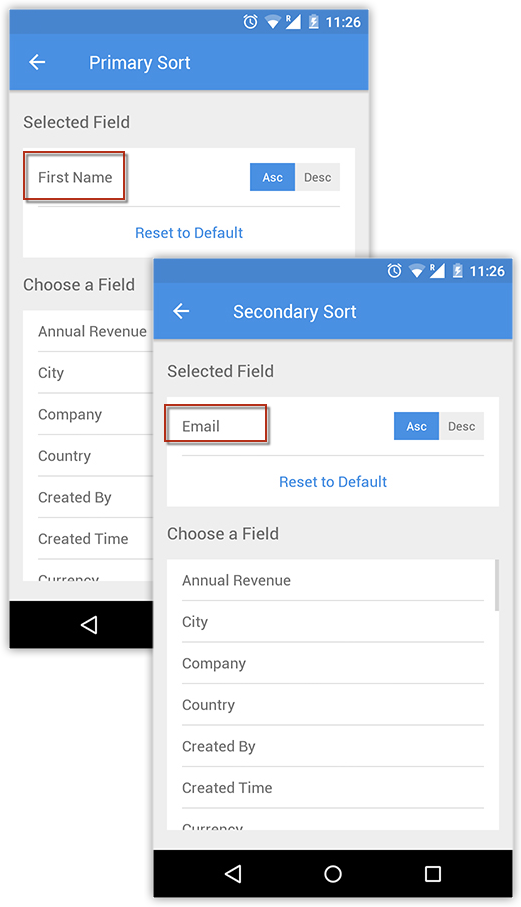
Sort
Records that are displayed within a group are sorted based on Primary and Secondary sorting settings. For example, according to the settings in the following screenshot, the records of the selected module are first sorted by the ascending alphabetical order of the First Name. In case of conflict based on Primary Sorting, they are classifield as per settings under Secondary Sorting., that is, ascending alphabetical order of the Email.
Display Fields
The
settings under Display Fields decides which fields are displayed under a
record in the Module List View page. You can choose upto four fields to
be displayed for a record.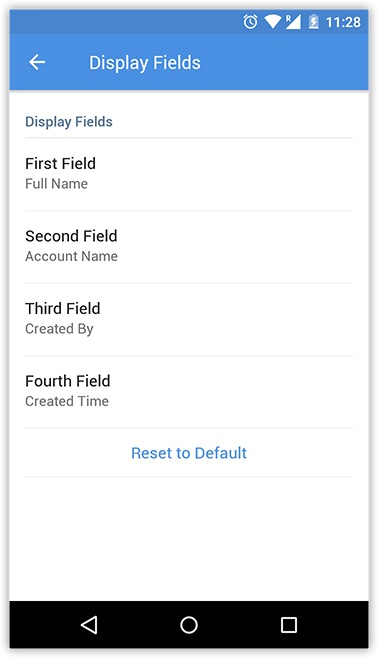
Other Settings
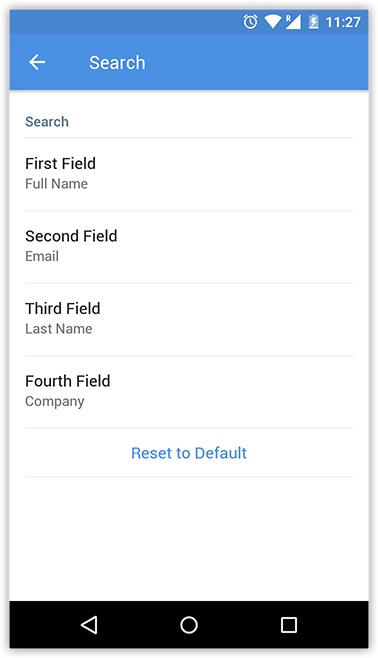
Search
When you run a search within a module, the app looks for matches only in certain specified fields. These fields are specified under the Search settings. You can specify upto four fields by which the search is done. If the search term entered lies in another field not specified under the Search settings, that search will not return any results.
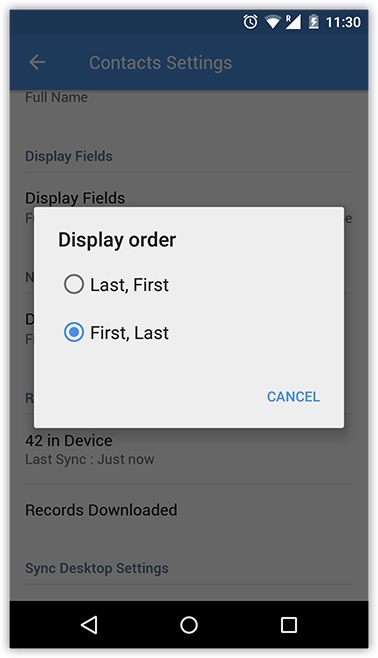
Name Display
For the Leads and Contacts modules you can change the order of the first name and last name.
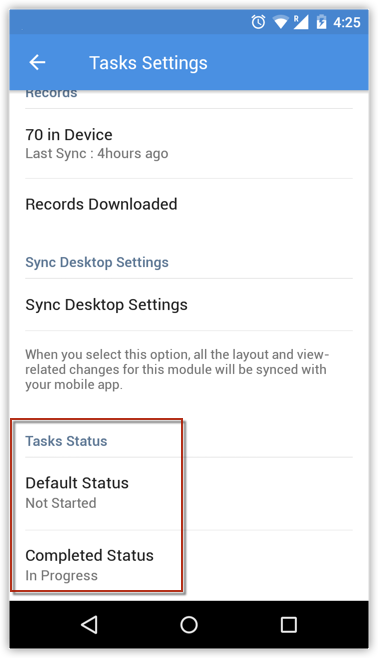
Records
This displays the number of records in the device and information on the last sync.
Records Downloaded indicates that all records from the server for the selected module have been downloaded.
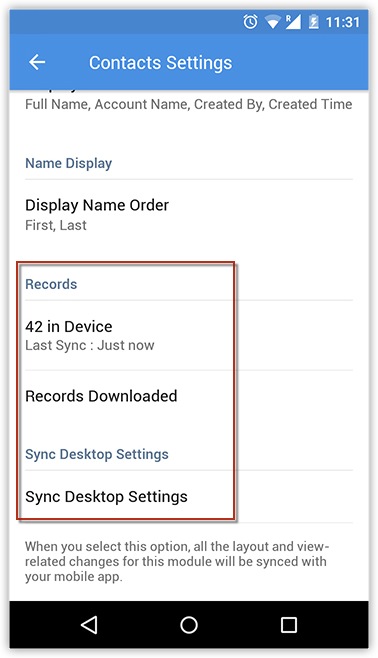
Sync Desktop Settings
If you would like the layout settings from the Desktop version to be synced with the mobile version, you can select this option.
Task Status
You can change the settings of Default Status and Completed Status of tasks under the Task Status section. This is available only in the Tasks Settings.
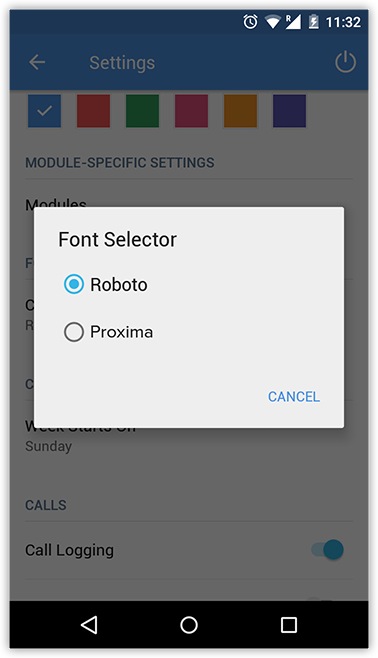
Choose Fonts
- In your Zoho CRM app, go to Settings.
- On the Settings page, under the Fonts section, tap Choose a font type.
- In the Font Selector popup, select the desired font.
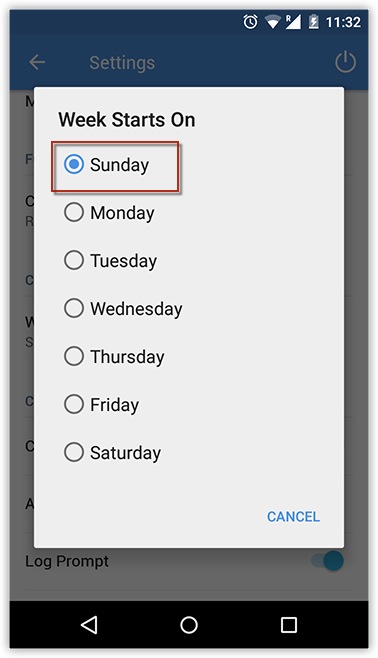
Configure Calendar Settings
- In your Zoho CRM app, go to Settings.
- On the Settings page, under the Calendar section, tap Week Starts On.
- In the Week Starts On popup, select the desired day of the week.
Configure Call Settings
- In your Zoho CRM app, go to Settings.
- On the Settings page, under the Calls section, you can enable or disable the following functions according to your requirements.
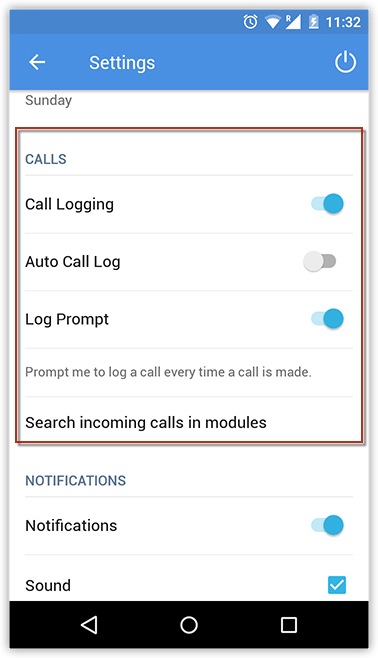
- Call Logging: Enable this function to be able to receive a prompt and log a call after you complete a call. Disabling this will disable both Log Prompt as well as Auto Call Log.
- Log Prompt: Enable this function to receive a Log Call prompt at the end of every call.
- Auto Call Log: Enable this function to automatically associate a call to a lead/contact at the end of every call.
- Choose modules in which incoming calls can be searched under Search incoming calls in modules.
Enable Notifications
You can choose how you want to be notified of CRM actions on your device. Under the Notifications section on the Settingspage, enable or disable Sound and Vibration options as per your needs.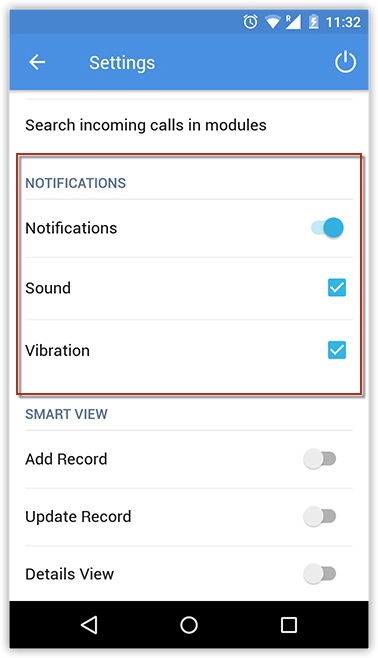
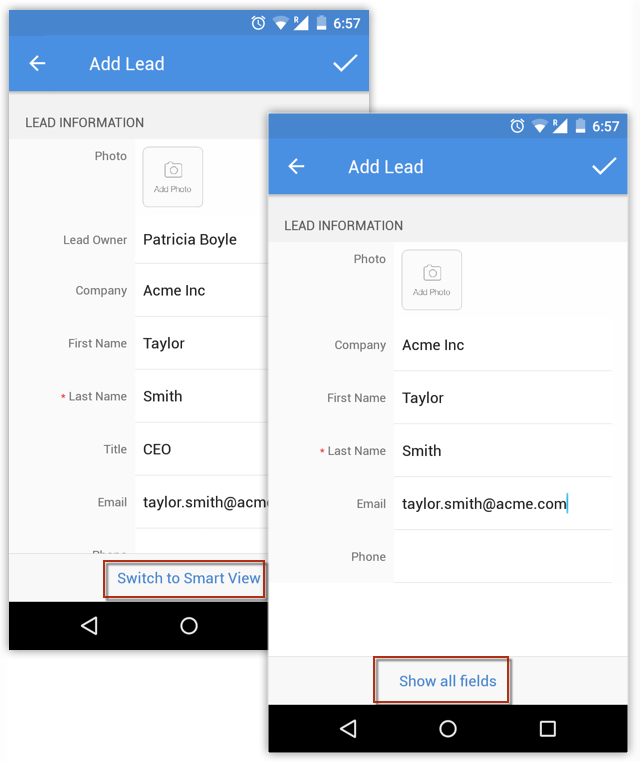
Configure Smart View Settings
The Smart View is a mobile-friendly view that is available for any module on the Zoho CRM Android app. It is available at four instances: Add Record, Update Record, Details View and Related Lists.
The Smart View is called so because it automatically displays only what is relevant to you. For example, let's say you have several fields with empty values in the Details View of a record. The default view would show a full list of fields including the glaring empty fields. Whereas the Smart View would automatically skip the empty fields and display only those fields with suitable values. This way you do not waste time scrolling up and down your screen looking for relevant information - it is presented to you in the form of Smart View.
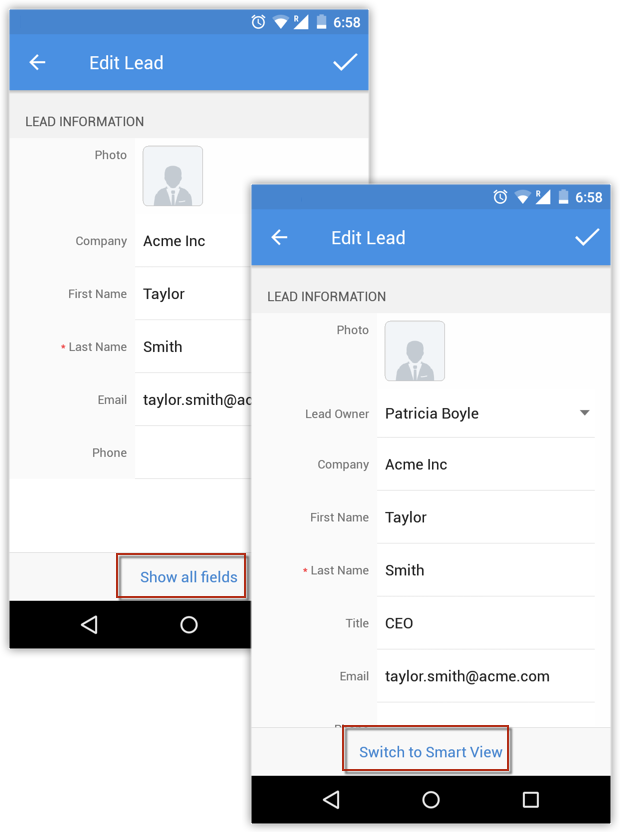
To enable Smart View as the default view type
- Go to Settings.
- Under the Smart View section, enable or disable the Smart View at the following instances.

- Add Record: Fill only the important fields while creating a record.
- Update Record: Update only what is important to you while editing a record.
- Details View: Skip all empty fields and show only fields for which there is data.
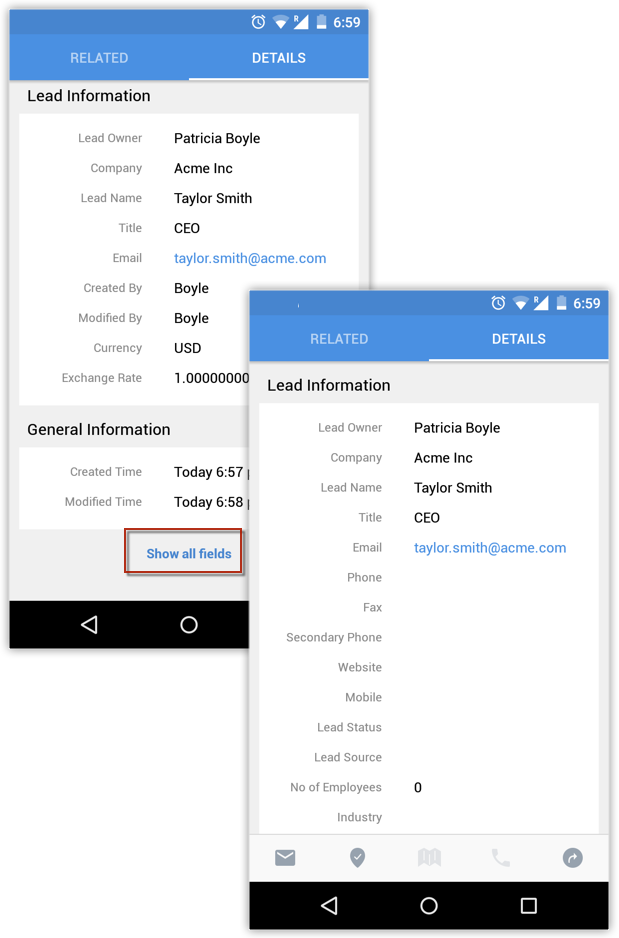
- Related Lists:
Push all empty related list items to the bottom of the page and show
only those for which there is any data on the top of the page.
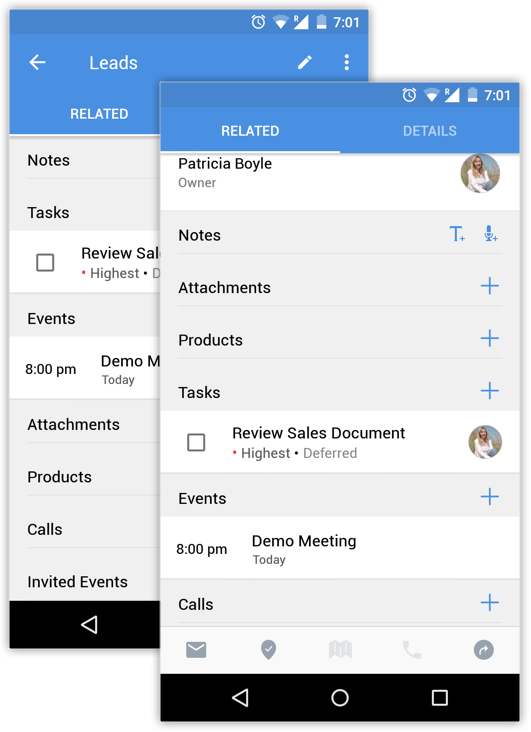
Besides this, you have the option to choose which tab to be displayed by default when you land on a record's details page. By default, the Related tab is shown. When you switch this off, the Details tab is shown by default. You can manually slide to the Related tab on the left.
Reset Zoho CRM for Android
You
can reset Zoho CRM for Android if you wish to start from scratch. There
are two levels to resetting the app. There is no loss of CRM data in
either case.
Reset
Reset is an action made to update the Zoho CRM app with the latest data from the Desktop version. When you Reset the Zoho CRM app, the latest additions made to the Desktop Version such as custom modules, components etc sync with the mobile app. The App settings configured earlier on the device such as Themes, Grouping and Sorting will be intact.
Reset and Erase Settings
When you Reset and Erase Settings, all the App settings configured on the device such as Themes, Grouping and Sorting are erased and set to default. The app is then updated with the latest data from the Desktop version so that you have a clean slate to work with.
Related Articles
Zoho CRM for Android Phones
Zoho CRM for Android is a native application that enables you to access and work with your Online Zoho CRM data from your Android phones. With this mobile application you can access and manage your Leads, Accounts, Contacts, Potentials, Cases, ...Configure Zoho CRM Settings in iPhone
Change Theme To change the color theme for your Zoho CRM app on your iOS device In your Zoho CRM app, go to Settings. On the Settings page, under Themes, select the desired colour theme. The chosen theme is applied across the app. Configure ...Configure Zoho CRM Settings in iPhone
Change Theme To change the color theme for your Zoho CRM app on your iOS device In your Zoho CRM app, go to Settings. On the Settings page, under Themes, select the desired colour theme. The chosen theme is applied across the app. Configure ...How to configure sync settings
Configure your sync settings to keep all of your campaigns and contacts updated across both applications. With options to push campaigns to CRM and update your contacts and campaign member status, you'll be able to better execute your campaigns and ...Install Zoho Sprints for Android
Zoho Sprints mobile app is now available for Android mobiles. If you're an Android user you can download the app and manage your projects and sprints in just a tap. Requirements: Android 4.1 and above Install from play store Go to your Play Store. ...