Configure your Salesforce Integrations
Type of visitors to be pushed into your Salesforce account
Salesforce integration section allows you to choose the type of visitor base that you would like to push into your Salesforce account automatically.
- Only Missed – Missed visitors will alone be pushed.
- Only Attended - Visitors who had already been assisted by the users alone will be pushed.
- Only Accessed - Visitors who had browsed through your website alone will be pushed .
- Selecting all – Will push the entire visitor base of your website to your Salesforce account.
- Selecting None - Visitors will not be pushed into your Salesforce account automatically, yet you can push them in manually.
- Else you can also club two categories of visitor base and push them into your Salesforce account automatically as in "Attended AND Accessed", "Accessed AND Missed" and "Attended AND Missed"
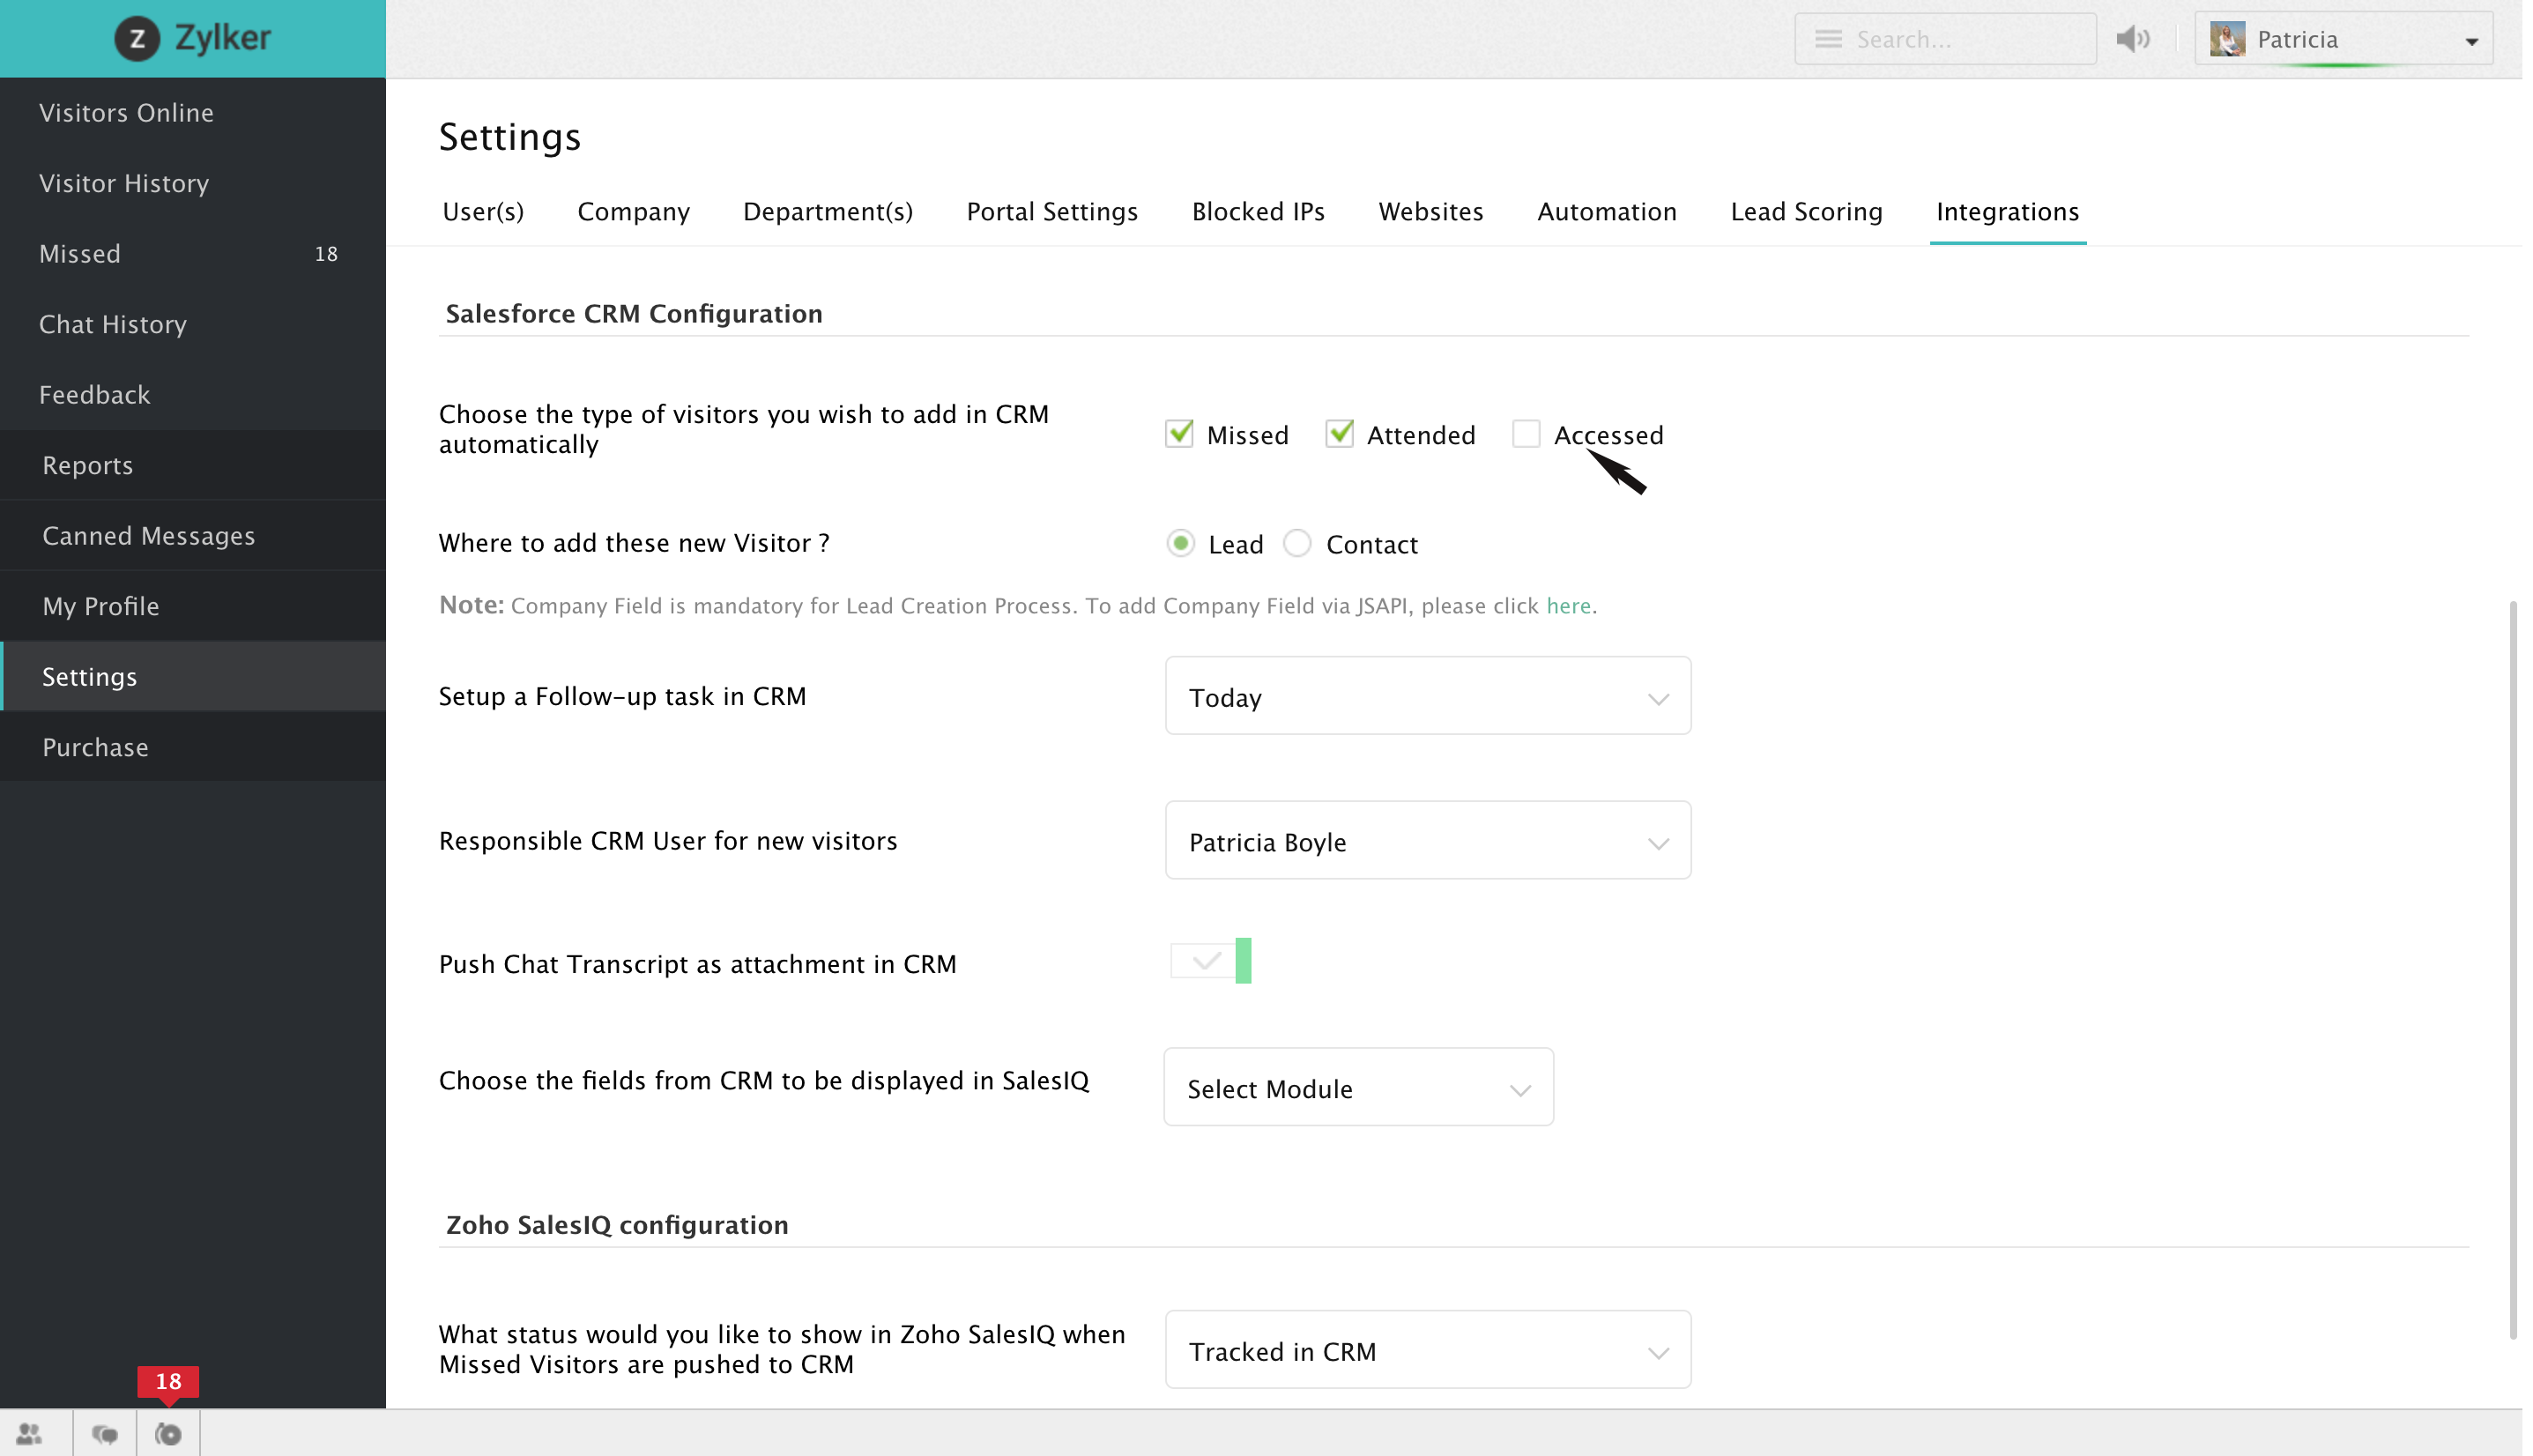
Add as Leads or Contacts
- After choosing the categories of visitor base to be pushed into your Salesforce account. Choose a tag for the filtered visitors which can either be Leads or Contacts.
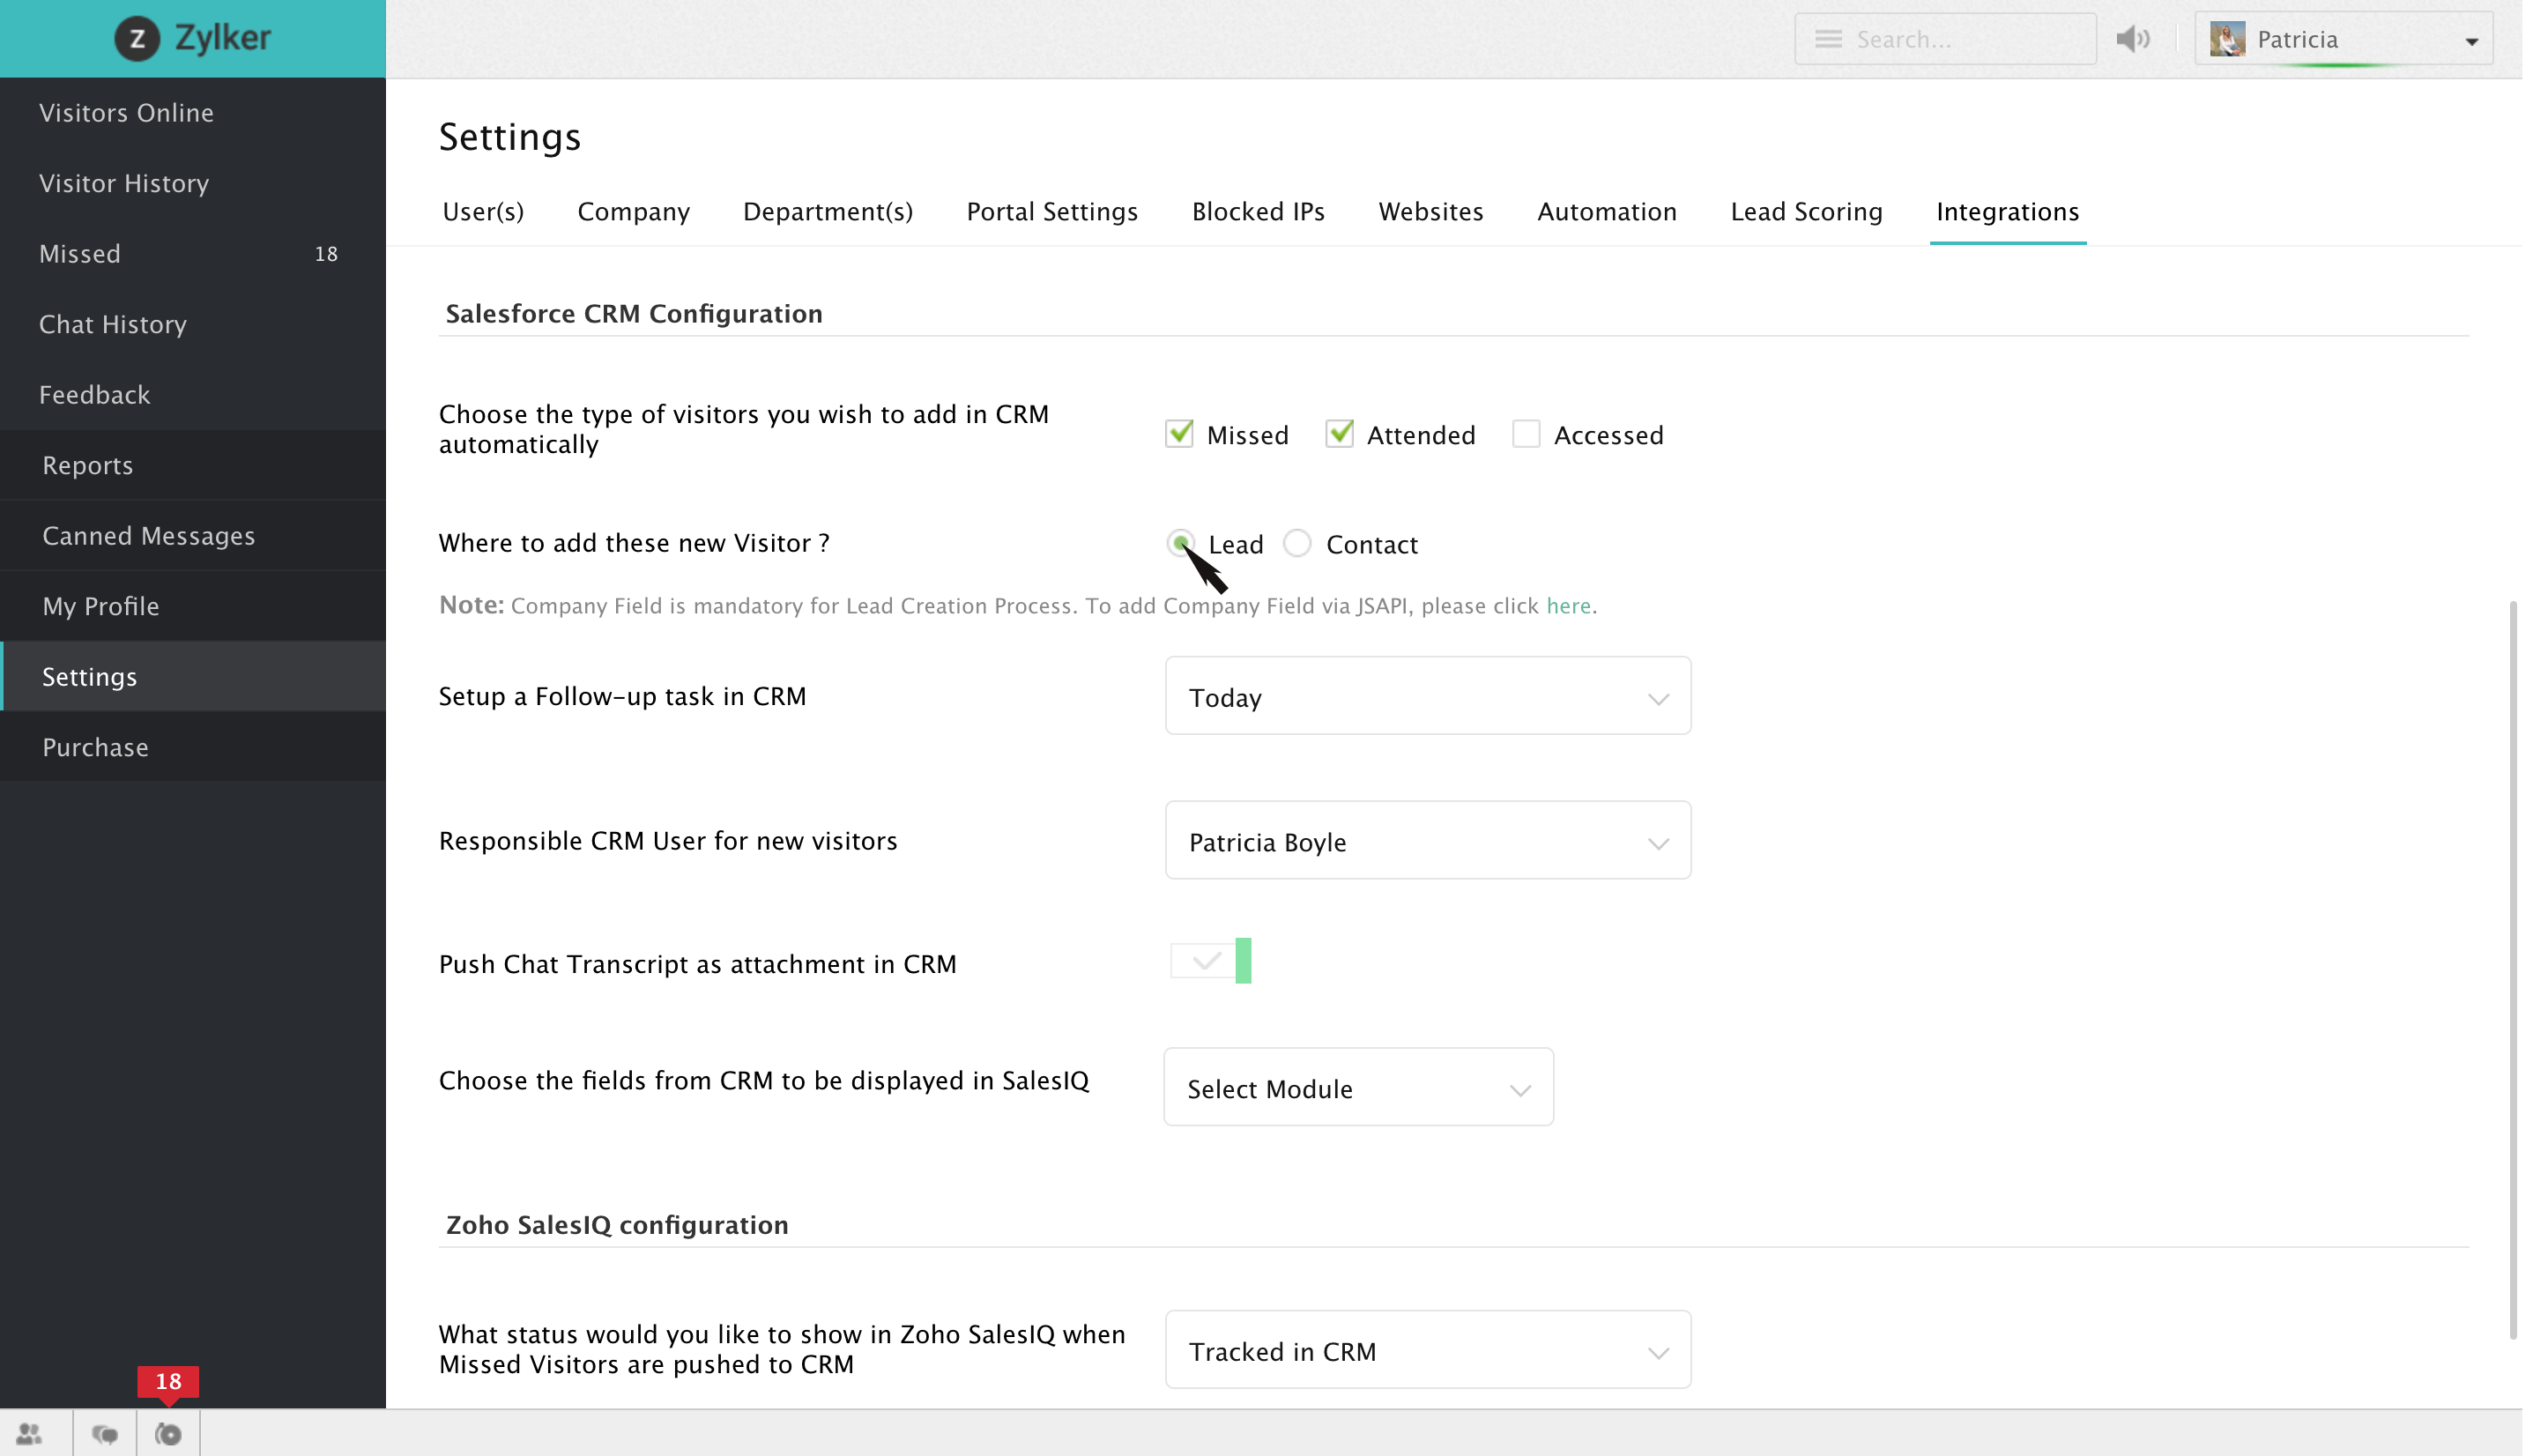

- Do remember that all the visitors who would fall under the categories that you have chosen would automatically be pushed into your Salesforce account.
- For creating a lead it is necessary that the field " Company " is associated with a value.
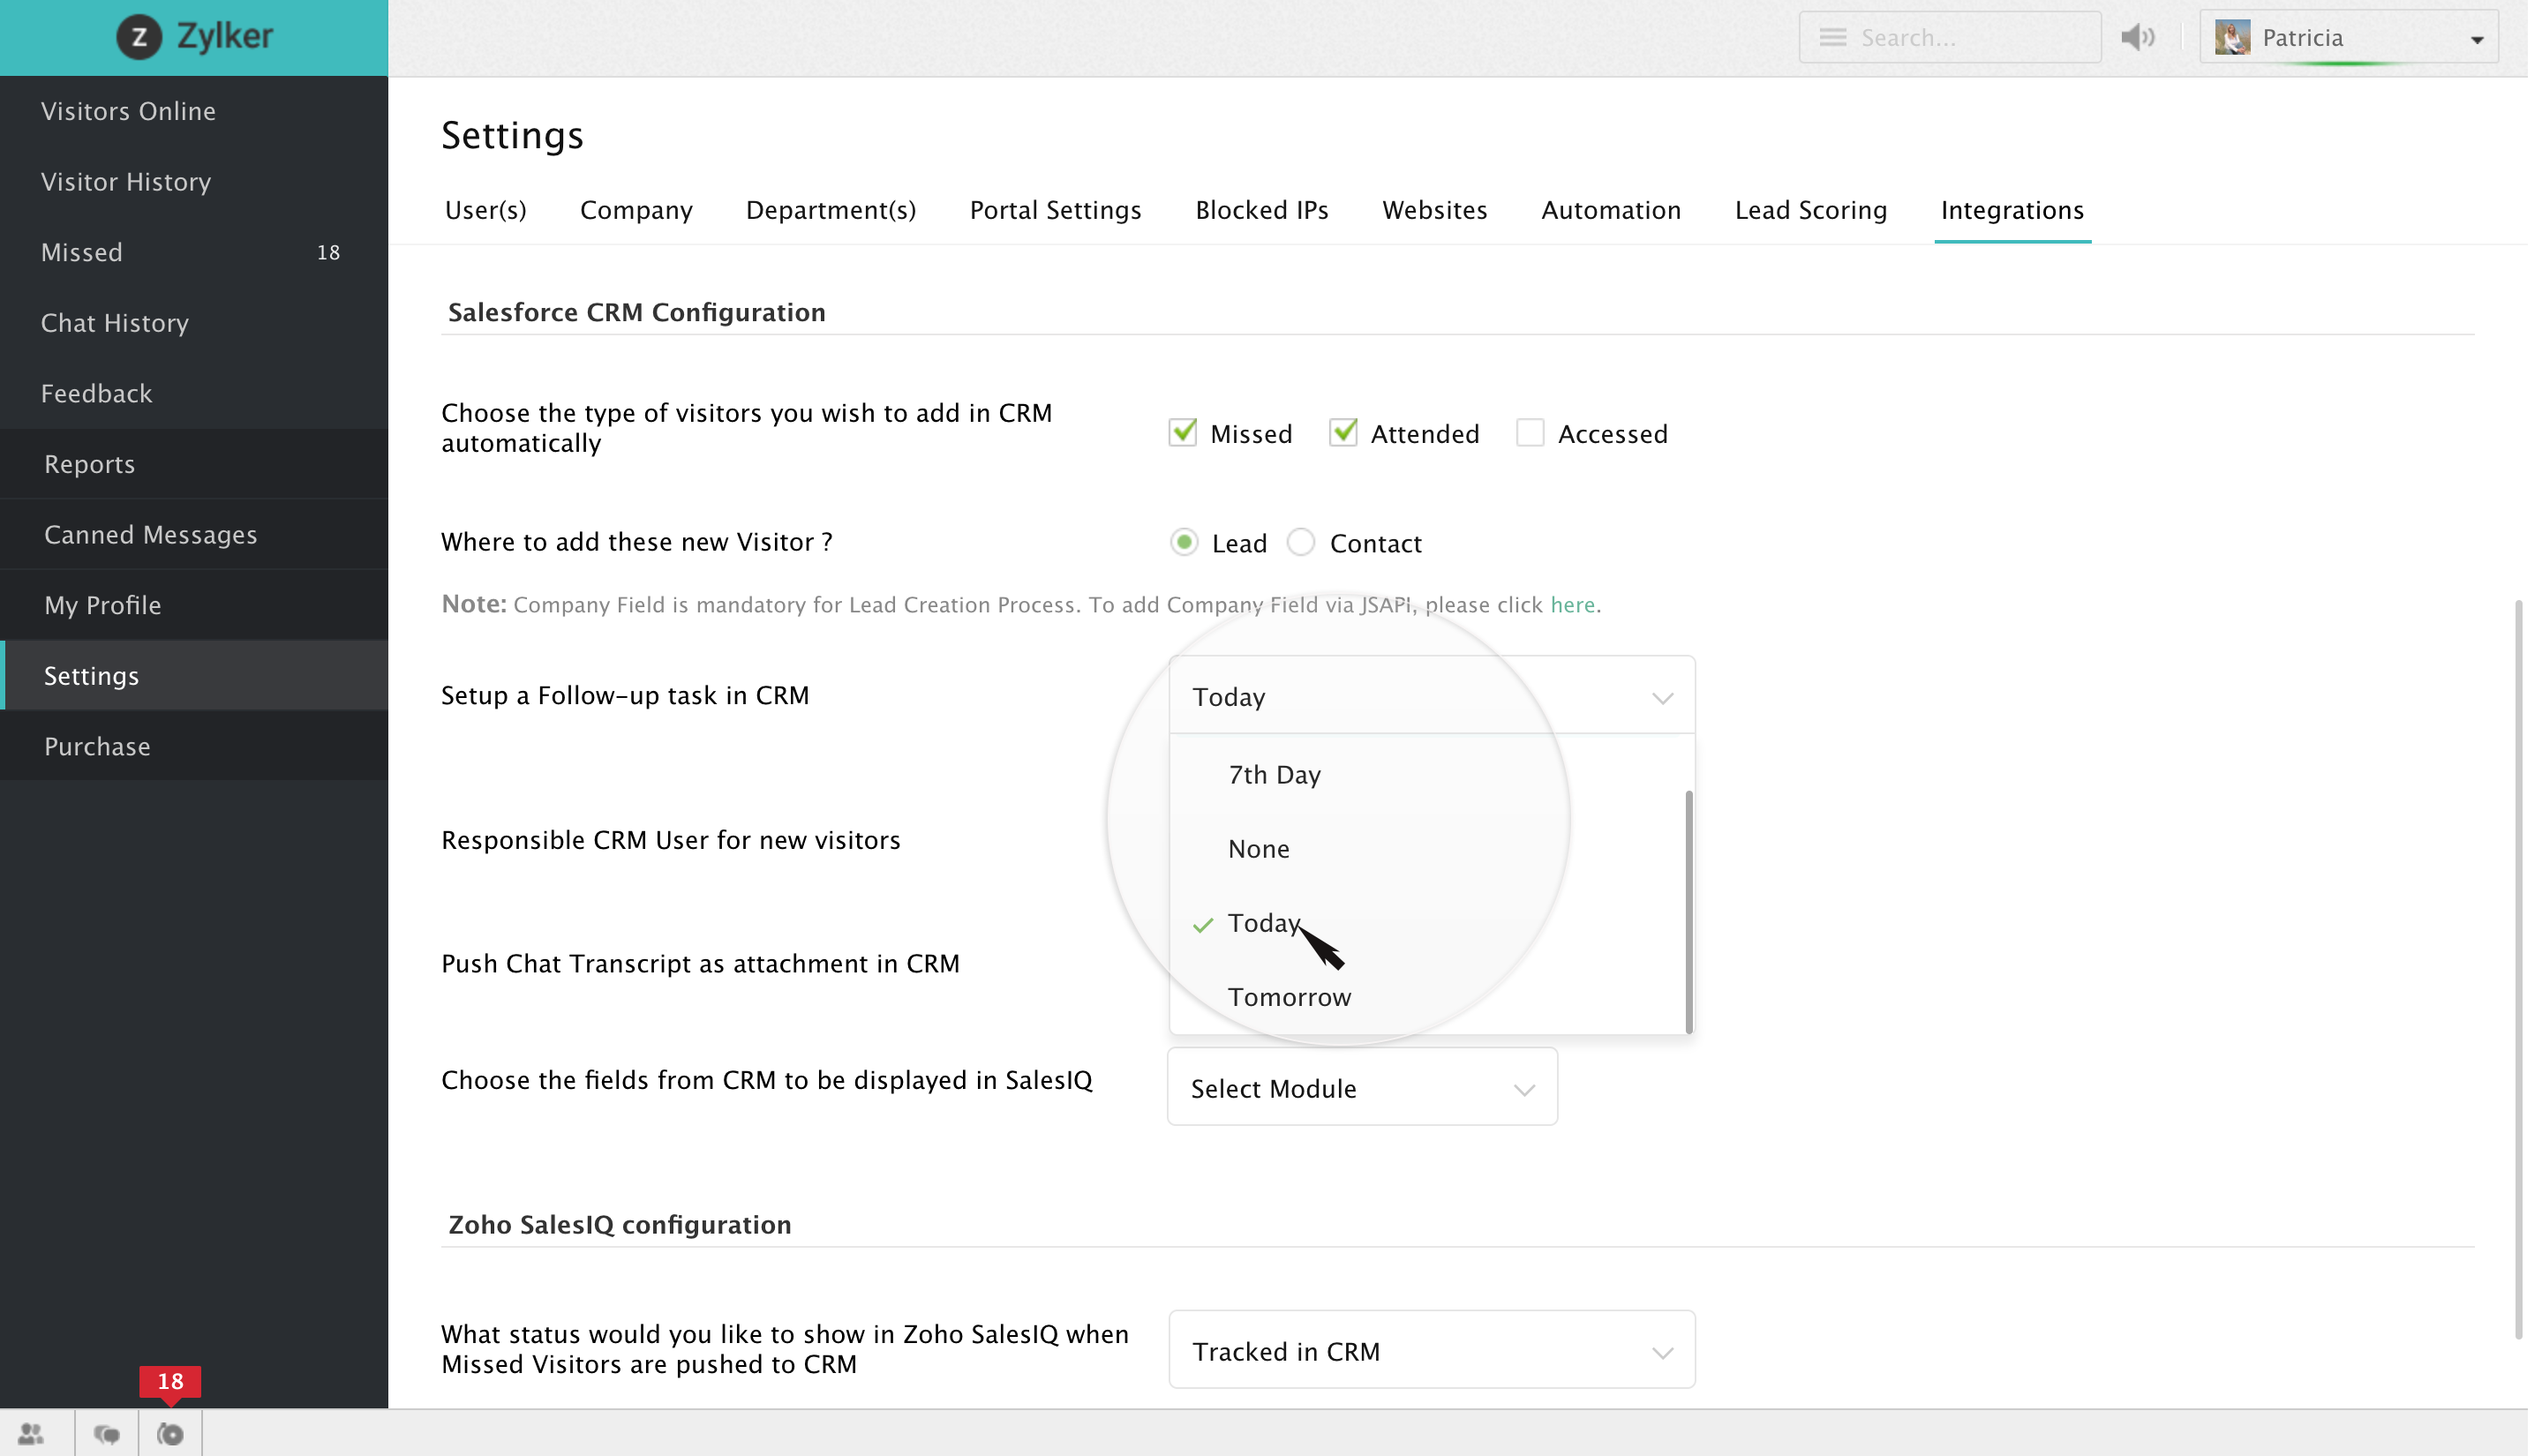
Automatically add a follow-up task
After choosing a tag for your filtered visitors, you can choose a time frame, within which you would like to set a follow-up task for the visitor base pushed into your Salesforce account to just keep track of them. The time frame can either be set for a week or two weeks or as today or tomorrow. If you do not really want to set a follow-up task for your filtered visitors then you can choose "None" in the drop-down box.
Operator responsible for the visitors pushed into your Salesforce
- Select the operator responsible for the filtered visitors by running through the list of Salesforce CRM operators in the drop-down box right beside the label "Responsible CRM user for new visitors"
- Else you can choose "Zoho SalesIQ Attender" if you would like to assign the visitors to the operators who have assisted them.
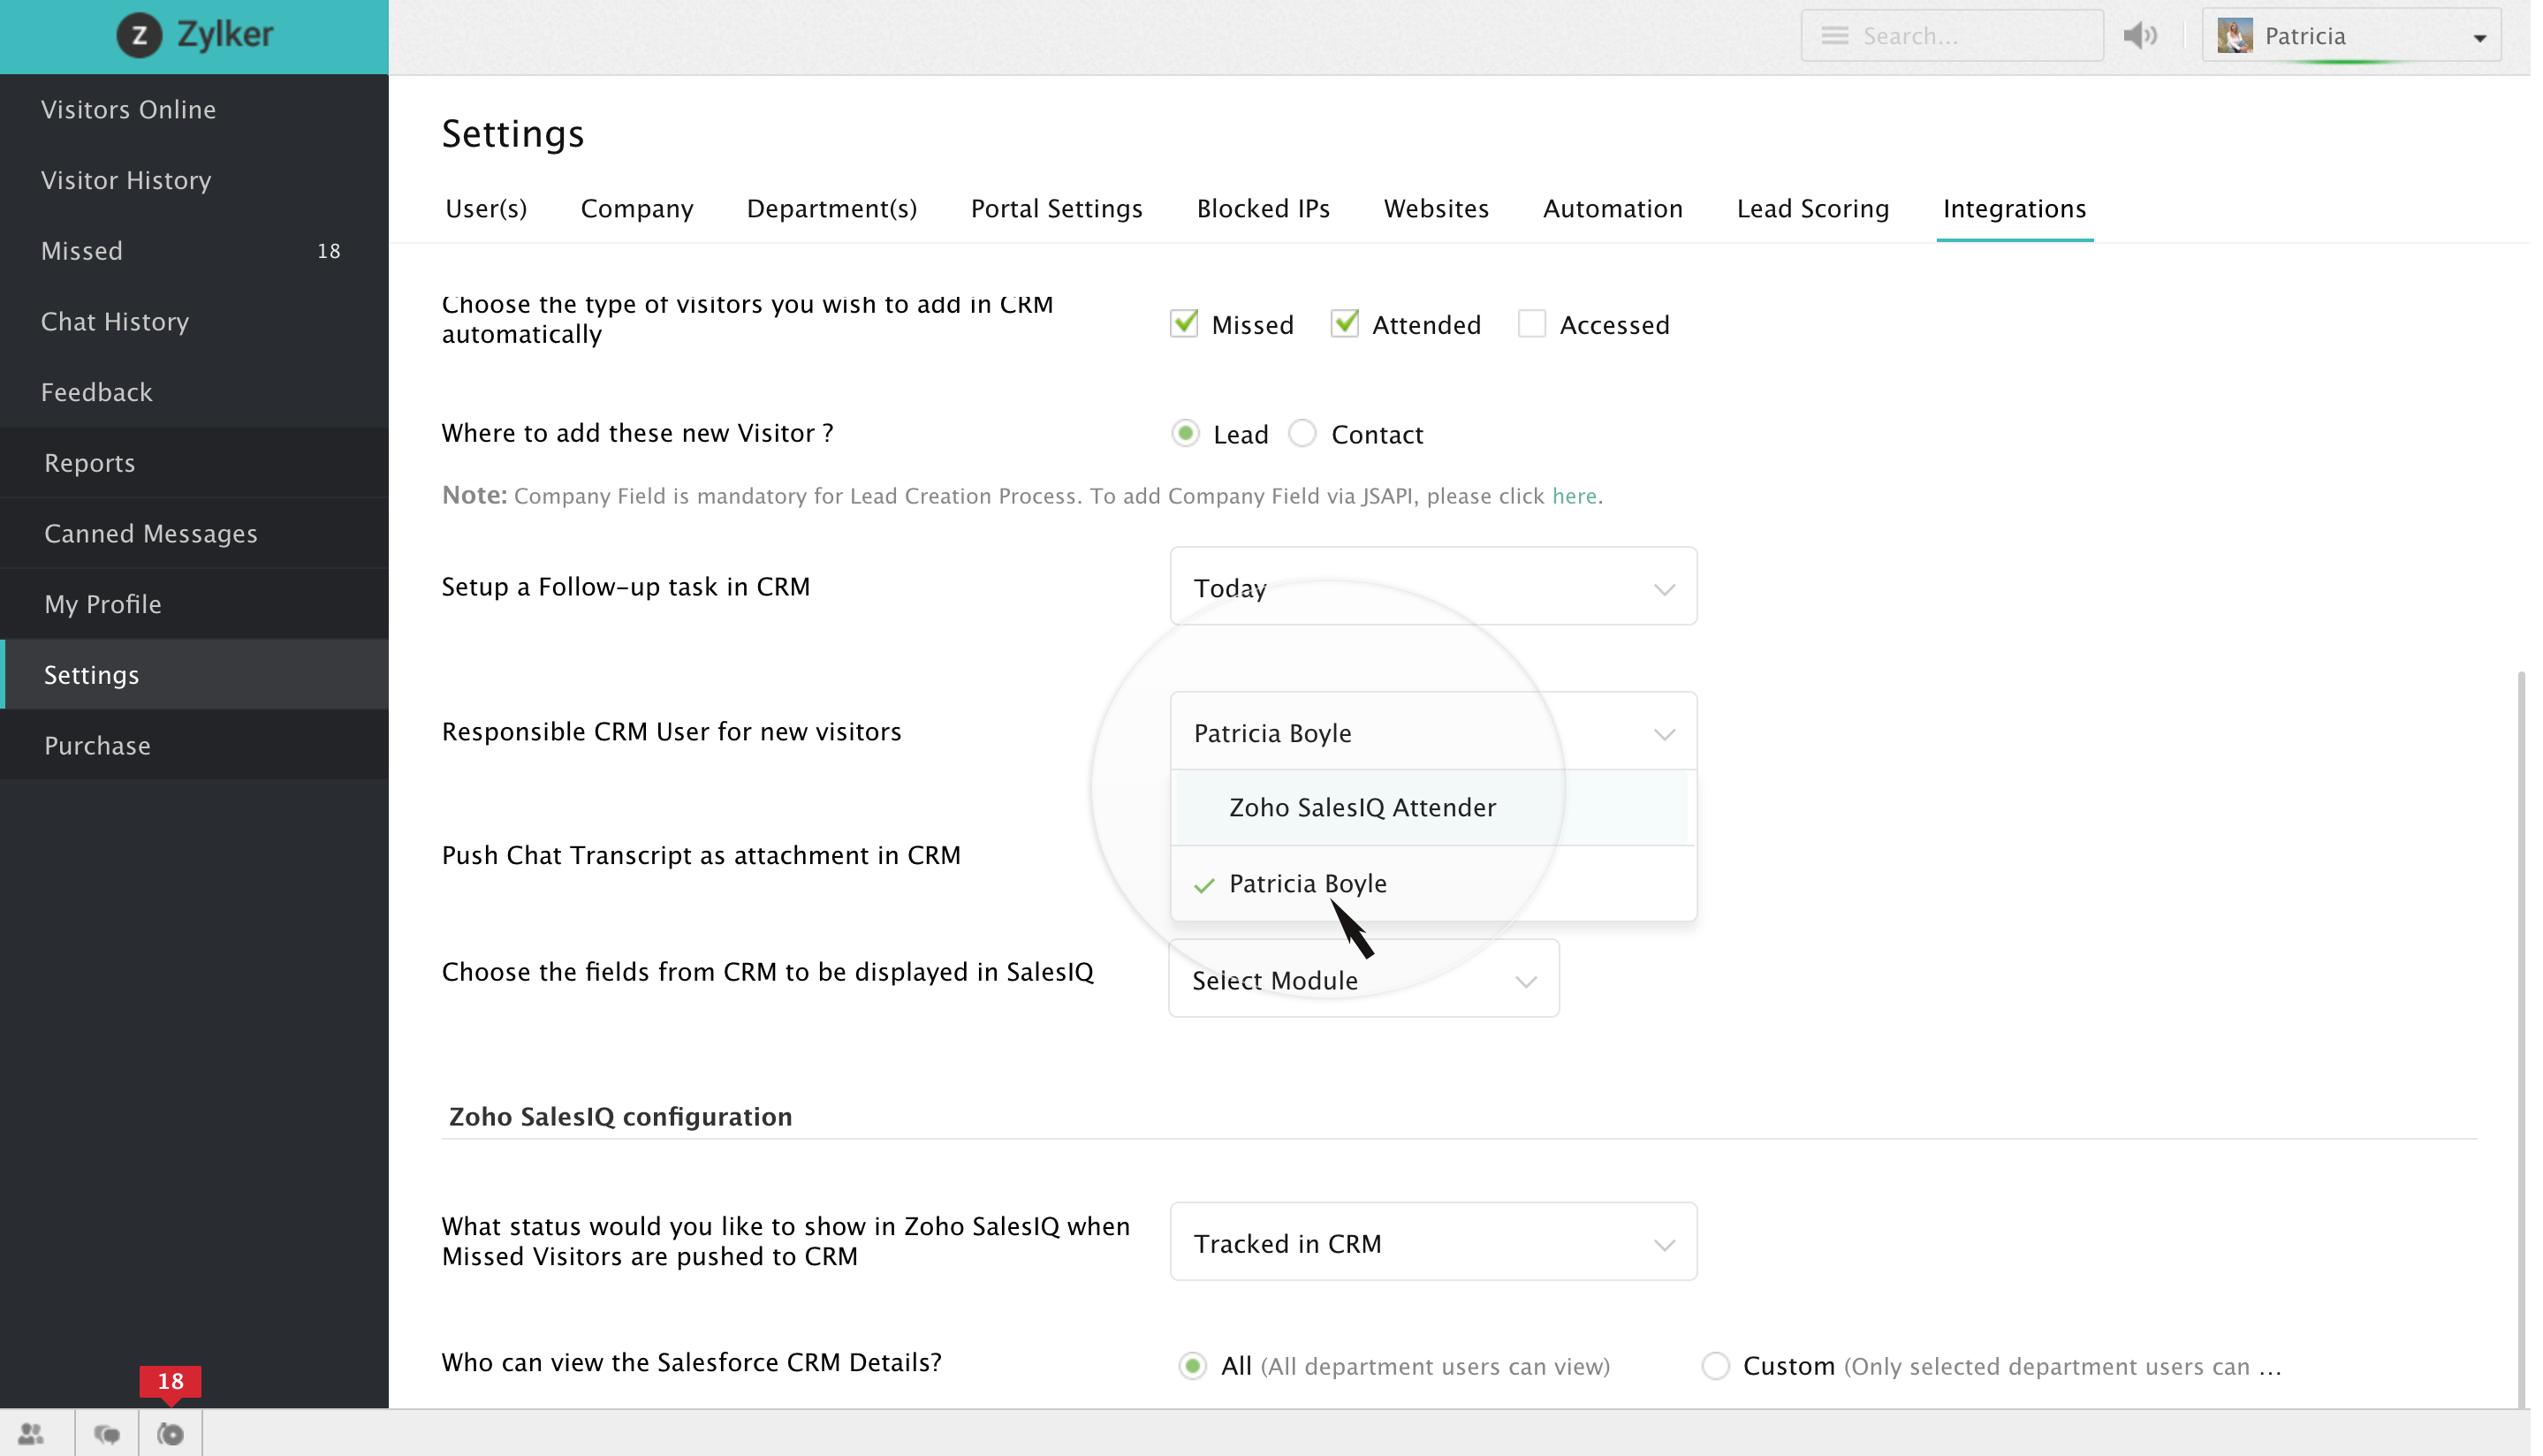
Do remember that if you choose to assign the visitors to the SalesIQ attender and if they aren't a part of your Salesforce account, then they will be assigned to the Salesforce admin.
Pushing your chat transcripts automatically
You can enable or disable the option for pushing the chat transcripts as an attachment to your Salesforce account automatically by just clicking on the slide bar right beside "Push chat transcript as an attachment in CRM".
![]()
Choose the Salesforce CRM fields to be displayed inside your SalesIQ account
- Here choose either one of the tags specified below,
- Contact
- Lead
- Opportunity
- Contact
- Then choose the fields which you would like to display inside your SalesIQ account, after which you can drag and drop them into the box right beside the list. Similarly you can choose a bunch of fields for each tag depending upon your requirements.
- To delete a chosen field, click on that particular field once, a cross icon would appear, click on it to remove.

Related Articles
Salesforce
Overview Amplify the value of every other conversation that your users have with your visitors by integrating Salesforce - CRM with your SalesIQ account, as Salesforce improvises every nuance of customer relationship management. Salesforce records, ...Integrations
Quick Links Can I get the Lead ID from Zoho CRM to Zoho Survey to auto-populate when the survey is sent to the responder? How can I map contact information collected from a survey (First Name, Last Name, Billing Address, and so on) to CRM? Is there a ...Integrating with Salesforce account
Unravel the best techniques to bag customer satisfaction by integrating your Salesforce account with your SalesIQ account. Login into your “Zoho SalesIQ” account. Navigate through Settings -> Integrations -> Other Applications section. Choose ...Salesforce for Zoho Directory
Configure SAML in Zoho One Sign in to the Zoho One Admin Panel. Go to Marketplace, then use the search bar to find and install Salesforce. Name your app and enter your Salesforce.com Organization ID. Note: You can find your Salesforce.com ...Set up sync with Salesforce
Using Zoho Campaigns' integration with Salesforce, create well designed branded email campaigns and send targeted emails to your contacts in Salesforce. Improve your engagement with your contacts using emails and measure how these email campaigns ...