Create projects
Projects can be created newly or created from existing project templates. You can also create groups to classify the projects and manage the privileges of the other project users by making the projects private or public.

Create a Project from Scratch
- Navigate to Projects.
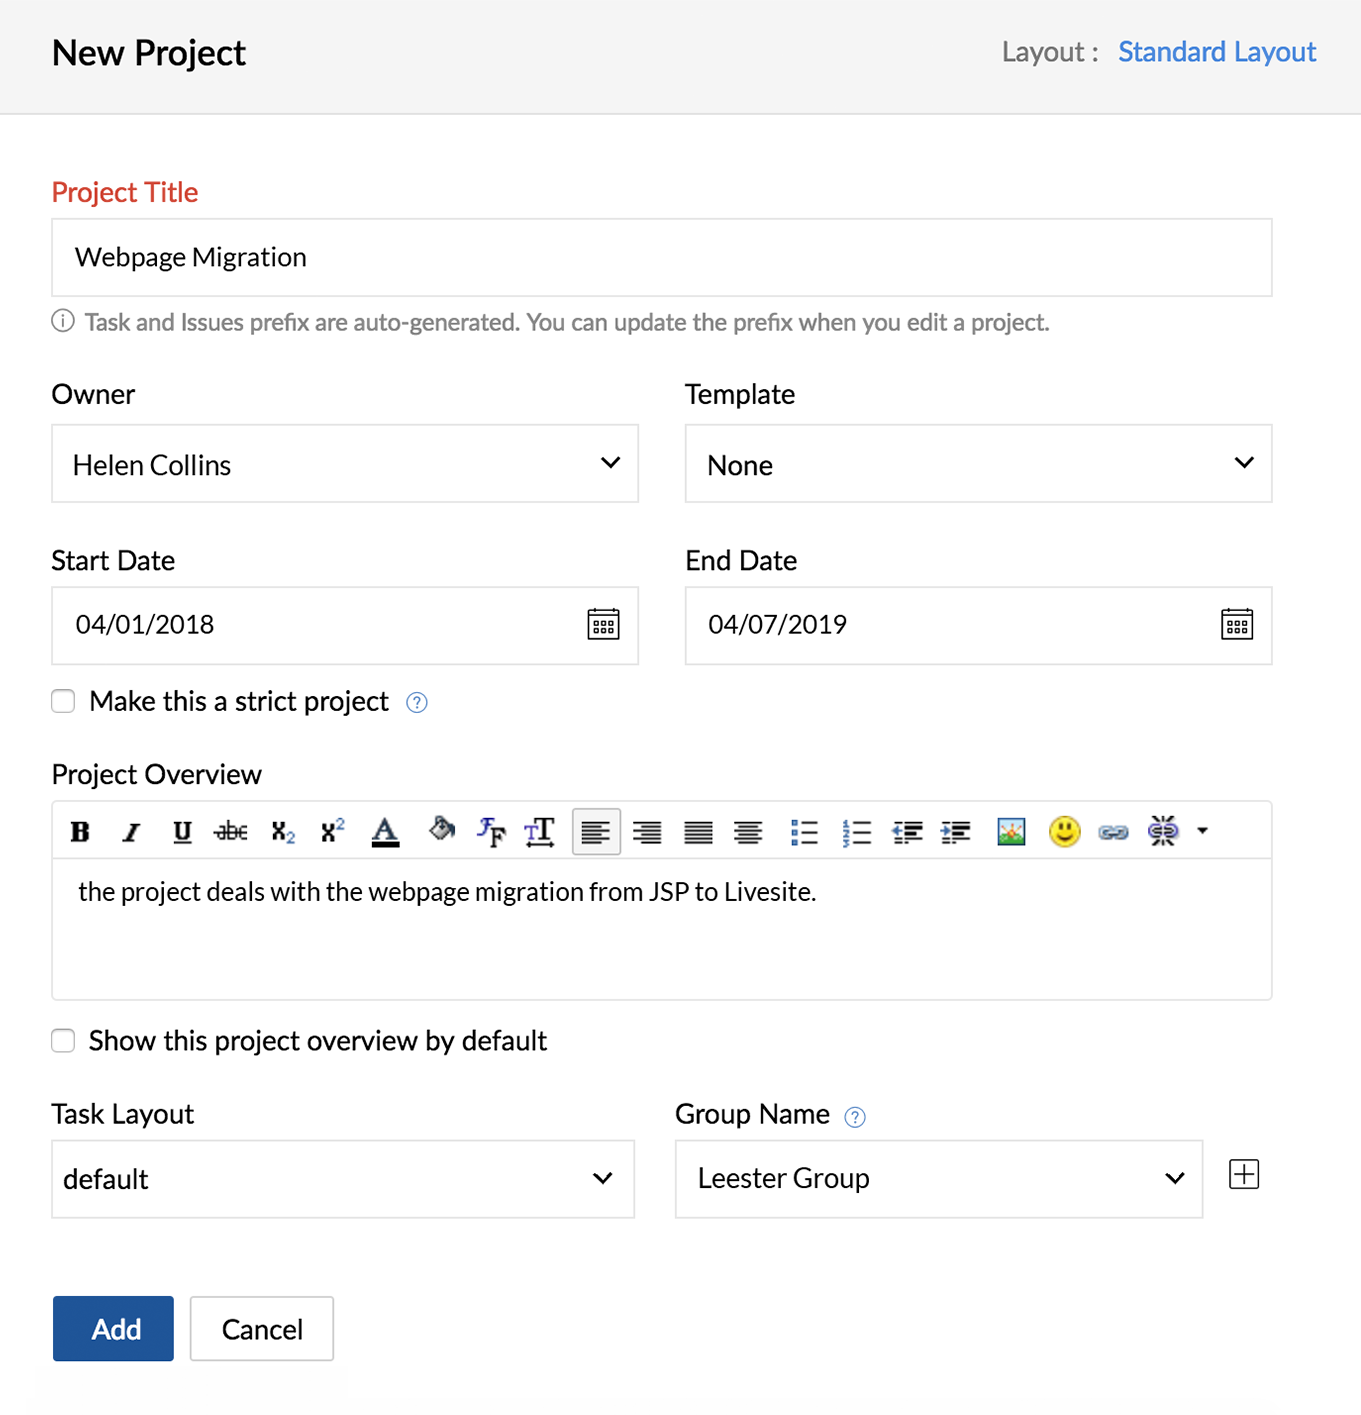
- Click New Project in the upper right.
- Enter a Project Name (mandatory).
- If desired, select a Template and an Owner, enter Start and End Dates, and create a Project Overview.
- Select a Billing Method (note that this option only appears when Zoho Projects is integrated with Zoho Invoice or Zoho Books, and it is not available in the free plan)
- Based on Staff Hours - Users are assigned different rates, and project billing is based on the user rates of the team members working on the project. You can set user rates in the Add User page.
- Based on Project Hours - All users are assigned a standard rate, and project billing is based on the hours logged for the project as a whole.
- Based on Staff Hours - Users are assigned different rates, and project billing is based on the user rates of the team members working on the project. You can set user rates in the Add User page.
- Set the Group, Budget, Task Layout, and other criteria for your project.
- Default Billing Status can be changed when creating a project. It will override the selection in Portal Settings.
- Map a relevant task layout to your project from the Task Layout drop-down. To view the list of task layouts available in your portal, navigate to Setup > Layouts and Fields > Tasks > Layouts.
- Default Billing Status can be changed when creating a project. It will override the selection in Portal Settings.
- Customize the tabs for your project as necessary. You can control the visibility of the modules to others in the project with this option.
- Click Add.
- All projects in the portal will be associated to the standard layout by default. To access the layout editor and make changes to the custom fields, click the Standard Layout link present at the top of the form.
- The changes made to the project custom fields in the standard layout will be reflected in all the projects present in the portal.
- Tasks and Issues will have an auto-generated unique ID with a prefix. Learn more on how to edit Task & Issue Prefix.
Associate a task layout while creating or editing a project
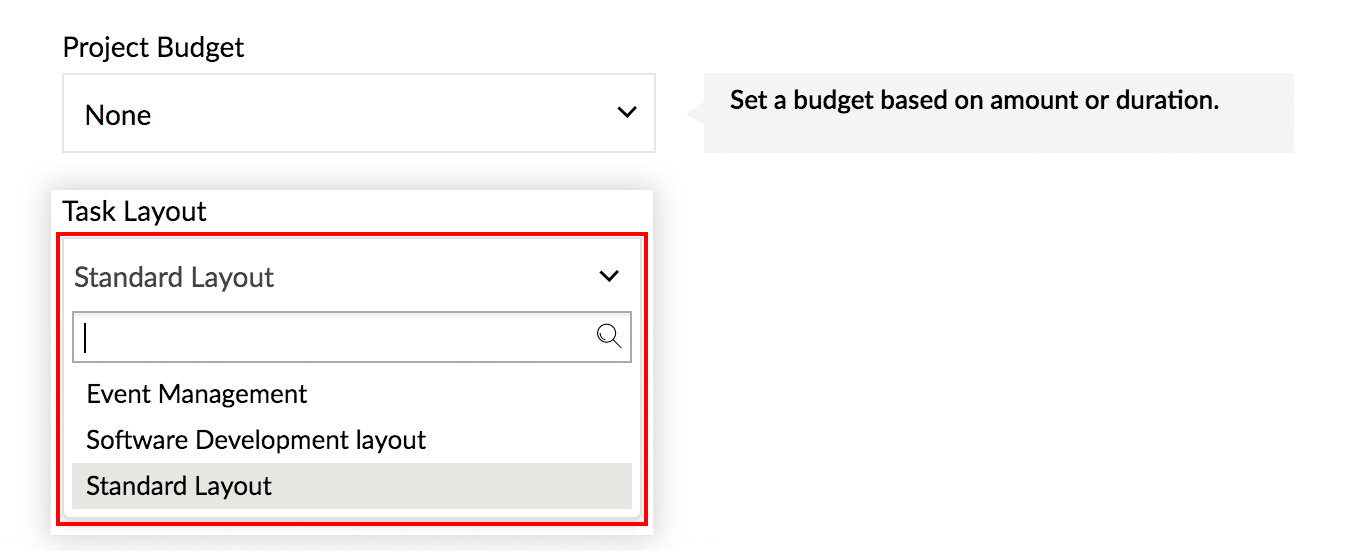
- Scroll to the Task Layout drop-down when you create or edit a project.
- Select a layout that matches your need.
- To view the list of task layouts available in your portal, navigate to Setup > Layouts and Fields > Tasks > Layouts and come back to the New Project form and select it from the drop-down.
- You can also search a layout in the search bar that appears when you click the drop-down.
- Fill the other details as necessary and proceed to create or update your project accordingly.
Create a Project using a Project Template
You can create a new project afresh or use an existing project template to create the project.
- Navigate to Projects.
- Click New Project in the upper right.
- Give a Project Name (mandatory).
- Choose a Template from the list of project templates that are displayed in the drop-down.
- When you Choose a Template, all the milestones, task lists, tasks, and other information from the chosen project template will be copied to the newly created project.
- The start time of the project modules (milestones, task list and tasks) will be shifted based on the Project Start Date of the new project.
- When you Choose a Template, all the milestones, task lists, tasks, and other information from the chosen project template will be copied to the newly created project.
- Select an Owner, enter Start and End Dates, and create a Project Overview.
- Select a Billing Method, set the Group, Budget, Blog, and other criteria for your project.
- Click Add.
To learn how to create a project template, refer here.

- When you create a project from an existing project template, the Project Start Date option is enabled.
- Say, in a project template X, Task A has a Duration of 5 days and it Starts After 2 days.
- Now, when you choose this template X and set the new Project Start Date to Jan 15th 2016, Task A's Start Date will be shifted to Jan 17th 2016 and the End Date will now be Jan 22nd 2016.
- The newly selected Project Start Date will automatically shift all your milestones, tasks, subtasks, forums, and documents in the selected project template.
- Now, when you choose this template X and set the new Project Start Date to Jan 15th 2016, Task A's Start Date will be shifted to Jan 17th 2016 and the End Date will now be Jan 22nd 2016.
Create a Strict Project (Premium and Enterprise Plans)
Strict projects have a fixed schedule. It is preferable to plan all the project activities within the schedule. Projects following the strict methodology are more successful because their project modules cannot extend beyond the scheduled project dates.
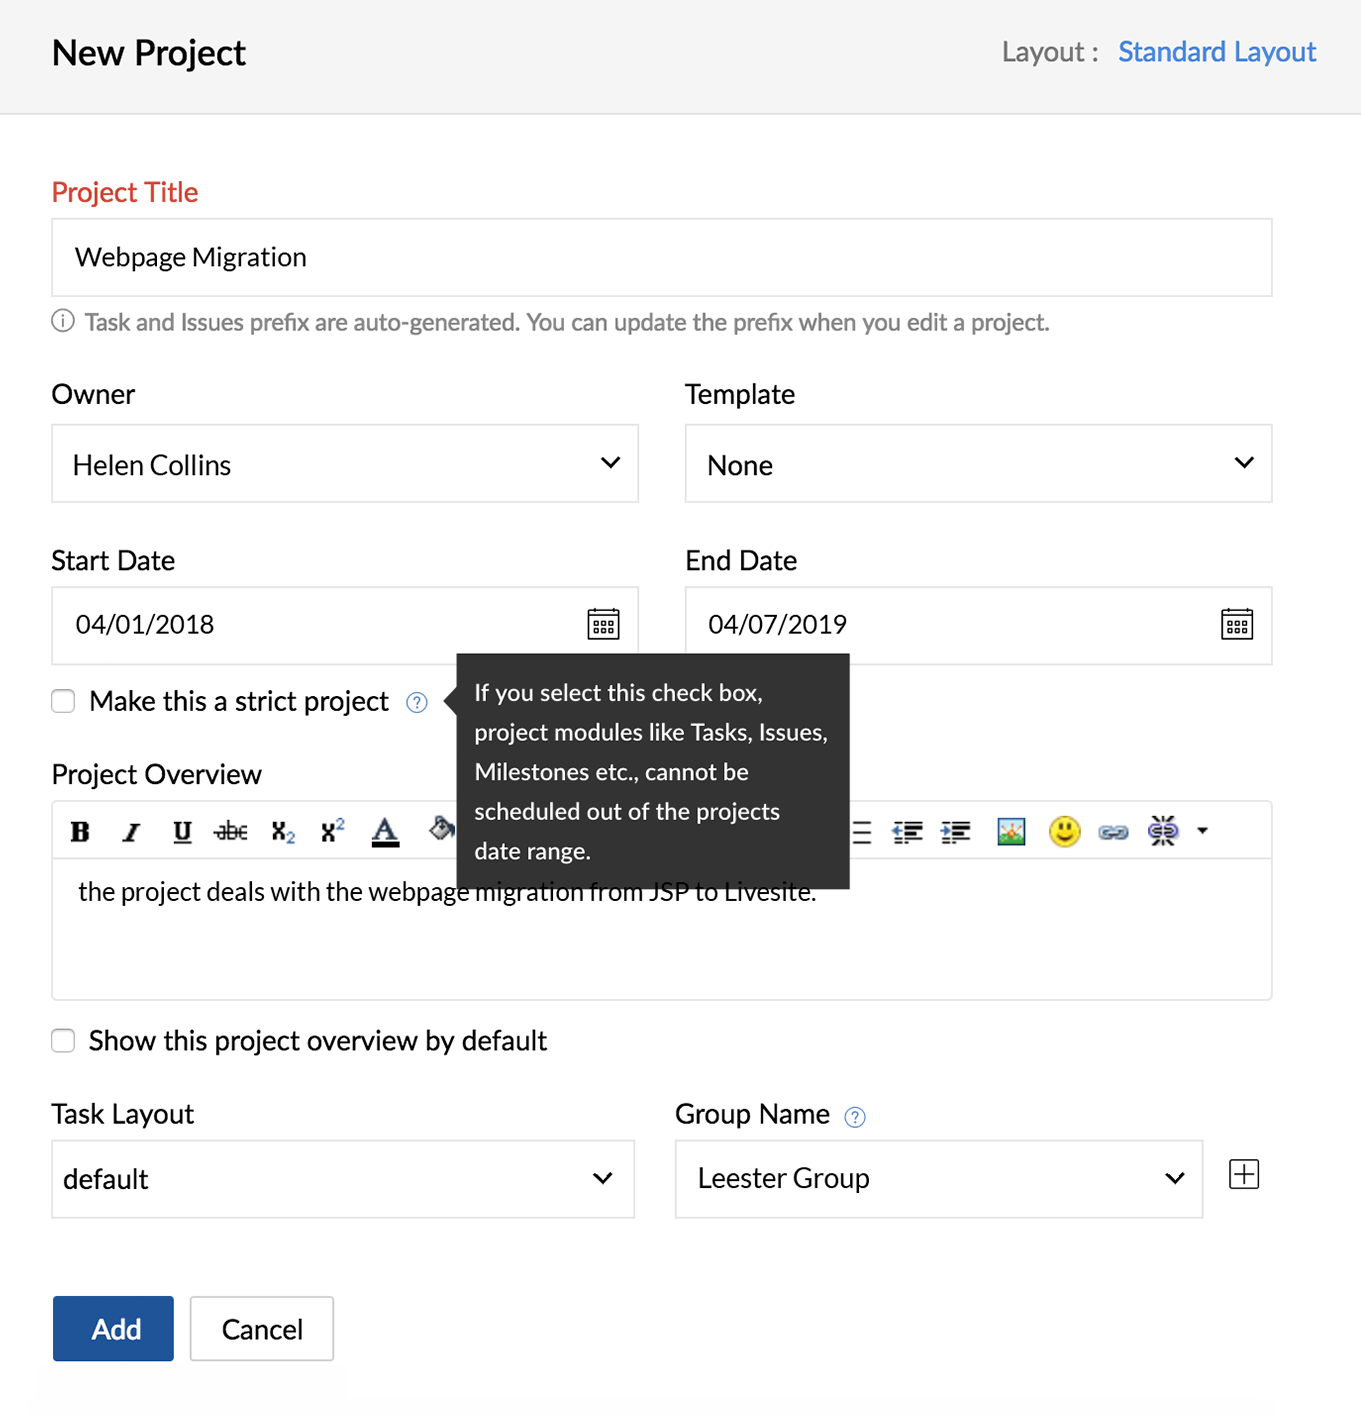
- All strict projects must always have a scheduled project start and end date.
- If you Make this a strict project, the project modules like Milestones, Tasks, etc., must have their start and end dates within the scheduled project Start Date and End Date.
- However, this feature is available only in the Premium and Enterprise plans.
And you cannot start or extend the start and end dates for any project modules beyond the scheduled project dates. Such as, Milestones will be scheduled within the projects date range, and Tasks will be scheduled within the Milestones date range and so on.
- If you do not make a project strict, the project modules can be scheduled without any date restrictions. i.e, It is not mandatory to have a scheduled Start Date and End Date, if it is not a strict project.
- The project cannot start and end on the same day.
Strict projects are distinct from other public and private projects in the Projects list view as they are indicated with the  icon. You cannot select dates beyond the project's schedule in any of the date pickers, for strict projects. An error message is displayed whenever you do not select a valid date range for the project modules.
More information about strict projects
- Timers are not automatically stopped even after the project finish date
- You can link both tasks and bugs with different milestone dates
- Meeting and log hour duration are not restricted by the scheduled project dates
- SLA in bugs do not follow the project finish date schedule
- You can add expenses for dates even after the project finish date
- Task and event recurrence are auto-adjusted based on the project dates
- While importing task or bug, the dates may exceed the scheduled project dates
- Bugs associated to milestones, will automatically consider only the Release Milestone dates
- While associating an existing task template in a real time project, the task dates are auto-adjusted to the scheduled project dates
Creating public and private projects
You can choose to make your project go public or private. Private projects can be accessed only by the selected project users, whereas public projects can be viewed and followed by all the portal users. In public projects, users will have only read access but they can view and follow projects and add comments. However, if you are the Admin, you will have all the access privileges even for public projects.
- While creating projects, set Project access to Private if you want the project to be accessed only by the project users in the selected project.
- If you set it to Public, the project will be followed and viewed by all the portal users. The public projects are highlighted with a distinct icon in the Projects list page.
Related Articles
Can I create invoice across projects?
No, you can create invoice only within the project and not across the projects in your portal.Zoho Projects
Here are some common questions you might have while integrating Zoho Sprints and Zoho Projects. These are segmented based on the project, work item, log hours, and user sync to guide you better. If you questions are not answered here, you can always ...Zoho Projects Mobile App
Zoho Projects is now completely mobile. Access and control your work from the palm of your hand. Create and work on projects with the Zoho Projects mobile app. Available for iPhone, iPad, and Andorid Phones. iPhone and Android requirements: iOS 8.1 ...Zoho Projects Integration - Overview
Efficient planning is the key to the success of any business project. A business always teams with several projects and people associated with those projects. Unless they are planned and managed efficiently, productivity takes a hit. A Project ...Projects list view
All Projects Click the Projects tab in the top navigation bar of your company portal. What you view here, is the overview of all the project related data in your company. You can view the list of active projects categorized group-wise, client-wise, ...