Create Timesheets
You can create Timesheets from three different modules--Timesheets, Jobs and Temps. Below are the steps to create timesheets from various modules.
Method 1: Create from the Timesheets module
- Go to the Timesheets module and click +New Timesheet
- Select a job for which you need to create a timesheet.
- Choose temps (You can select from the list of temps who have been assigned for the job that you selected)
- Enter Date cycle where the associates have been scheduled for the job.
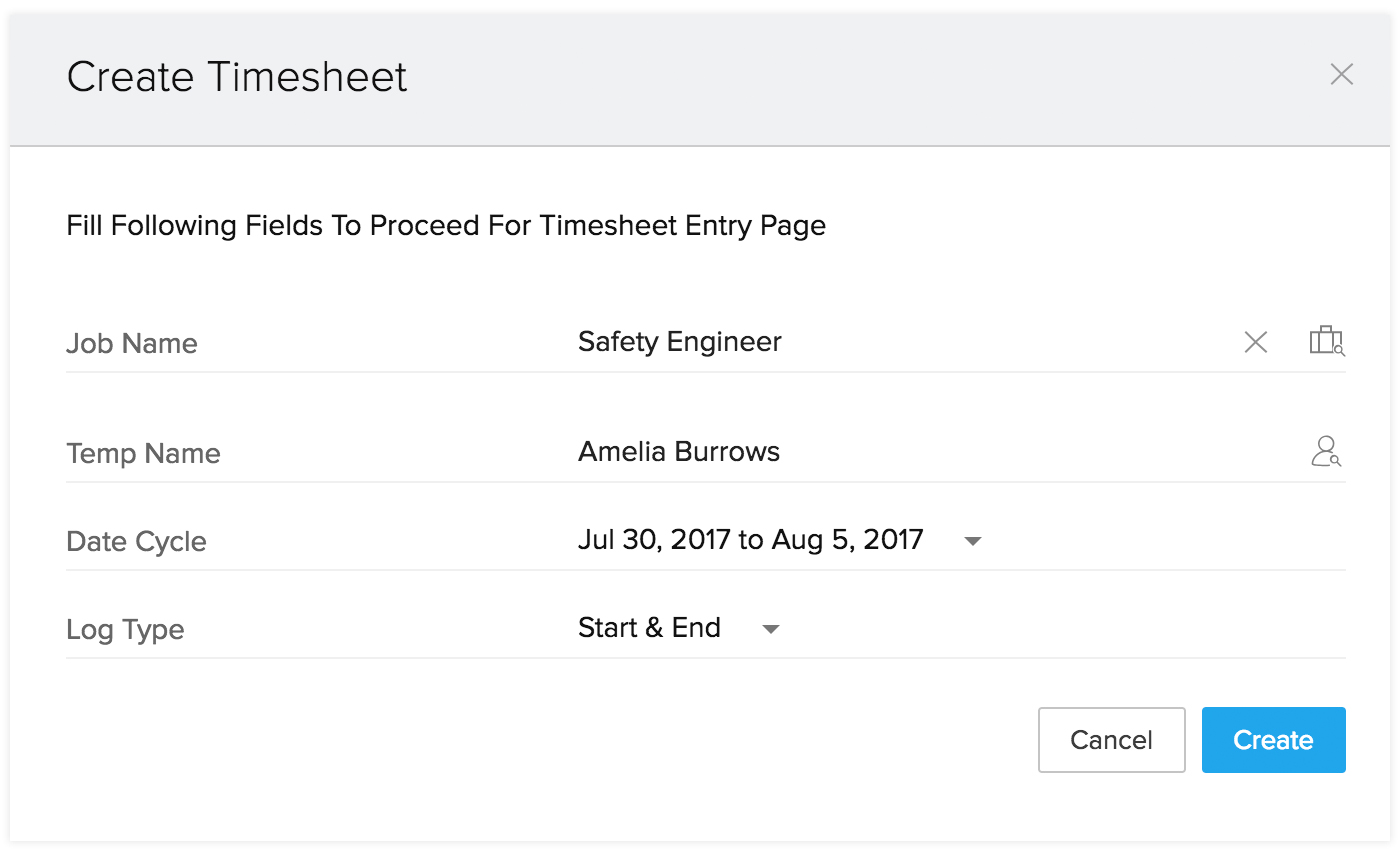
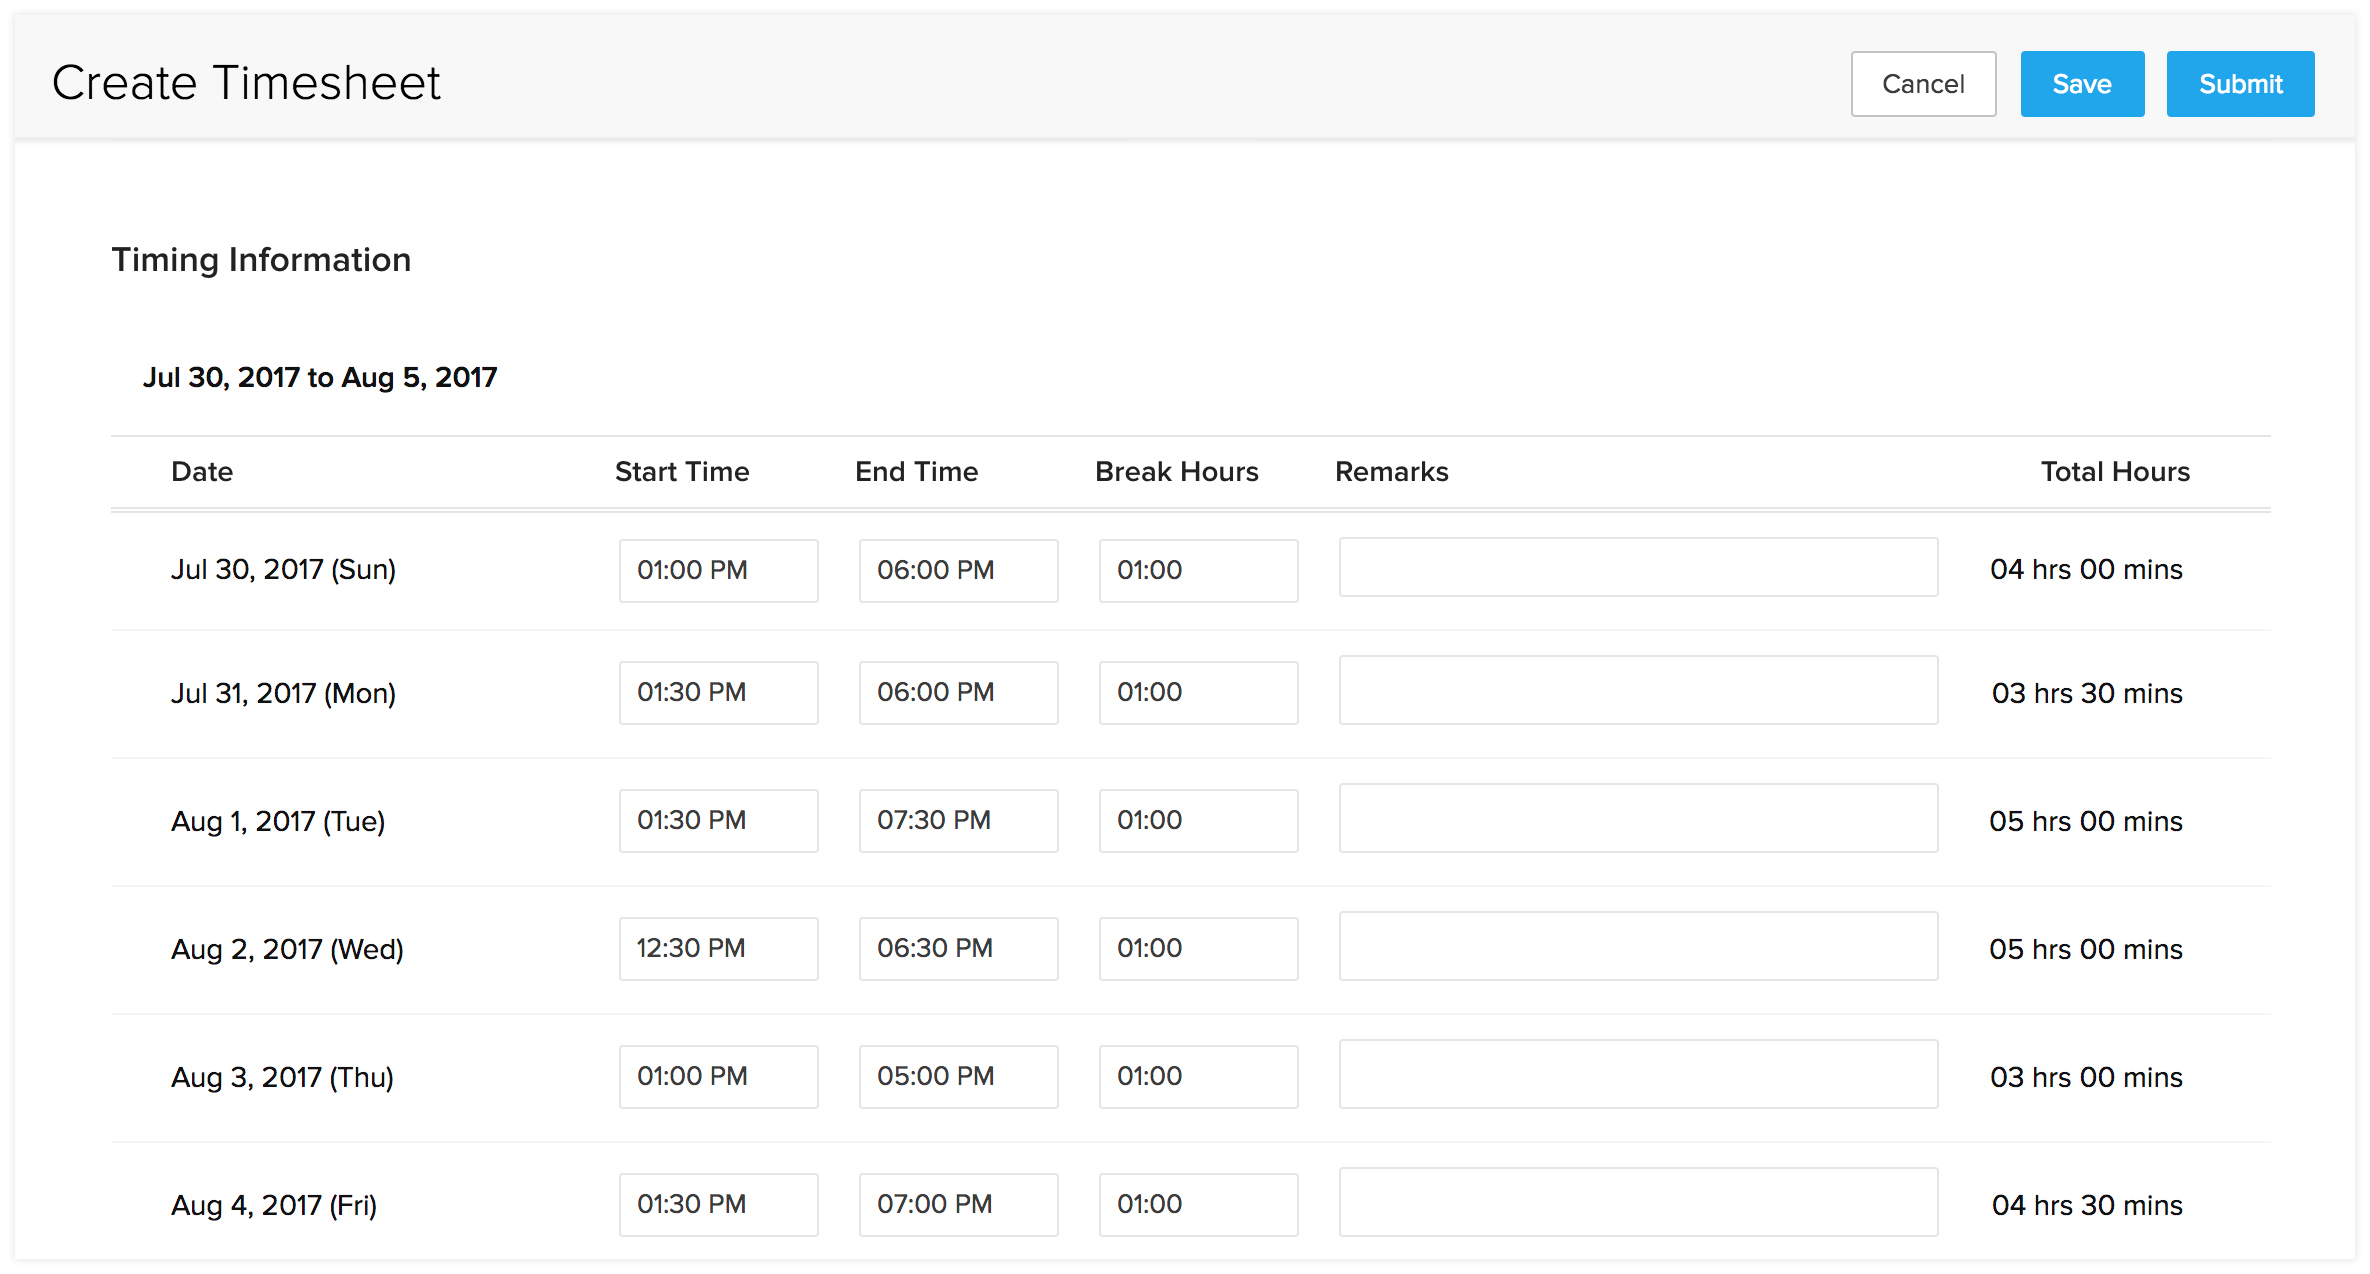
- Enter Log type. A log type can either be Hours or Start & End. If you select Hours, you need to enter the total work time of your temps in hours; If you select Start & End, you need to enter the start and end time.
Click Create
Method 2: Create Timesheets from Jobs/Temps module
- Select the [Module] from the navigation bar
- Choose the record and click Create Timesheet from Actions
- Select the Job and Temp name
Note:
a. If you create timesheets from the Jobs module, select the temps who have been associated for that job.
b. If you create timesheets from the Temps module, select the jobs scheduled for that temp. - Enter the date cycle.
- Click Create.
Once you update the timesheet status, you can either Save or Submit it. The saved timesheets can then be submitted to the approver who has been assigned for the temp worker.

Note: The following prerequisites are in place for creating timesheets in your Zoho Workerly account:
- Users cannot enter timesheets for future working days in Zoho Workerly.
- For jobs with Weekly or Monthly billing duration, users can enter the hours worked by temps, but cannot submit the timesheets until the last working day of that week or month.
- Users cannot enter timesheets for jobs which have a status of Inactive, Declined, or Cancelled.
- Zoho Workerly doesn't allow you to duplicate timesheets for the same assignment, associate, and duration.
- A temp worker can fill their own timesheet, or it can be filled by the agent who assigns them the job.
Clone Timesheets
Zoho Workerly allows you to clone timesheets with either the Submitted or Approved status for jobs with a Daily billing cycle. For example, let's consider a building contractor who works five hours a day for a whole month. Rather than creating separate timesheets for the temp worker, you can simply create timesheet for a single day and clone it for the rest of the month.
Steps to clone timesheets:
- In the Timesheets tab, click the timesheet to be cloned.
- In the Timesheets Details page, click the More icon then select Clone.
- In the Clone Timesheets page, select the dates for which you need to clone the timesheet.
- Click Clone & Submit.
Understanding Timesheet Status
When a timesheet is submitted by a temp or agent, it must be approved by the person who is assigned to approve for that particular worker. The approver will receive an email where they can either accept or reject the timesheet submitted by the temp or agent. Timesheets can have the following statuses:
Yet-to-submit: The timesheet is yet to be submitted by the temp.
Submitted: The timesheet has been submitted, but not yet approved.
Approved: The timesheet has been approved by the approver
Rejected: The timesheet has been rejected by the approver.
Request for cancellation: When a timesheet has been Approved, an agent can send a request to cancel the timesheet.
How do I cancel a timesheet?
There are chances for you to cancel a timesheet that has been submitted with a wrong time entry. Fret not! With Zoho Workerly, it is more than easy for you to cancel a timesheet even after it has been approved. Once you cancel a timesheet, a mail will be sent to the approver, after which the timesheet will be automatically canceled.
Steps to cancel a timesheet:
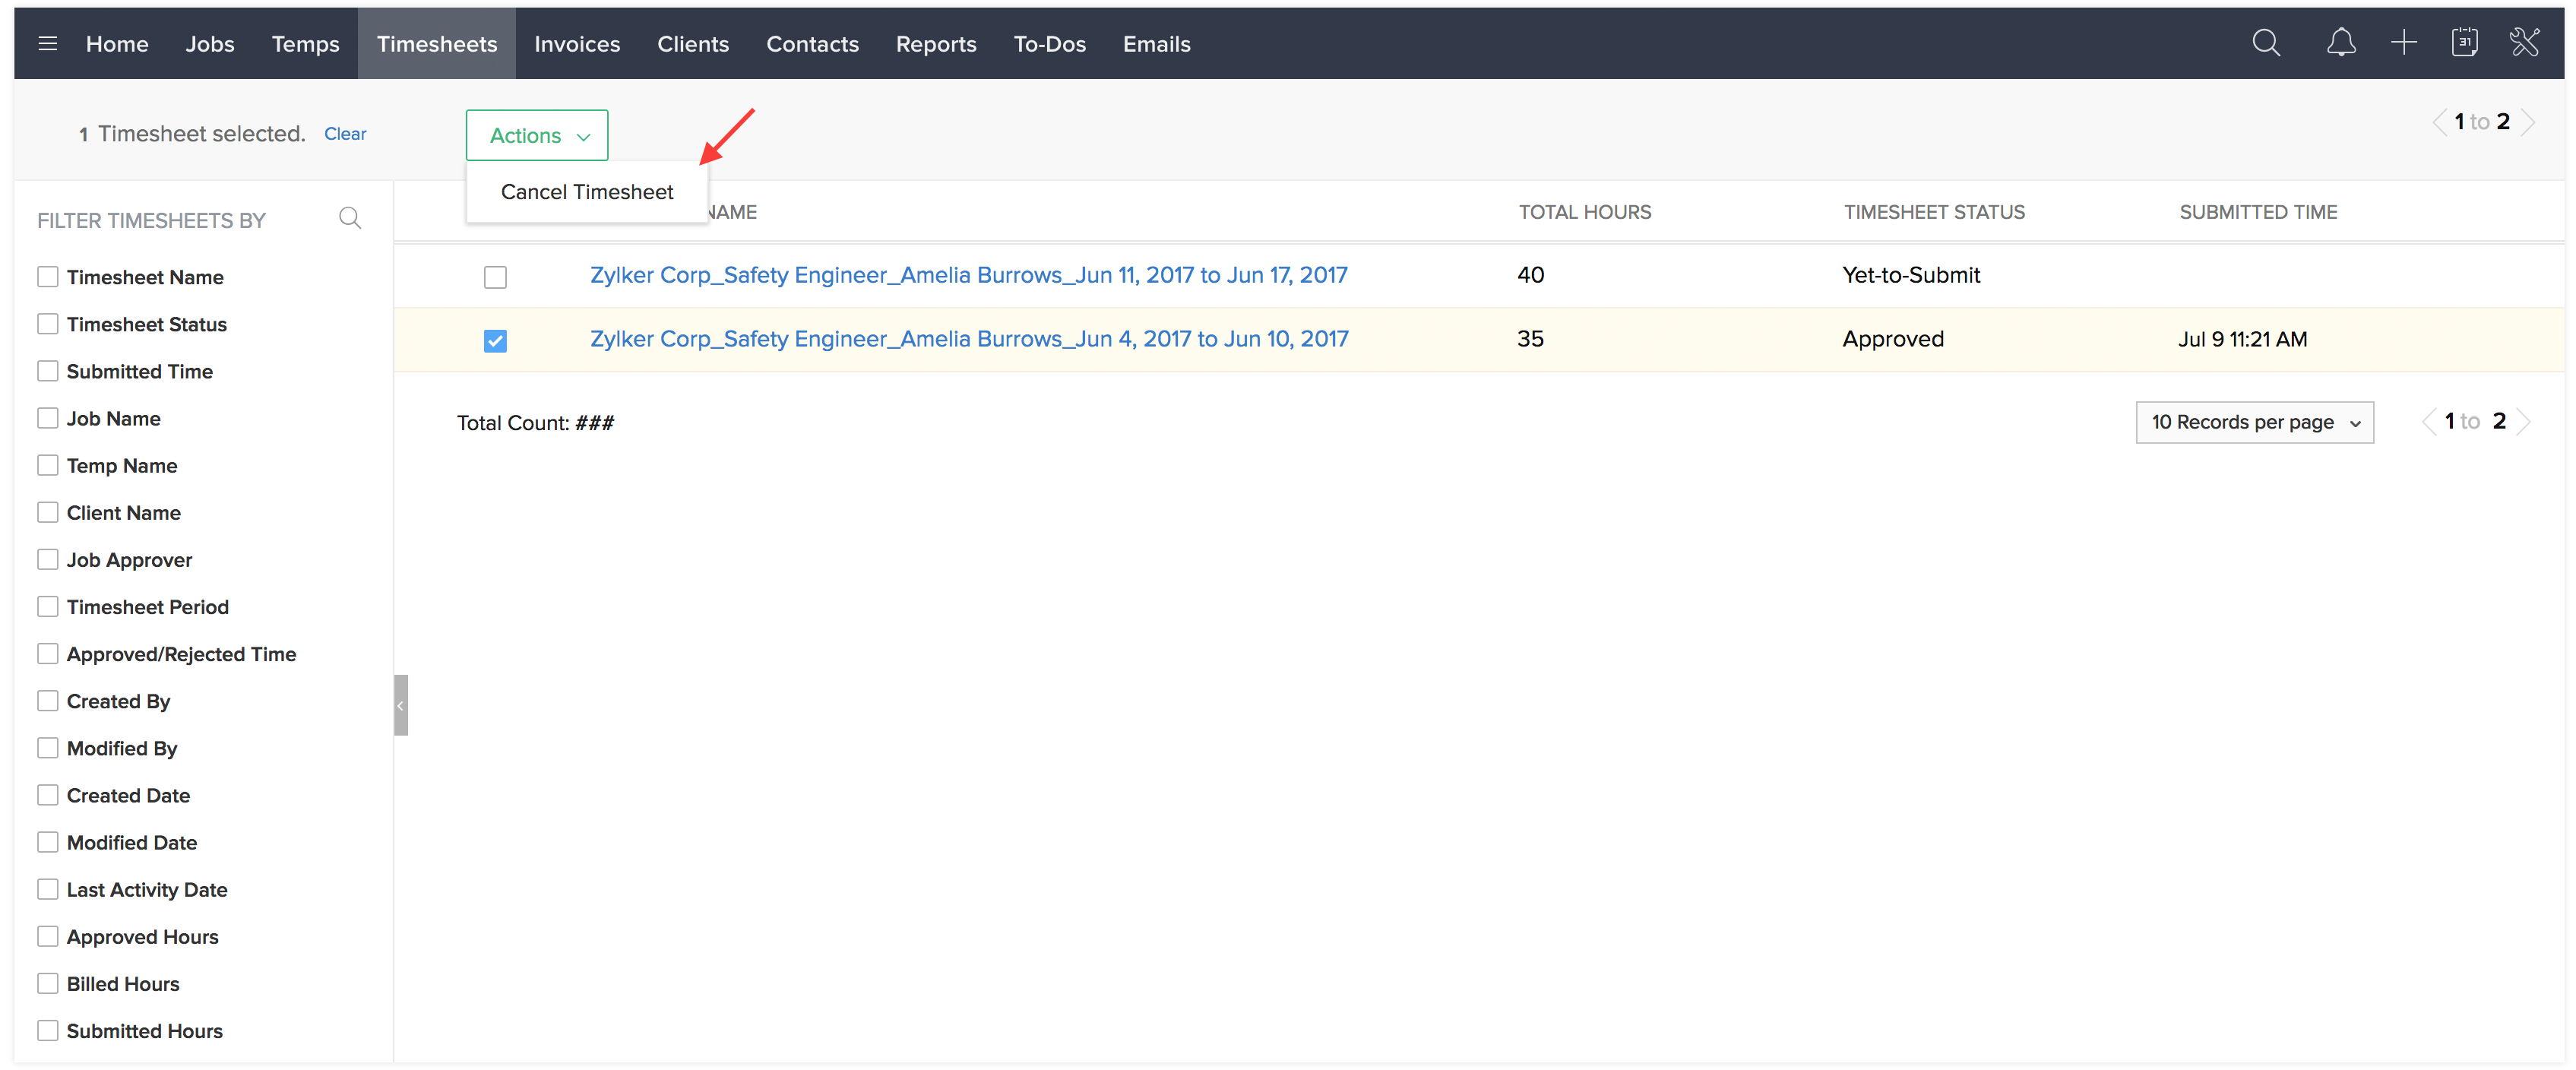
- Navigate to the Timesheets module.
- Select the timesheet for which you need to request cancellation.
- Choose Cancel Timesheet from Actions button.
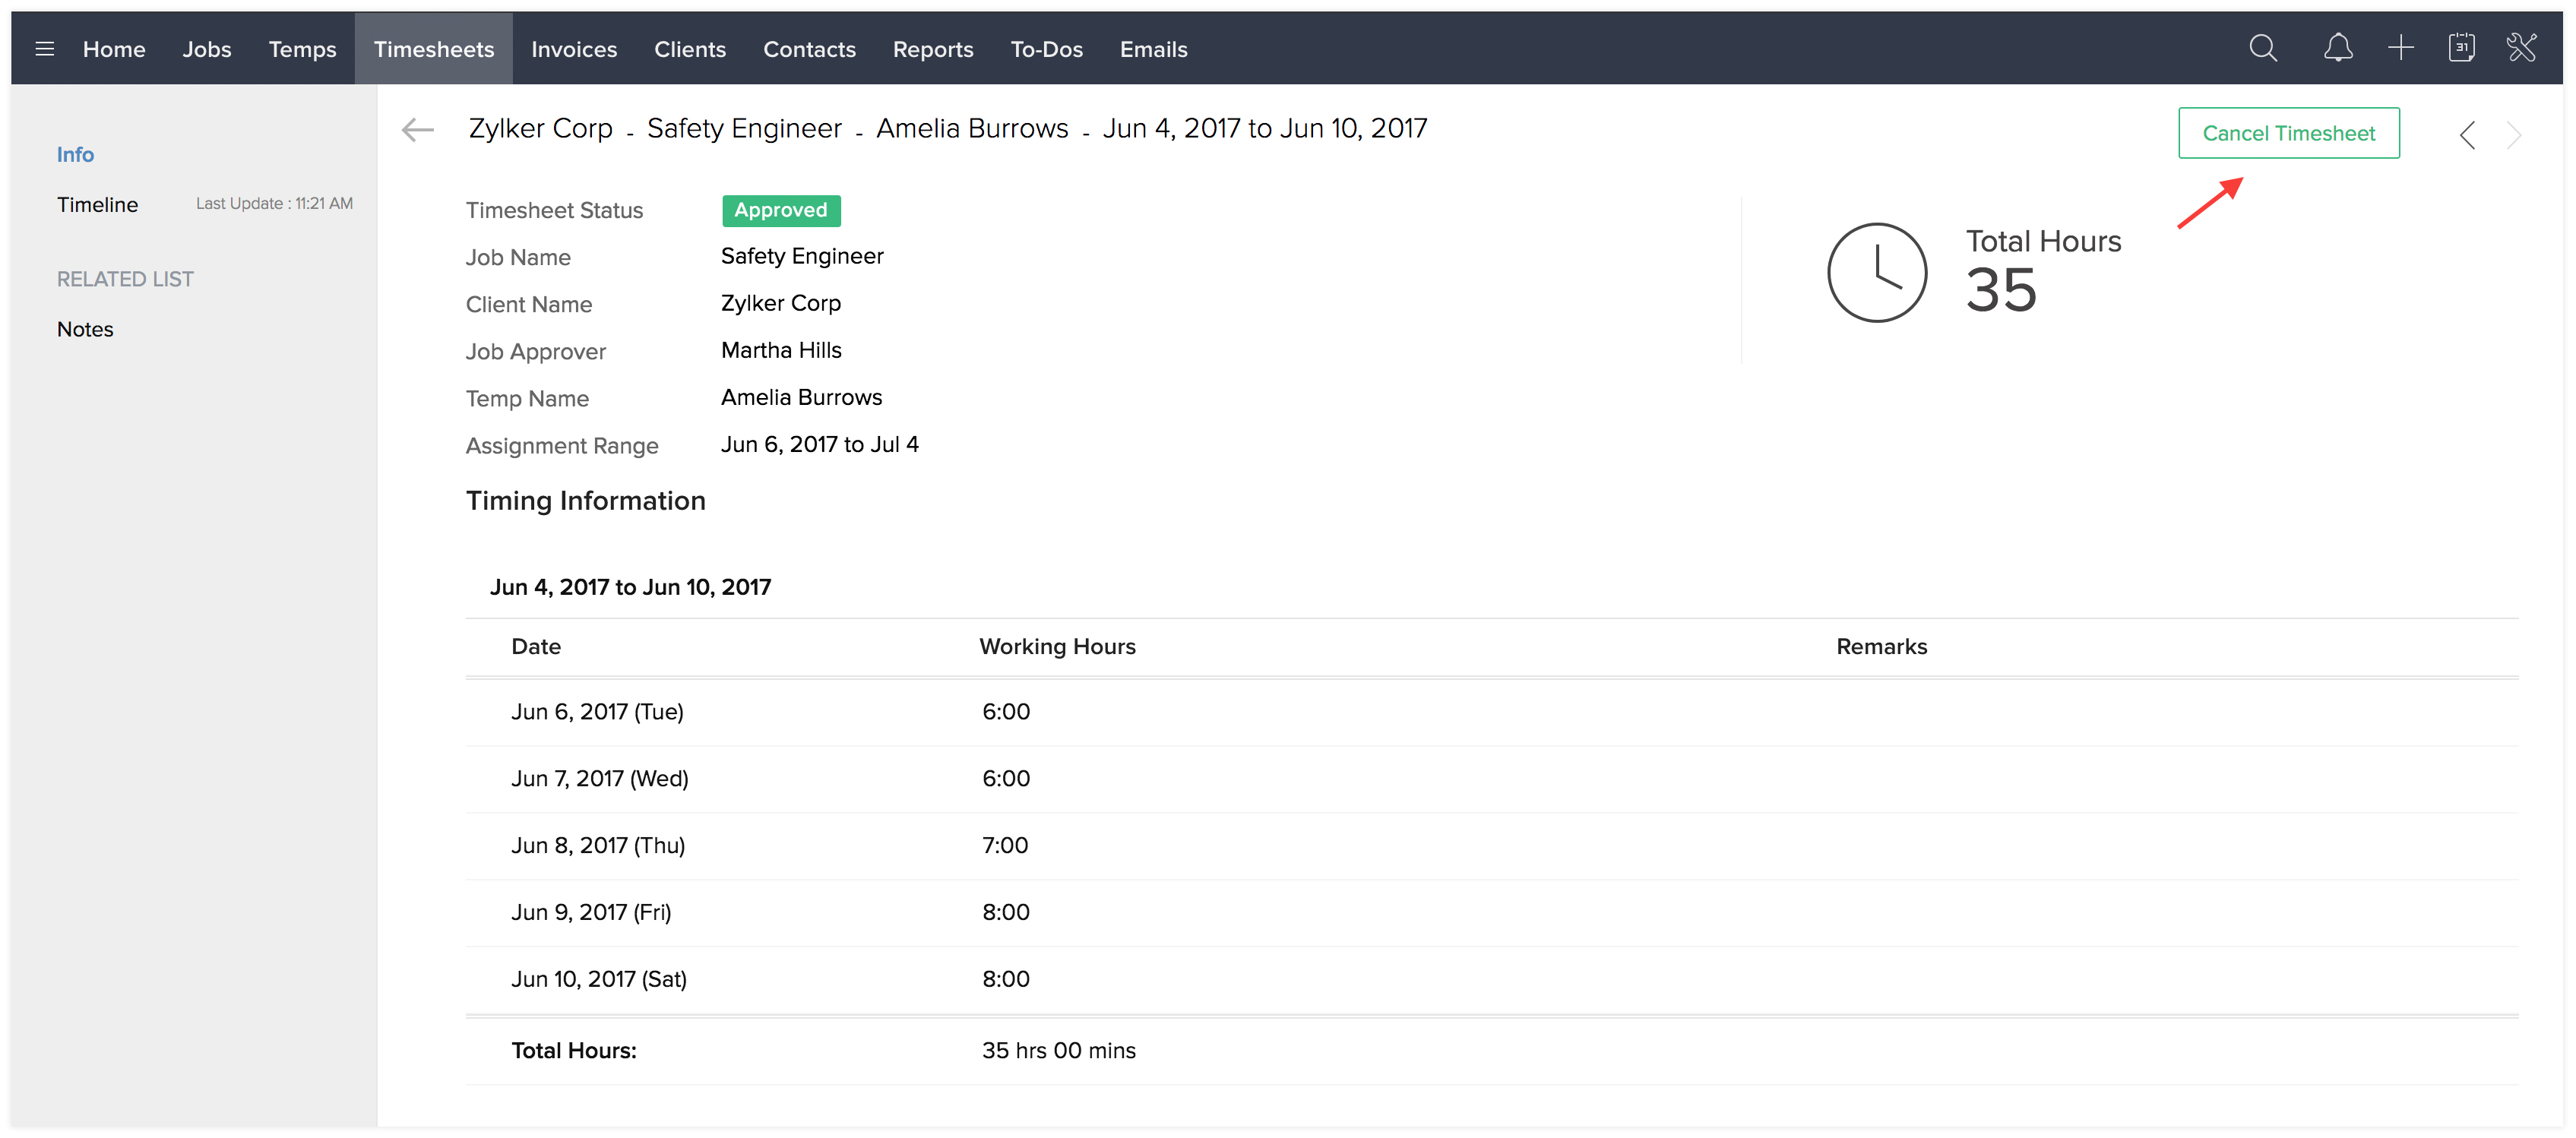
- Alternately, you can also cancel a timesheet from inside the timesheet detail page.
Related Articles
Create and Manage Jobs
In any organization, Jobs are the most important records to generate the real revenue for the organization. Jobs are typically a requirement from a Client. Once a client raises a requirement, Temps are assigned to that Job and the whole Staffing ...Timesheets
Tracking the work hours of your temps is a significant part of workforce management. Accurate tracking of work hours spent by each worker will ensure that there is harmony between all the important stakeholders involved -- Your agents, temps and the ...Manage timesheets
Add log hours Navigate to Timesheets in the left panel. Click + Log Hours in the upper-right corner. Select the User, Work Item, Date, Hours, Billing Status, and Description. Click Add to log hours for the work item. The date in ...Timesheets views
You can view timesheets in List, Grid and Calendar views. List view In List view, the tasks and bugs are displayed on a daily basis for the selected time period and you can also see the total billable and non-billable hours for that week. By default, ...Approve timesheets
If timesheet approval setting is enabled you can go ahead and start approving timesheets. Feature Availability: Express, Premium, and Enterprise plans. Navigate to Projects and choose a project. Click Timesheet to view the entries in the list view. ...