Creating a consent email
Types of consent email
- Instant consent email: Select this type of email if you want to send a consent email to your contacts as soon as they join the mailing lists in your organization.
Once you set up an instant consent email, it will automatically be sent to contacts as soon as they join. You need not have to wait for an interval for sending the email. - Recurring consent email: Select this type if you want to send your consent emails at fixed intervals. You can set a time at which the email will be sent out. This is recurring because an email will be sent regularly at intervals unless you stop/pause it.
- Standard consent email: Standard consent email is more like a one-time email. Create this email, send it to mailing lists of your choice, and get consent from the contacts in those mailing lists. This email is not recurring so you'll have to create a new email each time when you select this type.
Add basic details for the consent email
- Select Contacts from the Navigation toolbar, then click Manage Topics.
- Click Create Consent Email on the top-right corner of the page.
- Select any one from the three types of consent email.
- Enter a name for the email.
- Choose a purpose.
- Choose how would you like to get consent
- Zoho Campaigns - If you select this and if you use the default consent email template that we provide, the options for Consent and Deny will be added automatically. If you select any other template, you have to add the consent and deny merge tags manually.
- Zoho CRM Form - Select this if you want to send the Zoho CRM form to obtain consent from the contacts that you have synced from Zoho CRM.
Required merge tags will be added by default in the templates that we provide. For templates other than that, you'll have to add the Zoho CRM merge tags. Form that you have created in Zoho CRM will be used here. Note that you can use this form only when you have enabled Compliance Settings in Zoho CRM. The consent that you obtain from your contacts will be updated only in Zoho CRM. - Choose recipients: Select if you want to send the consent email to all your mailing lists or specific mailing lists.
- Click Create.
- Create your consent email just as you create an email campaign.
- Ensure that your email content has the merge tags for Consent and Deny.
Use case:
If you've chosen Zoho Campaigns to receive consent, there are two options to add content.
Case 1: You can choose a consent based email templates that has inbuilt Call to action (CTA) for Consent and Deny.
Case 2: You can create the email content using any predesigned template or other content options such as HTML editor. In these cases, you have to manually add Consent and Deny in your content by adding the merge tags $[LI:EMAILCONSENT]$ and $[LI:DENY_EMAIL_CONSENT]$ in your email content.
- To add merge tag, navigate through Email Template's Editor and select Merge Tags and click Consent Merge Tags.
- Add the merge tags for consent and deny.
Case 1: You can choose a consent based email templates that has inbuilt Call to action (CTA) for Consent.
Case 2: You can create the email content using any predesigned template or other content options such as HTML editor. In these cases, you have to manually add Consent in your content by adding the merge tags $[LI:EMAILCONSENT]$ in your email content. Once a contact clicks the Consent button, he'll be taken to a CRM form where he can give his consent.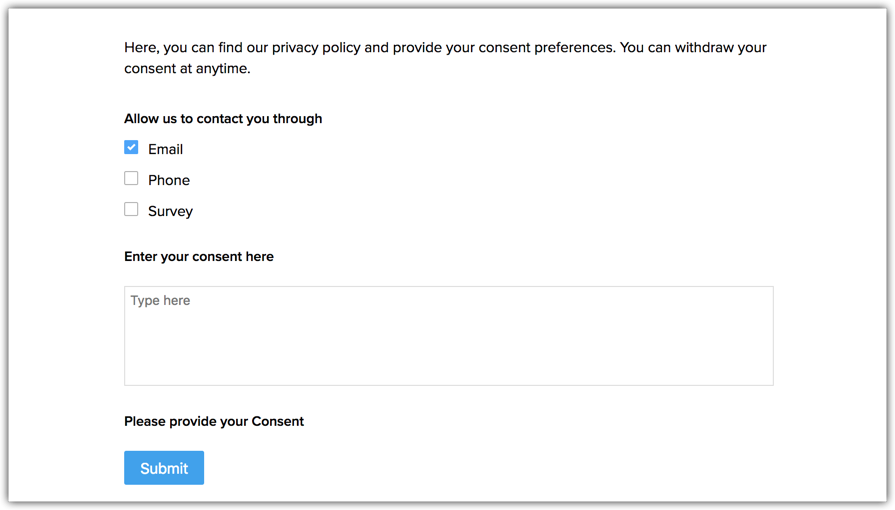
Multiple Purposes in GDPR compliant email marketing
Creating content for the consent email
- Add basic details for your consent email and click Next.
- Select a consent email template to add content.
- Click Save and Proceed.
- Click Start Now to start the consent series immediately or click Schedule for Later to send it at a specified time.
Creating a reminder email
- From the Navigation toolbar, select Contacts.
- Select Manage Topics and click Emails.
- Mouse over the email for which you want to create reminder emails and click on the View Reports icon on its right corner.
- Click View Details on the top-right corner of the page and click Create Message under First Reminder email.
- Create the reminder email following the steps mentioned under Creating content for the consent email above.
- Set a date for the reminder email to be sent.
- Follow steps 1-5 to create the second reminder email.

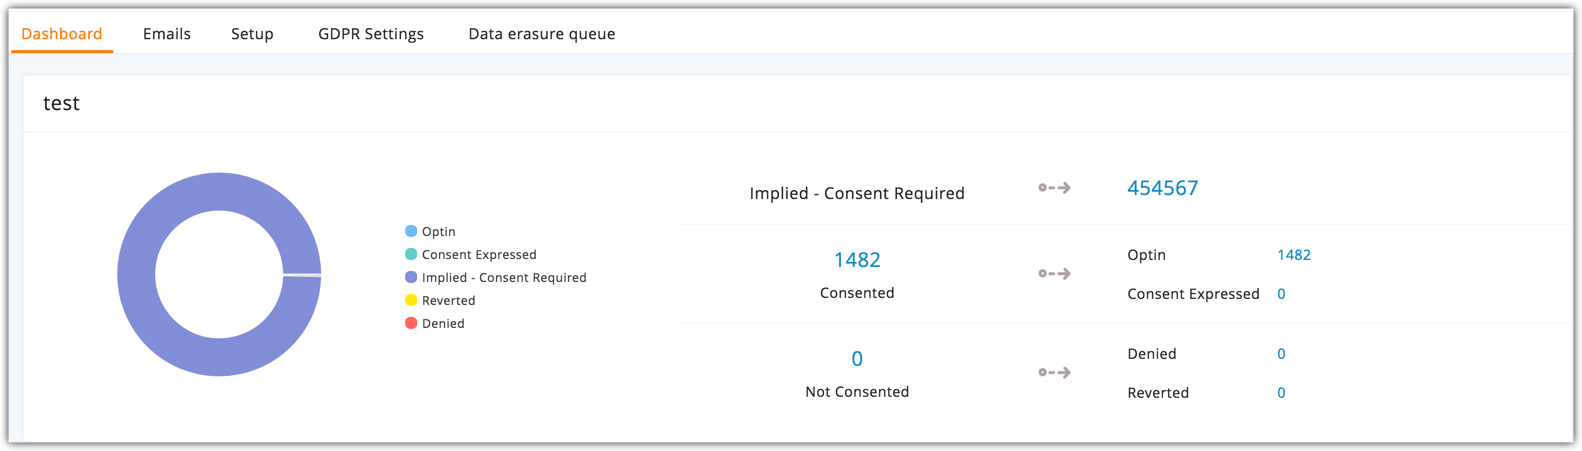
Consent Dashboard
Consent Dashboard provides a detail view on the consent status of your contacts and summarizes the various details in different views.
Your purpose of sending email
Consent Status

Consent Email Details

Related Articles
Creating a consent email
Creating a consent email for your leads allows you to get their permission before sending out newsletters about your business or product. This is a two step process: There are two types of consent email that you can send: Recurring consent email: ...Consent Management
Zoho CRM's consent management settings helps you get consent from your prospects and customers. We provide a system where you can customize the consent form, include it in your email templates, set consent related preferences, and most importantly, ...Consent Management
Zoho Recruit's consent management settings helps you get consent from your data subjects by providing a system where you can customize the consent form, include it in your email templates, set consent related preferences, and most importantly, get ...Manage Consent
We aim to protect individuals from spam that has been sent through any mode of communication. As an email marketing service, we ensure that all our users get permission from their leads before sending emails. Zoho MarketingHub's Manage ...Get Consent
We aim to protect individuals from spam that has been sent through any form of electronic communication. As an email marketing service, we ensure that all our users get permission from their contacts before sending emails. You can select 1 out of the ...