Custom Domain: How to link CNAME records in popular Domain Name Service (DNS) providers?
How to Set Up a CNAME Record in GoDaddy
1. Log into your GoDaddy account and Click on My Products in the main menu.
2. Beside the domain that you'd like to set up your ShowTime site under, click on DNS.
3. On your Records page, you can add a new CNAME record by clicking Add in the lower right hand corner.
6. In the form that appears, apply the following:
Type: Select CNAME
Host: This will be your desired subdomain.
Points to: Enter the URL specified in the Custom Domain section after adding your own domain.
6. Click Save
How to Set Up a CNAME Record in Bluehost
1. Log into your Bluehost account.
2. Select domains, then zone editor, and choose the domain you'd like to have your ShowTime site available at.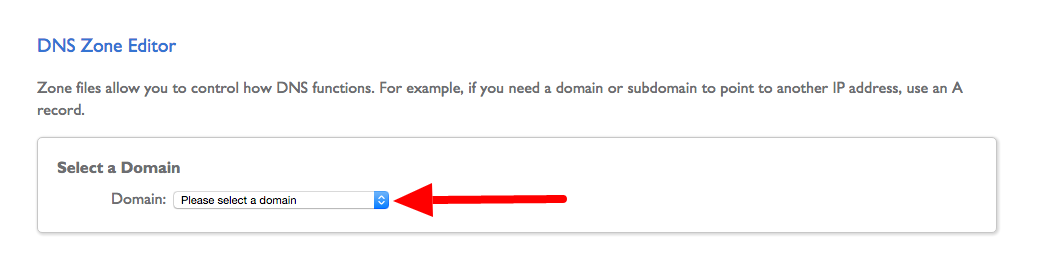
2. Select domains, then zone editor, and choose the domain you'd like to have your ShowTime site available at.
3. Select Add DNS Record and fill out the following fields:
Host Record: This will be your desired subdomain.
TTL: Leave the default value. It is often 3600, but may be different depending on your account type.
Type: CNAME
Points To: Enter the URL specified in the Custom Domain section after adding your own domain.

4. Next, select add record to save your CNAME record.
Using a CNAME Record in Hover
1. Log into Hover, and choose Domains from the Your Account dropdown:
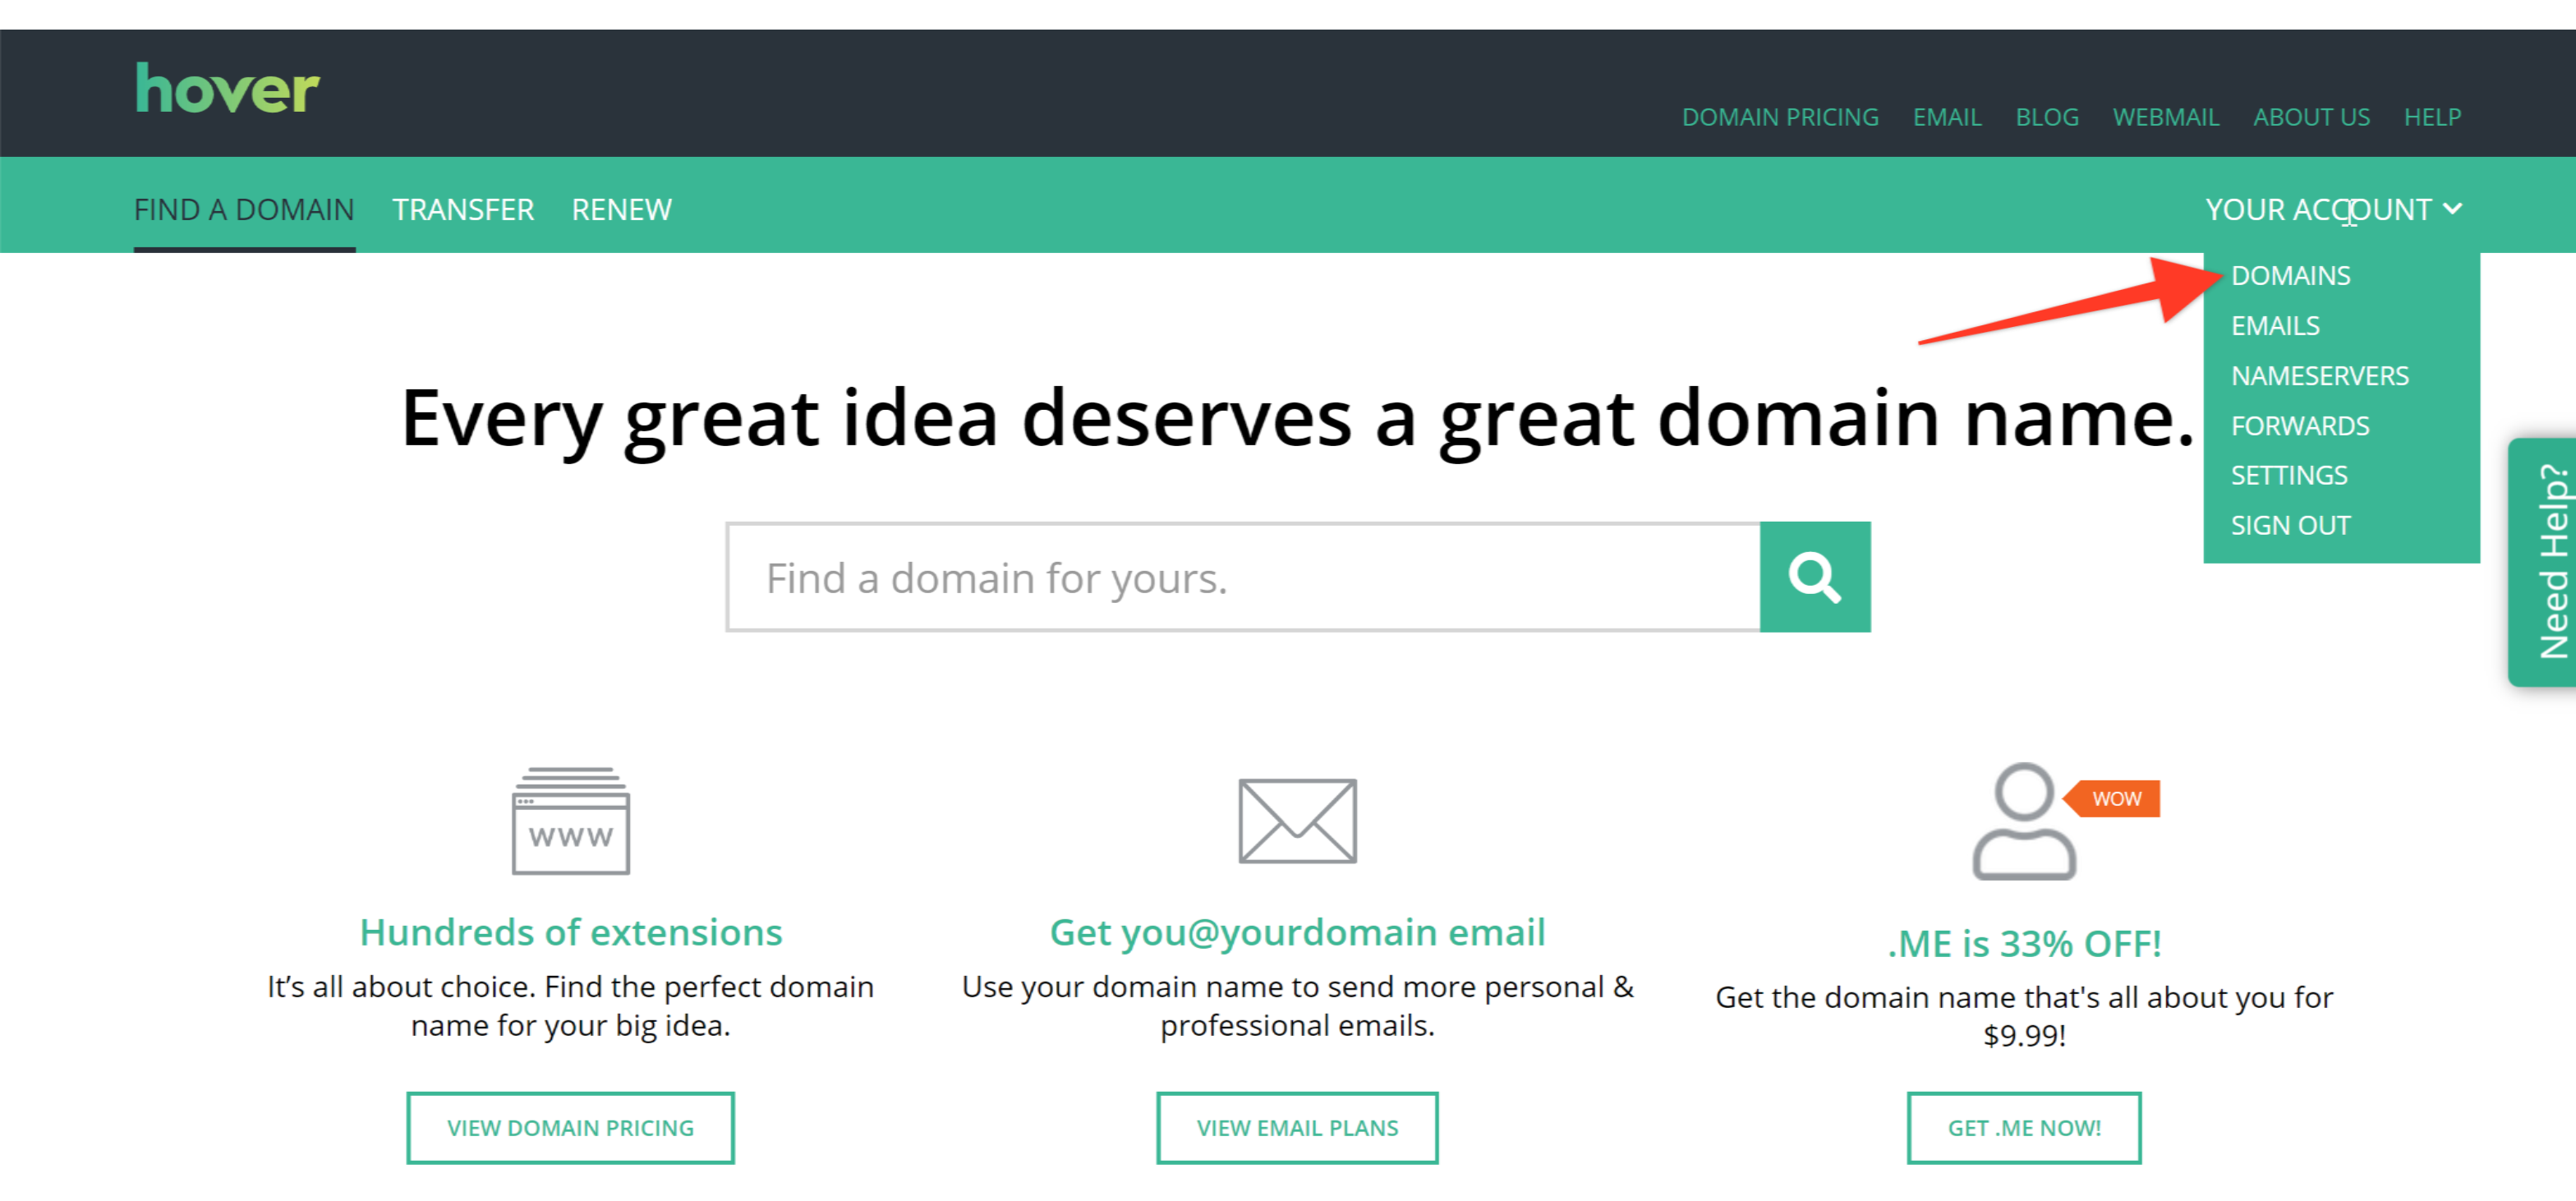
2. Select the domain you would like to use to set up your custom URL for your ShowTime site. Click on the DNS tab.
4. From there, click on the Add A Record button.
5. In the pop up, select a CNAME record from the dropdown and complete the fields.
Hostname: your desired subdomain.
Target name: Enter the URL specified in the Custom Domain section after adding your own domain.

TTL: leave as the default
How to Set Up a CNAME Record in CloudFlare
1. Log in to your CloudFlare account and in the top menu, select DNS.
2. Under DNS Records, you will see an option to add a record. Fill out the following
First dropdown menu: Select CNAME
Name: This will be your desired subdomain.
Domain name:
Enter the URL specified in the Custom Domain section after adding your own domain.
Enter the URL specified in the Custom Domain section after adding your own domain.
Automatic TTL: You can leave this as the default. TTL stands for Time to Live and simply indicates how long it will take this change to propagate.
Cloud icon: Click this until you see a grey cloud icon. This will ensure it is set to DNS only, which means traffic will not go through CloudFlare. Advanced set up is required in CloudFlare if your record is orange clouded.
5. Select Add Record
Related Articles
Custom Domain
Super admins and admins can view and edit this information. Managers can only view this information. Staff members will not have access to this information. If you already own a domain for your business, you can attach the booking page to your ...Custom Domain
The Custom Domain feature allows you to access Zoho Lens from the domain of your choice. For instance, your organization's name is Zykler and your website is "zylker.com", you can access Zoho Lens using "lens.zylker.com" instead of "lens.zoho.com". ...Custom Domain
Custom Domain feature allows you to access Zoho Assist from the domain of your choice. For instance, your organization's name is Zykler and your website is "zylker.com" , you can access Zoho Assist using " assist.zylker.com" instead of ...Setting up Custom Domain
You can setup and access Zoho Connect from your own domain by following the below steps: Go to Settings-->Network Settings-->Custom Domain. Create a CNAME (Eg: connect) and map it to customer-connect.zoho.com. Map the custom domain ...Custom domain mapping
If you have purchased a domain for your business and you run the company's portal on Zoho Projects, this domain mapping feature will come in handy. All the users in your company will be able to access the portal from your domain name itself. So, your ...