Custom Workflow
Create custom workflows to suit your various business needs. Custom workflows is an important automation tool that allows you to create processes unique to your product enabling you to define the various paths your contacts can take in a workflow. Define a trigger, configure the processes that follow the trigger, and select the end-of-workflow actions the way you want.
Create a custom workflow
- From the Navigation toolbar, select Automation and choose Workflows.
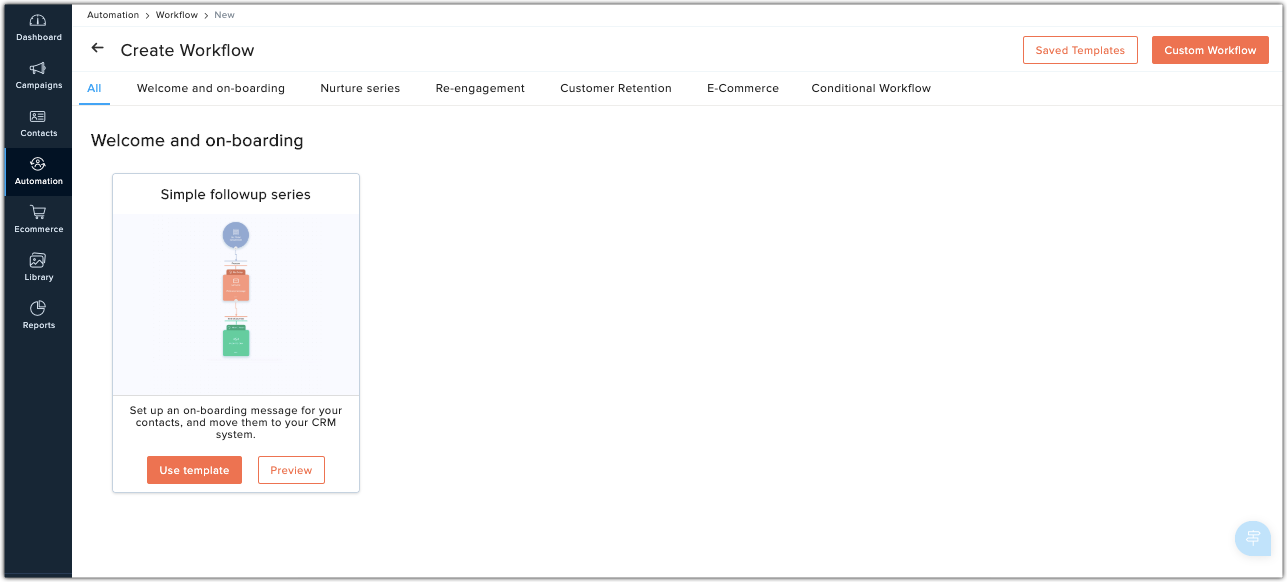
- Click Create workflow from the top-right corner.
- Click Custom Workflow on the top-right, give your Workflow a name and click Create.
Alternatively, you can choose from a set of pre-designed workflow templates that matches your exact needs.
Configure trigger
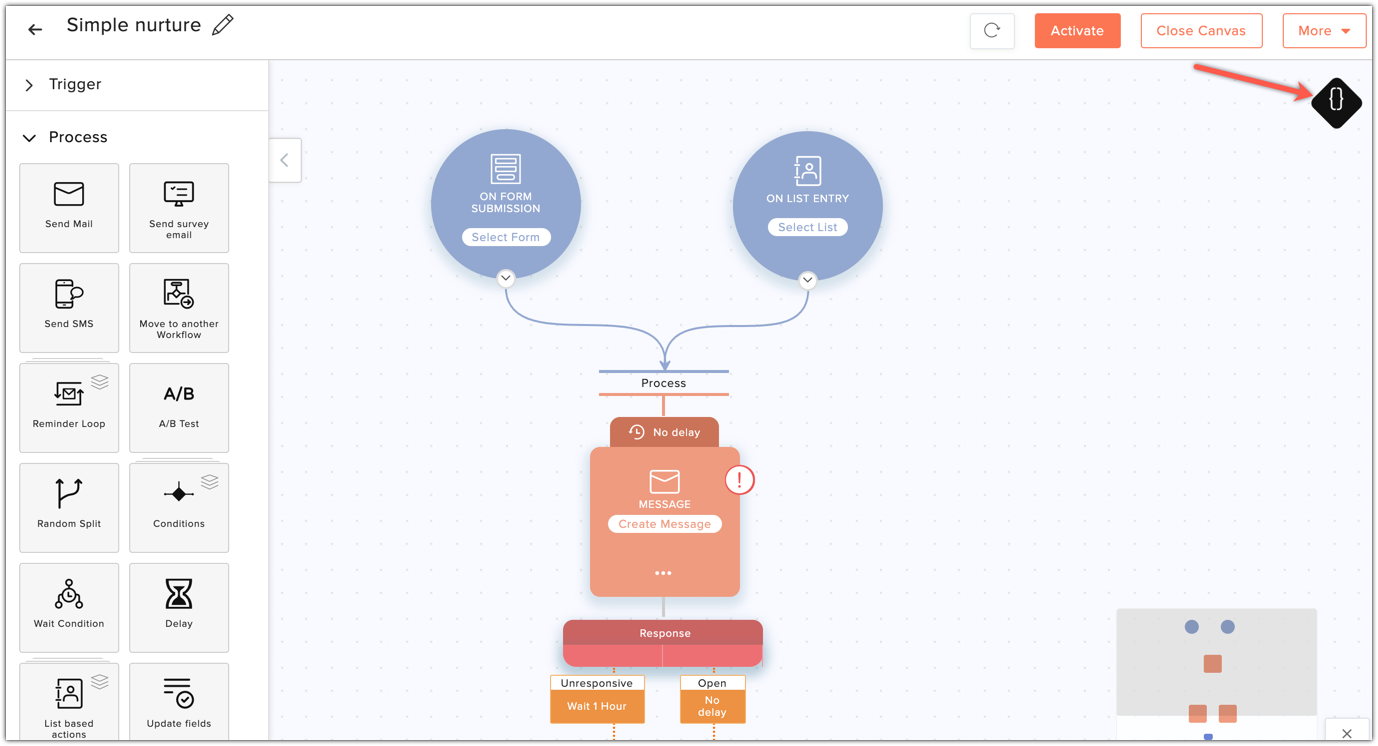
After creating the workflow, you will be taken into the workflow canvas. You can set multiple triggers in one workflow, however, the email action trigger cannot be set with other triggers because it depends on recipients activity for thr workflow to be triggered. First, you will have to configure a trigger.
Listed below are the various triggers:
- Form Submission trigger: The workflow will trigger for sign-ups through the form you select. Drag the trigger component into the canvas and click Select Form. Select the intended signup form. It can be a regular form or a pop-up form.
- List Entry trigger: The workflow will trigger for contacts entering the mailing list you select. Drag the trigger component into the canvas and click Select List. Select the intended mailing list.
- Open Trigger: The workflow will be open to contacts moved in here by other entities (e.g., other workflows). Drag the trigger component into the canvas and click Configure. You can add contacts into workflow using an API request.
- Field Update trigger: The workflow will trigger when the field you select is updated. Drag the trigger component into the canvas and click Select Field. Select the intended field.
- Email Action trigger: The workflow will trigger for contacts who received, opened, or clicked the selected campaign, based on the condition you set. Drag the trigger component into the canvas and click Select Email. Select the intended campaign.
- Tag Assigned trigger: The workflow will trigger when the tag you select is assigned to contacts. Drag the trigger component into the canvas and click Select Tag. Select the intended tag.
- Tag Removed trigger: The workflow will trigger when the tag you select is removed from contacts. Drag the trigger component into the canvas and click Select Tag. Select the intended tag.
- Video Click trigger: The workflow will trigger when a video component is clicked by your contacts. Drag the trigger component into the canvas and click Select Video. Select a video tag or create a new video tag.
Set up process
Build a complete workflow for your contacts under the process section; create email series, define actions, and set rules to separate paths based on contacts' behavior and information. The following is a list of all that you can do under the process section:
Send Email
Send an email to your contacts when they reach this stage of the workflow. To configure: - Drag and drop Send Mail component from the Process section of the left panel onto the canvas.
- Click Create Message in the message block.
- Click Edit icon on the top-left and give your message a name.
- Click Add Subject. Enter the subject and preheader details for your message
- Click Add Sender Details and enter the sender name.
- Click Show reply-to details. Enable reply tracking, enter a reply-to address and click Save.
- Click Create Content to add content for your message.
- Click Send for Review after you create the your email content to send your message to our compliance team for review.
Your reviewed message will be sent out as per schedule once you activate the workflow. Messages, by default, will be sent one day after the previous action was performed. However, you can edit the message's schedule.
Send Survey
Send surveys to your contacts to gain valuable information about your product. To configure this process :
- Drag and drop the Send Survey component from the process section of the left panel onto the canvas.
- Click Create Message in the survey message block.
- Add the message's basic info, select a survey to be sent and click Next.
- Select one of the templates to add content for your survey. Add the content and include the survey tag. Click Save and Next.
- Click Send for review to send your message to our compliance team for review.
Your reviewed message will be sent out as per schedule once you activate the workflow. Messages, by default, will be sent one day after the previous action was performed. However, you can edit the message's schedule.
Send SMS
Use this component to send SMS messages to contacts who enter the workflow. To send SMS messages :
- Drag and drop the Send SMS component from the process section of the left panel onto the canvas.
- Click Configure.
- Give a name to your SMS message by clicking the Edit icon on the top-left. Click Save.
- Click Select an SMS Gateway. Select the SMS gateway and click Proceed.
- Click Configure Content to add content for your SMS.
- Add the content and include merge tags to personalize your message.
- If you want to send your message in multiple parts select Send message in parts and click Save.
- Click Configure Fields and select your contacts' phone number and country fields.
- Click Go Back to Canvas to send your message for review.
- Click Send for review to send your message to our compliance team for review.
Your reviewed message will be sent out as per schedule once you activate the workflow. Messages, by default, will be sent one day after the previous action was performed. However, you can edit the message's schedule.
Move to Another Workflow
Set up this process if you want your contacts to be moved to another workflow. This process can be used only when you have another workflow that has an open trigger. Drag and drop the component from the Process section on the left panel onto the canvas and click Configure. Select the workflow into which you would like to move your contacts to. Add a delay after which your contacts will be moved and add criteria to skip certain con tacts if needed.
Set Reminders
Send your contacts reminders when they do not respond to your emails. Following are the different types of reminders:
- To open: When contacts who do not open your email
- To click: When contacts do not click any links in the email
- To click specific link: When contacts do not click a specific link in the email
- To complete survey: When contacts don't complete a survey
- Custom: Create your own condition
Click Reminder loops component from the Process section of the left panel and drag and drop the desired loop into the canvas. You will then need to do the following:
- Connect this component to an email. However, you can only connect the survey reminders to a survey email.
- Create the reminder emails and set the time period between each email. You can create a maximum of three emails.
- Define a path for those who match the reminder criteria. As soon as contacts match the criteria, they will take this path.
Define a path for those who do not match the reminder criteria. contacts who do not match the criteria in spite of your reminder emails will take this path.
AB Test
With this component you can AB test two versions of your campaign. Send these two versions to a small group of your contacts and decide the winner based on their performance. Once the winning version is decided, it will be sent to the remaining contacts. Drag and drop the AB test component from the process section of the left panel into canvas. Click Configure in the action block. Fill in the following information:
- Size of the test group: Enter the number of contacts who should receive these test versions. 50% of the selected number will receive version A and the remaining 50% will receive version B.
- Select how the winner should be decided . You can choose to decide based on open rate or click rate, or decide the winner manually once the test is complete, based on their reports.
- Test duration: Select the time duration for which the test should run. The test will start after the versions have been sent to the selected test group.
Select which version should be sent in case of uncertainty . The following are the cases of uncertainty:
- When there is a tie after the test.
- When a contact reaches this stage after the versions have been sent to the test group and while the test is still running.
After the test is complete the winning version will be decided. contacts who enter after the selected test duration will take the path that follows the winning version.
Random Split
Split the path of the workflow randomly to two group of contacts. Drag and drop the Random split component into the canvas. Click Configure and select the percentage for each group. When contacts reach this stage, they will be randomly put into each path.
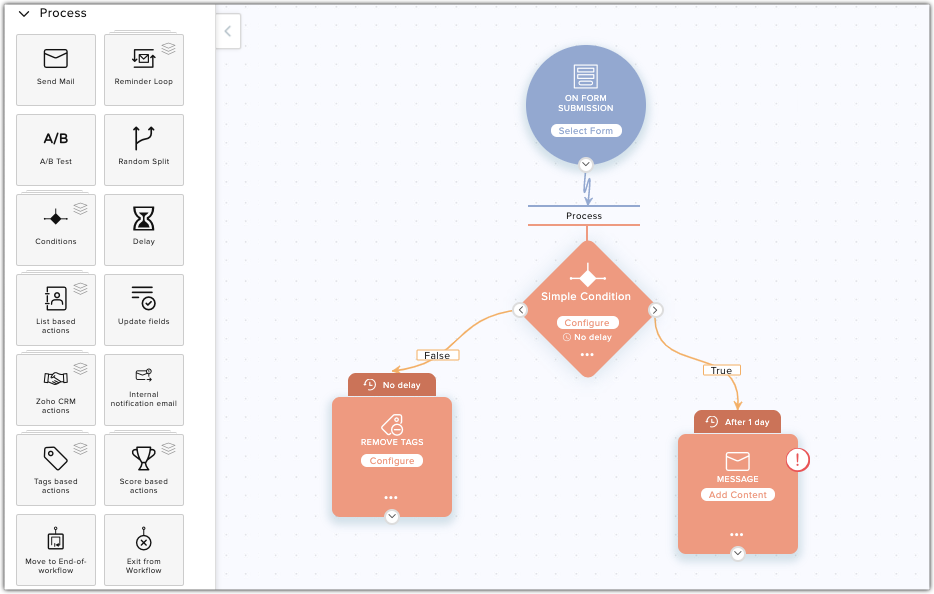
Set Conditions
Set conditions based on contact information and behavior and branch out the path. When contacts reach this stage in the process they will be checked for whether they meet the criteria or not, and will take the corresponding path. There are three types of conditions:
- Simple criteria
Set up a criteria based on either contact information or recipient activity. Split the workflow here for contacts who satisfy the criteria and for those who don't. - Three way
Segment your contacts based on their field value and create separate paths for each segment. You need to provide two different values for the field you select. You will create two paths for these two values and a third path where both these conditions are false. - Multi way
Segment your contacts based on their field value and create separate paths for each segment. You can provide a maximum of six values for the field you select. You will create as many paths for as many values you provide, and another path where all these conditions are false.
Click the Condition component from the Process section of the left panel and drag and drop the desired condition into the canvas and configure it to suit your requirements.

Wait
Set a time period for contacts to wait before performing certain actions set up in the workflow. You can choose to let your contacts wait for certain hours or days and prompt them to perform actions at a specified time and at specified days of the week.
Wait condition
Set wait conditions for your contacts to satisfy, for them to move into further processes in the workflow. You can choose to wait for a specific number of hours or days until the contacts satisfy said conditions. If they don't satisfy the conditions they will automatically be moved into the alternate path, chosen for them, in the workflow. To set wait conditions :
- Drag and drop the wait condition component onto the canvas.
- Click Configure to set conditions.
- Choose to set conditions based on Contact Information or Recipient Activity.
- Enter the wait time in hours or days and click Apply.
- Choose an action to performed on the contacts who have satisfied the condition and connect the process to the 'TRUE' side of the wait component.
- Likewise, choose an action to be performed on contacts who have not satisfied the conditions and connect the process to the 'FALSE' side of the wait component.
List-based Actions
- Add to List - Add contacts to a list when they reach this stage of the workflow. Drag and drop the Add to list component from the Process section of the left panel into the canvas. Click Configure in the action block and select your intended mailing list.
- Remove from List - Remove contacts from a list when they reach this stage of the workflow. Drag and drop the Remove from list component from the Process section of the left panel into the canvas. Click Configure in the action block and select your intended mailing list.
Update Fields
Update the value of your contacts' field when they reach this stage of the workflow. Drag and drop the Update field component from the Process section of the left panel into the canvas. Click Configure in the action block and select the intended field and the value to be updated.
Zoho CRM Actions
Push to Zoho CRM
Push your contacts' data into Zoho CRM when they reach this stage of the workflow. Drag and drop the Push to Zoho CRM component from the Process section of the left panel into the canvas. Click Configure in the action block. Fill in the following information:
- Select from the following two options: you can either push the Zoho Campaigns-related information of all contacts to Zoho CRM (new records will be created for contacts new to Zoho CRM) or update just the data of contacts already existing in Zoho CRM (new records will not be created for contacts new to Zoho CRM).
- Select the Zoho CRM module that you want to push your contacts into.
- Map Zoho Campaigns fields with the respective Zoho CRM field.
- Click Save.
Create tasks in Zoho CRM
You can create tasks for those contacts who have reached stage. When you create tasks for contacts, they will automatically pushed into Zoho CRM. To create task in Zoho CRM:
- Drag and drop the Create task in Zoho CRM component from the Process section of the left panel into the canvas.
- Click Configure in the action block.
- Select from the following two options: you can either create tasks for all contacts entering this component (new records will be created for contacts new to Zoho CRM) or create only for contacts already existing in Zoho CRM (new records will not be created for contacts new to Zoho CRM).
- Click Map fields and map Zoho Campaigns fields with Zoho CRM fields.
- Click Create task.
- Fill in the following information:
- Subject - Enter your task subject.
- Status - Select the status you want to give your task.
- Priority - Select the priority of the task.
- Owner allocation - Allot owner for tasks being created in CRM. You can select from the following options:
- Assign all tasks to one owner
- Select owner by round robin method for each task
- Subject - Enter your task subject.
- Click Save.
Send Internal Notification Email
Set up emails to notify your organization members when contacts pass a particular stage in the workflow. Drag and drop the Internal notification email component from the Process section of the left panel into the canvas. Add subject, email content and select email addresses.
Tag-based Actions
- Assign tags - Assign tags to contacts when they reach this stage of the workflow. Drag and drop the Assign tags component from the Process section of the left panel onto the canvas. Click Configure in the action block and select your intended tag from the list.
- Remove tags - Remove tags from contacts when they reach this stage of the workflow. Drag and drop the Remove tags component from the Process section of the left panel into the canvas. Click Configure in the action block and select your intended tag from the list.
Score-based Actions
- Add Score - Add score to your contacts when they reach this stage of the workflow. Drag and drop the Add score component from the Process section of the left panel into the canvas. Click Configure in the action block and select the score to be added.
- Subtract Score - Subtract score from your contacts when they reach this stage of the workflow. Drag and drop the Subtract score component from the Process section of the left panel into the canvas. Click Configure in the action block and select the score to be subtracted.
Move to End-of-workflow
Remove contacts from the process and move them to end-of-workflow when they reach this stage of the workflow. Drag and drop the Move to end-of-workflow component from the Process section of the left panel into the canvas. Remember that an end-of-workflow process must have an end-of-workflow action. Drag and drop the end-of-workflow action below the end-of-workflow process.
Exit from Workflow
Remove contacts from the workflow when they reach this stage of the workflow. Drag and drop the Exit from workflow component from the Process section of the left panel into the canvas.
After configuring the actions to be performed under process, connect the actions in your desired sequence and set the delay between them.
Merge
Use this component if you need to merge two or more paths into one. Drag and drop the Merge component from the Process section of the left panel onto the canvas and make the connections as required. You cannot connect the end node of the merge component with an end-of-workflow action.
Response actions
In an ideal email automation scenario where you have a well-defined workflow for your contacts, it is best practice to add a conditional wait period after you send an email to your contacts. This practice becomes a must when the conditions in your workflow (triggers) are based on your contacts opening the email, replying to the email, or clicking links in the email. The wait period that you set should give your contacts sufficient time to interact with your emails. The workflow will wait the specified time before it moves a contact to the next action.
Using Zoho Campaigns' custom workflows, when you send an email to your contacts you can configure follow-up actions for four responses - email open, email reply, any link click, and specific link click in the email. You can set up three types of wait periods between the trigger and its action:
- Common wait period for all the responses: Set a delay period that will be common for all the email responses. When contact makes any of the response in the email, the configured follow-up action will be triggered after the common delay period.
- No wait period: Follow-up action will be triggered as soon as contacts make a specific response to the email.
- Custom wait period: Follow-up action will be triggered for a specific response after waiting for the delay that you set. You can set different delays for different responses using this.
To setup a wait period:
- Click the More icon in the selected process.
- Click the Add Response toggle.
- In the popup that follows, check the box corresponding to the responses for which you want to set a follow-up action wait period.
- For any response, you can choose one from the three types of wait periods.
- On the right side of the popup, you'll see how the action flow will work based on the wait period that you've set.
- Click Save after you're done setting up the wait periods for the responses.
Add skip criteria
Decide who the process actions should or should not be performed for by setting up a criteria based on contact information or recipient activity. The contact that meets the criteria will skip that component and proceed to the next component. To add a skip criteria, click the More icon in the component, select the Add Skip Criteria option, and set the criteria that fits your requirements.
Define end-of-workflow actions
End-of-workflow actions are performed once the contact has exited the process. Drag and drop action components from the End-of-workflow process section of the left panel onto the workflow canvas and configure them. Listed below are the actions that can be performed:
- Add to another list
- Remove from list
- Add contact score
- Subtract contact score
- Update field
- Push to Zoho CRM
After configuring the actions to be performed after process, connect them with the other processes in your workflow. Note that having end-of-workflow actions is not mandatory.
Wait between end-of-workflow components
The default wait period between the actions is one hour. However, you can edit the wait period to suit your requirements. Mouse over the wait section above the actions and click the Edit icon to change the time period. The wait period for the first action is based on the time the contact exits the process. The wait period for the other actions is based on the previous action.
Add skip criteria
Decide who the actions should or should not be performed on by setting up a criteria based on contact information or recipient activity. The contacts that meet the criteria will skip that action and proceed to the next action. To configure skip criteria, click the More icon in the action block, select the Add Skip Criteria option, and set the criteria that fits your requirements.
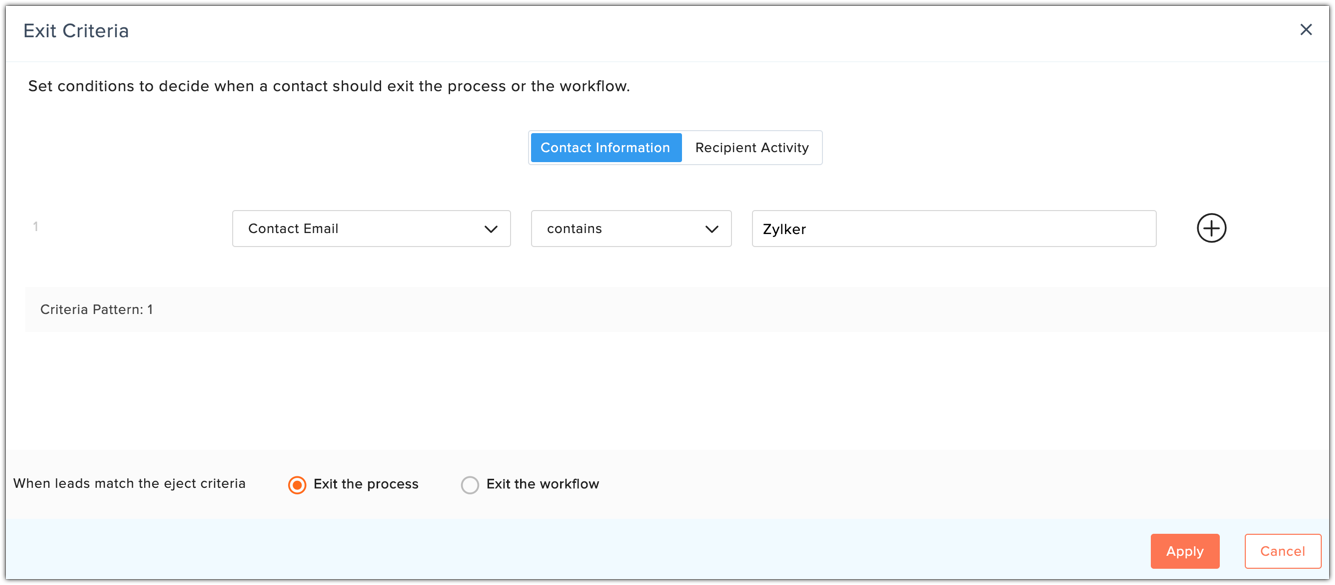
Exit Criteria
Set up criteria based on contact information or recipient activity to remove contacts from the workflow or process. Navigate to the Exit criteria icon on the top-right corner.
Click the icon and define criteria that fits your requirements and choose whether the contact meeting the criteria should be ejected from the process or the workflow.
Activate the workflow
After you've built up your workflow you need to activate it. Find the Activate button in the top-right corner.
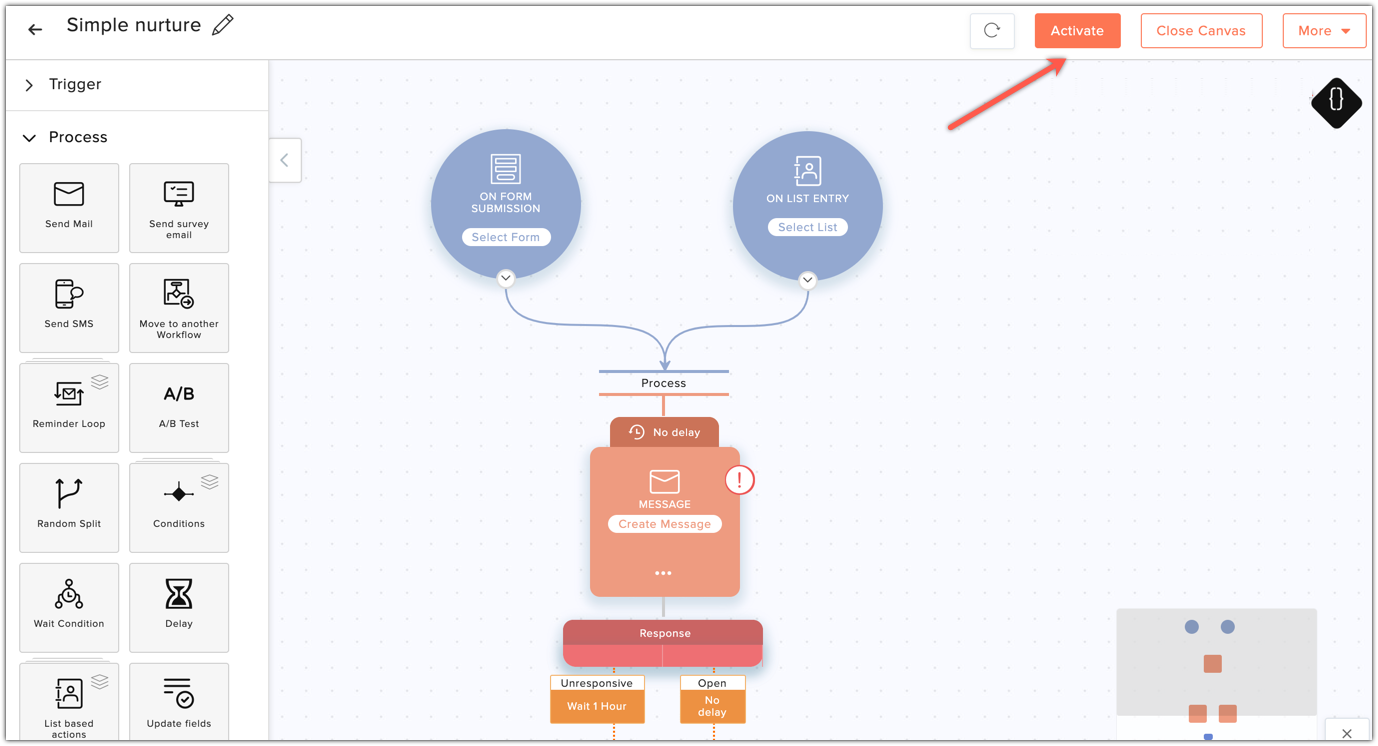
Once activated, your workflow is all set. Before activating a workflow:
- Trigger and all components in the canvas should be configured.
- All components in the canvas should be connected.
- All end nodes of conditions should be connected.
- All email content should have been reviewed.
Related Articles
Managing Workflow
Workflow management helps you to automate your staffing processes. You can automatically assign tasks to users, based on the criteria defined in the rules and update certain fields. Workflow automation consists of the following components: Workflow ...Workflow Rules
Workflow Rules in Zoho Recruit are a set of actions (alerts, tasks, and field updates) that are executed when certain specified conditions are met. These rules automate the process of sending email alerts and SMS alerts, assigning tasks, and updating ...Workflow Rules
Workflow Rules in Zoho Workerly, are a set of actions (alerts, tasks and field updates) that are executed when certain specified conditions are met. These rules automate the process of sending email alerts, SMS alerts, assigning tasks and updating ...Workflow Rules
Workflow Rules in Zoho Recruit are a set of actions (alerts, tasks, and field updates) that are executed when certain specified conditions are met. These rules automate the process of sending email alerts and SMS alerts, assigning tasks, and updating ...Custom Functions
Custom functions help in automation where procedural logic is required, which cannot be implemented with the default actions such as, Tasks, Webhooks, etc. With custom functions you can automatically update the data in the related Zoho Recruit ...