Date-field Autoresponder
Understanding date-field autoresponder
Date-field based autoresponders are a series of automated messages that are sent to contacts based on the date in the date field associated with them. Wishing customers happy birthdays and anniversaries are common uses for date-field autoresponders. Here, we'll explain how to set up a date-field autoresponder and explore the different scenarios you may encounter while creating one.
How can I use date-field based autoresponders?
- Wish your customers a happy birthday or anniversary.
- Send reminders about membership renewals.
- Remind your customer when their free trial is over.
User Scenario
As the booming metropolis of Duluth, Minnesota continues growing, so does its public library membership. Many of the new members aren't in the habit of returning their books on time yet, so the librarians have set up a date-field autoresponder to help them remember.
Here's how it works: every time a library member checks something out, they are sent an email about the return date. One week before that date, they are sent another message, telling them to make sure they can get their items back on time. Then, two days before the due date, they are sent another reminder, and once again on the due date. If the member still hasn't returned their items, a message is sent out twice a week thereafter with the updated late fees and a message about civic duty and the importance of libraries. It's a rare day that a book goes late in Duluth now.
Create a date-field autoresponder
- From the Navigation Toolbar choose Automation and select Autoresponders.
- Click Create Autoresponder. Mouse over the Date-field autoresponder and click Create.
- Fill in the following information:
- Name the autoresponder for your future reference.
- Select a custom field to associate with your autoresponder. For example it can be a field with your contacts's birth date or date of subscription renewal.
- Select a mailing list that should be associated with your autoresponder. If necessary, you can create a new mailing list.
- Select segment of the mailing list if you want to send messages only to the segmented contacts.
- Set the frequency as to whether you want your autoresponder to be sent just once or recur yearly.
- Click Create.
Date field autoresponder has two views: the timeline view, and the tree view. You can toggle between these two views using the switch in the top-right corner. 

Create the date field series
- Click Create Message button.
- Add message details and content.
- Click Send for Review to send your message to our spam compliance team.
- Once the message has been reviewed, click the Set Delay button. Here you need to define when your message should be sent relative to the date in the date field.
- Click Create Follow-up Message and create the follow-ups in the similar manner.
Click Activate to start sending your messages. Each message's schedule is based on the date in the date field. You can pause and re-enable it any time you need. To stop the whole series you can disable the autoresponder. 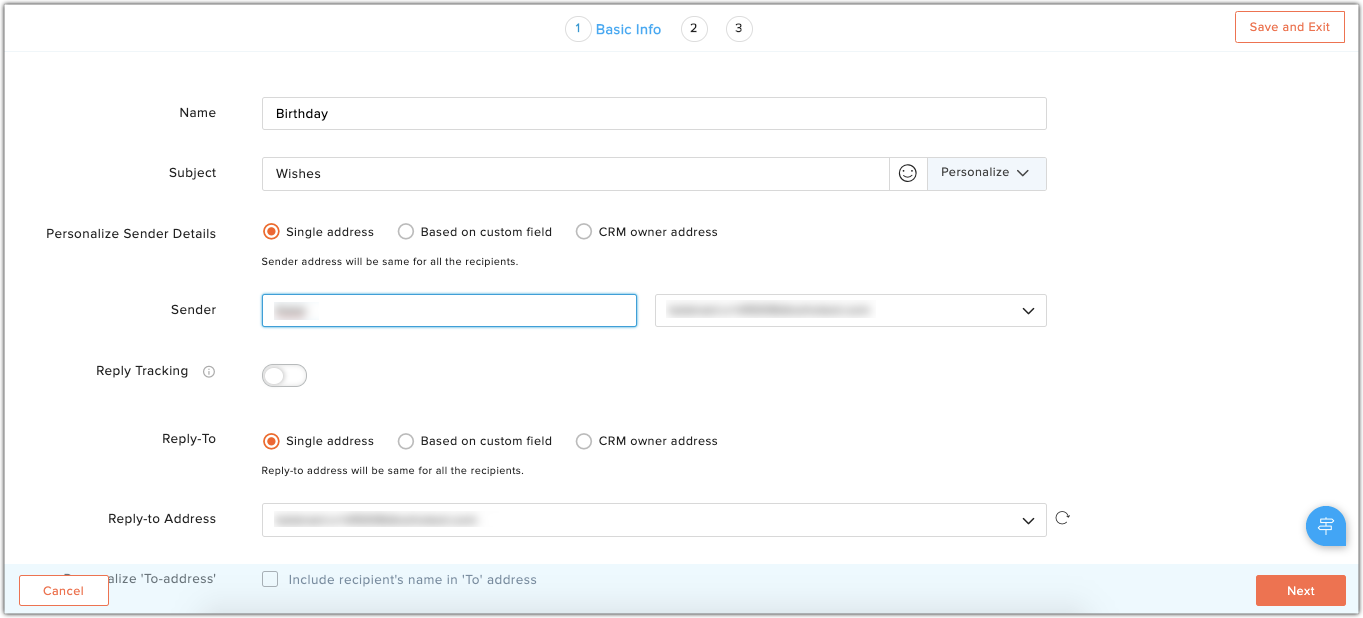
Managing autoresponder messages
To edit the message schedule:
- Click the Edit icon to the right of your message schedule details.
- Select a time to send your message, then save your changes.

Notes:
- Any timing changes may take up to 24 hours to take effect.
- It may take up to 30 minutes from the scheduled delivery time for the autoresponder message to be sent.
- Schedule after one day means your message will be sent exactly 24 hours from the previous message.

To edit an email:
- Click the More icon next to the email you want to edit.
- Select Edit from the list.
- Make the intended changes and click Save and Exit .
Notes:
- Only an email in draft can be edited.
- Any changes in the email content must be sent for another review.

To delete an email:
- Click the More icon next to the email you wish to delete.
- Select the Delete option. A pop-up window will appear asking you to confirm. Click Delete to confirm.
Note: Only an email in draft can be deleted.

To delete a message:
- Click the Delete icon on the right side of your message. A pop-up will appear, asking you to confirm.
- Click Delete to confirm.
Note: Deleting a message will delete all the emails associated with it.

End-of-series action
Once the autoresponder message series comes to an end, you can take further actions on contacts present in the mailing list to which the autoresponder was associated. You can remove contacts from the existing mailing list or add them to a new one.
Configuring End of series actions is as follows:
From the autoresponder summary page, navigate to the End-of-Series section at the bottom of the page.
To remove contacts from the list:
- Click the Configure Now link found in the Remove Contacts section.
- Provide your preference as to when you wish the action to take place (either immediately or scheduled for later).
- Click Save to confirm.
To add contacts to another list:
- Click the Configure Now link found in the Add Contacts section.
- Select a mailing list to add the contacts to. You can also create a new mailing list here.
- Provide your preference as to when you wish the action to take place (either immediately or scheduled for later).
- Click Save to confirm.
Notes: The end-of-series actions' schedule is dependent on the last message of the series
Click the View Reports link to see contacts that were removed from the list or added to a new mailing list. You can pause these actions any time you want and enable it later clicking on the Pause/Enable link.

To filter recipients for messages:
Use criteria to filter the recipients of each message. Criteria can be based on contact information or recipient activity. Only contacts who meet the specified criteria will receive that particular message.
- Navigate to the message that you want to add criteria to.
- In Timeline view: Click the Add criteria to filter recipients link.
- In Tree view: Click the Add criteria icon.
- Choose Contact information or Recipient activity .
- Define the condition by which to filter your contacts.
Notes:
- You cannot filter contacts for the first message of the series.
- You cannot filter contacts by recipient activity before the previous message is sent.


Creating and managing multiple email versions
The date-field autoresponder lets you create multiple emails under one message and have one active at any given time.
To create alternate message content:
- Navigate to the intended message and click Create another version. You'll be redirected to the message creation page.
- Add the message details and the content.
- Click Send for Review to send it to our compliance team.

To manage the alternate content:
After you have created alternate email, it will be listed under your existing content. Click Show more to view all of your message content. You can activate them by clicking the Activate option next to the message content. Other versions will be deactivated automatically.
Sending campaigns to autoresponder opened and clicked recipients
You can send campaigns to recipients who have opened and clicked your autoresponder.
- From the autoresponder timeline, navigate to the Reports section and click Send email button on the top-left corner of the screen.
- Select from the options Opened or Unopened from the drop-down menu.
- Select from the options All messages or Any message from the drop-down menu.
- Click Create .
You can now create the message, configure content and schedule the campaign.
Related Articles
When will a date-field autoresponder trigger?
The messages in a date-field series will be triggered based on the date in the custom date-field associated with the autoresponder.Can I change the custom date field associated with a date-field autoresponder after creating the autoresponder?
Once you've created a date-field autoresponder, you cannot change the date-field. If you want to send the autoresponder according to a different date-field, you can clone the autoresponder and change the parameters as you like.Can I create an autoresponder for more than one date field?
Only one date field can be associated with an autoresponder at a time. If you want to associate the same series with another date field, you can clone the autoresponder and change the parameters as you like.Managing Autoresponder
Clone an autoresponder From the Navigation Toolbar, choose Automation tab and select Autoresponder. Mouseover the autoresponder you wish to clone from the autoresponder lists page. Click the Clone icon in the far-right corner. You can also clone the ...Email Action Autoresponder
Understanding email action autoresponder Gaining and retaining contacts is about creating a personalized experience for your reader. Email-action based autoresponders allow you to send targeted messages and follow up with contacts based on their ...