Designing the microsite
Design a branded microsite that goes with the goal of your event. Apply a theme for the microsite pages that is compatible with mobile devices. Add a logo, media, and favicon to get started on designing your event microsite.
Choose a design for the microsite
A beautifully-designed microsite captivates attendees and entices them to have a look at your event. With Zoho Backstage, you have control over your microsite’s appearance by picking out a theme that best fits you.
- Click the Design tab in the Microsite Builder.
- Click Themes on the left pane.
- Select an option for the microsite from the resulting panel.
- Modify elements in your microsite:
- Modify the Home page header layout by clicking the Settings icon [
] in the left of the header. The Banner layout pop-up will display. Select the best option and click Save.
Note: To revert to the previously saved layout, click the Reset link before saving. - Modify the titles and one-line description text for all the sections in the pages of the microsite. Text displayed in these placeholders are sample text or details that are entered in the Event Details tab in the Microsite Builder. Text that is modified in the design is automatically updated in the Event Details tab.
- Modify the Home page header layout by clicking the Settings icon [

You can change the layout of the Home page header in the Professional, Enterprise, and Ultimate plans.
Set a logo
Set a logo as a symbol or insignia for your event.
- Click the Design tab in the Microsite Builder.
- Click Upload Logo to the left side of the navigation bar.
- Click the Choose image link in the resulting dialog box.
- Select the logo image that you have ready.
- Click Done.
Supported logo formats
JPG JPEG PNG
GIF SVG
Logo size limit
Less than 1MB
Logo dimensions
340x120 pixels at 72dpi
Change the logo
- Hover over the existing logo to the left of the navigation bar in the Design tab.
- Click the Edit icon . The Edit logo dialog box will appear.
- Click the Change button.
- Choose an image and click Select.
Delete the logo
- Hover over the existing logo to the left of the navigation bar in the Design tab.
- Click the Edit icon . The Edit logo dialog box will appear.
- Click the Delete button.
- Click OK in the dialog box that appears.
Note: This action will delete both the main and the alternate logo.
Embed media
Embed event-related media in the header section of the Home page. This will get potential guests interested in your event when they visit the microsite.
- Click the Design tab in the Microsite Builder.
- Click Upload Media.
- Select the Image radio button to embed an image in the header of the Home page.
- Click the Choose Image link below the Image radio button.
- Select a picture associated with the event from the dialog box and click OK.
- Click Done.
- Alternatively, you can select the Video URL radio button to embed a video in the header of the Home page. This video should be a public YouTube or Zoho Docs link and will load with the audio when played.
- Enter the URL of the video in the text box below the Video URL radio button.
- Click Done.
Supported media formats |
JPG JPEG PNG
GIF SVG
Image media size limit
Less than 5MB
Image media dimensions
720x360 pixels at 72dpi
Supported video media formats
YouTube Zoho Docs
Manage link settings
Decide how you want the links to appear in the navigation bar. You can modify the link's name, hide a link or even connect different pages such as your organization's website or blog to the event microsite and increase awareness of your brand by adding external links.
To edit a link
- Click the Settings icon [
] below the links in the navigation bar. The Link settings pop-up will appear.
- Click
to the right of the link and choose Edit from the dropdown.
- Enter a new name for the link that will be displayed in the navigation bar of the microsite.
- Choose Page from the Linking options dropdown to link to a page.
- Select a page from the Select page dropdown.
- Click Save.

Note: Editing options are limited for the Home and Login pages in the navigation bar:
- The Login page cannot be renamed in the navigation bar.
- The Home and Login pages cannot have their URL renamed.
- The Home and Login pages cannot be hidden.
To change the order of links
- Click the Settings icon [
] below the links in the navigation bar. The Link settings pop-up will display.
- Click and drag
to move pages up or down the list.
To hide a link
- Click the Settings icon [
] below the links in the navigation bar. The Link settings pop-up will display.
- Click
to the right of the link you want to hide.
To add an external link
- Click the Settings icon [
] present below the links in the navigation bar. The Link settings pop-up will display.
- Click the Add link option.
- Enter the name of the page or website the link will lead to in the Link title textbox. This name will be displayed in the navigation bar of the microsite.
- Select External URL from the Linking options dropdown.
- Paste the URL of the page you want to link to the microsite in the Enter URL textbox.
- Select the Open in new tab checkbox if you want the page to be opened in a separate tab.
- Click the Save button.
To delete a link
- Click the Settings icon [
- Click
Note: Only the link will be deleted. You can access the page from the Pages tab in the left pane.Customize the header background
Add a background image or video in the header section of the Home page that will display in the microsite and the attendee mobile app. This will let you show potential guests a visual preview of your event.
- Click the Design tab in the Microsite Builder.
- Click
to the left of any header. The Edit Background dialog box will appear.
- Select the Website tab.
- Select the Image Background radio button to set an image as the background.
- Select an image from the design library or a cloud service
- Click Done
- Resize the image as needed in the Image cropper dialog box. You can select the Use original image checkbox if you don't want to make any changes
- Click Done
- Alternatively, select the Video Background URL radio button to set a video as the background.
- Paste a YouTube video URL or Zoho Docs public video URL
- Click Done.
Supported image formats
JPG JPEG PNG
GIF SVG
Image size limit
Less than 5MB
Image dimensions
1440x760 pixels at 72dpi
Supported video formats
YouTube Zoho Docs
To set an alternate background for mobile browser
- Select the Website tab.
- Select the Use an alternate background for the mobile web checkbox if you want to have a different background for your mobile browser.
- Click the Choose image link that appears. Then select a different image as the background.
Note: The mobile browser supports only an image background.To set an alternate background for the attendee app 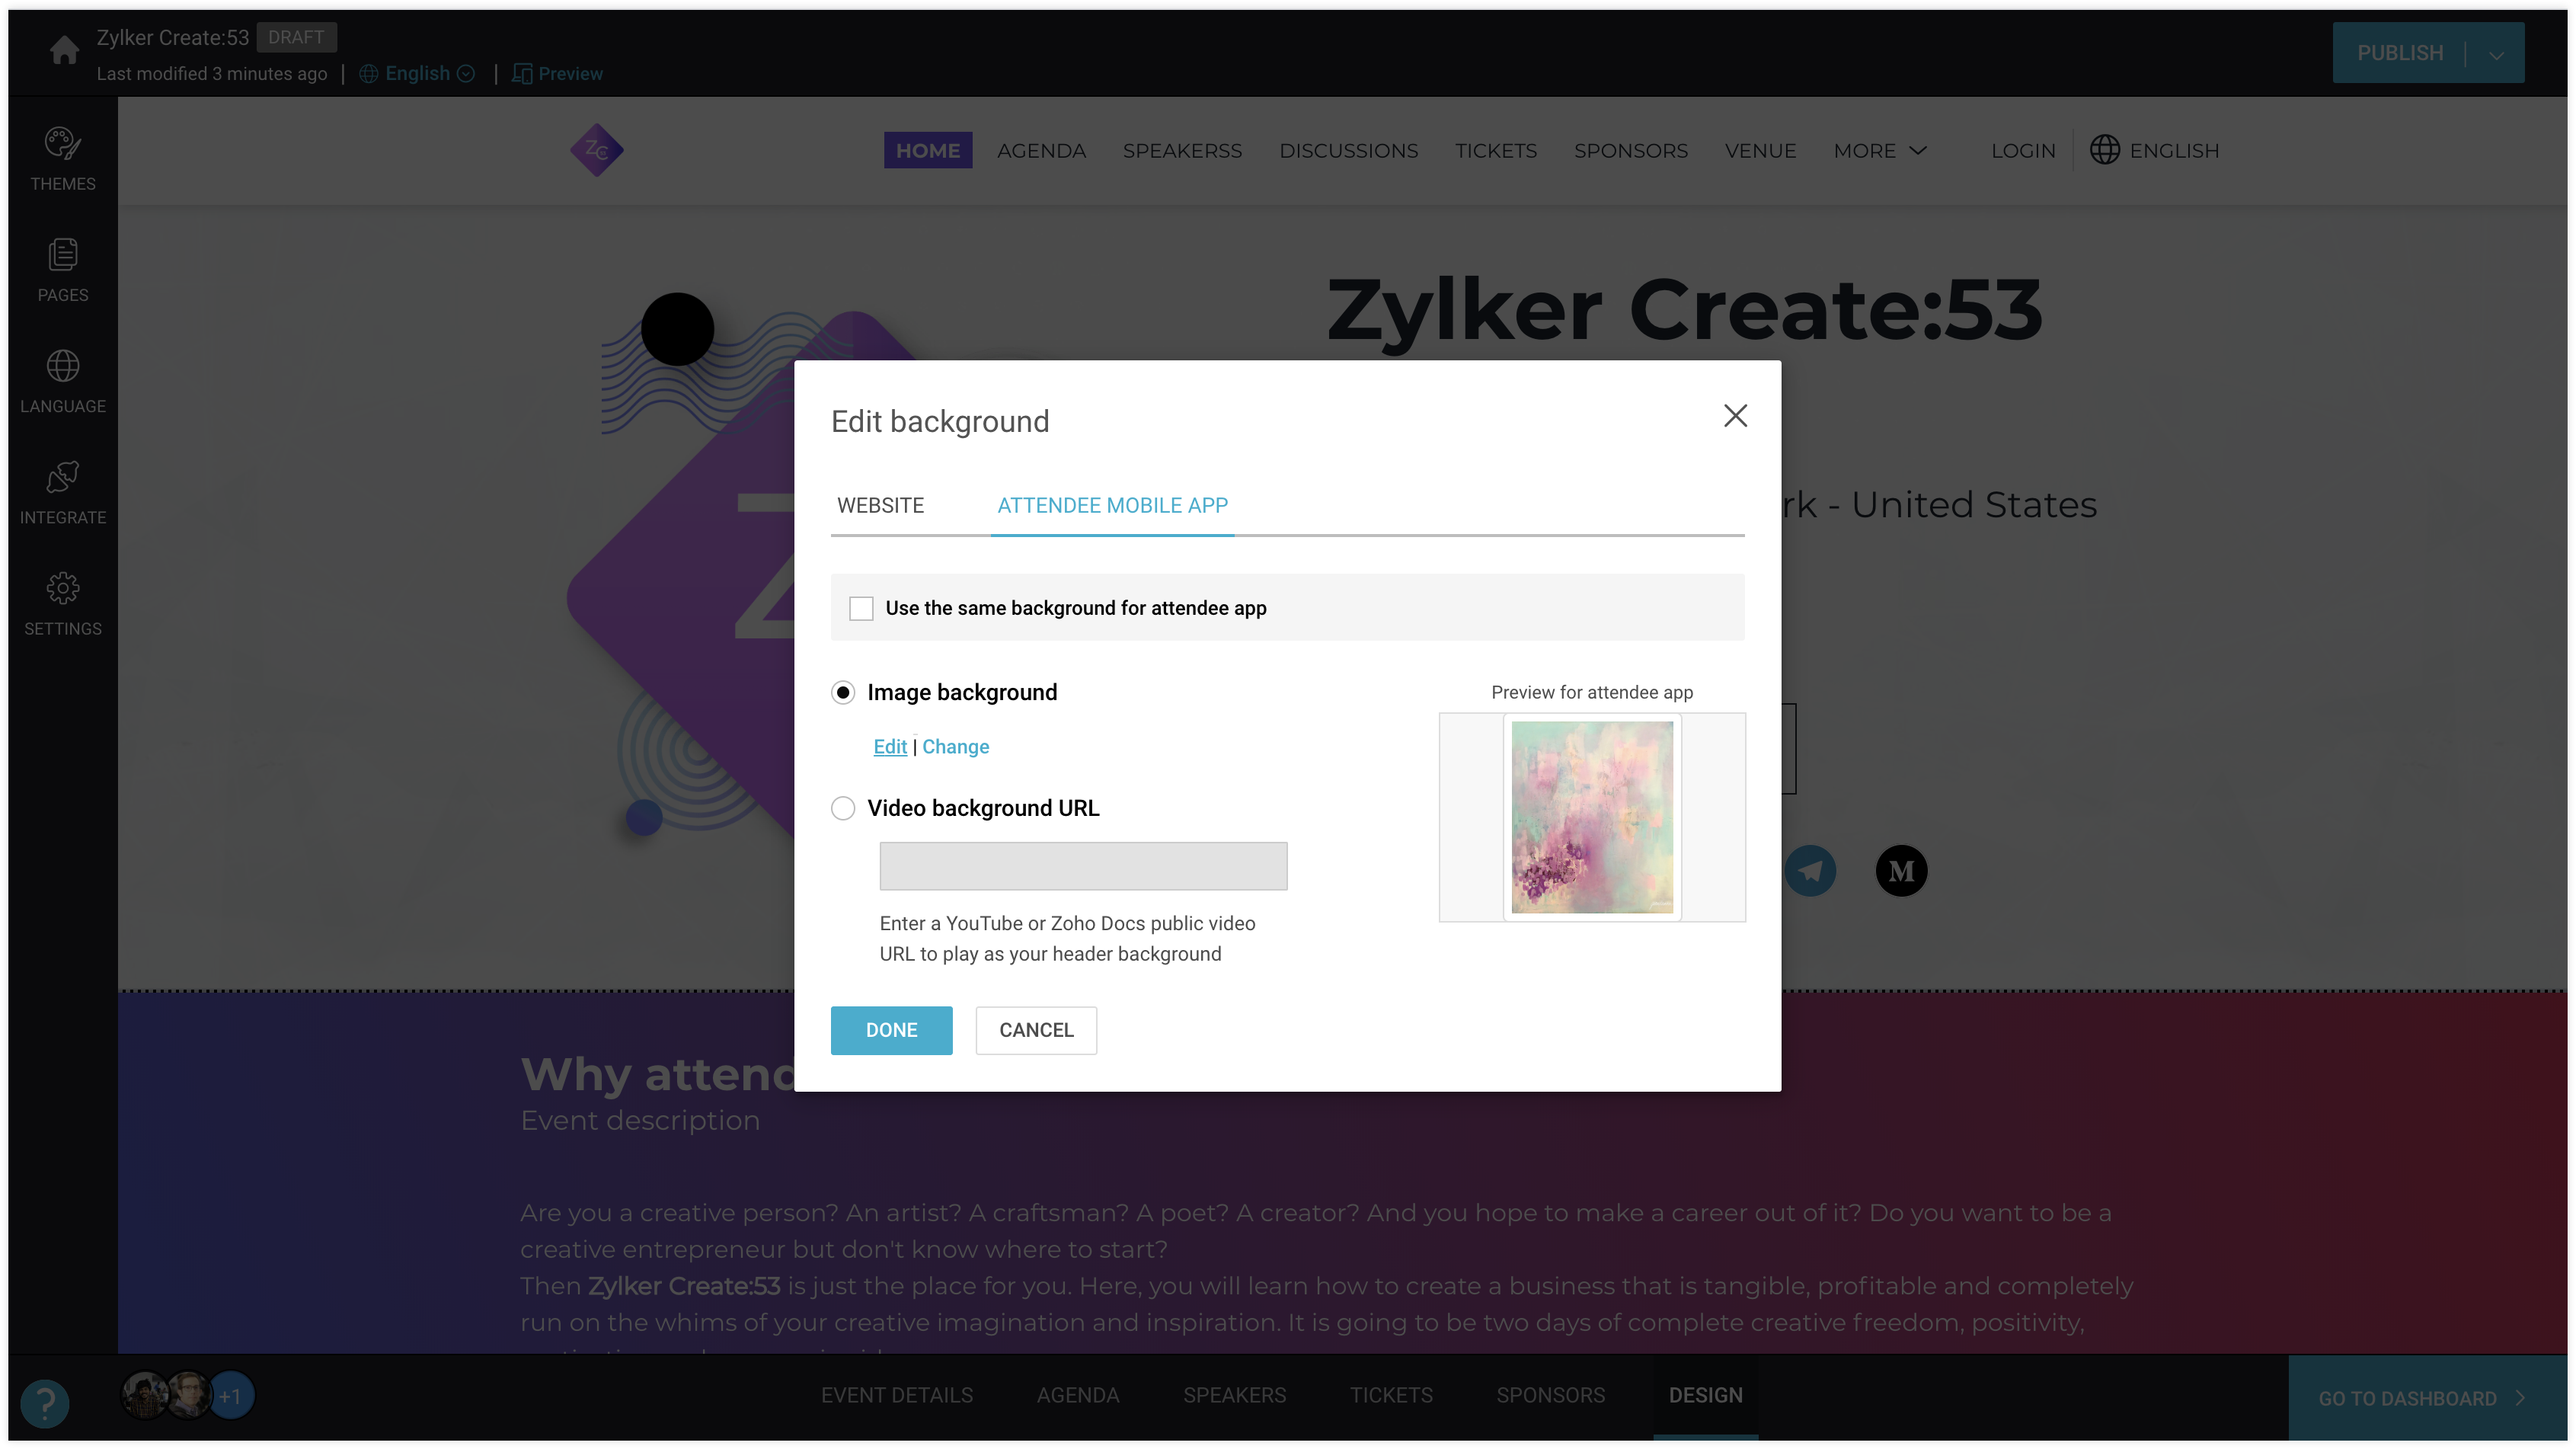
- Select the Attendee app tab to set a background for the section in the attendee app.
- Select the Use same background for attendee app checkbox if you want to use the same one.
- Alternatively, set a different background for the attendee app.
- Select the Image Background radio button if you want to set an image as the background. Select a different image from the Choose image dialog box that appears.
- Select the Video Background URL radio button if you want to set an video as the background and paste the video's URL.
- Click the Done button.
Note: To restore the default section background, hover over the header of the Home page and click the Reset to default icon [ Customize the section background
Add more flair to your microsite with custom backgrounds for the sections. You can also choose to have different backgrounds for the mobile browser and attendee app.
- Click the Design tab in the Microsite Builder.
- Click the Move Up [
] or the Move Down icons [
] to reorder sections.
- Hover over a particular section and click the Hide icon [
] to hide it.
- Click
to the left of any section. The Edit Background dialog box will appear.
- Select the Website tab
- Select the Image Background radio button to set an image as the background.
- Select an image from the design library or a cloud service.
- Click Done.
- Resize the image as needed in the Image cropper dialog box. You can select the Use original image checkbox if you don't want to make any changes.
- Click Done.
Supported image formats
JPG JPEG PNG
GIF SVG
Image size limit
Less than 5MB
Image dimensions
1440x760 pixels at 72dpi
JPG JPEG PNG
To set an alternate background for the mobile browser
- Click
to the left of any section. The Edit Background dialog box will appear.
- Select the Website tab.
- Select the Use an alternate background for the mobile web checkbox if you want to have a different background for your mobile browser.
- Click the Choose image link that appears. then select a different image as the background.
To set an alternate background for the attendee app
- Select the Attendee app tab.
- Select the Use same background for attendee app checkbox if you want to use the same one.
- Alternatively, select the Choose image link if you want to have a different background. Select a different image from the Choose image dialog box that appears.
- Click the Done button.
Set a favicon
Set a favicon to project your event brand. This is a small graphic will be displayed in the links bar, on the browser tab, in the bookmark list, and in the address bar.
- Click the Design tab in the Microsite Builder.
- Click the Settings button on the left pane. The Settings panel will be displayed.
- Click the Favicon option.
- Click the Upload link and select an image from the dialog box. You can modify or delete a favicon by performing the above steps again. Click the Change or Remove button in the Settings panel respectively.
Supported image formats
JPG JPEG PNG
ICO
Image size limit
Less than 256KB
Image dimensions
16x16 pixels at 72dpi
Related Articles
Managing microsite settings
Manage your microsite settings to control how people view your event microsite. Set search visibility preferences Increasing the visibility of your event's microsite and having it appear in multiple places will help prospective attendees find your ...Conducting an online event
Host your event digitally, and have attendees participate in the session in real-time from anywhere in the world. Add details for the event, such as what it's about, what the agenda is, and who the speakers are. You can also sell tickets and get ...Creating an event
An event is a good chance to help people learn about a product, support a cause, or talk about your brand. With your Zoho Backstage account and portal ready, it's time to plan your event. Entering event details Start creating your event by providing ...Zoho Backstage Integration
Zoho Backstage is an online event management software which allows you to organize meetings, trade shows, classroom trainings, and more. Integrating Zoho Backstage with CRM allows you to create and manage events in Zoho Backstage from within Zoho ...Blueprint
Create a mirror image of the entire business process with Blueprint Help guide Blueprint - An Overview Designing a Blueprint Executing a Blueprint