Explore Settings
Bigin has various functions which can be configured by administrators from the Settings menu.
Access the Settings menu
The Settings menu can be accessed by clicking the gear icon  in the top right of your window. All the features and Configurations in Bigin are listed on the left and you can select and customize them according to your business needs. The menu contains:
Users and control: Allows you to add users, create roles, and profiles and manage compliance settings.
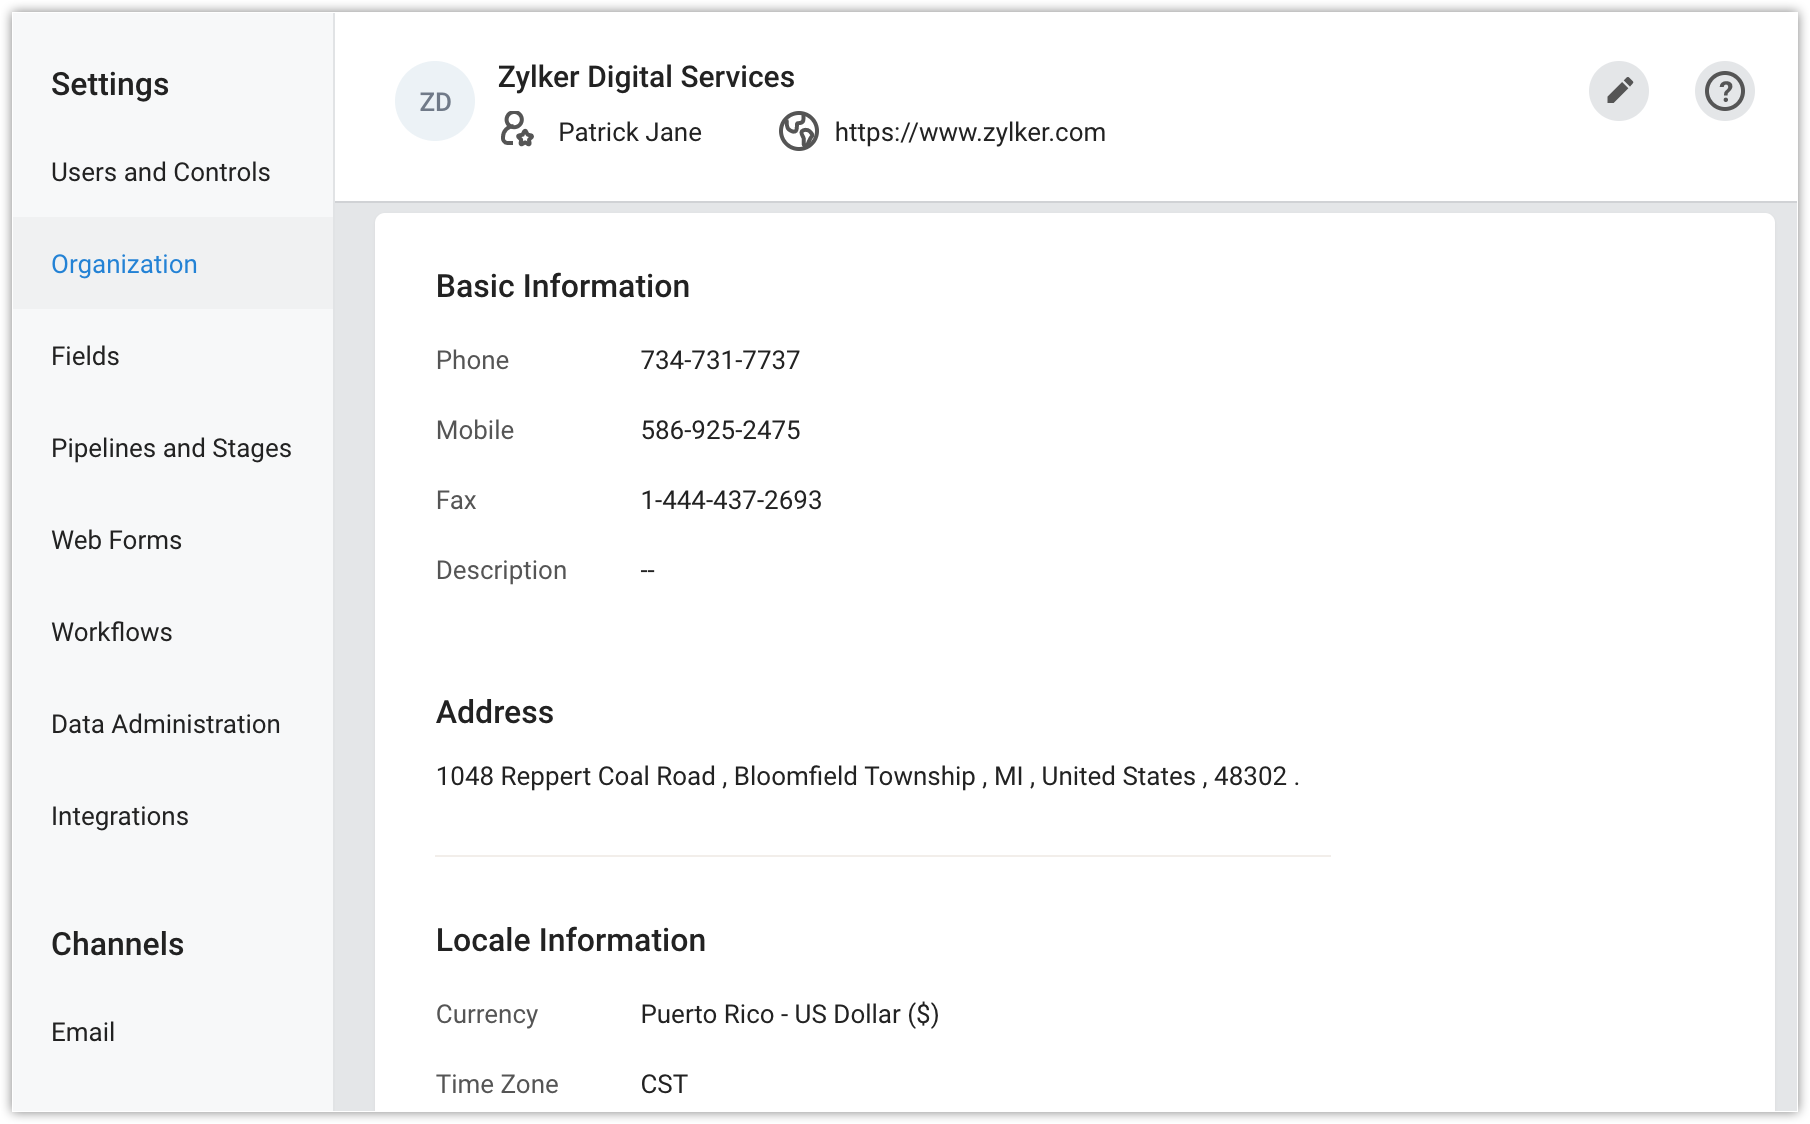
Organization: Here details about your organization can be specified. Information such as phone, fax, address, and locale information can be added.
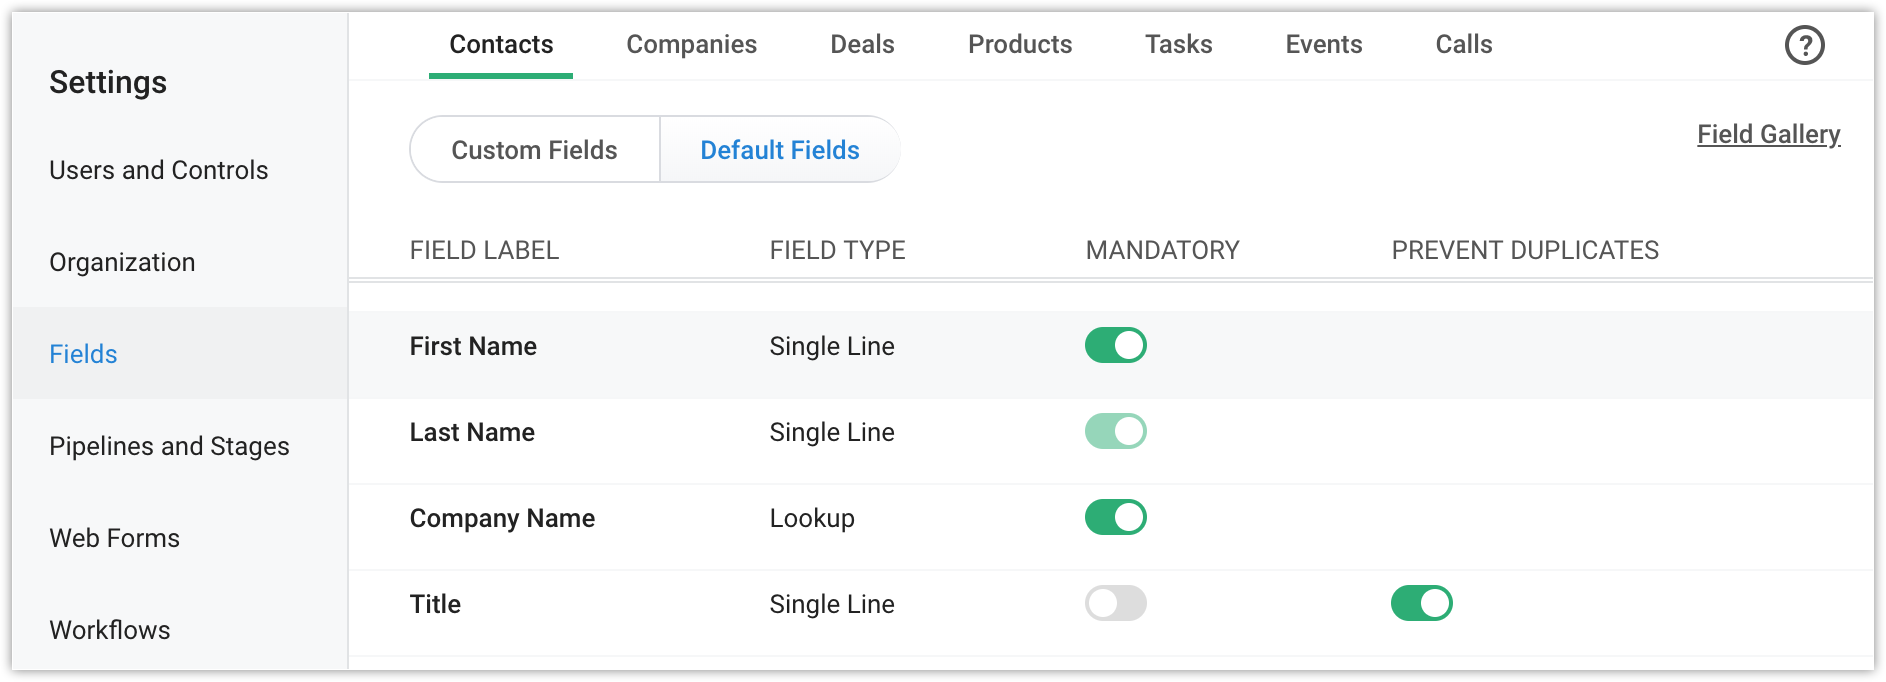
Fields: A list of default and custom fields available in a module will be displayed. You can further add custom fields, mark a field as mandatory and unique to prevent duplicate record entries.
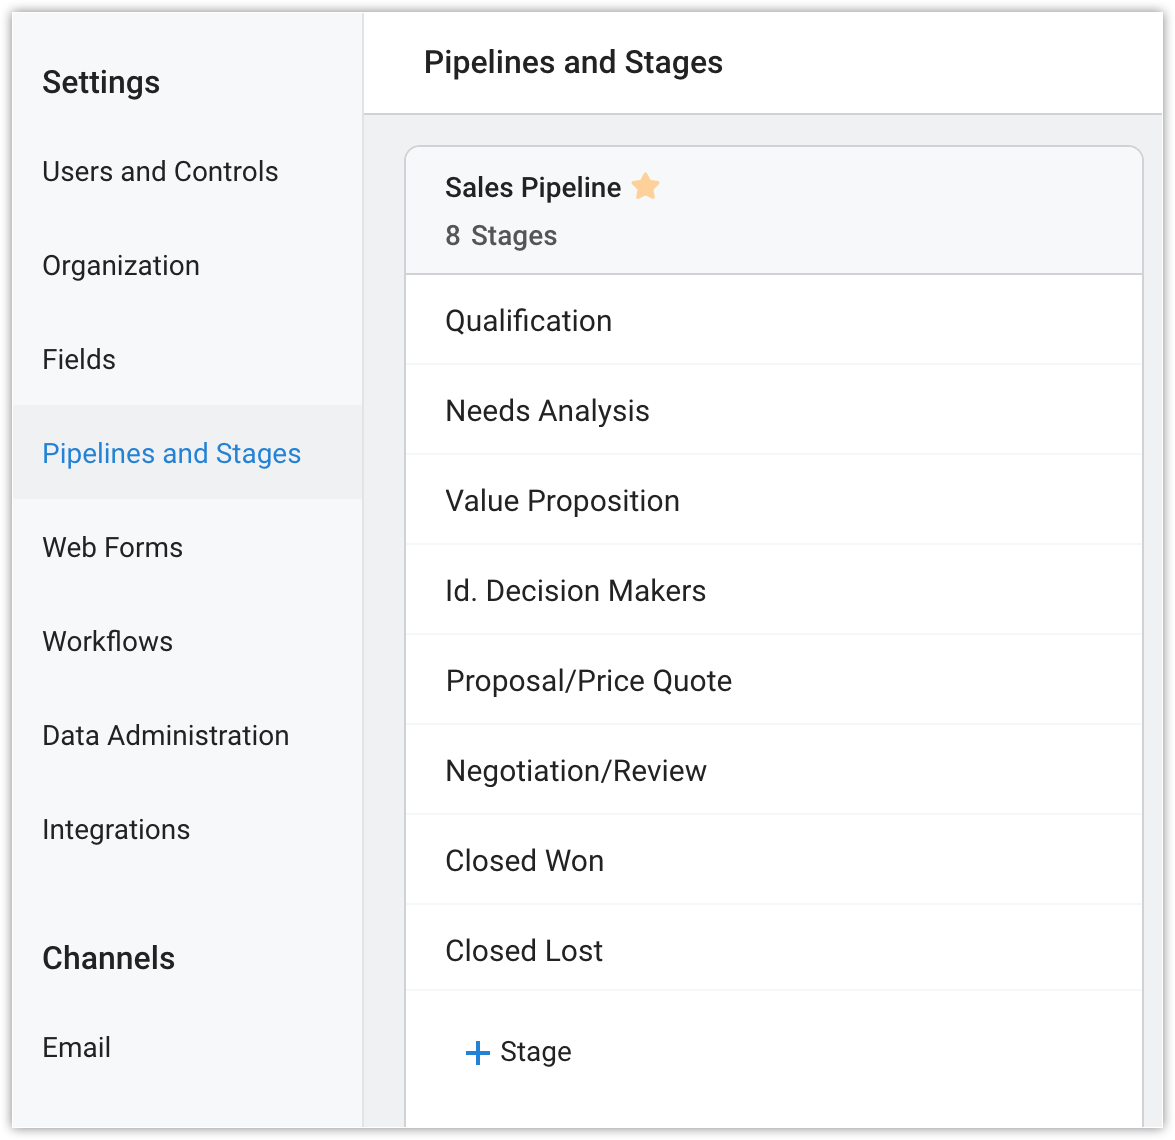
Pipelines and Stages: Create, modify, and manage the various sales pipelines followed by your organization.
Web form: Design a webform and embed in it your webpage. This allows you to capture prospects as Contacts in your Bigin account upon submission.
Workflows: Automate the actions when records meet the criteria that you have specified. For example, when a new contact is added, an email notification can be sent to the record owner and a task to follow up with the contact can be assigned to take place automatically.
Data Administration: Manage the data present in your Bigin account. You can view the history of records imported into your account, export records, schedule/download a backup of your data, view all the actions carried out from audit logs, manage your recycle bin, and monitor the storage utilized.
Integration: Integrate third-party applications with your Bigin account.
Channels
Set up communication channels for staying in touch with your customer.
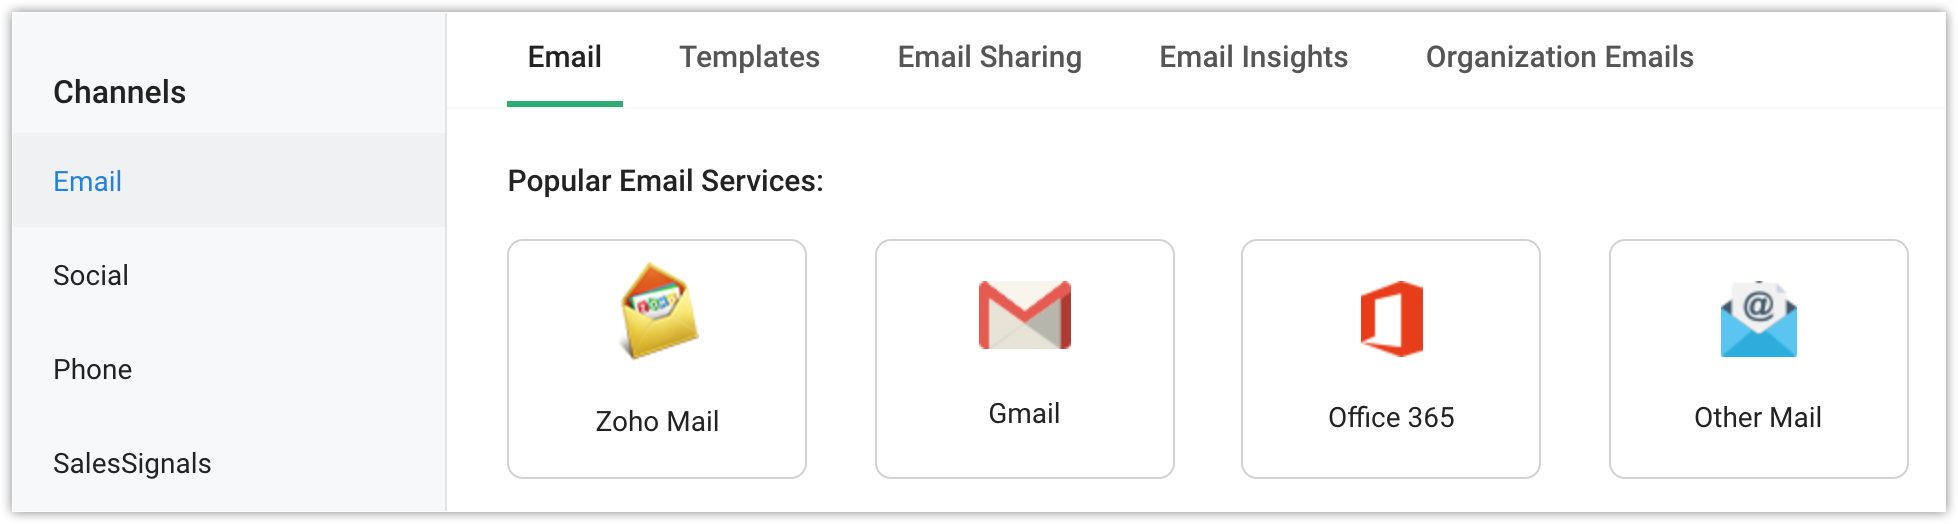
Email: Integrate your email to send, receive, and stay on top emails with your customers. You can integrate with your Zoho Mail, Gmail, Office 365, or other mail account that you have. You can also create email templates and send it to a bunch of your customers.
Social: Add your twitter account and be informed whenever your customers are tweeting about your organization.
Phone: Set up your phone and make calls to your customers with a single click. Purchase a number and say goodbye to the hardware phone that you had been used for so long.
SalesSignal: Be notified when any interaction takes place between you and your customers across various channels.
Related Articles
Org settings
Configuration Update Portal Logo Click in the top band. Navigate to Portal Configuration > Org Settings > Configuration > Portal Settings tab. Click the Upload button. Click Choose File and select an image from your local computer. Click Upload. You ...Explore your Account
Take a screen tour to know your CRM display better. Home Tab When you open your Zoho CRM account, the first screen that you see is the home page. Here, you can take a quick glance at the progress of your CRM activities. It is a dashboard that ...How to configure notification settings
Notifications consists of two parts: Campaign settings and Mailing lists. You can receive timely notifications about your campaigns and mailing lists by configuring the respective notification settings. This way, you can be updated on the progress ...Managing Zoho Desk Settings in the Android App
Be it aesthetic appearance or user, product, project, or customer requirement, the need for change is unending. Hence, we at Zoho Desk, understand the need for providing "Settings" as an option to provide users the ability to make some changes to ...Settings
How do I tell my audience about the Viewer app? 1) Visit the Settings tab. 2) Click > Promote Audience app on the Settings page. 3) Promote the app by: Using the printable banners. Sharing the link on social media. Embedding the code on your web ...