Generating Invoices
An Invoice is a document issued to your clients, detailing out the client name, job details, working hours of temps and much more. It lists the individual temp workers, their duration for a job, and the amount payable for each of them.
How do I setup books integration?
Getting started with setting up your books integration with your account has three initial criteria to be considered.
a. New user to Zoho.
b. Existing user of Zoho Invoice and new to Zoho Books.
c. Existing user of Zoho Books and Zoho Invoice.
- Log into your Workerly account with your credentials.
- In the top right of your account, click Setup > Extensions & APIs > Zoho.
- If you're a new user to both Zoho books and Zoho Invoice, the system will start creating your account for you in Zoho Books as soon as you sign up for Zoho Workerly. Click Manage in the Zoho Books integration widget.
- If you have an account in Zoho Books or Zoho Invoice, you need to go to the Setup page and configure the integration.
- You can now setup your account portal name and the permissions for all the users/agents added in your account.
Case 1: If you're a new user to both Zoho books and Zoho Invoice, the system will start creating your account for you as soon as you sign up for Zoho Workerly. Go to Setup > Extensions & APIs > Zoho and click Manage in the Zoho Books integration widget.
Case 2: If you have an account in Zoho Books or Zoho Invoice, you need to go to the Setup page and configure the integration. Click setup now and your account portal name and the permissions for all the users/agents added in your account.
Case 3: If you are an existing Invoice user, but do not have a Zoho Books account, you'll have an option to convert to Zoho Books.
To create an account from Zoho Invoice:
1. Navigate to Setup > Extensions & APIs > Zoho. You'll be prompted to create an account in Zoho Books.
2. Click Ok, and you'll be taken to the Zoho Invoice page where you can upgrade your account by moving all your organization data.
Setting up portal name and permissions
Once you select manage button, you'll see options to setup your portal and give permissions to agents in your account. 
You can edit the portal name however you want it to be and click save. Going forward, clicking on the Permissions tab will allow you to give access to agents in your account. 
How can I generate Invoice?
Zoho Workerly allows you to generate Invoices for all Timesheets that have been approved by your clients. Once approved, you can generate Invoices from one of the three modules--Jobs, Clients, Invoices.
Following are the steps to generate an invoice from the Jobs module:
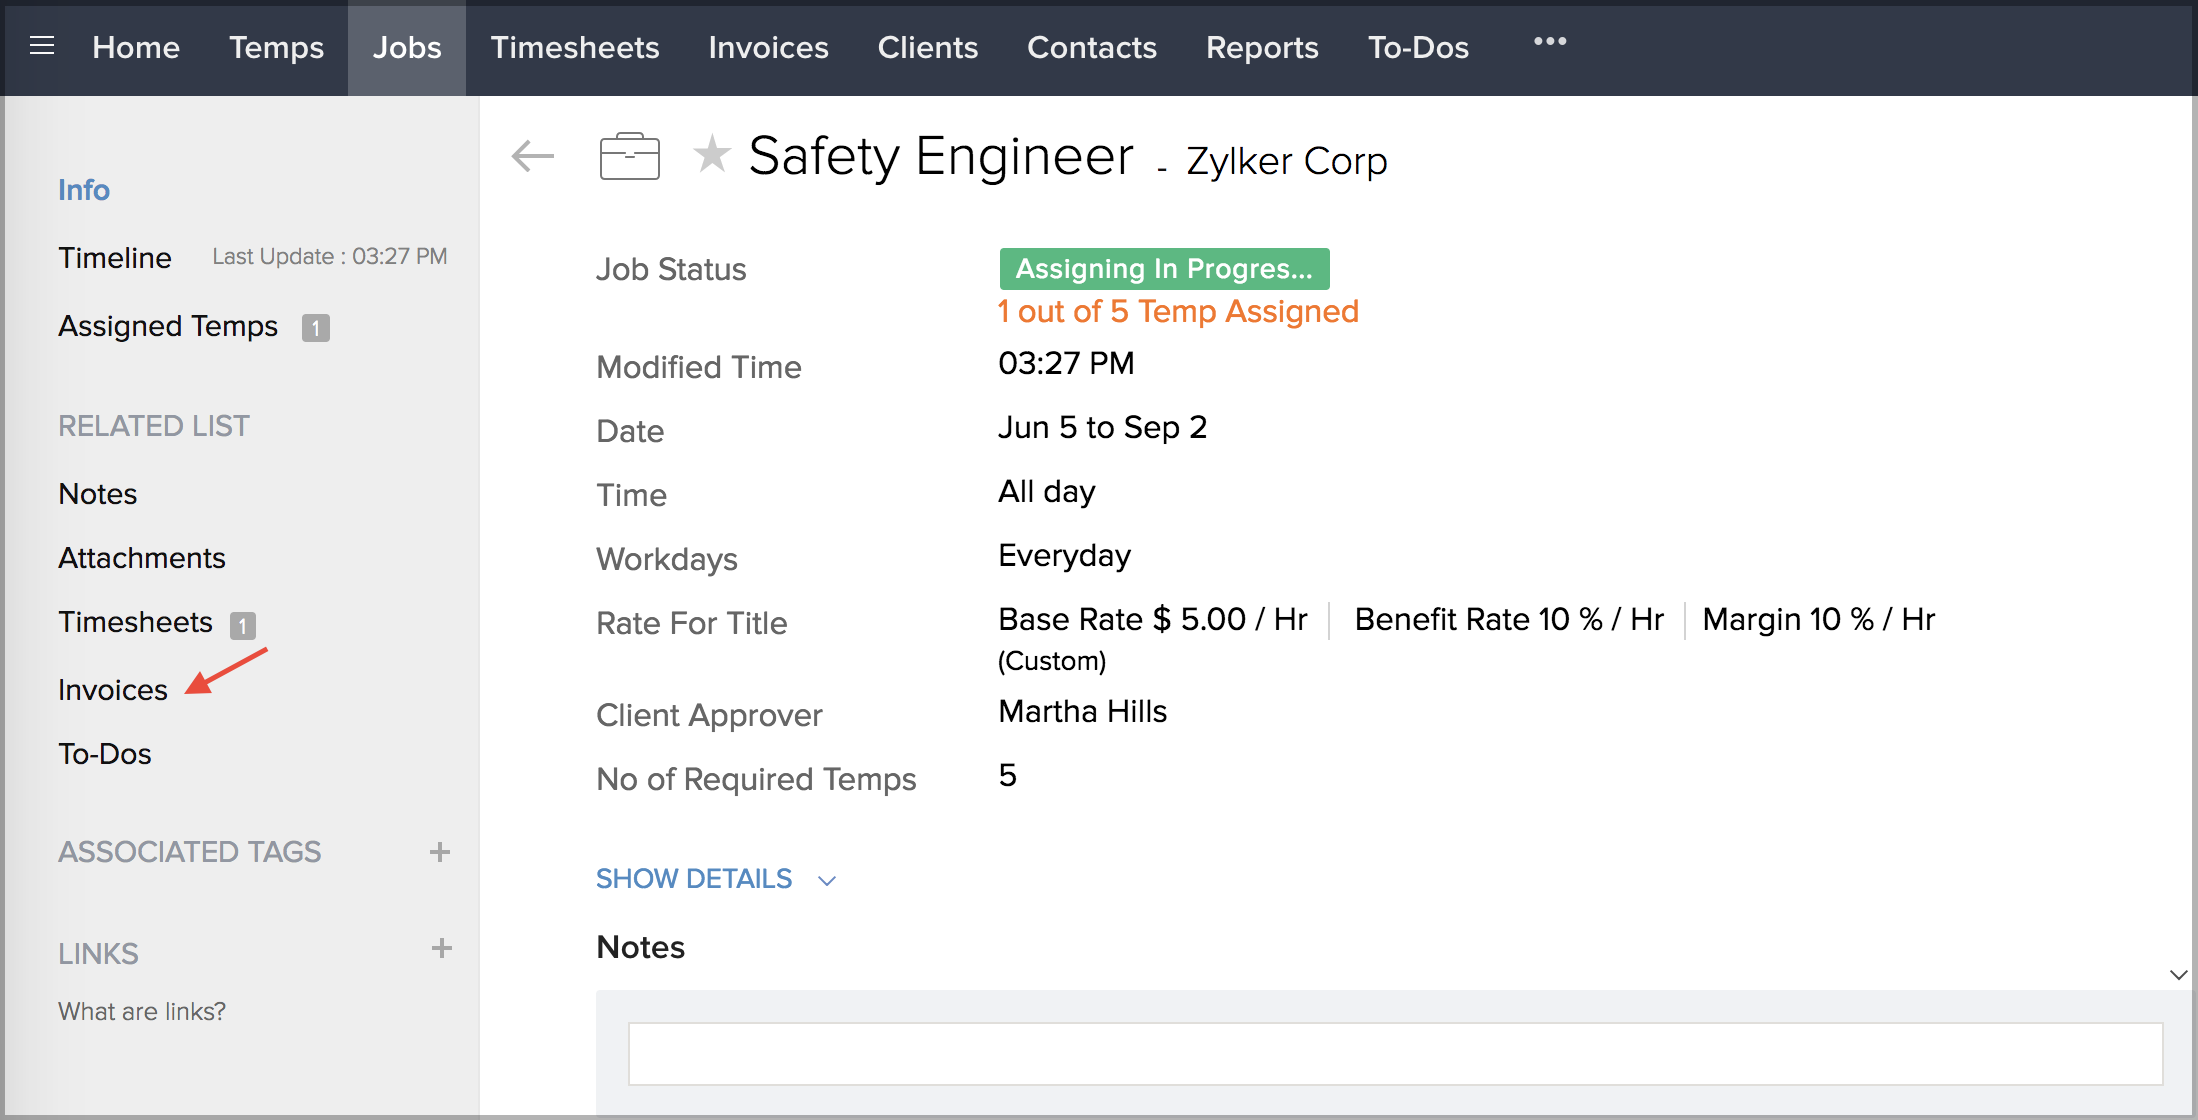
- Naviate to Jobs module at the top of your screen.
- In the Related list at the left side, you will find the invoice option.

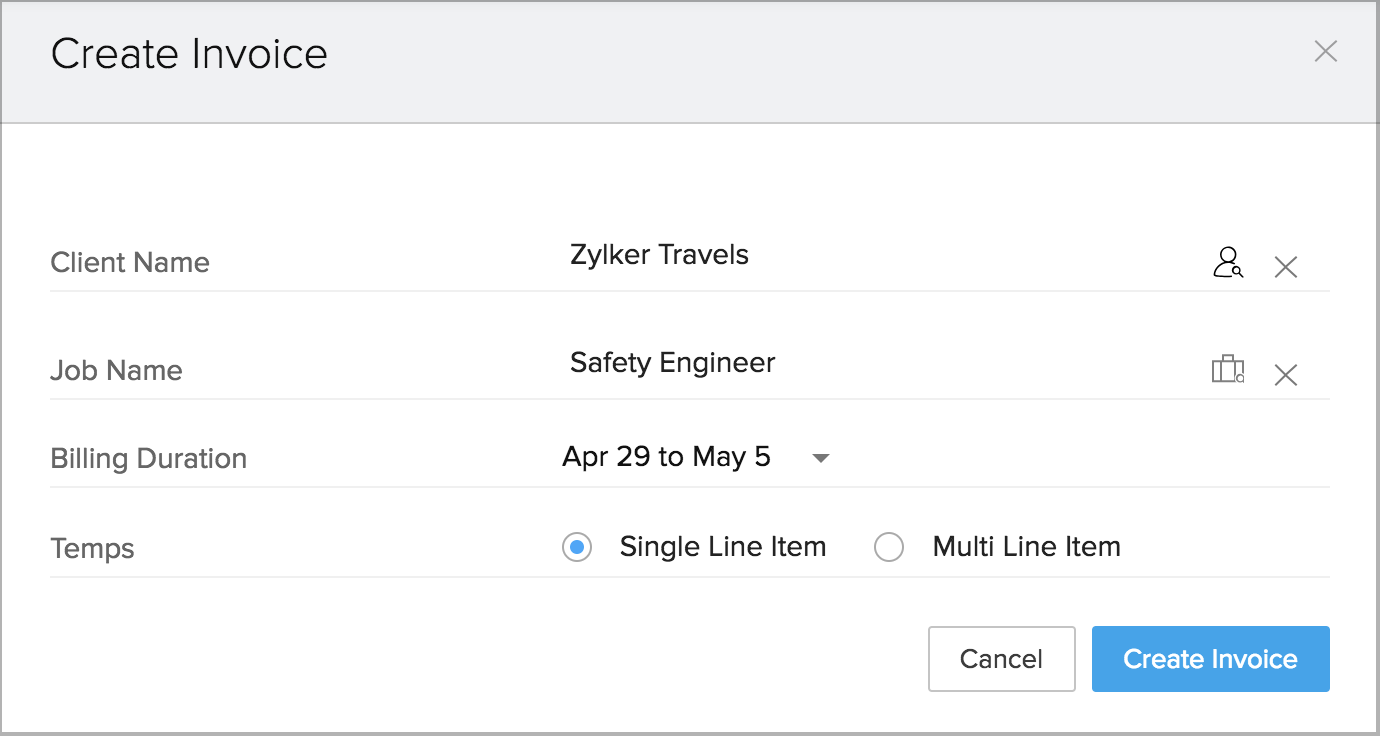
- Click Invoice and give the Billing Duration.

- Select Create Invoice

Note:
- If you wish to generate invoice with the selected work hours as one single entry, choose Single Line Item.
- If you wish to list out the work hours as individual entries, choose Multi Line Item.
Actions to be done from the Invoices module:
- Login to your Zoho Workerly account and navigate to the Invoices module
- You can view the list of invoices that you have already raised.
- To create a new one, click +New for the timesheets that are approved by your clients.
Related Articles
Creating Invoices
In Zoho CRM, you can create invoices by entering data in the Invoice details form. Note Some of the standard fields may not be visible or editable depending on your organization business process. In case you want to add or modify fields, please ...Working with Invoices
Once the sales stage reaches its final phase you may start working on the payment procedure. In this regard an Invoice plays a vital role, which is important for both Sales and Accounting purposes. An invoice is a bill issued by the vendor to the ...Standard Fields in Invoices
Following are the list of Zoho defined standard fields available in the Invoices module: Field Name Description Data type Maximum Limit Invoice Owner Select the name of the user to whom the invoice is assigned. Lookup Subject Specify the name of ...How do I download all my invoices?
You can view your payment history and download the invoices in Zoho Sprints. Select your Profile in the upper-right corner. Click Subscription < Change. Select the drop-down in the upper-right corner to the left of your profile. Select Your Store ...Generating Reports
Introduction You can create new module-specific reports linking some of the other cross-functional modules. For example, you can create a report in the accounts module linking other modules such as Contacts, Job Openings, and others. Types of Report ...