How do I send email invites for my survey from within Zoho Survey?
Send your survey's link to your email lists within Zoho Survey, without having to switch a tab. You can also track the responses and see the details of opened, unopened, bounced, and unsubscribed invites.
Note: You can send up to 3000 email invites per day with a maximum of 1000 email invites for integrated apps (Eventbrite, Zendesk, Shopify) per campaign and 500 email invites for Zoho Survey email distribution. Your total email invites per month will be 60000. To send to a larger client list, you can use Zoho Campaigns, which is integrated with Zoho Survey.
Read on our email distribution terms and conditions here.
To create an email within Zoho Survey:
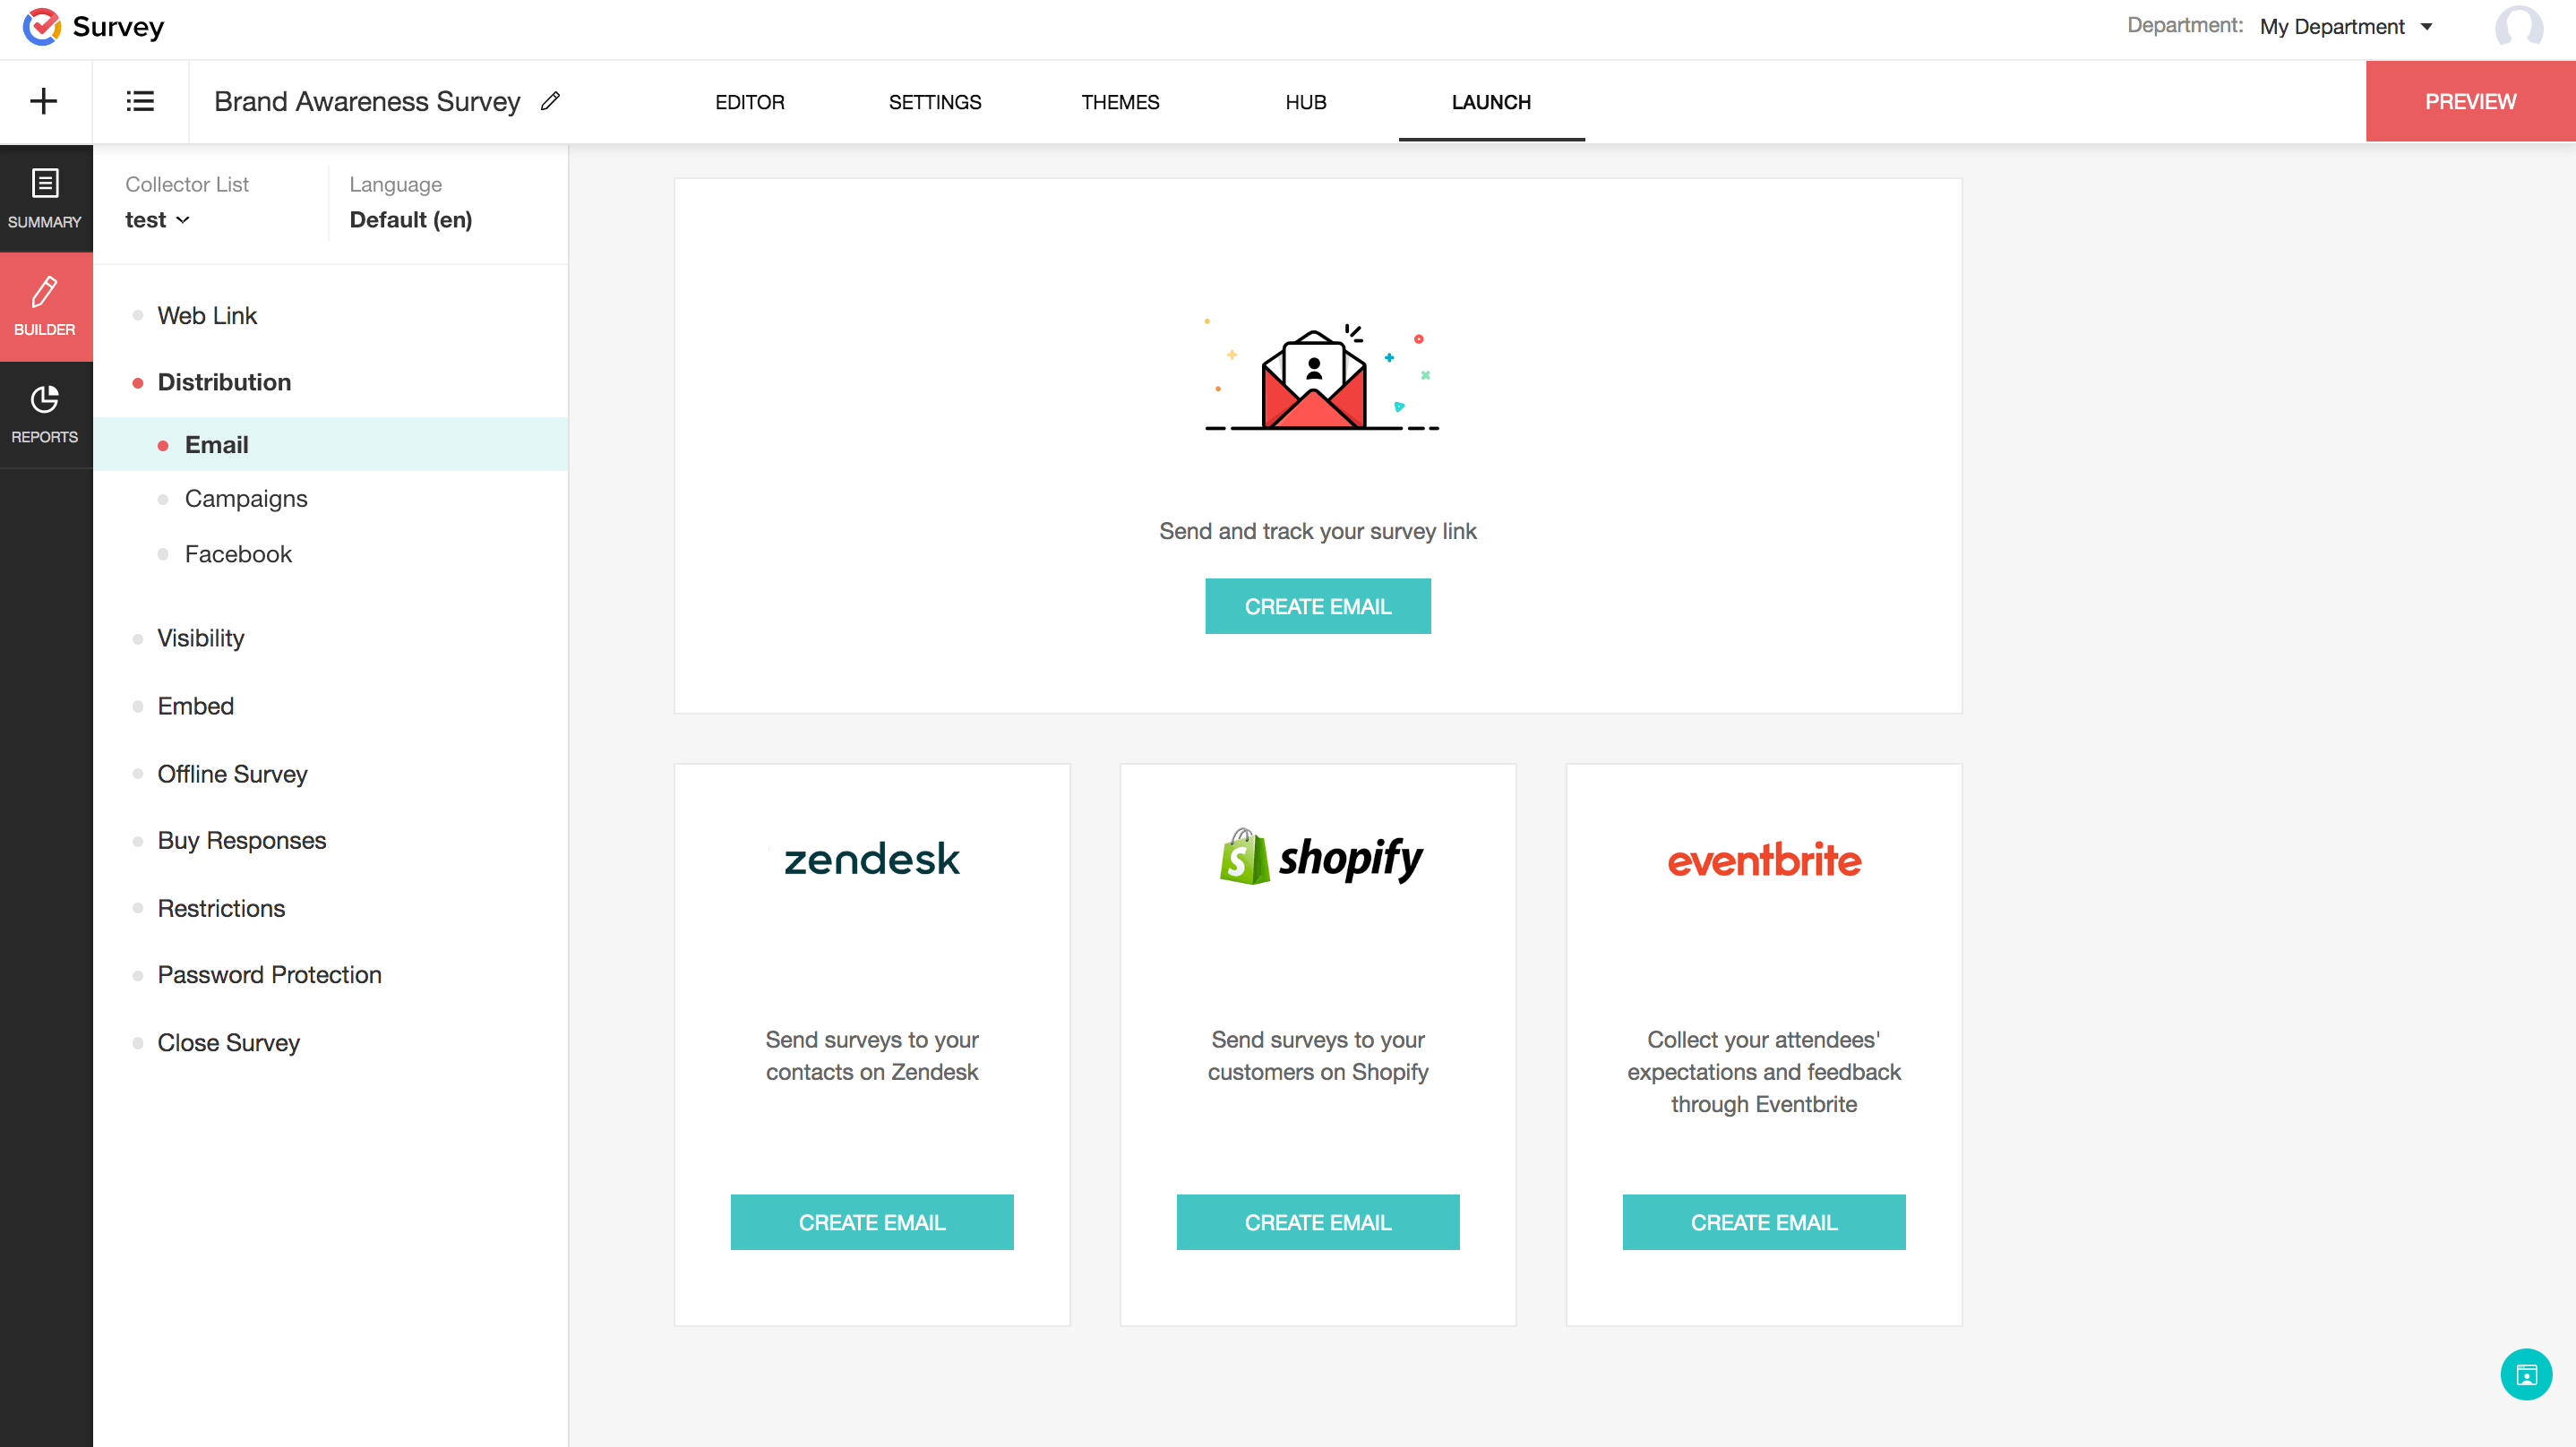
- Go to the Launch tab.

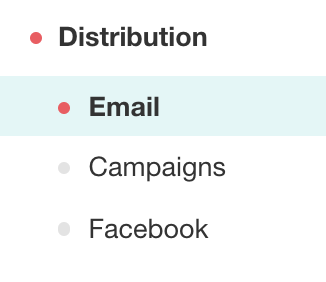
- Click Distribution on the left pane. You can access this only after you publish the survey. The email distribution option is the default selection.
- Click Create Email to send and track your survey link. If you have already created one before, click Create New. You can also, send surveys through Zendesk, Shopify, and Eventbrite.


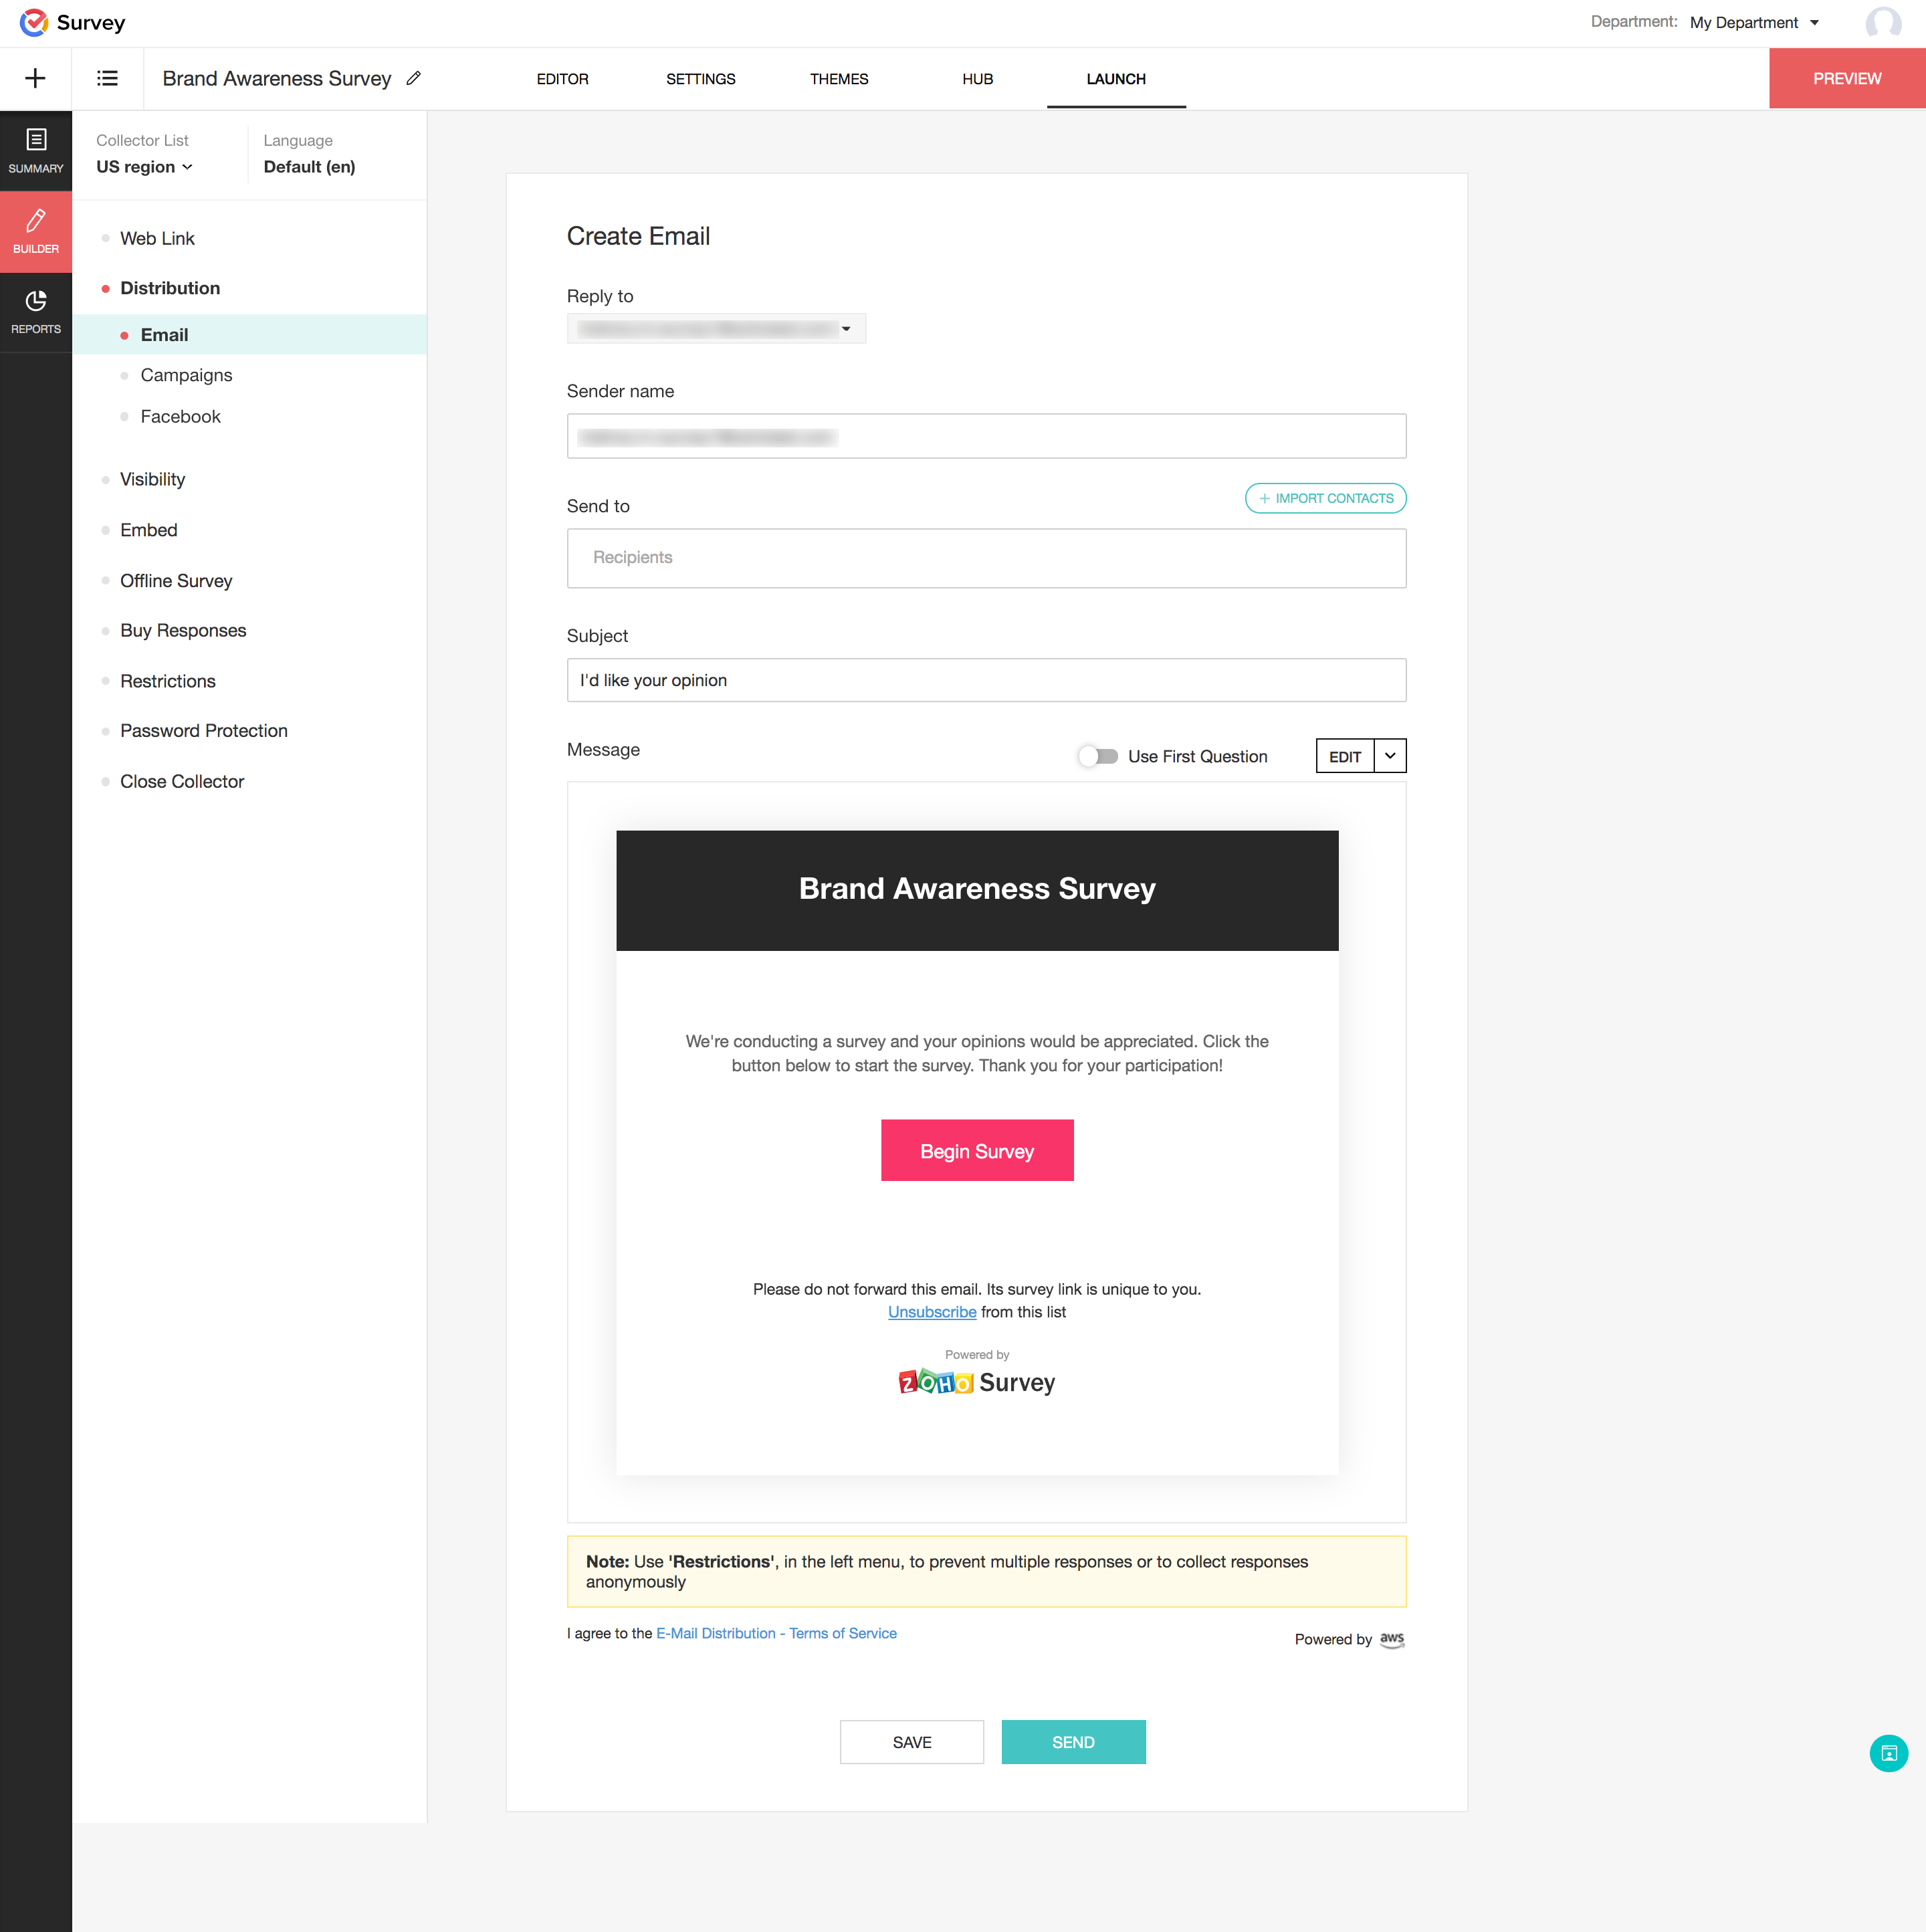
- Click the email address displayed in the Reply to box if you want to change the default 'from' email address.
- Type the name of the sender in the Sender name field.
- Type the recipients' email addresses in the Send to box.
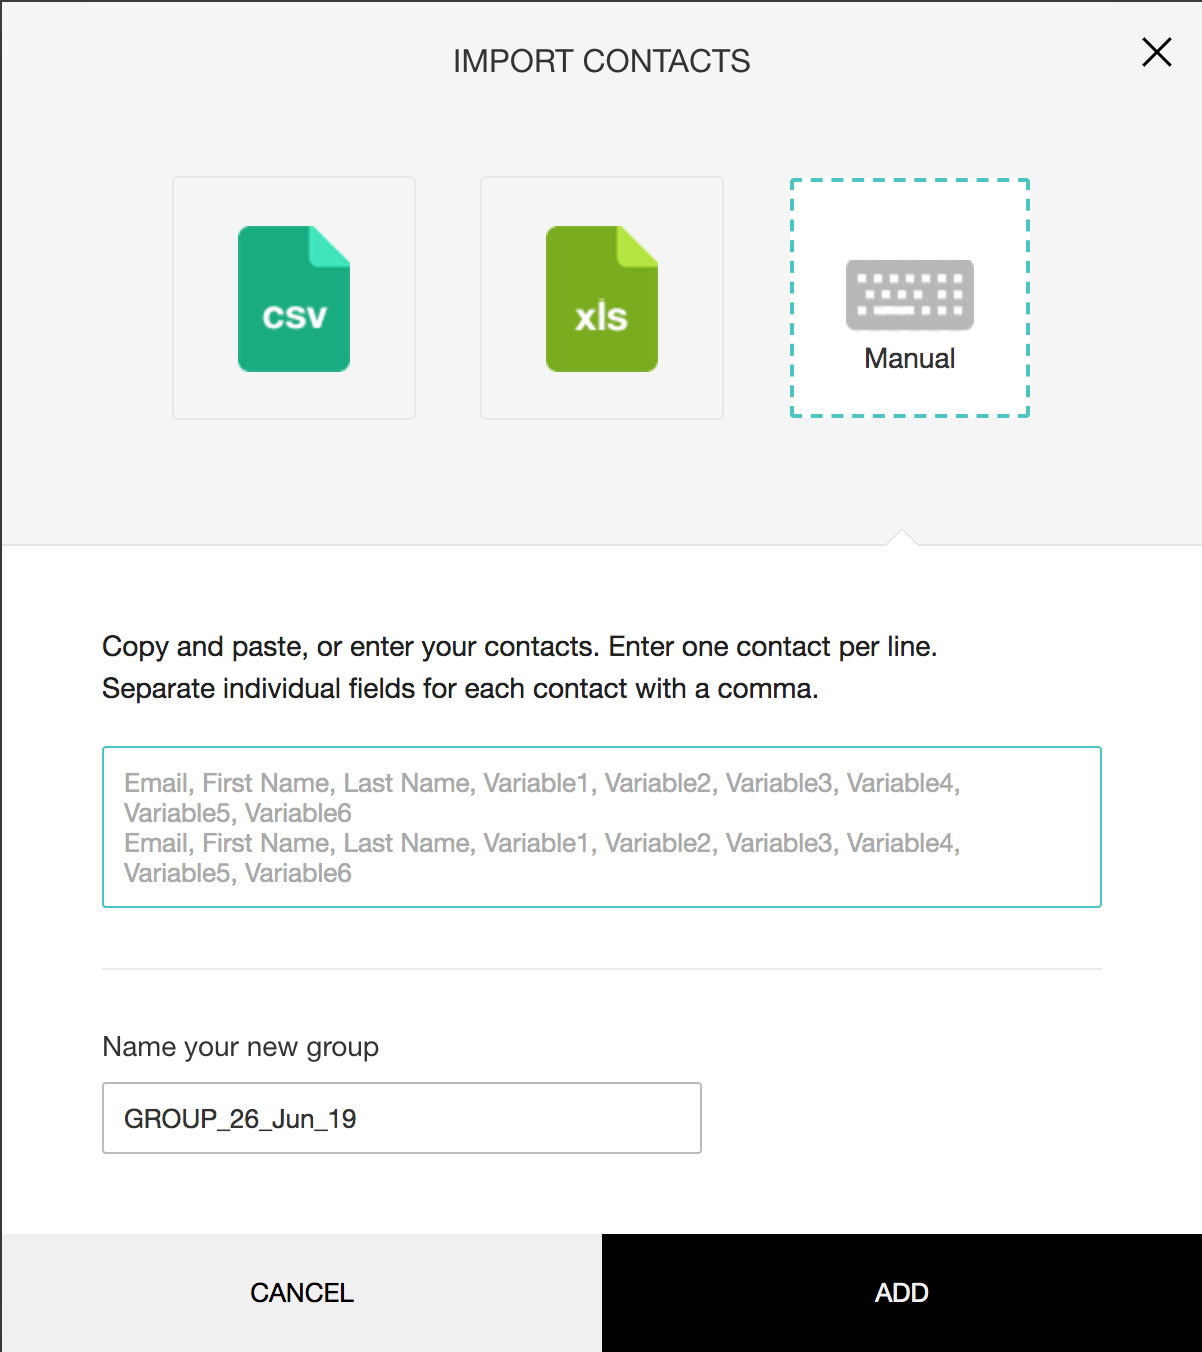
- To import contacts by uploading CSV or XLS files, or by manually typing the contact details, click Import Contacts .
- Click CSV and select Choose file to upload a CSV file.
- Click XLS and select Choose file to upload an XLS/XLSX/ODS file.
- Click Manual to type or copy-paste contacts manually. Insert known variables, separated by commas, to tag respondents. For the manually-inserted custom variables, responses are in the Individual Responses section of the reports. Note: Email invitations will be sent as many times an email address occurs in a contact list and the corresponding invitation variables are recorded for each occurrence of the email.
- Type a name for the new group of contacts you import in the Name your new group box.
- Click Add to add the group to the recipient's list.
- Type a subject for the email in the Subject box.
- Click or hover over the email template and click
 to edit the email template or you can click the Edit button on the top right corner of the message box. You can make edits to the default template that gets displayed here.
 - Click the dropdown arrow next to the edit button and select Save as template to save any changes you make.
- Click Select an existing template to choose from a list of templates you have already made.
- Click Insert Variable to personalize the body of the template to include contact information like first name, last name and custom variables. You can embed a multiple choice, rating, drop down or NPS question from the first page of your survey directly into your email. This particular question will replace the Begin Survey button as a link to your survey.
- Click Save to save the changes.
- Choose to enable or disable the footer in your surveys in the Footer section when you use the email distribution feature.
- Click Background color, and Font color palettes in the Button section to adjust the background and font colors of the button name respectively.
- Make edits to the button name in the Button name field, if required.
- Click Background color and Font color palettes in the Header section to adjust the background and font colors of the template respectively.
- Make edits to the title of the email template, if any, in the Title name box. If you do not make any changes to the title, it will take the name of the survey by default.
- Click Send to distribute your survey through email. You can also save a draft version and send it later.
Email Campaigns
Email campaigns help you send your survey to a lot of people at once. Zoho Survey is integrated with Zoho Campaigns and MailChimp, so you can link your survey with either of these accounts and send your survey to your contacts via an email campaign. Read more on both of these integrations in the respective Zoho Campaigns and MailChimp pages.

Facebook
Post your surveys on your Facebook page by linking your Facebook page to your Zoho Survey account. Read more on how you can embed your survey in your Facebook page.
Related Articles
Email Distribution
Send your survey's link to your email lists within Zoho Survey, without having to switch a tab. You can also track the responses and see the details of opened, unopened, bounced, and unsubscribed invites. Note: You can send up to 2000 email ...When can you send email invites?
A page campaign generally has four campaign statuses: Draft, Running, Scheduled, and Completed. You can send email invites during any of the above campaign statuses except Completed. Your campaigns will complete when the campaign's end date has been ...How do I track survey email invites I've sent to my respondents?
To track the survey: Go to the Launch tab. Click Email on the left pane. Click Overview to see the following details. Invites - Displays the details on how many of your respondents have opened your invite, how many are yet to open it, if any ...How do I send my survey from within Zoho CRM?
You can now send surveys from within your CRM module. Read here to learn more about this.How do I change the 'From' email address when sending email invites for my survey?
To change the 'From' email address: Go to the Launch tab. Click Distribution on the left pane. You can access this only after you publish the survey. The email distribution option is the default selection. Click Create Email to send and track your ...