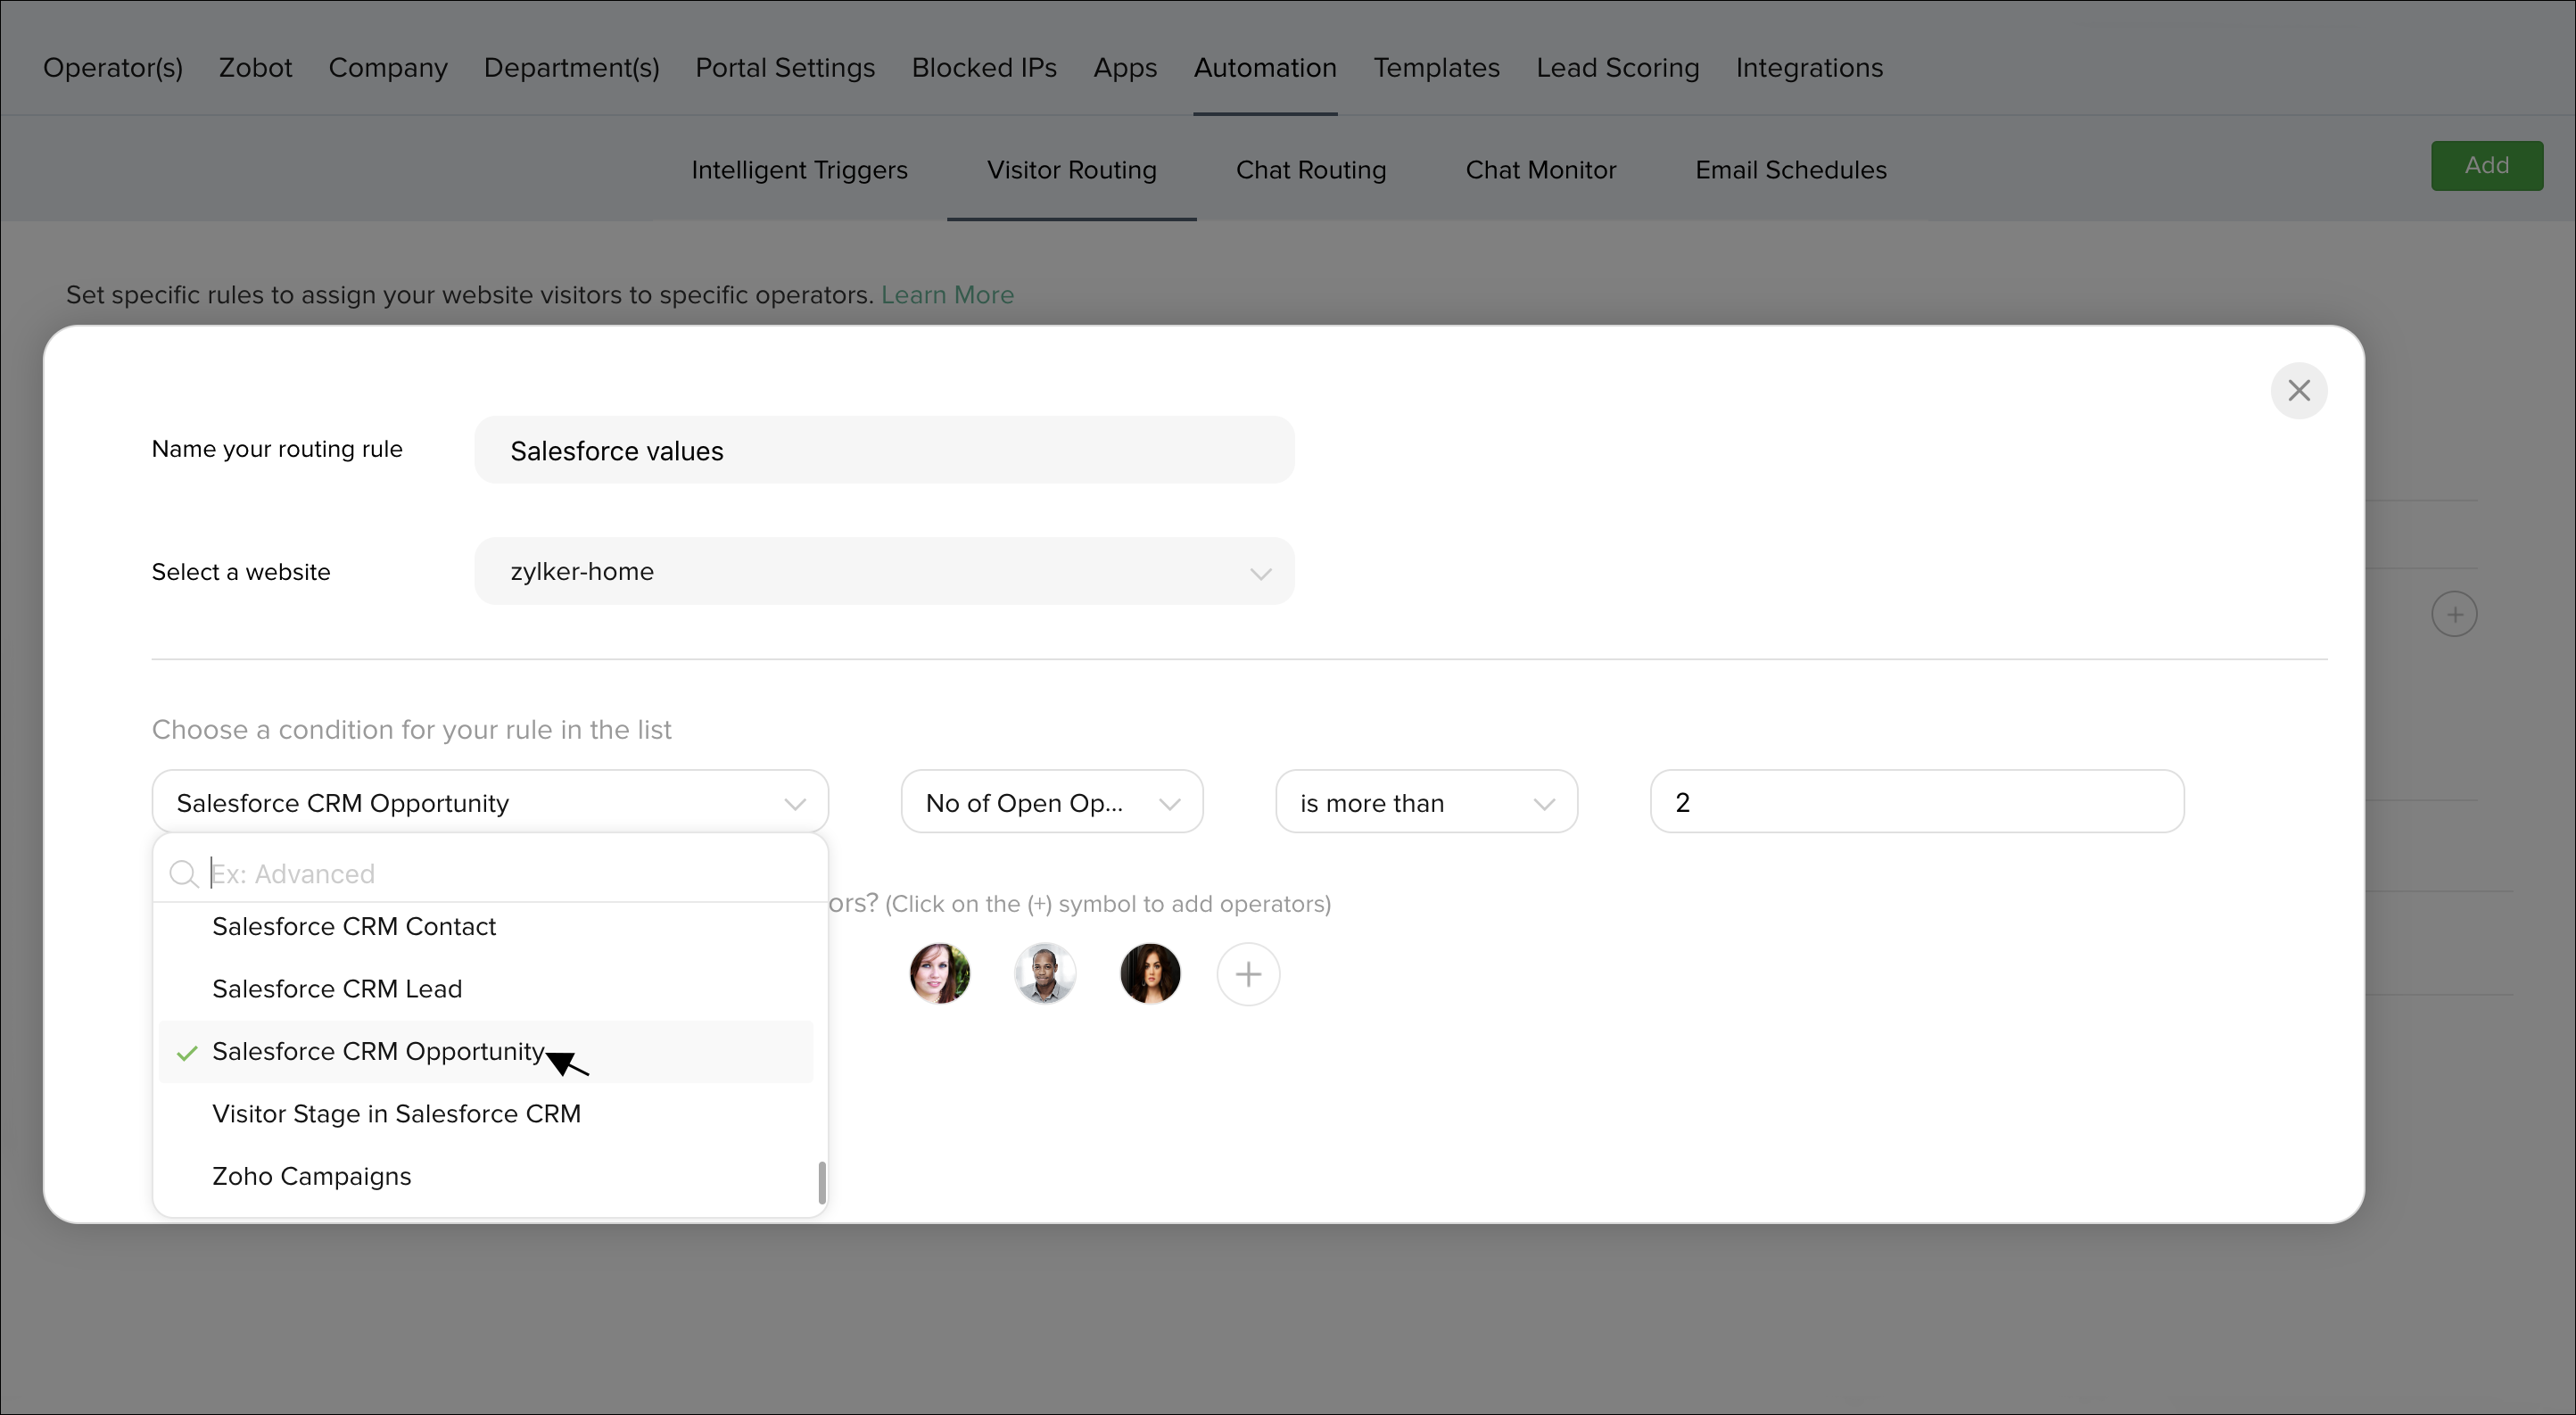
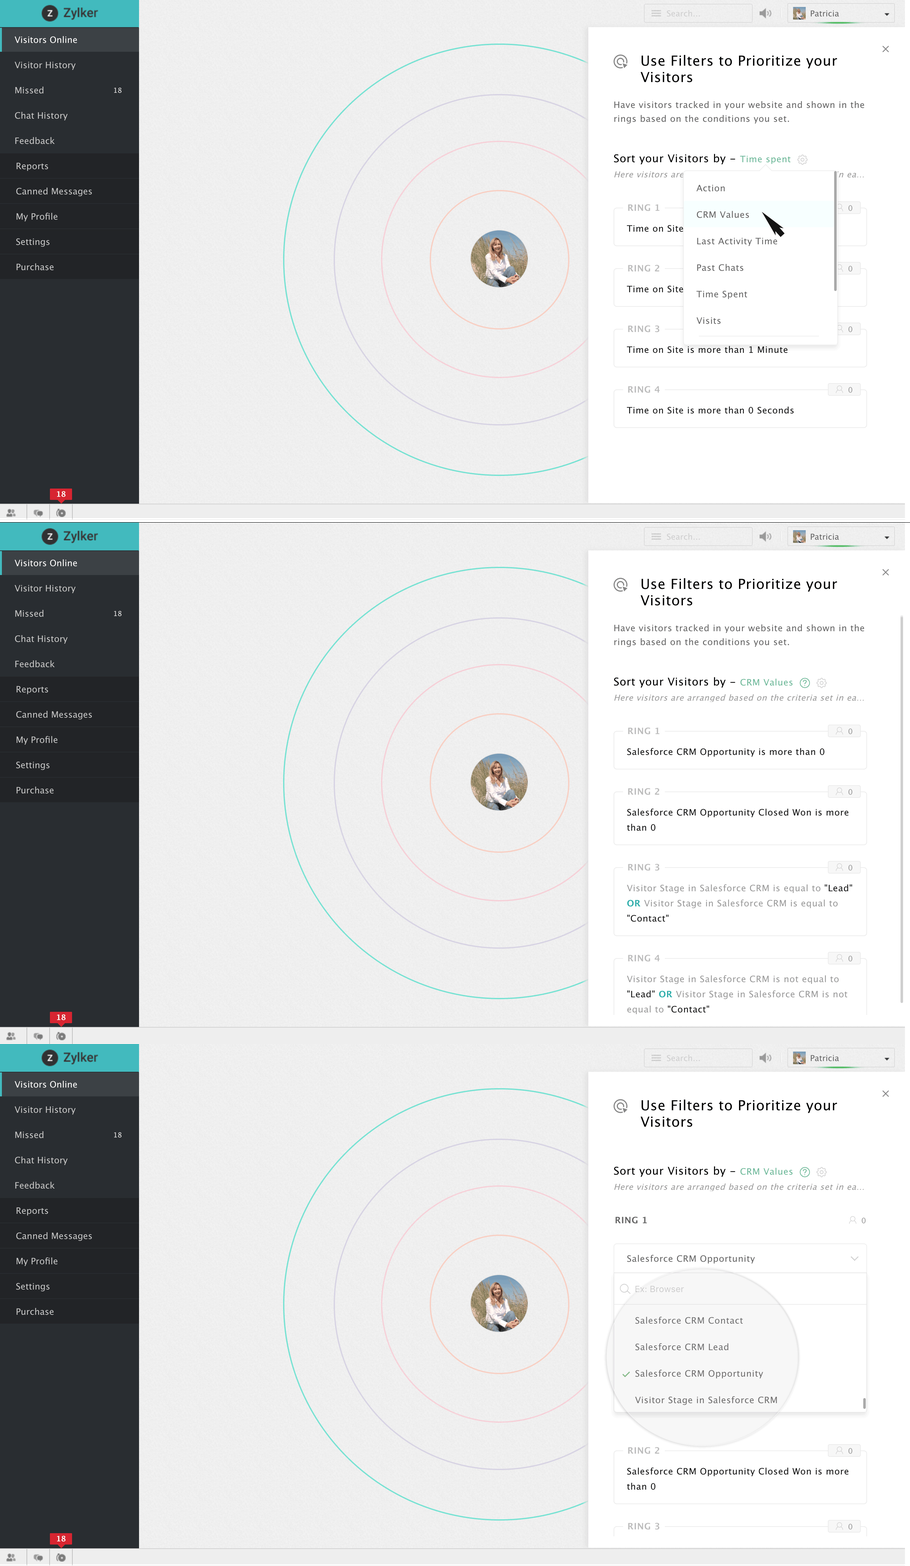
SalesIQ allows you to route the visitor base to the operators of your firm based on the various Salesforce CRM values.
- Navigate to Settings > Automation > Visitor routing.
- Click on Add which you can find in the top right corner of the window.
- Specify a name for the rule.
- Choose a website in which you would like to activate the rule.
- Under "Choose a condition" label, there would be drop down box, clicking on which you will be displayed with a bunch of predefined options, run through it to find the Salesforce CRM values,
- Salesforce CRM Lead.
- Salesforce CRM Contact.
- Salesforce CRM Opportunity.
- Visitor stage in Salesforce CRM.
- Salesforce CRM Lead.
- Metrics associated with these predefined Salesforce CRM options are as follows:
- Salesforce CRM Lead: Mailing country, Mailing state, Mailing zip, First name etc.,
- Salesforce CRM Contact: City, Company, First name, Country, Annual revenue etc.,
- Salesforce CRM opportunity: Closed won, Closing date, Number of opportunities, Number of open opportunities and Revenue in pipeline.
- Visitor stage: Contact, Customer, Lead, Not available and prospect.
- Salesforce CRM Lead: Mailing country, Mailing state, Mailing zip, First name etc.,
- Once you've chosen an apt metric, you can associate it with an appropriate value(s) by using the relational operators like equal to, not equal to, greater than, less than etc.,
- Then choose a routine according to which the visitors are to be routed to your operators and then select the operators you would like to assign the filtered visitor base to, by clicking on the "+" icon right beside the drop-down box.
- If you would like to remove a chosen user, then click on the "-" symbol that appears when you hover over that particular user.

Routing visitor chats to operators based on CRM values
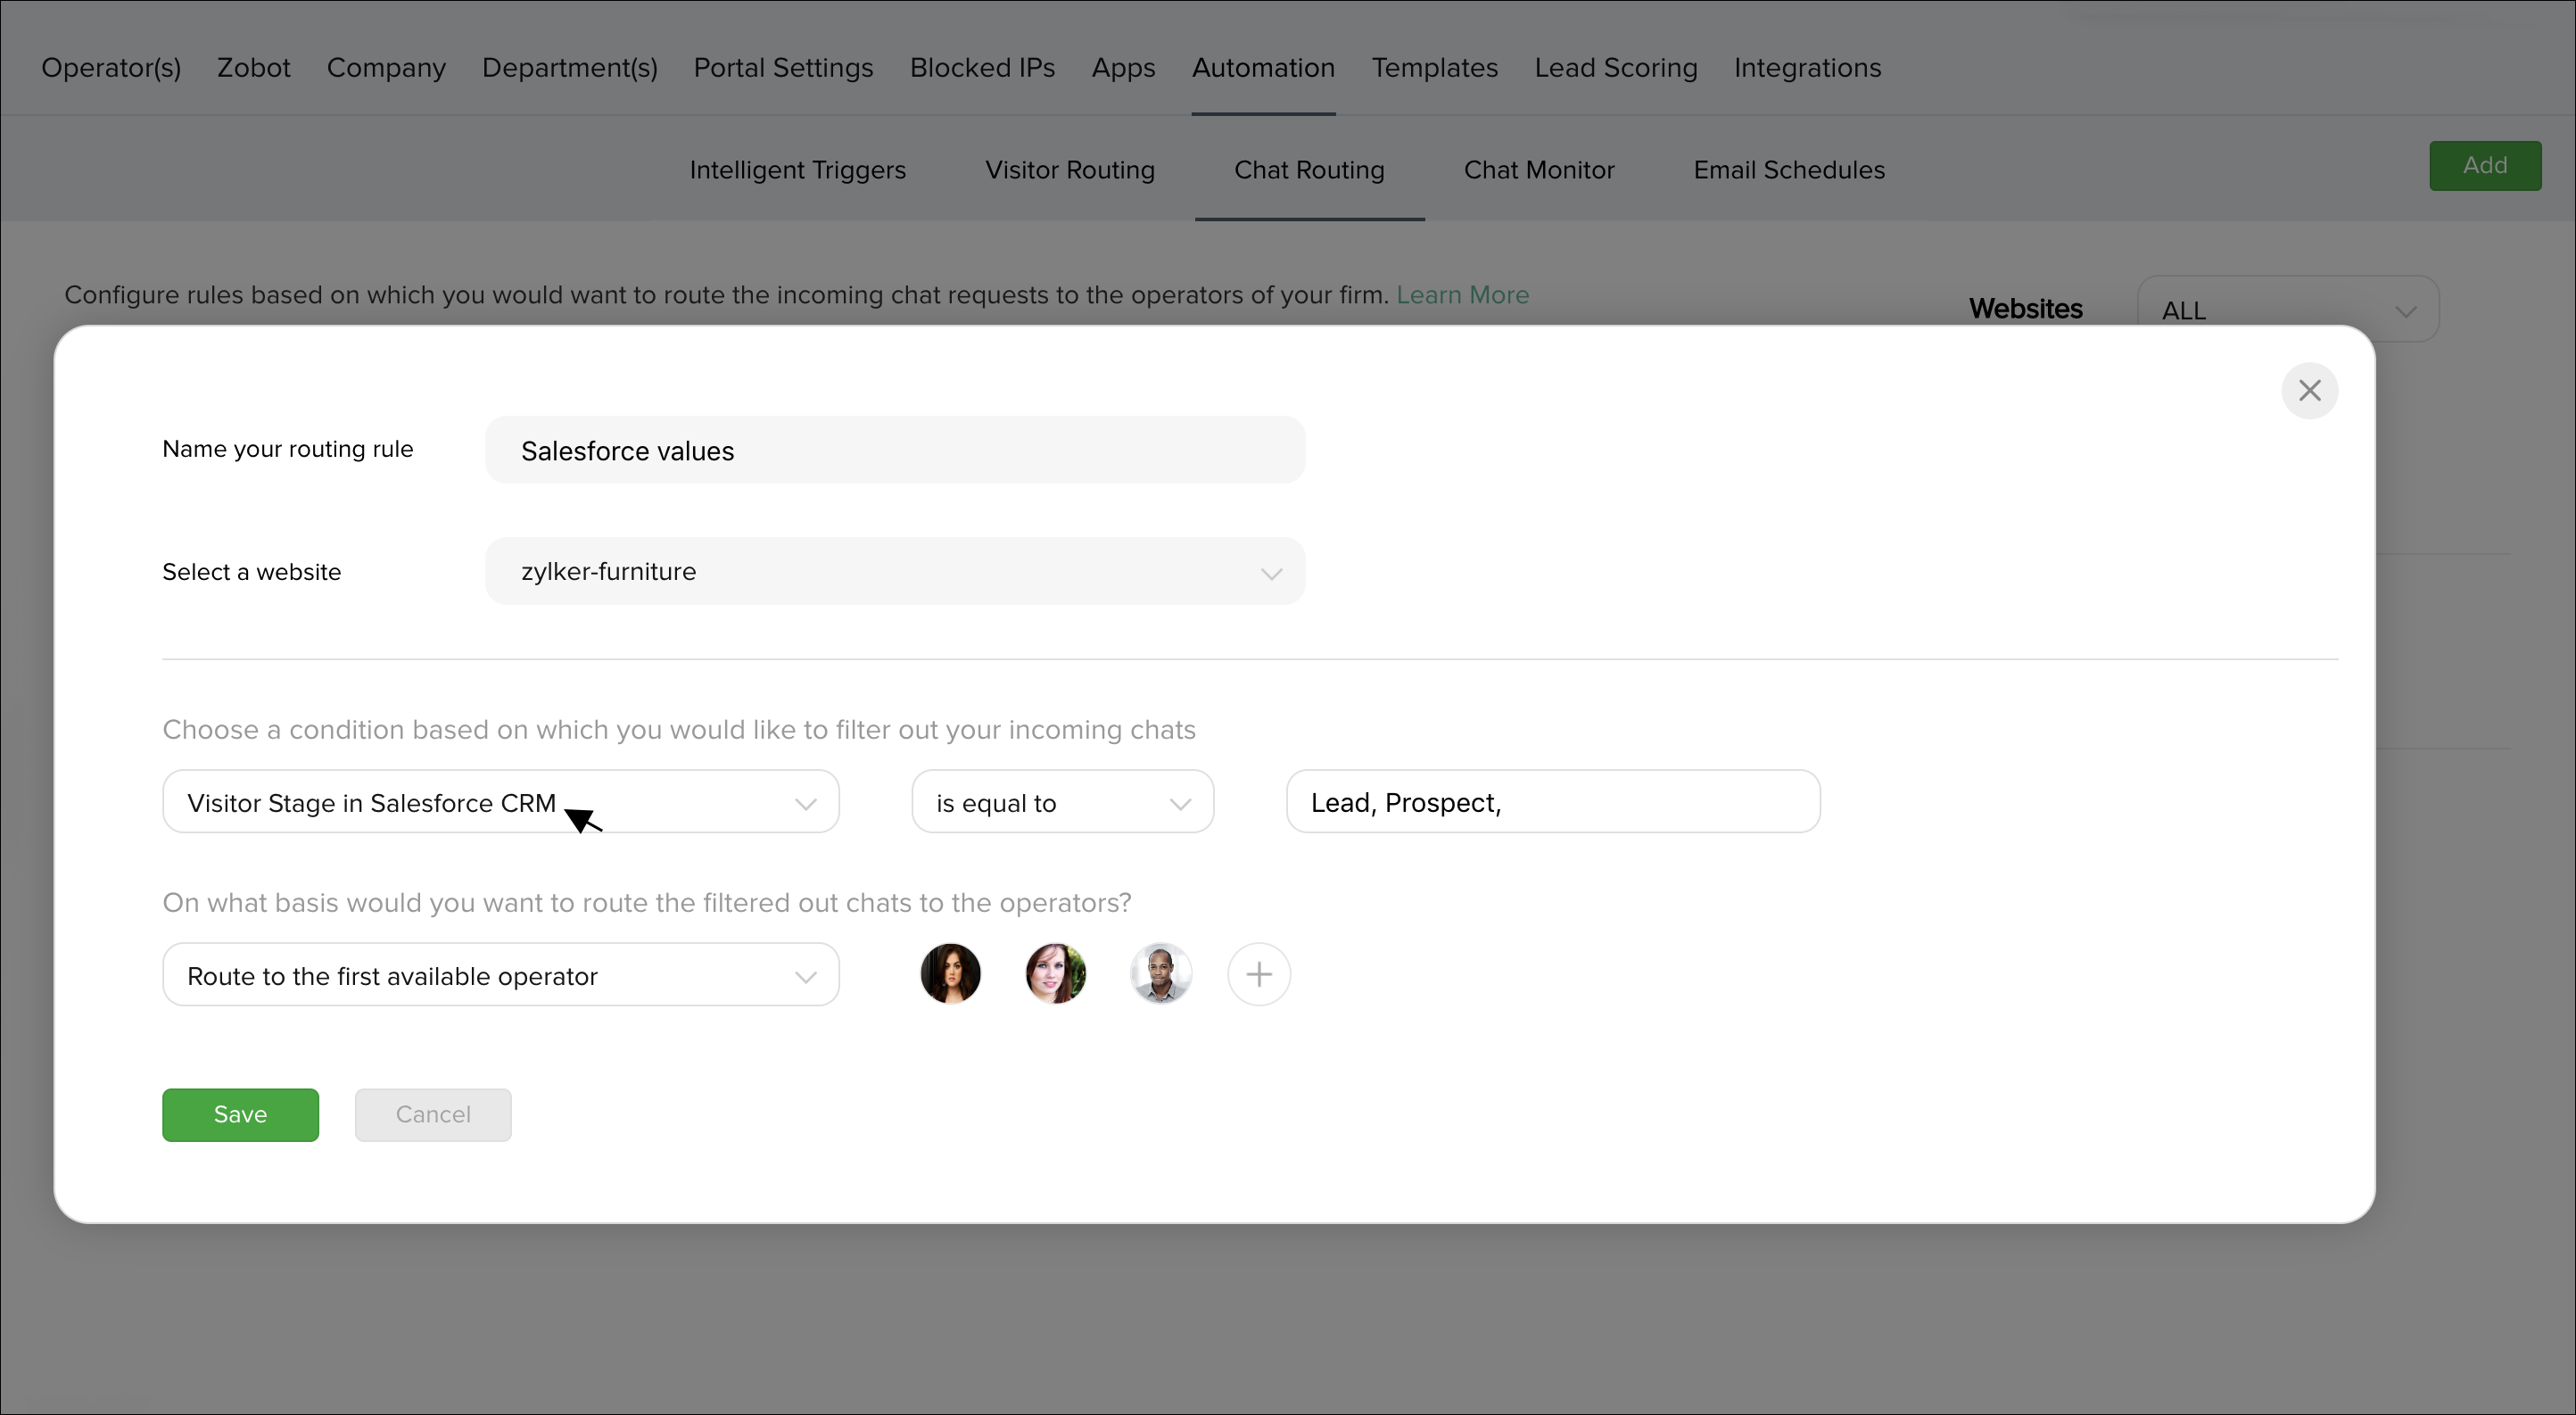
SalesIQ allows you to route visitor chat requests to operators of your firm based on various Salesforce CRM values.
- Navigate to Settings > Automation > Chat routing.
- Click on Add which you can find in the top right corner of the window.
- Specify a name for the rule.
- Choose a website in which you would like to activate the rule.
- Under "Choose a condition" label, there would be drop down box, clicking on which you will be displayed with a bunch of predefined options, run through it to find the Salesforce CRM values,
- Salesforce CRM Lead.
- Salesforce CRM Contact.
- Salesforce CRM Opportunity.
- Visitor stage in Salesforce CRM.
- Salesforce CRM Lead.
- Metrics associated with these predefined Salesforce CRM options are as follows:
- Salesforce CRM Lead: Mailing country, Mailing state, Mailing zip, First name etc.,
- Salesforce CRM Contact: City, Company, First name, Country, Annual revenue etc.,
- Salesforce CRM opportunity: Closed won, Closing date, Number of opportunities, Number of open opportunities and Revenue in pipeline.
- Visitor stage: Contact, Customer, Lead, Not available and prospect.
- Salesforce CRM Lead: Mailing country, Mailing state, Mailing zip, First name etc.,
- Once you've chosen an apt metric, you can associate it with an appropriate value(s) by using the relational operators like equal to, not equal to, greater than, less than etc.,
- Then choose a routine according to which the chat requests are to be routed to your operators and then select the operators you would like to assign the filtered chat requests to, by clicking on the "+" icon right beside the drop-down box.
- If you would like to remove a chosen operator, then click on the "-" symbol that appears when you hover over that particular operator.

Configure triggers based on Salesforce CRM values
Salesforce allows you to configure triggers based on CRM values, exclusively for the visitor base pushed into your Salesforce CRM account.
- Navigate through Settings -> Automation -> Intelligent triggers.
- In the drop-down box right below the label "When would you like to trigger the visitor", select the instant at which you would like to set the trigger off.
- Once you are done, choose a condition based on which you would like to filter the visitor base of your website. This is where you can utilize the predefined Salesforce CRM options which are,
- Salesforce CRM Lead.
- Salesforce CRM Contact.
- Salesforce CRM Opportunity.
- Visitor stage in Salesforce CRM.
- Salesforce CRM Lead.
- Metrics associated with these predefined Salesforce CRM options are as follows:
- CRM Lead: Mailing country, Mailing state, Mailing zip, First name etc.,
- CRM Contact: City, Company, First name, Country, Annual revenue etc.,
- CRM opportunity: Closed won, Closing date, Number of opportunities, Number of open opportunities and Revenue in pipeline.
- Visitor stage: Contact, Customer, Lead, Not available and prospect.
- CRM Lead: Mailing country, Mailing state, Mailing zip, First name etc.,
- Once you've chosen an apt metric, you can associate it with an appropriate value(s) by using the relational operators like equal to, not equal to, greater than, less than etc.,
- After which choose a type of trigger that you would like to use and set the time after which you would like to set the trigger off. (Time frame after the user performs a particular configured action)

