Issue details
View issue details and modify them. Add comments, attachments, provide resolutions, log hours, link other issues and tasks, view activity stream, follow issues, move or clone, and print the issue.
- Select a project and navigate to Issues.
- Click an issue.
- Add a description or update the details using Edit Description.
- Edit the required fields under Issues Information. Hover over the field to view the edit option.
- The changes are saved automatically.
- The changes are saved automatically.
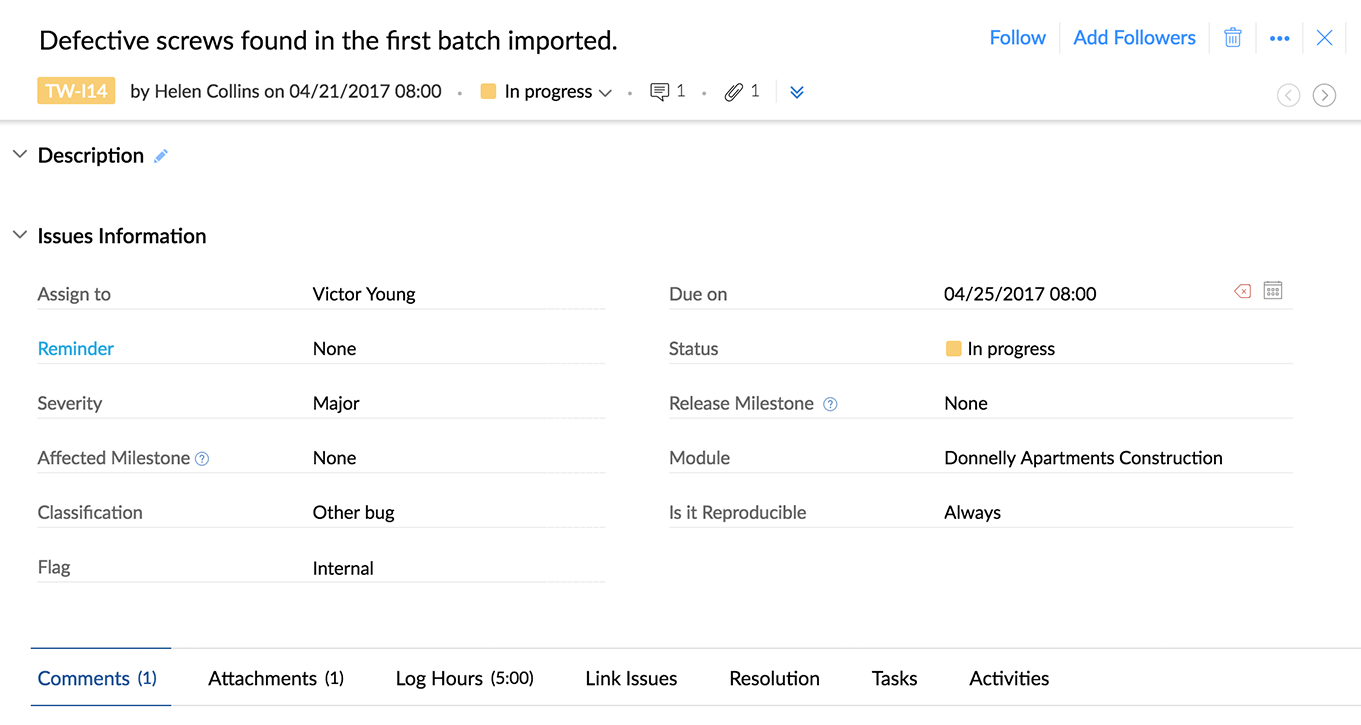
- Scroll the issue details page to add additional information to the issue.
- Comments: You can add comments while modifying an issue. Use the screen-grabber to share screenshots or the in-built draw tool to highlight or obscure areas.
- Attachments: Attach and share screenshots using the screen-grabber. Attachments added in Comments and Resolution section are shown here.
- Resolution: Use this option to resolve the issue. You can also add attachments and screenshots when resolving an issue.
- Log Hours: Add the time you spent on resolving the issue. You can also set the start and end time.
- Link Issues: You can link and classify related issues.
- Tasks: Link related tasks to your issue. (Not applicable for stand-alone BugTracker subscriptions)
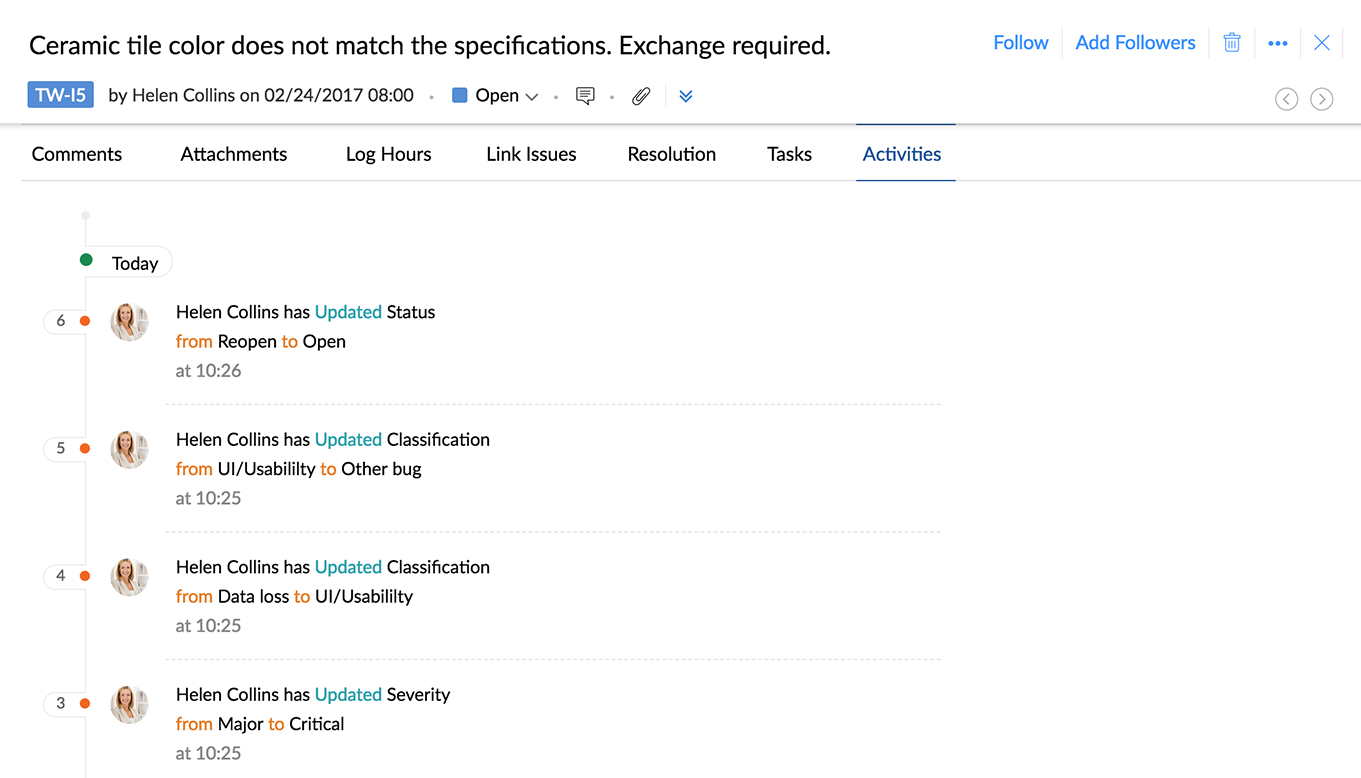
- Activities: View the history of the issue. The activities are listed chronologically.
- Follow or Add Followers to the issue. Click Follow to track the issue or Unfollow to stop. Click Add Followers to select and add project users to the issue.
- More Actions: Click
 in the upper-right corner to show more options. You can move, clone, or print an issue. Use Notification Helper to check if you will be notified for any given notification event.
- Comments: You can add comments while modifying an issue. Use the screen-grabber to share screenshots or the in-built draw tool to highlight or obscure areas.
Related Articles
Submit an issue
Submit issues in your projects. A unique issue ID is created and assigned to your issue automatically. Submit issue Select a project and navigate to Issues. Click Submit Issues. Enter the Issue title. Select a Project when submitting from My ...Issue layouts & fields
Feature availability Feature Availability: Enterprise plan Navigate to > Portal Configuration > Layouts and Fields > Issues to create custom fields and layouts for Issues. If you are an admin but unable to access the above path, write ...Associate task with an issue
There will be instances where you might wish to associate tasks to an issue so that it's easy to track and close the task as well as the associated issue. While completing tasks, you can opt to enable or disable the alert message about the associated ...User Details
The User Details page provides detailed information about a particular user. There are various sections that display the user's Skillset, Planned vs Actual hours, Status summary, and Gamescope scorecard. Click in the top band. Navigate to Manage ...Issue reminder
You need not worry about missing deadlines anymore. Paid plan users can set reminders for issues and the assignee will receive a reminder email. Navigate to the Issues module and click Submit issue. Click Reminder. In case of Specific dateenter, Date ...