Microsoft SharePoint
Live Chat and Visitor Tracking Software for Microsoft SharePoint
Microsoft SharePoint is a document management and collaboration platform that helps companies manage archives, documents, reports, and other content that is vital to the business process. Organizations use SharePoint to create websites. You can use it as a secure place to store, organize, share, and access information from any device.
You can add Zoho SalesIQ to SharePoint site and start identifying and interacting with the visitors on your website. You can engage and support instantly from any SharePoint powered site with Zoho SalesIQ.
How do I add Zoho SalesIQ code snippet to SharePoint?
- To begin integrating your SalesIQ with SharePoint, you should have an app catalog in Microsoft SharePoint. If not, create one by following the instructions here.
- Login to Zoho SalesIQ
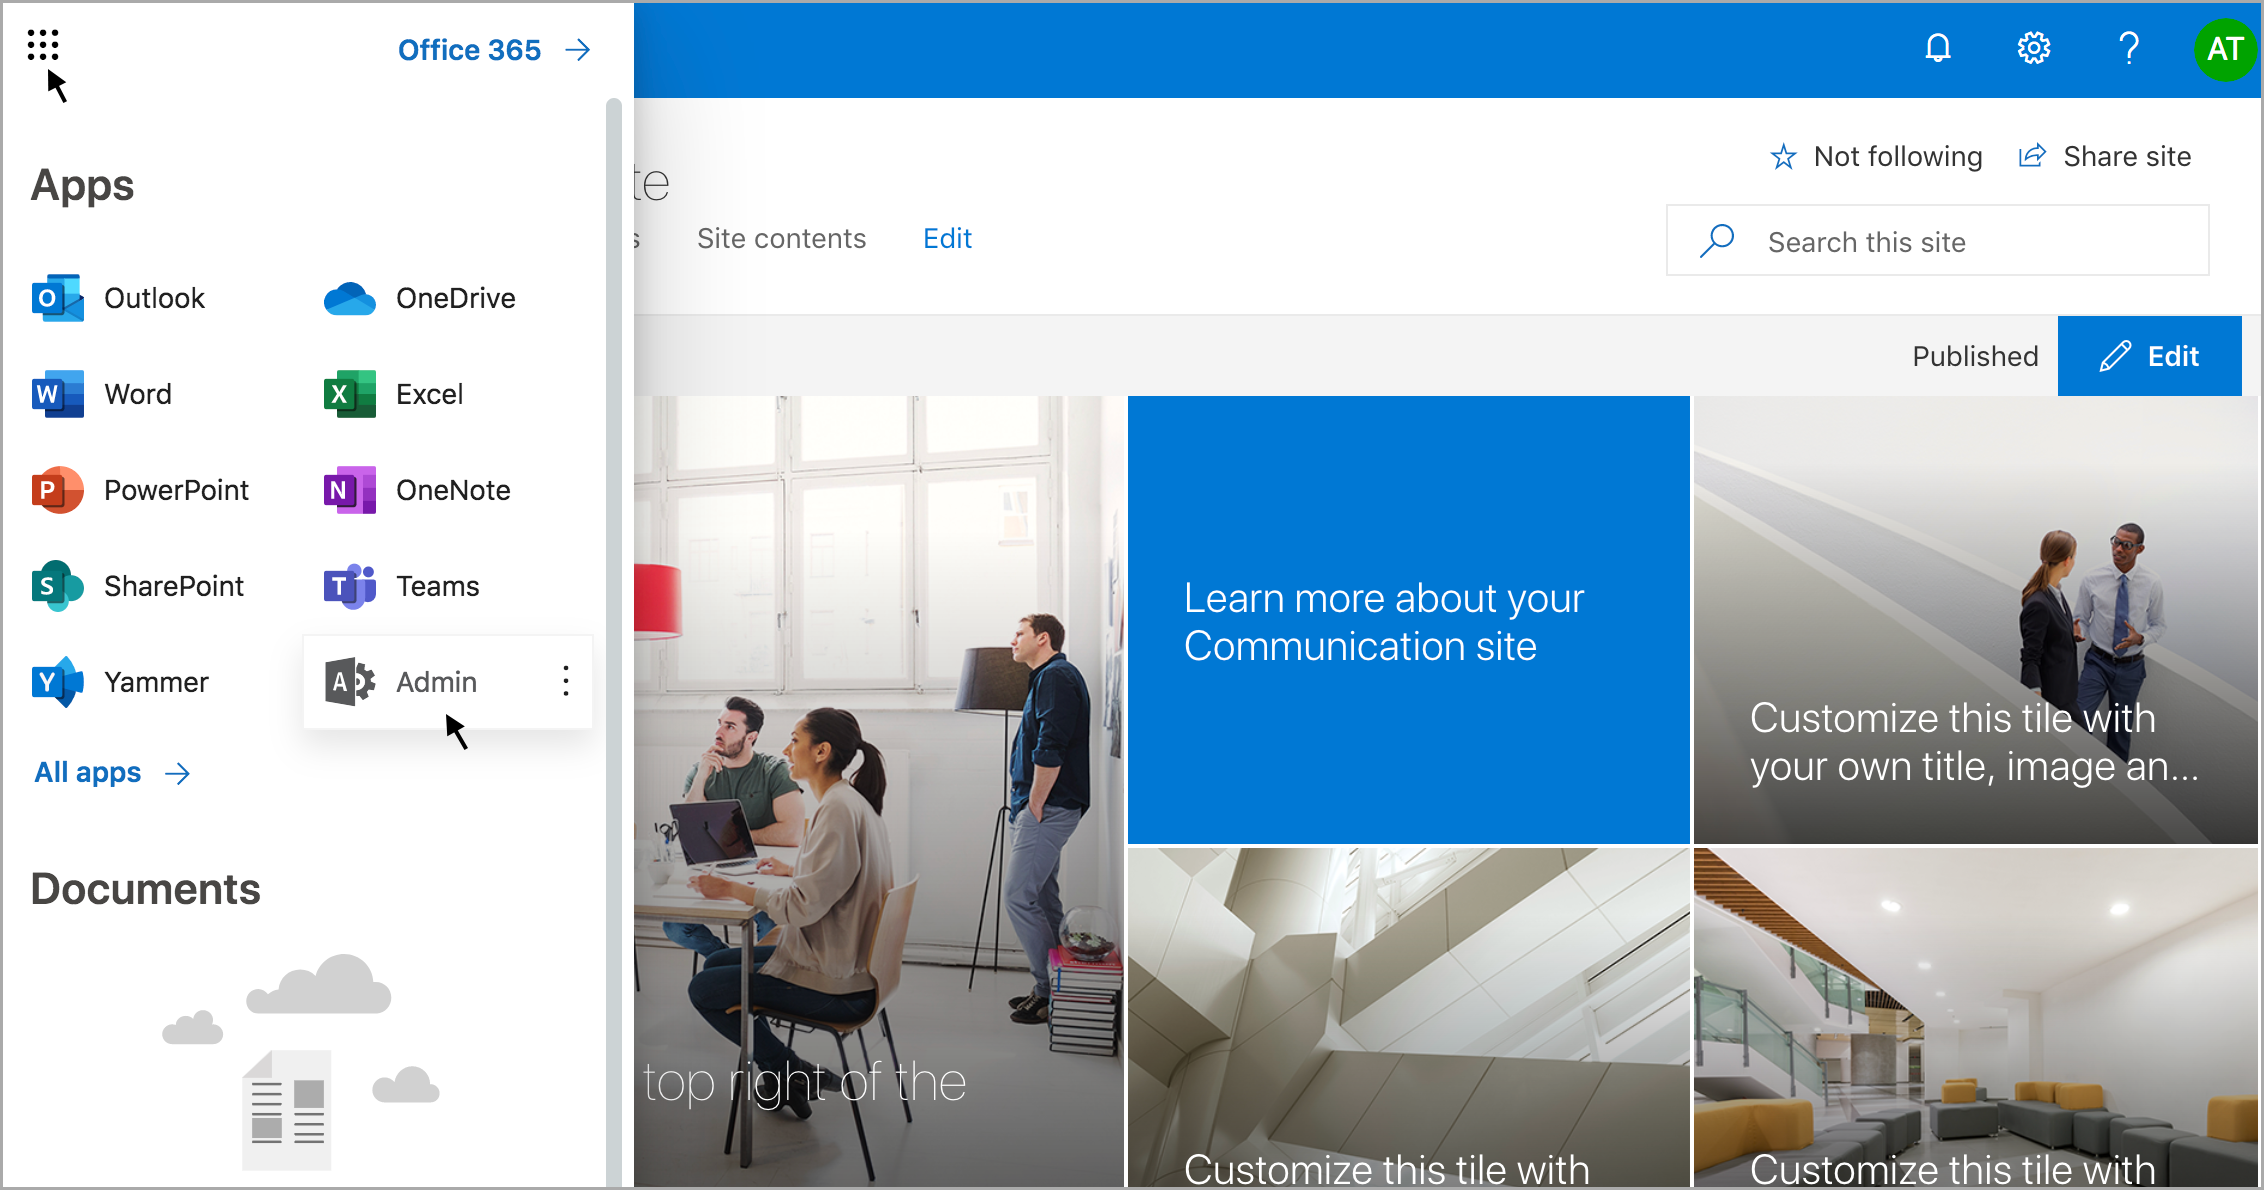
- Now open the app catalog in Microsoft SharePoint, by clicking on the App launcher icon from the far left corner of the SharePoint Dashboard and click Admin from the LHS.
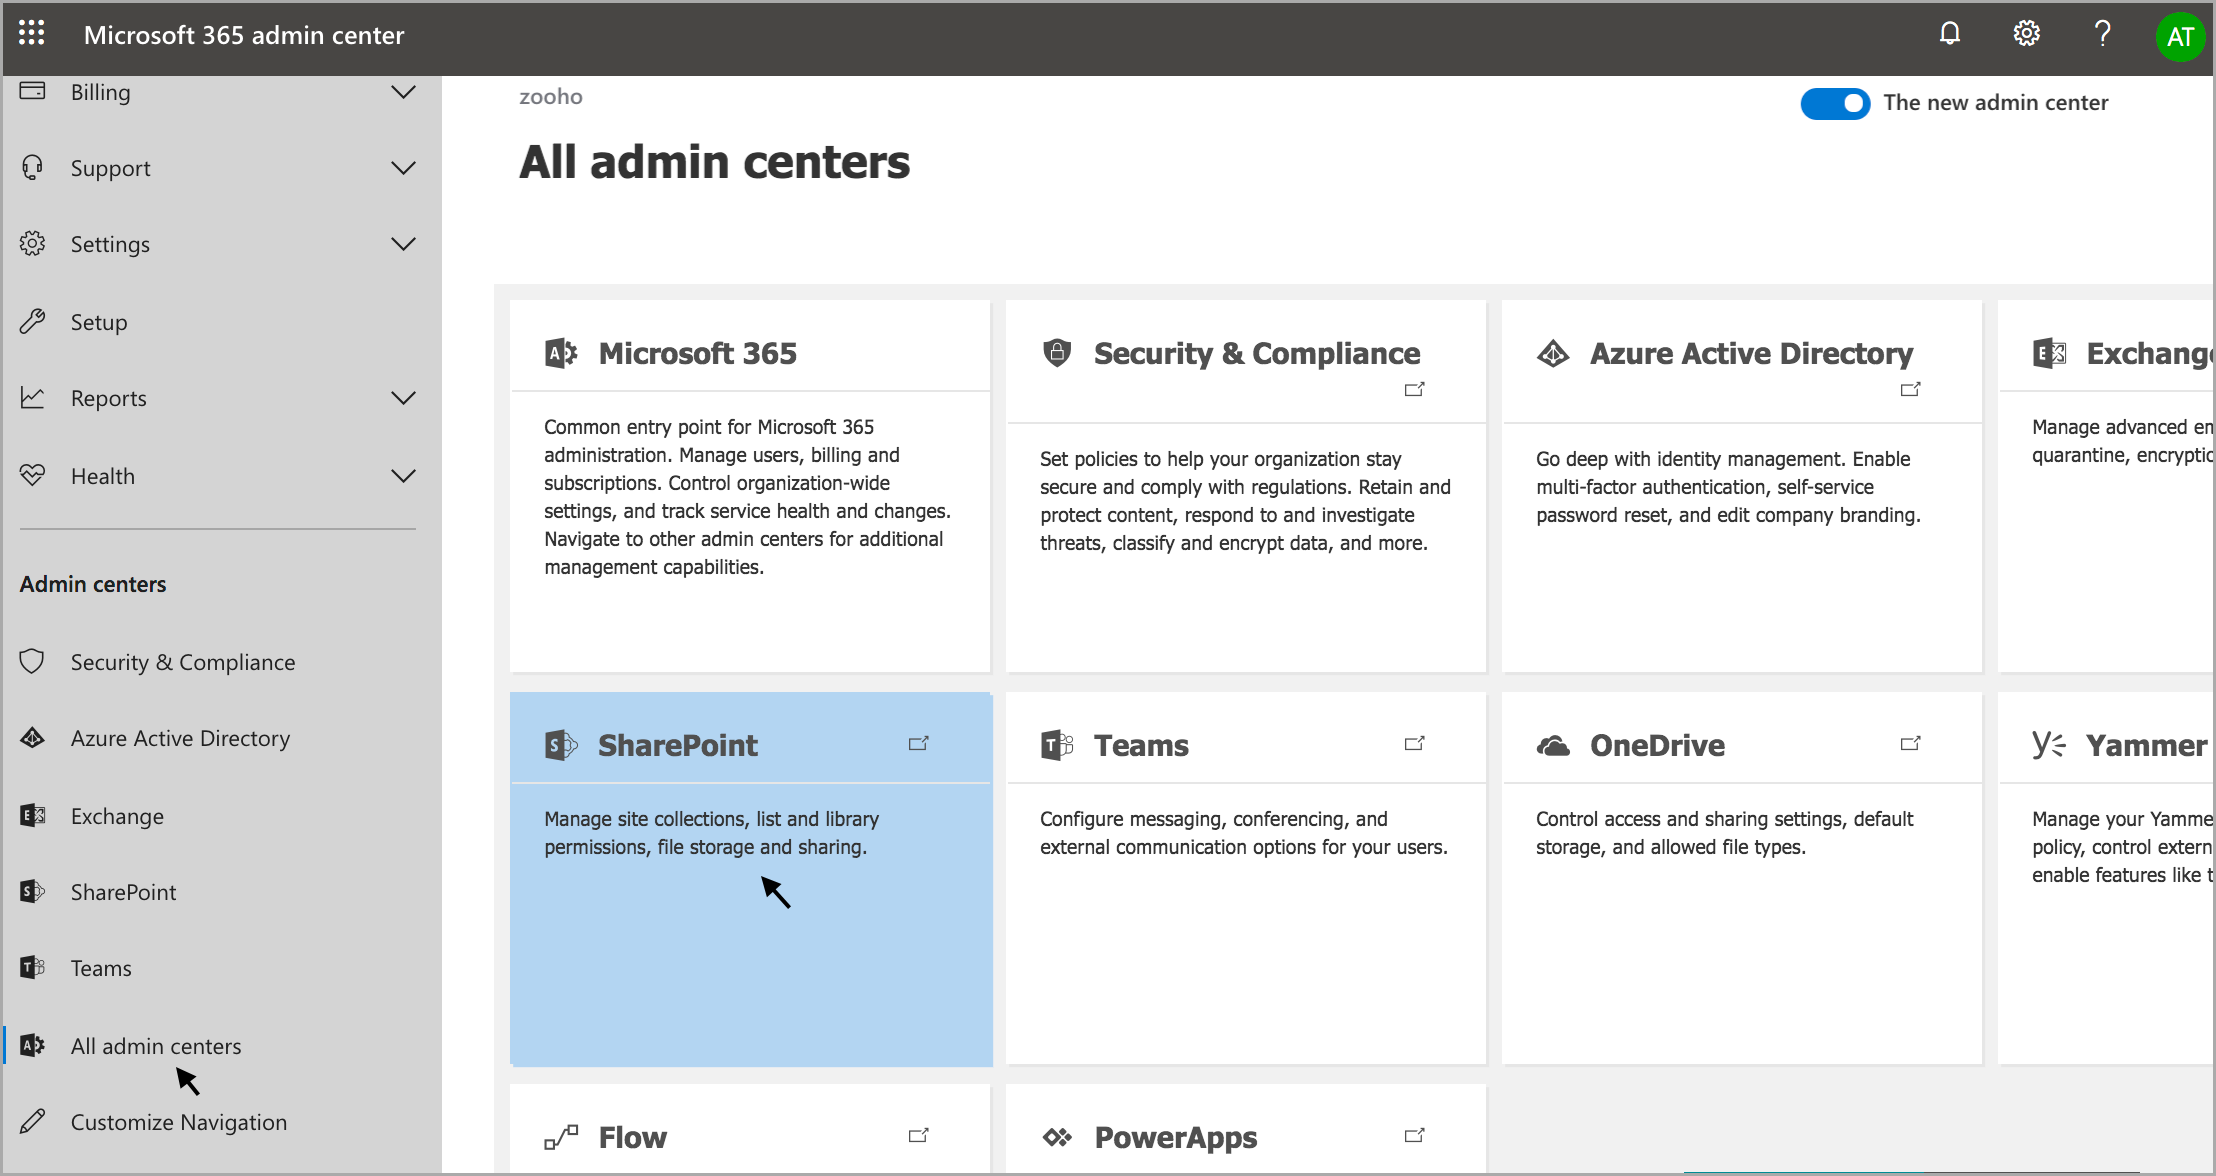
- You will be re-directed to the Microsoft 365 admin center page. Under Admin centers section, Click All Admin Centers and choose SharePoint.
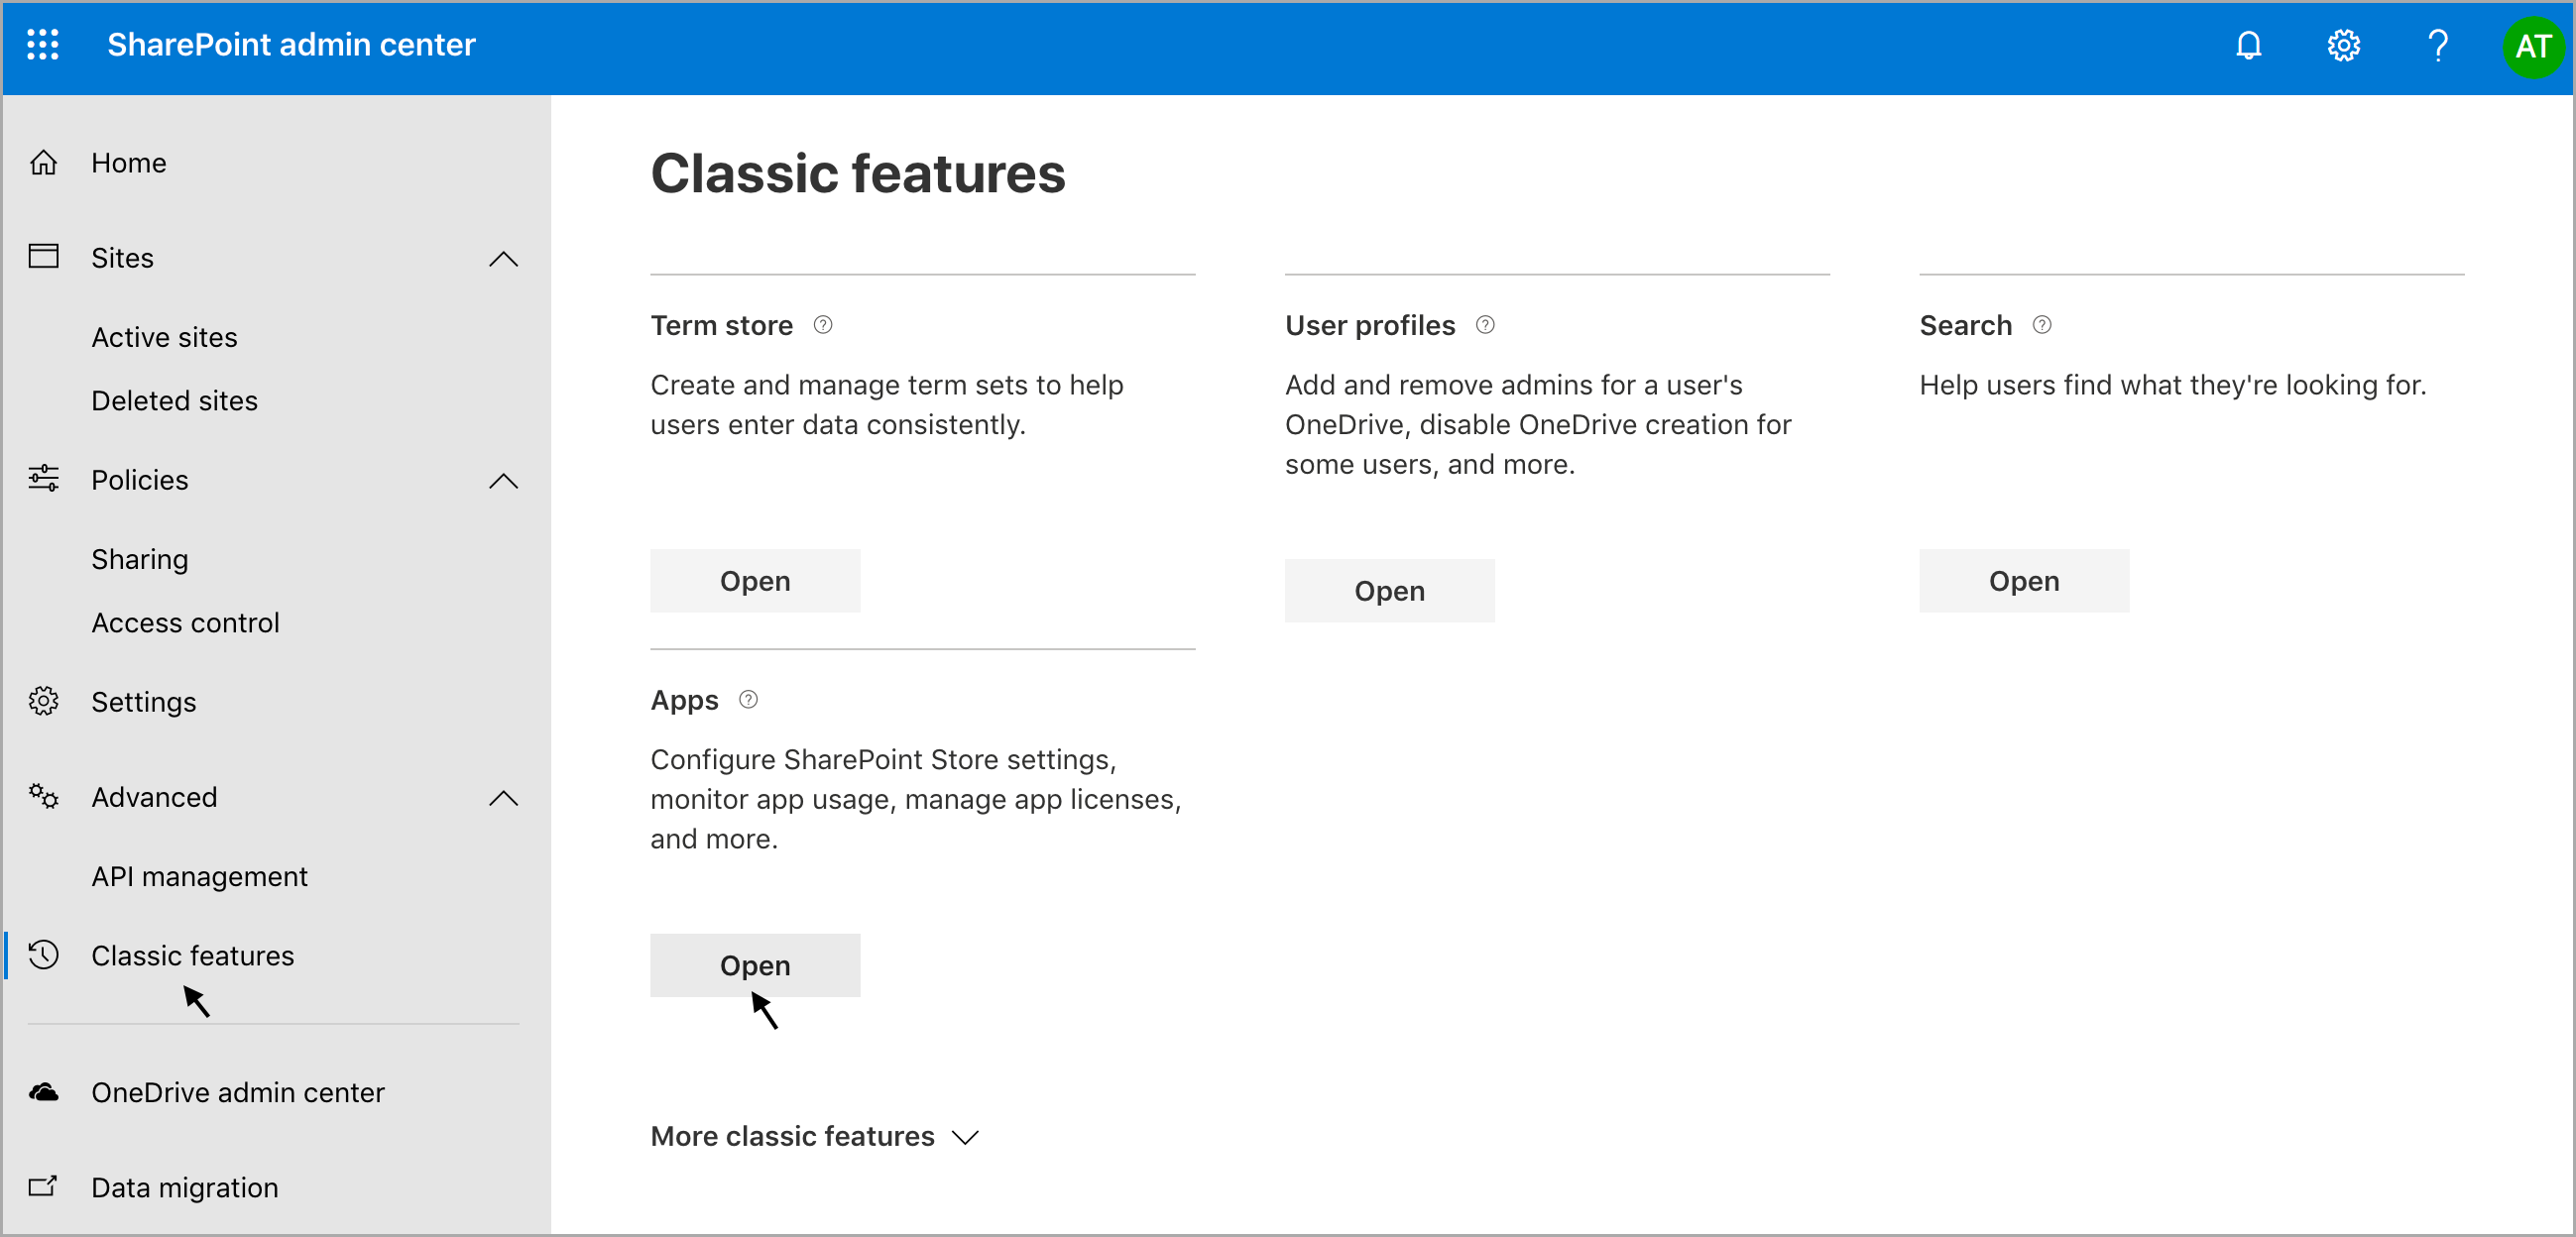
- You will be re-directed to the SharePoint admin center, click Classic features from the LHS menu, and Open the Apps.
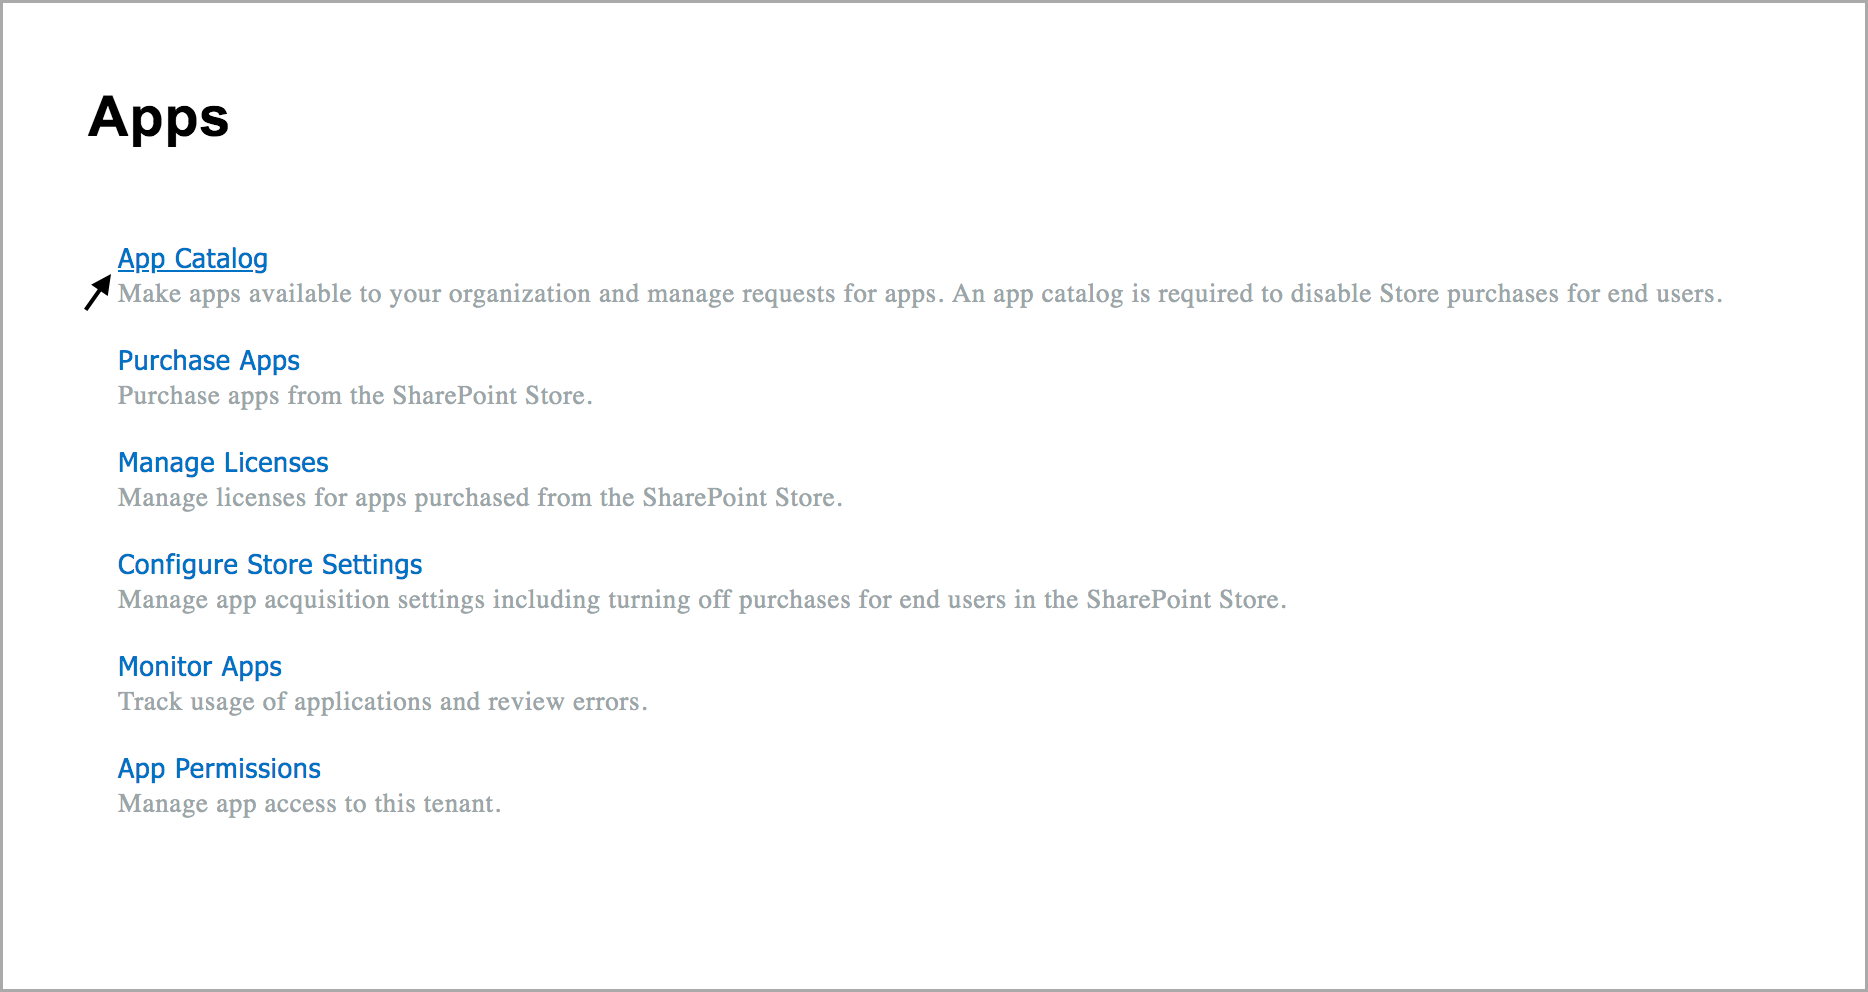
- Click App Catalog.
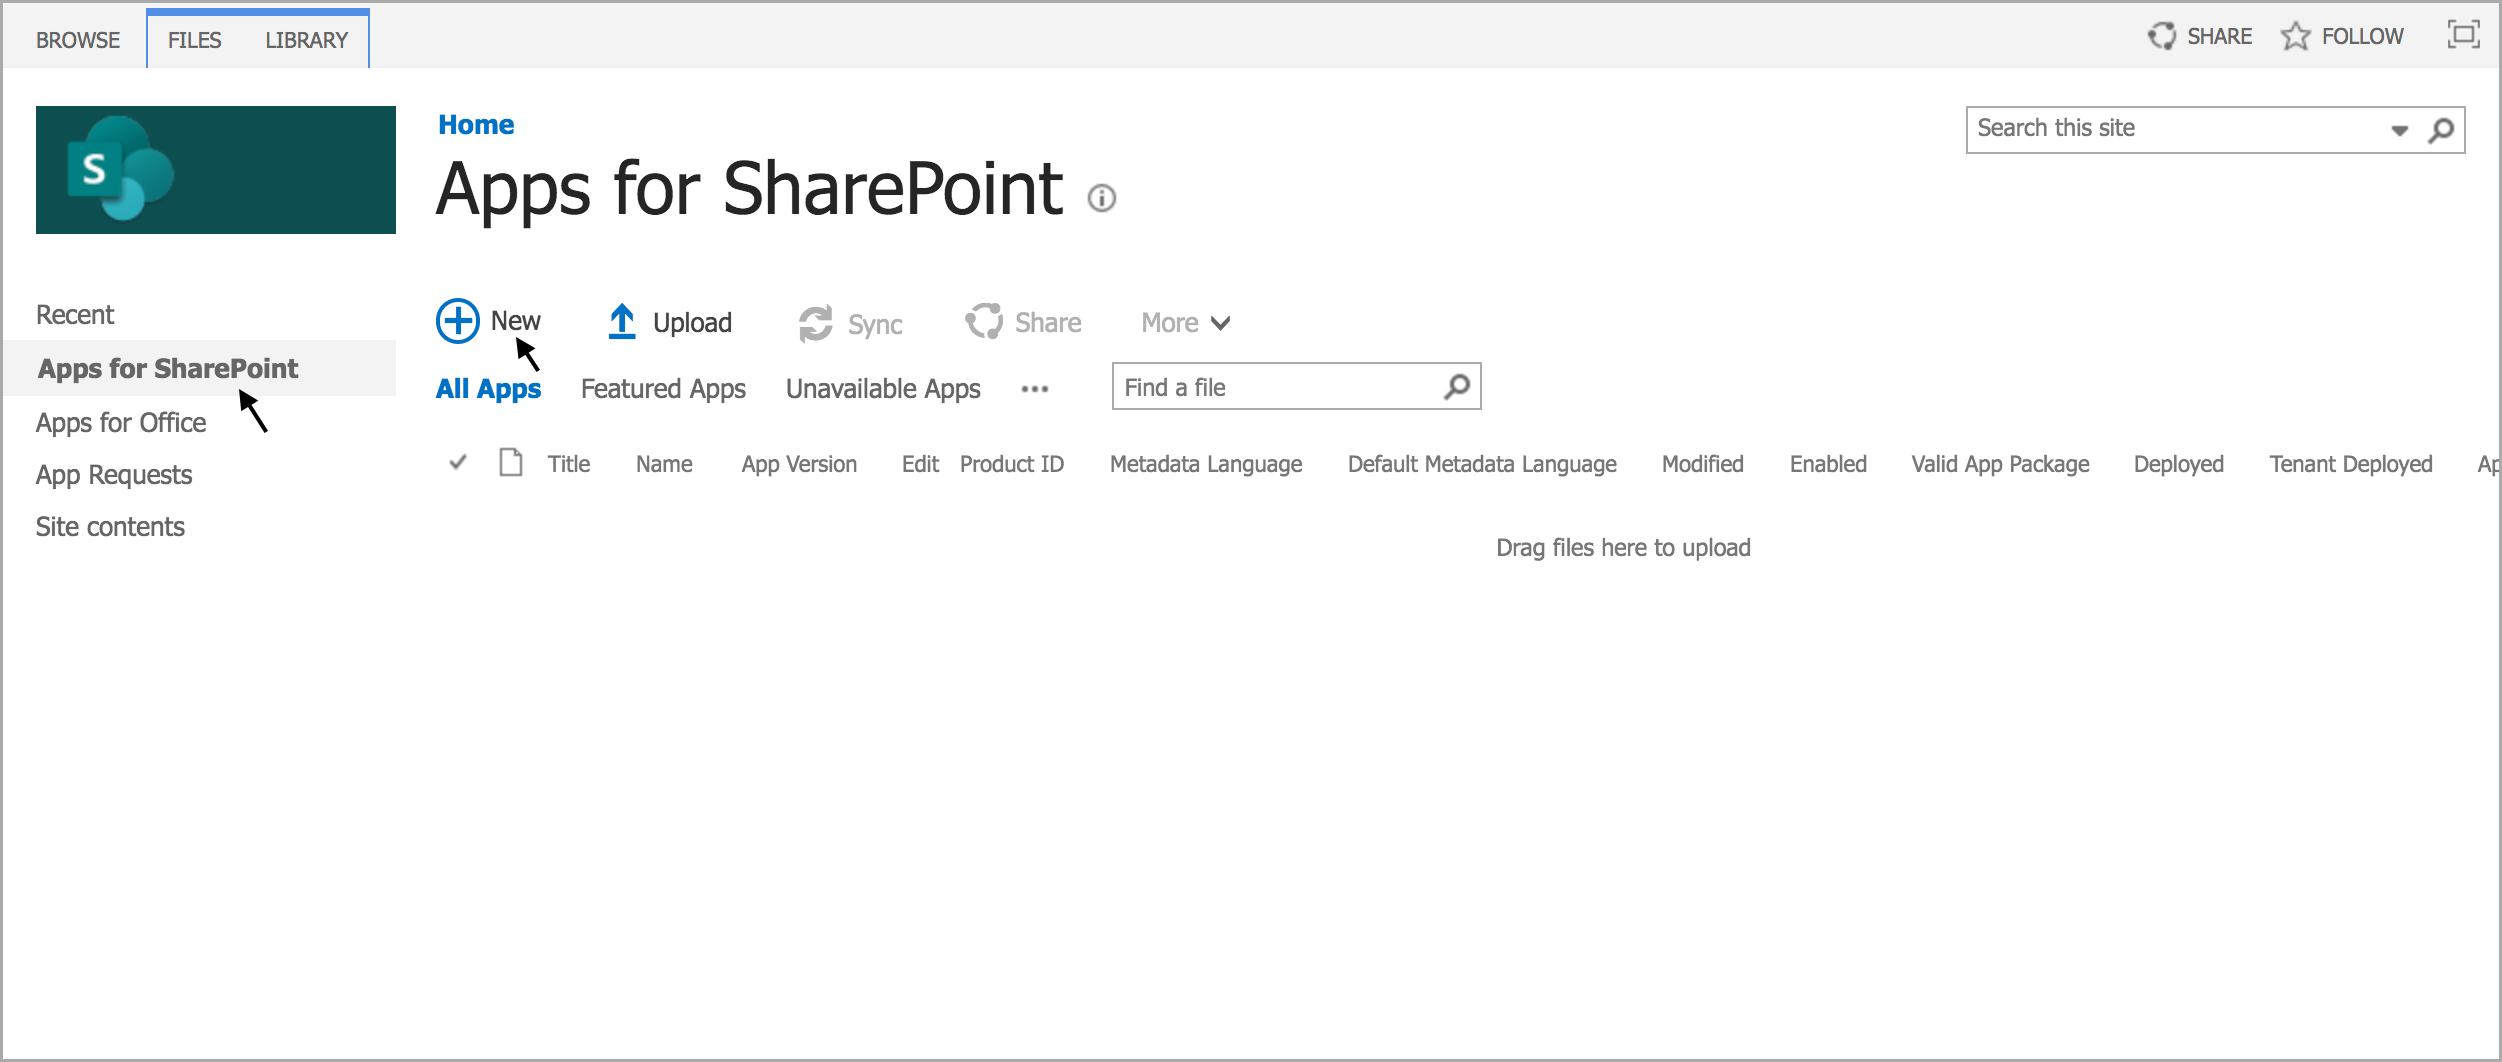
- Choose Apps for SharePoint from the LHS menu and click New.
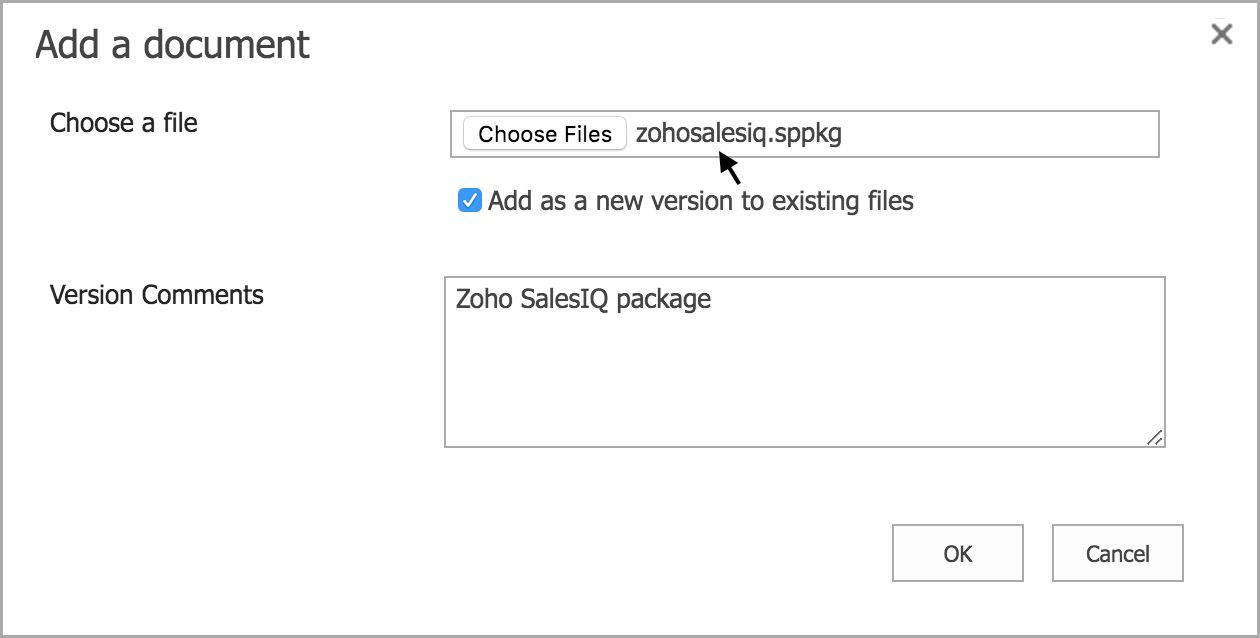
- The Add a document pop-up appears, now download this file from here and upload in the Choose a file section, and click Ok.
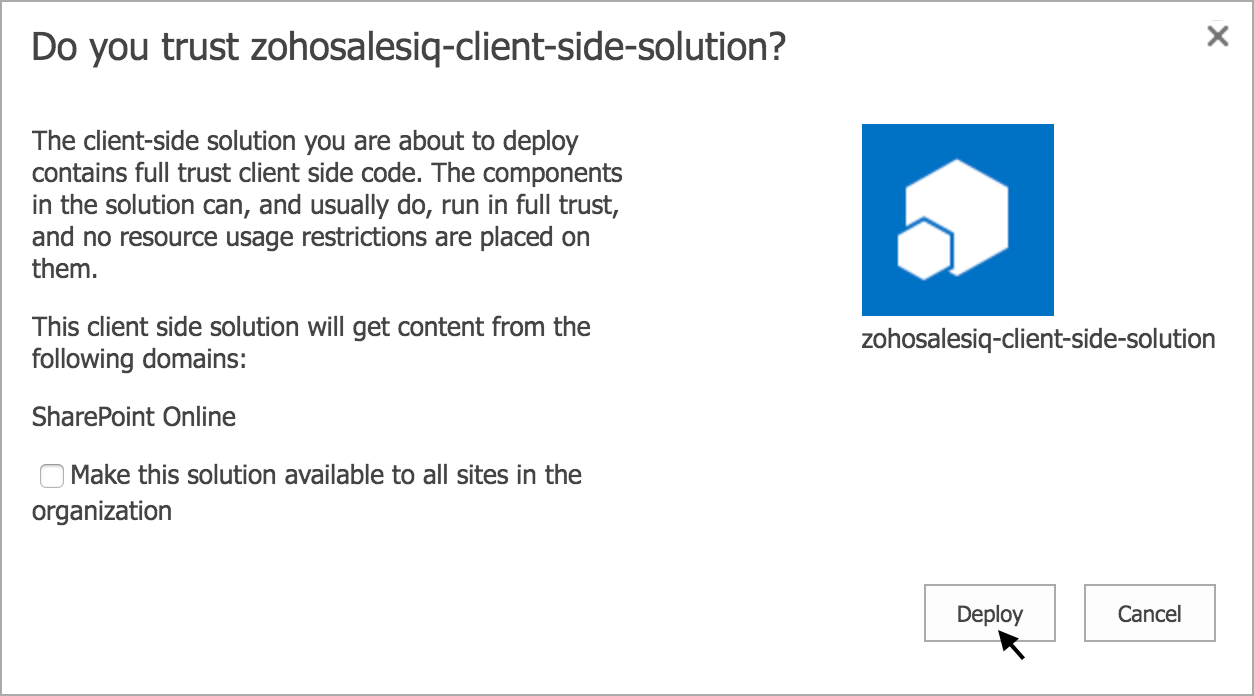
- Here you can choose to use Zoho SalesIQ for all the sites available in your organization by enabling the check-box or choose to apply for the specific site you are installing.
- Click Deploy.
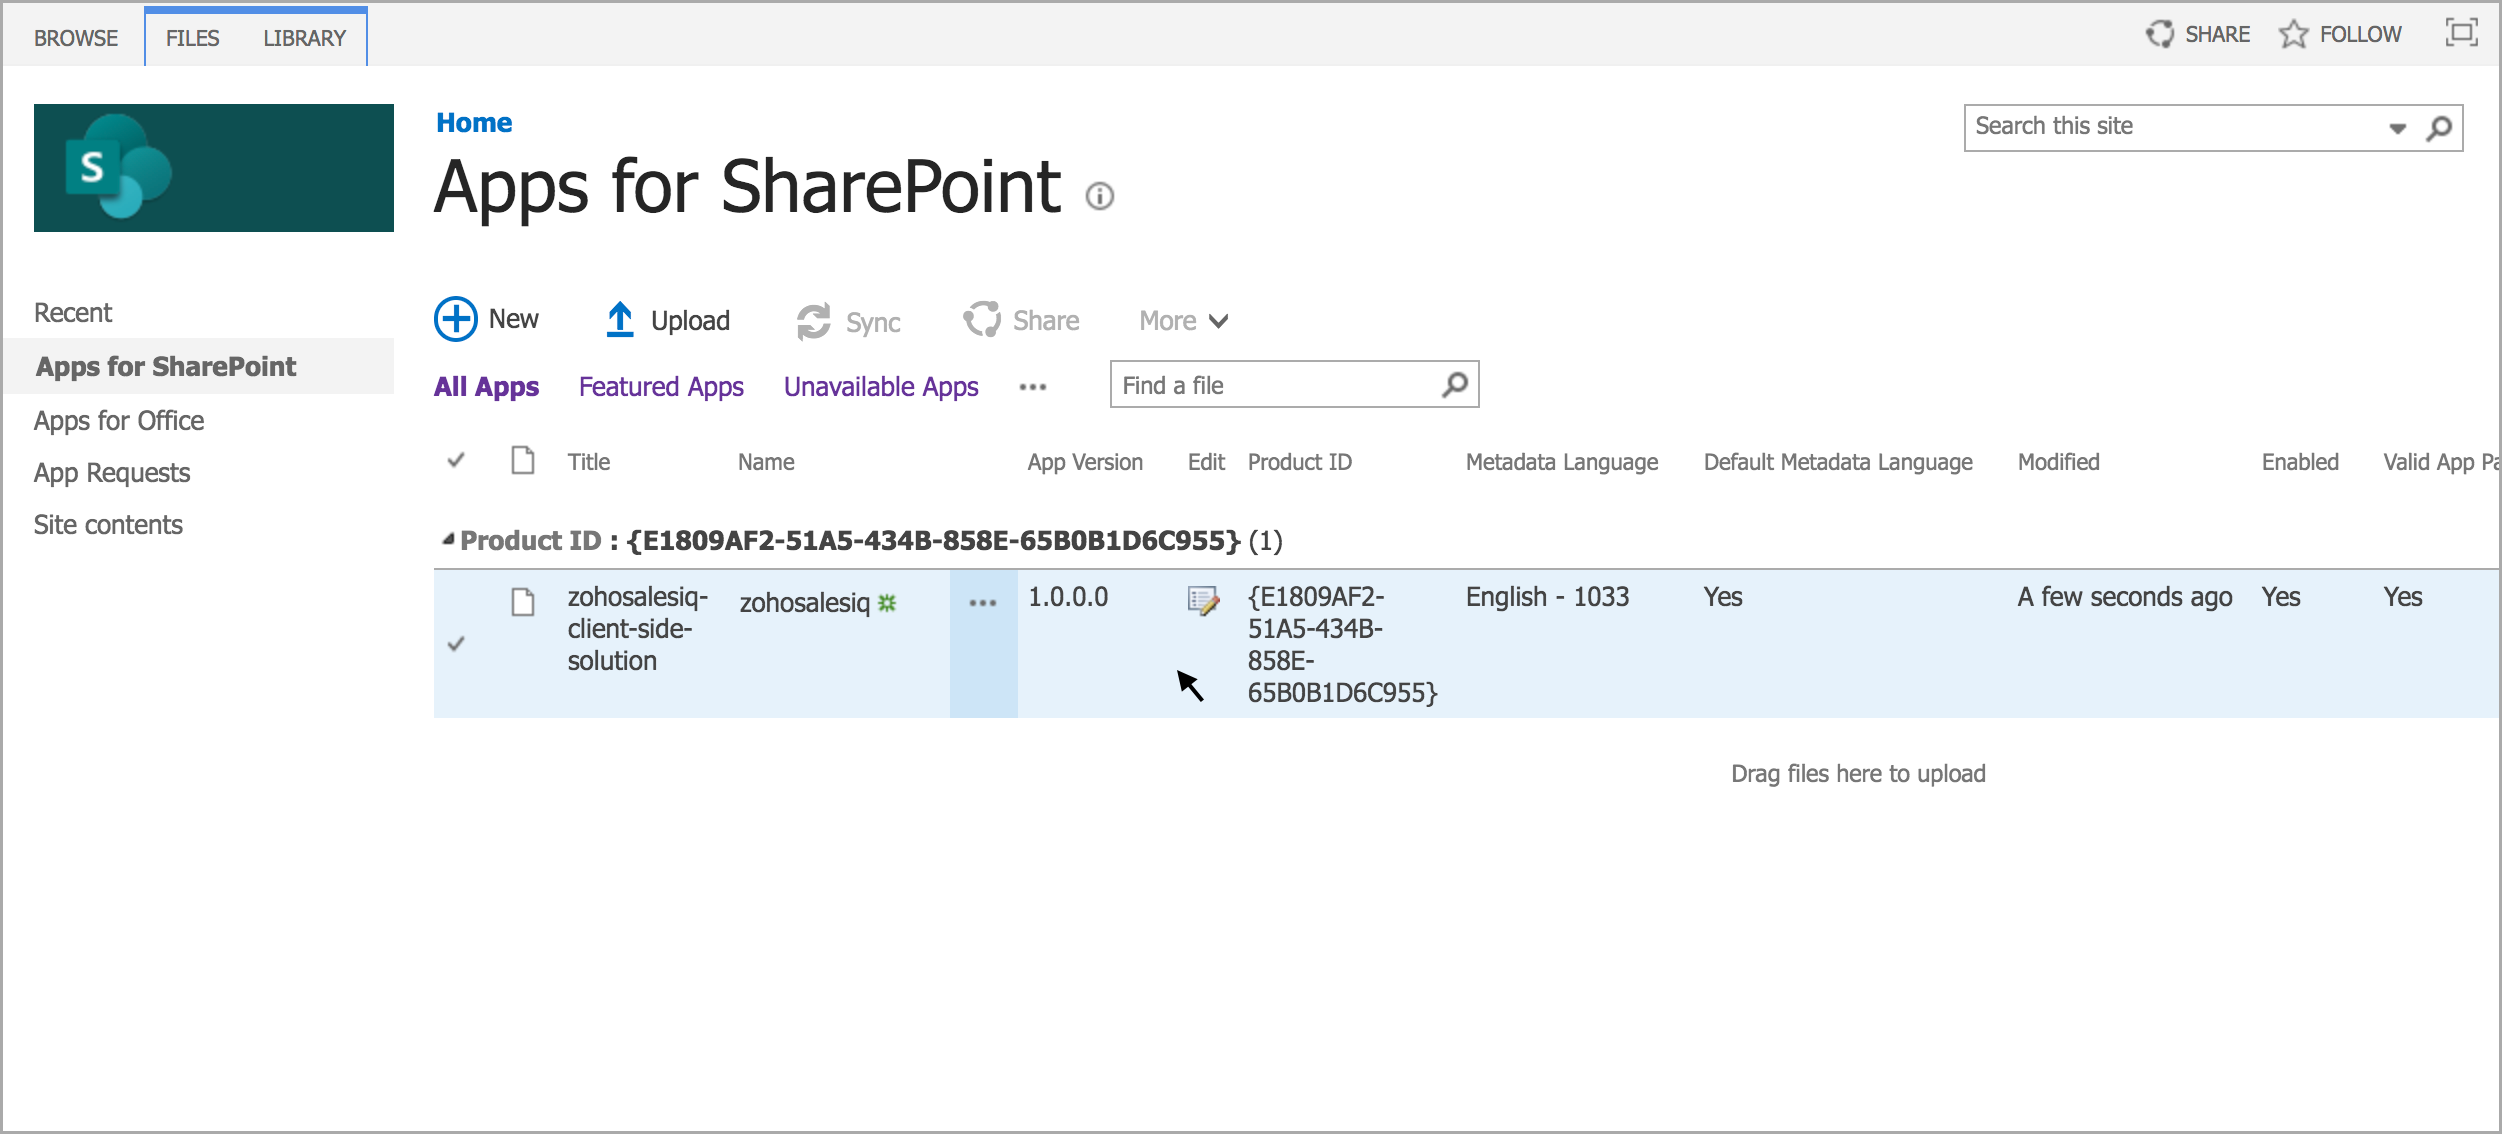
- The file has been uploaded, and you can view along with the Product ID.
- The SalesIQ plugin is successfully added to the SharePoint Apps. You should now activate Zoho SalesIQ plugin on your SharePoint Command Line.
Steps to activate Zoho SalesIQ Plugin on your Website via Command line

Requirements
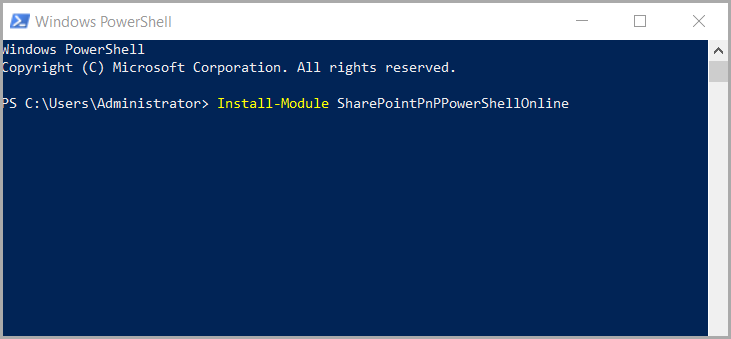
You should have a Windows OS Machine installed with PowerShell that contains SharePointPnPPowerShellOnline package. If not, you can also install using the command.
- Command : Install-Module SharePointPnPPowerShellOnline
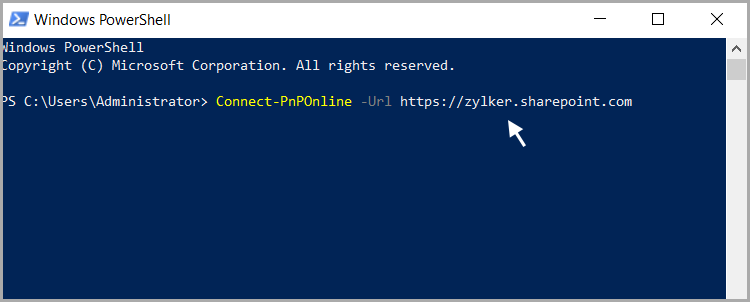
- Step 1 : Connect your SharePoint website via command-line.
 Note: Zoho SalesIQ's live chat and tracking will be enabled only for the links that are provided in the command-line. For example: If you have given the link as " http://zylker.com/ " then the live chat and tracking will be enabled only on the home page. If you wish to add to all the pages in the website then you should be following the same procedure to add SalesIQ to that pages as well.
- Connect-PnPOnline -Url https : //****.sharepoint.com
- Step 2 : A pop-up window appears prompting you for your website credentials to connect SharePoint online. Provide a valid User name and Password , and click Ok to proceed.

- Step 3 : You will be successfully logged into your website. You should run another command to inject the Zoho SalesIQ code to your website.
- Copy the code given below and paste it in your command-line, now you should replace the Zoho SalesIQ website widget code that is unique to your website.
To get your Zoho SalesIQ website's widget code:
- Login to your Zoho SalesIQ Operator console.
- Navigate to Settings -> Websites , click on the name of the website you are attempting to include in a page.
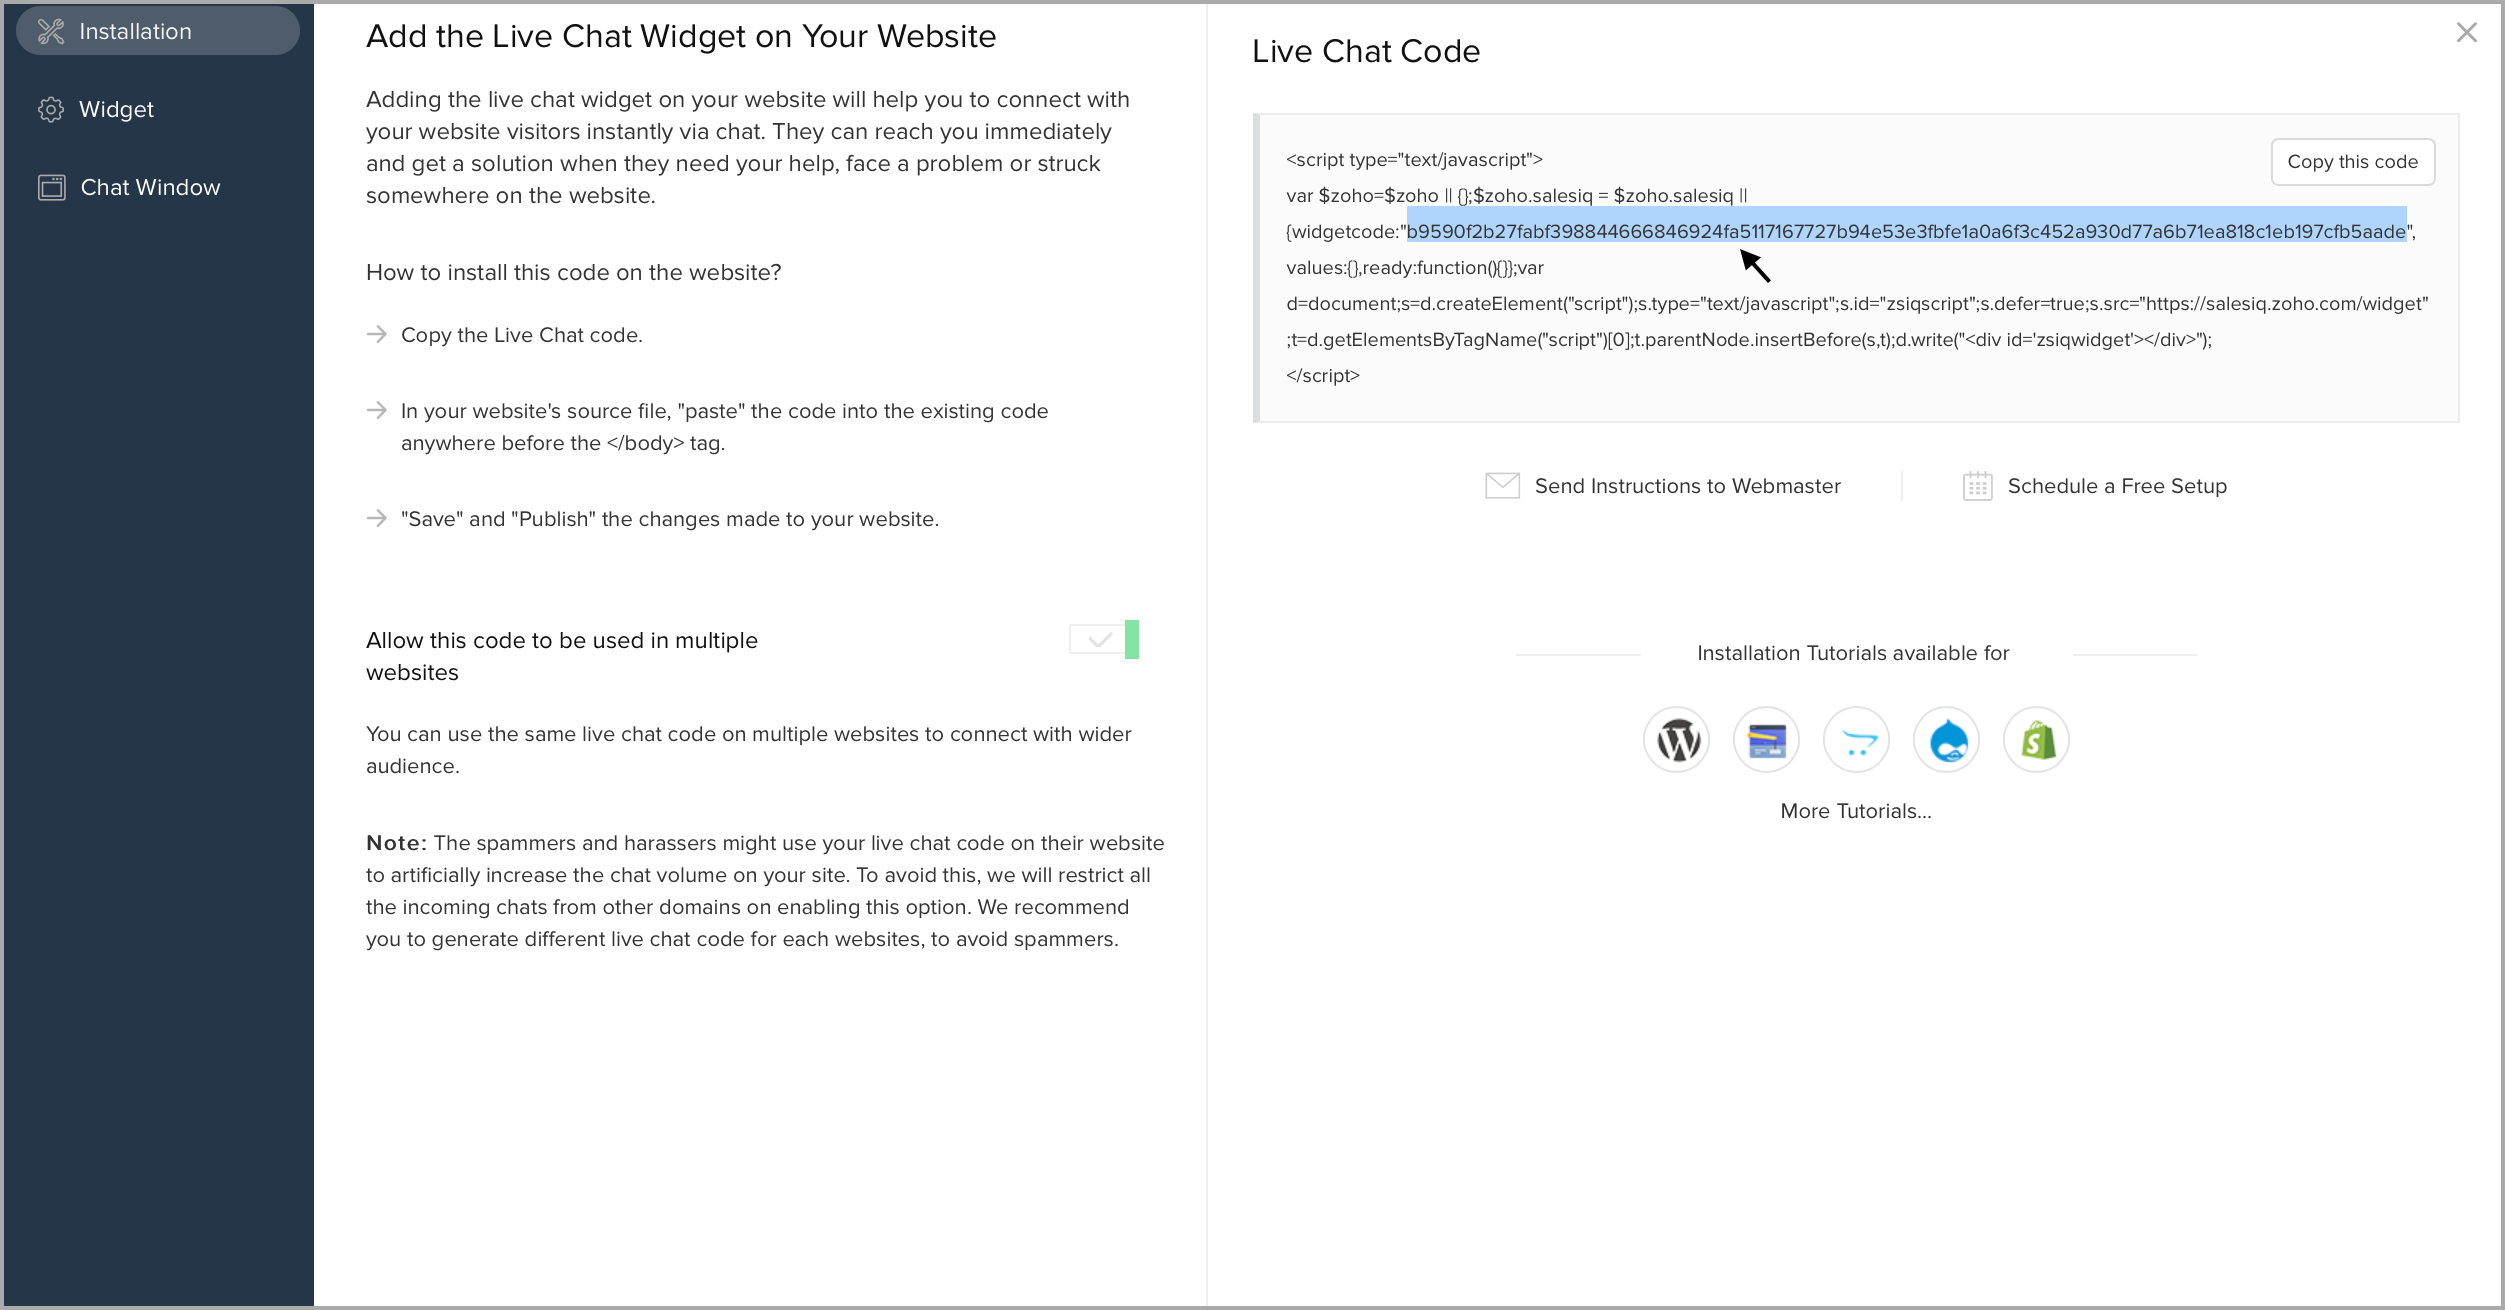
- Add-PnPCustomAction -ClientSideComponentId "9a33c707-89fb-4032-a9e3-d7b9e4f57c90" -Name "zohosalesiq" -Title "zohosalesiq-client-side-solution" -Location ClientSideExtension.ApplicationCustomizer -ClientSideComponentProperties: '{"widgetCode":" window.$zoho = window.$zoho || {}; $zoho.salesiq = $zoho.salesiq || { widgetcode: \"3d1464274e6eba67e5f1800ea1783ca81b17e297c43db48052436c41b8a73e2f\", values: {}, ready: function () { } }; var d = document; var s = d.createElement(\"script\"); s.type = \"text/javascript\"; s.src = \" https://salesiq.zoho.com/widget/\ "; s.defer = true;\n s.id=\"zsiqscript\" ; var t = d.getElementsByTagName(\"script\")[0];t.parentNode.insertBefore(s,t);"}' -Scope site

- You can also use the JS-API scripts available in Zoho SalesIQ, for which you can replace the script in the JS-API-functions inside the code. For example: I've used the JSAPI script to get the visitor name in the reference screenshot.
The JSAPI functions that you use must be appropriately parsed in-order to reflect successfully in SharePoint.

- Refresh the SharePoint website, you can view the SalesIQ live chat widget popped-up on your website.

To receive live chat notifications you should be logged in to https://www.zoho.com/salesiq/
Related Articles
Integrate with Microsoft
Co-existing with Microsoft Zoho applications offer many points of integration with Microsoft Office 365. Below, we've linked to some help pages about popular ways to sync information between Zoho and Microsoft applications. Books Microsoft Outlook ...Notebook for Microsoft Teams
Add Notebook to your personal tab in Microsoft Teams to create, view and update your notes. Notebook for Microsoft Teams lets you to, Create notes and notebook. View and update notes. Set reminder and get notifications for reminder notes. Secure your ...Microsoft Exchange - User Guide
In the Microsoft Exchange extension for Zoho CRM, only the administrator can manage all the settings options. The users are restricted to the following actions: Authorize the extension Access the extension dashboard Access emails Update the account ...Types of Microsoft Integrations
Zoho CRM offers an intriguing feature by enabling seamless synchronization of two applications. Using several Plug-in options, your Zoho CRM account can now be synchronized with a wide range of Microsoft applications (MS Oulook, MS Word, and MS ...Microsoft Teams for Orchestly
Microsoft Teams is a cloud-based collaboration workspace that facilitates communication between different teams in your organization. Benefits of the Extension By integrating Microsoft Teams with Orchestly, users can create jobs, perform transitions, ...