Project groups
You can group projects based on criteria, requirements, clients, users and various other project needs. By grouping projects, you can segregate multiple projects and efficiently manage your project groups.

For instance, if you’re working in a company that runs projects across departments like finance, invoices, and accounts. Selecting the projects in a particular category can be daunting, you may go baffled at times. To reduce the cumbersome process, you can groups projects under similar category and fetch them when required. Now, you can group all the project related to finance, budget, accounts, price under Accounts. Project Groups will help you do this in a jiffy.
Create a project group
Create a new project group based on your business requirements.
- Navigate to Projects and click
in the upper-right corner and then select Manage Groups.

- Select Manage Groups.
- Projects are displayed based on Recent Projects, Active Projects (Projects and their groups), and All Projects (Projects that are not associated with any groups).
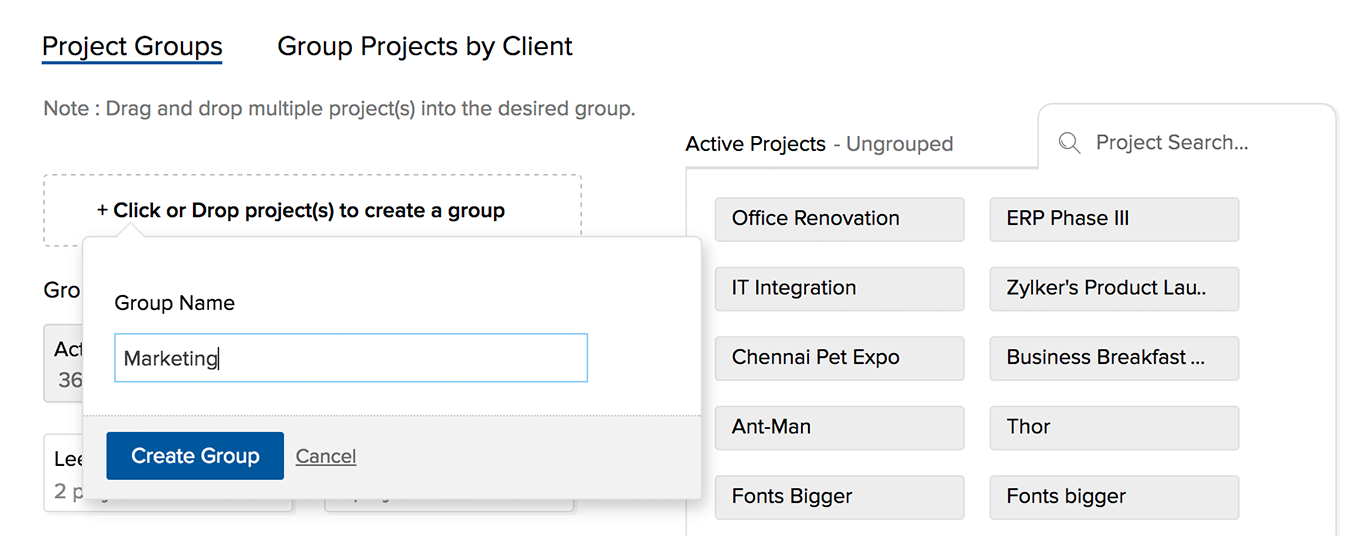
- Click + Click or Drop project(s) to create a group.
- Enter the group name for the projects that you want to group together in the Group Name.

- Click Create Group to create a project group.
- You can also drag and drop projects from Active Projects to + Click or Drop project(s) to create a group and then create a group if required.
You can create multiple project groups or associate multiple groups to a single project group.
Manage your project groups
After creating a project group, you can effectively organize and manage the groups according to your preferences. All the actions are right within the groups to get your work done on time.
- Hover over the required project group and click
to edit the project group.
- Hover over the required project group and click
to remove the project group.
- Click
to drag and drop the project groups based on your choice, and then click Save Order to save the project group order.
- Click a project group and view the list of projects associated with the project group.
- Search for projects using Project Search in the upper-right corner of the Active Projects. (i.e.) However, it is case-sensitive.

However, any projects associated with the project group will not be deleted instead, they will be moved into Active Projects. A warning message is displayed, when you delete a project group. Click Ok to delete.

Create a new project and associate a project group
Create a new project and associate it with a project group.
- Click New Project in the upper-right corner in Projects.
- Enter the Project Name.
- Select the Project Owner in Owner field.
- Select a project template in Choose a Template field.
- If you create a project from an existing project template, the Project Start Date option is enabled.
- Select a start date for the project in Project Start Date field.
- Enter a brief summary about your project in Project Overview field.
- Select the Show this project overview by default checkbox, if you wish to display the project overview summary in the project Dashboard.
- Select the budget option to estimate project in Project Budget. Projects can be estimated Based on Amount or Based on Hours.
- Select a project group in Group Name to associate the project.

- If required, hover over the Group Name, and then click Add New Group to create a new project group.
- Indicate the privileges to access the project in Project Access. Learn more about public and private projects.
- Click Add Project to create a new project.

- If required, you can also edit the project and modify its Group Name. Learn more about editing projects.
- If available, custom fields are populated while creating or editing the projects. Learn more about custom fields.
Reorder and alphabetically sort projects
Reorder projects within a project group as desired. Click the desired project group and then click the  icon to reorder the projects. You can also alphabetically sort the projects by clicking the reorder icon and selecting the Alphabetically Sort link. Now, select Save Order to save the list.
Ungroup projects from a project group
Ungroup projects associated with a project group, if required.
- Click the desired project group to view its associated projects.
- Click on the desired project and then drag and drop the projects into Active Projects.
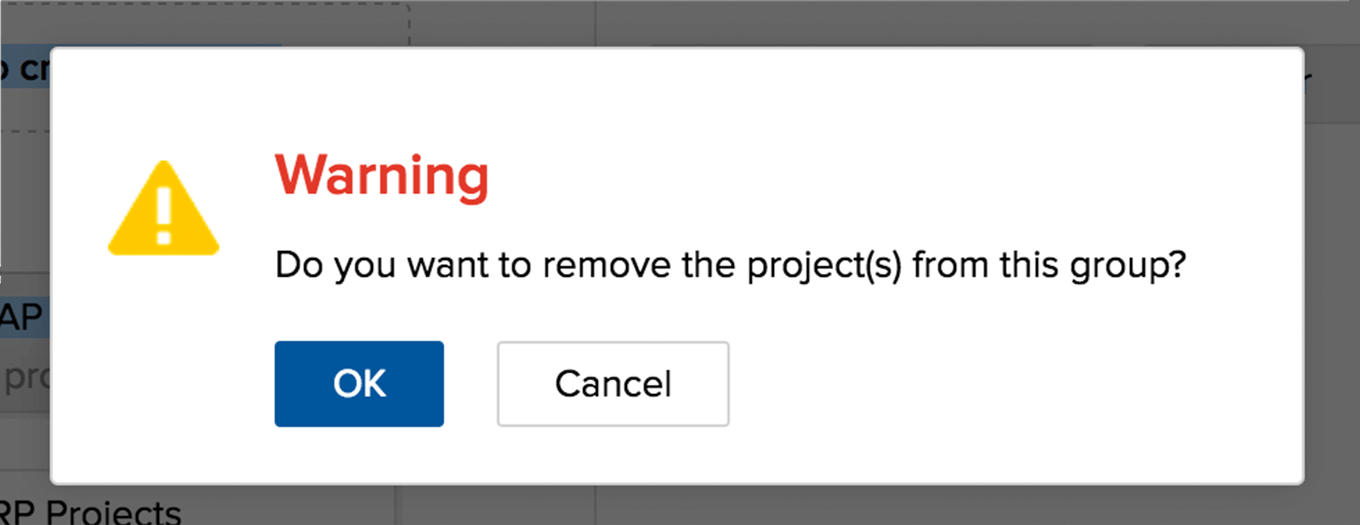
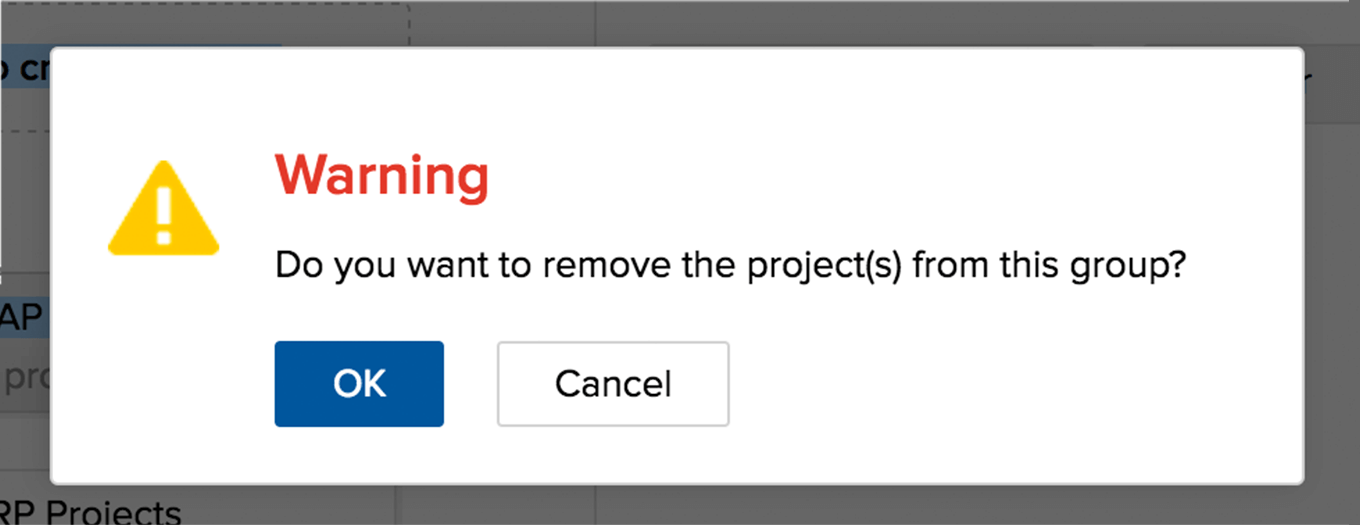
- A warning message about removing the projects from that project group is displayed.

- Click OK to remove the projects from its project group.

To remove a single project, you can hover over the project and select  right next to the project to remove only that project from its project group.
Associate a project to a client group
Click the View by Client tab and then click the Manage Groups icon in the left corner, to view the client projects and associate projects to the desired client group. To associate a project to a client group, you need to drag and drop the project into the desired client group.

Related Articles
Who can reorder projects and project groups?
Only the Admin owns the permission to reorder projects and groups in the team.Manage project
View project details Navigate to Projects. Select a project card and click . Click Details. View the details of the project. Edit a project Navigate to Projects. Hover over the project card and click in the upper-right corner. Select Edit. Update ...Project and client timesheet report
Project Report Navigate to Home > My Timesheet. Click the drop-down action panel beside the Calendar view section. Click Project Report. Highlights of Project Report: Be it two months or two years, irrespective of the project span, a report is ...When working on projects which target prospects and involve many stakeholders, how can I flag groups of contacts for any project related activity?
You can use the tagging feature to flag the right contacts for any project related activity. Read more about tagging here.Managing Groups
In Zoho Recruit, you can create different types of groups (set of users) to manage a set of common records. Groups can be used for setting up team selling, team support, event management by a group of marketing users, etc. Users associated with a ...
