SalesIQ Data in SalesIQ
Viewing SalesIQ data inside your Salesforce CRM account
To view the pushed SalesIQ data inside your Salesforce account it is necessary that you follow the below-given steps,
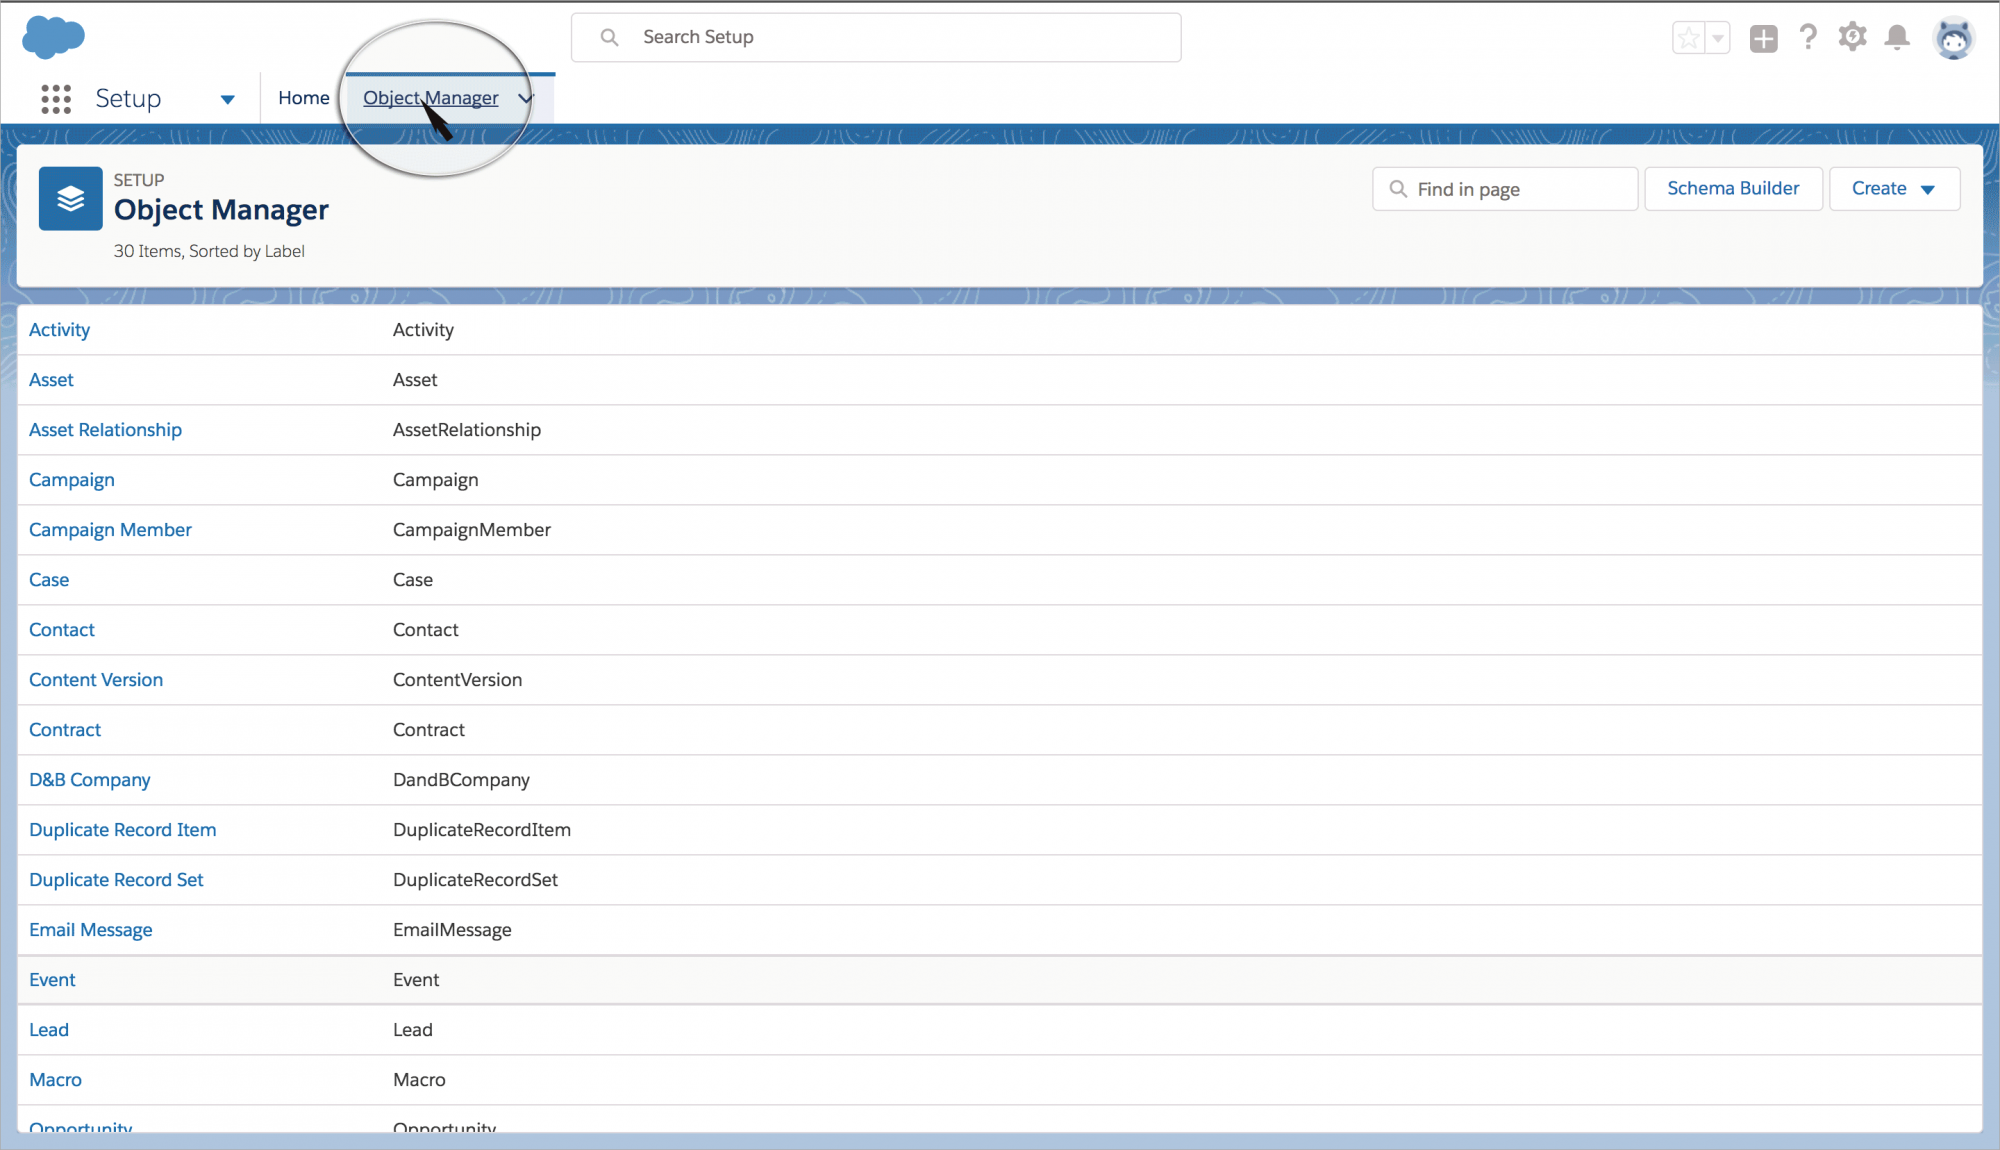
- Click on the Setup icon which you can find in the top right corner ( Fourth icon from the left)
![]()
- Then click on Object manager which you can find in the top left corner beside the Home tab.
- In the list of options that appears choose either Lead or Contact .

- Then click on Page layout, which you can find in the pane onto your left .
- After which choose a layout from the list that appears.

- Then choose the following specified custom fields,
- Number of chats
- Average time spent
- Visitor score
- Last visited time
- Number of days
- Number of chats
- Drag and drop them under the appropriate titles that you would find right below.
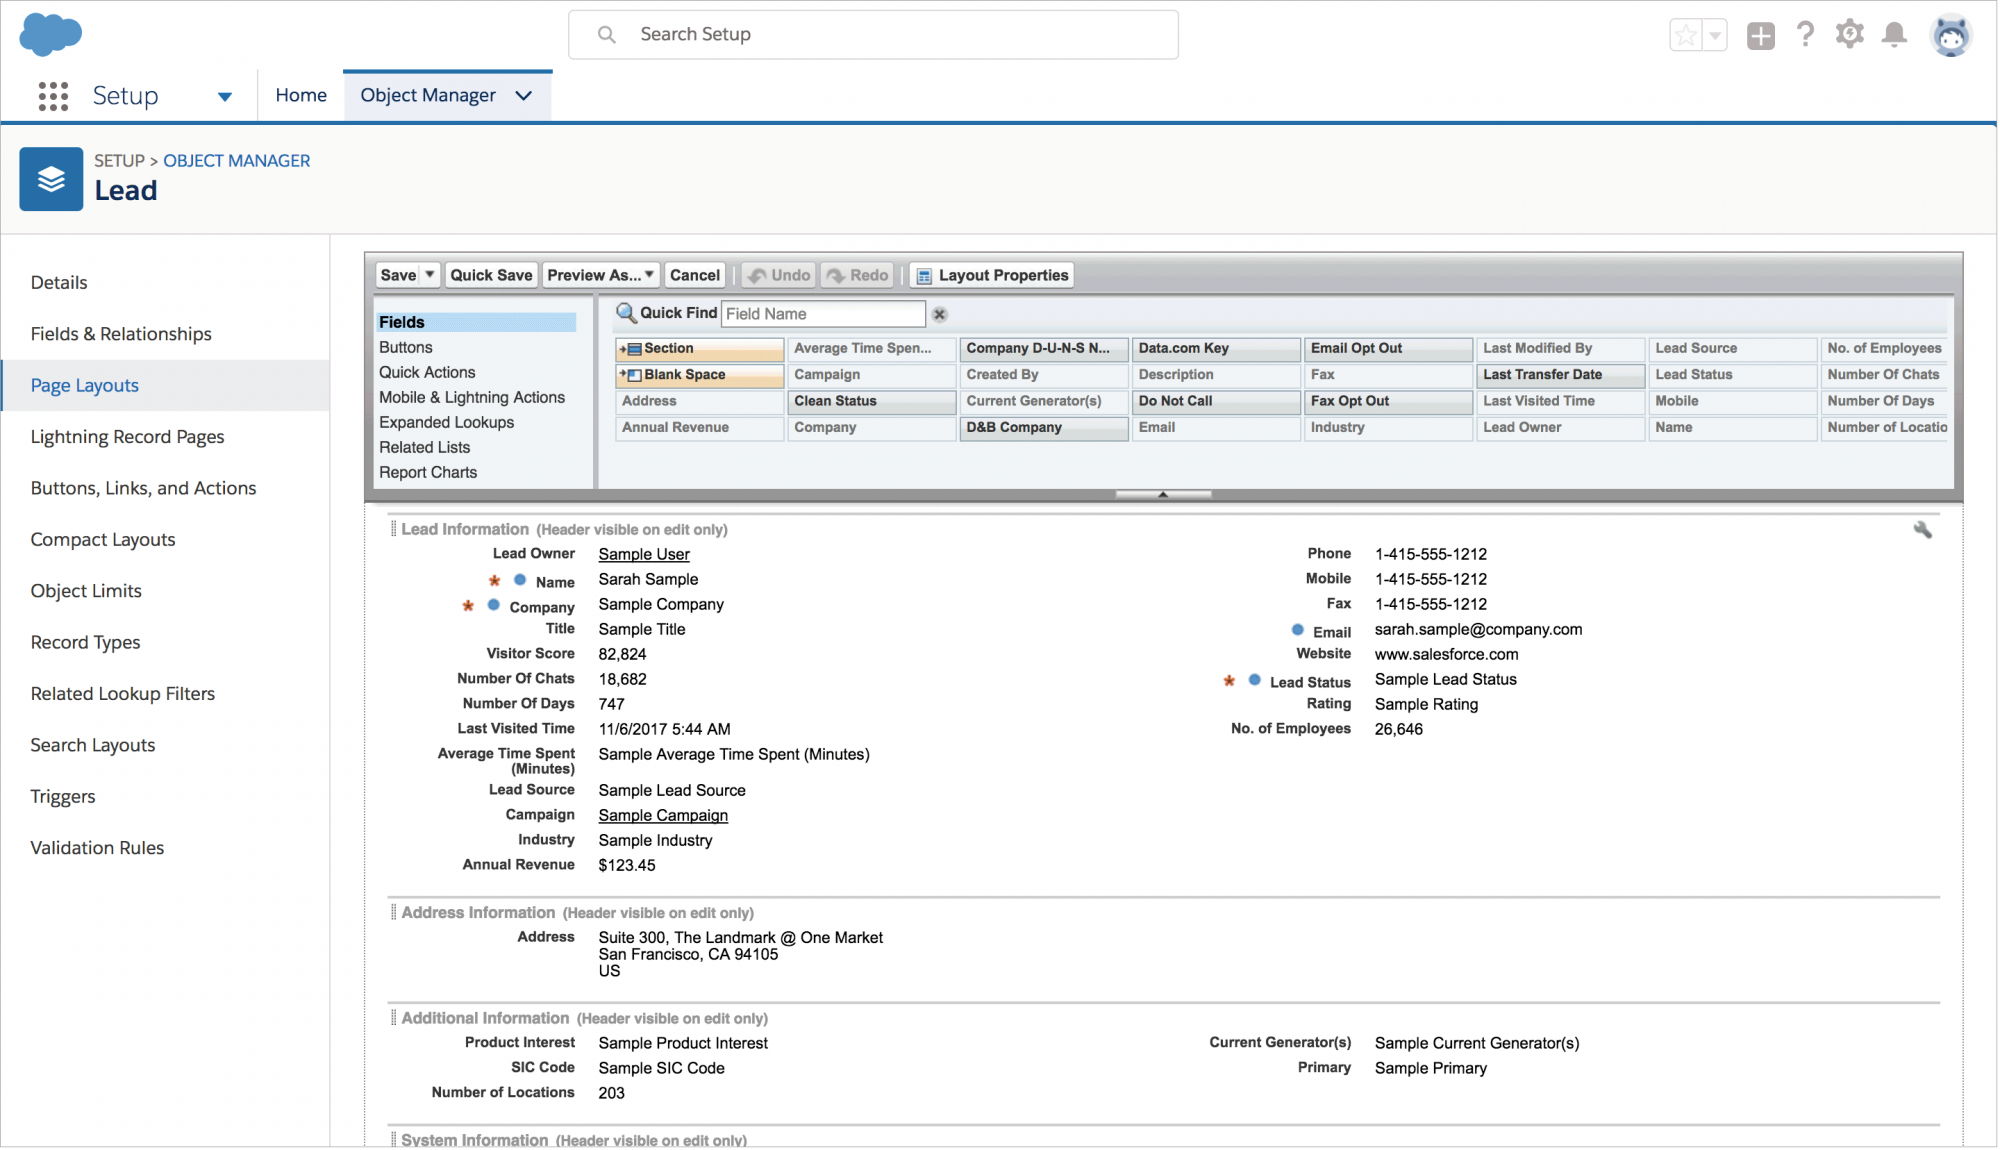
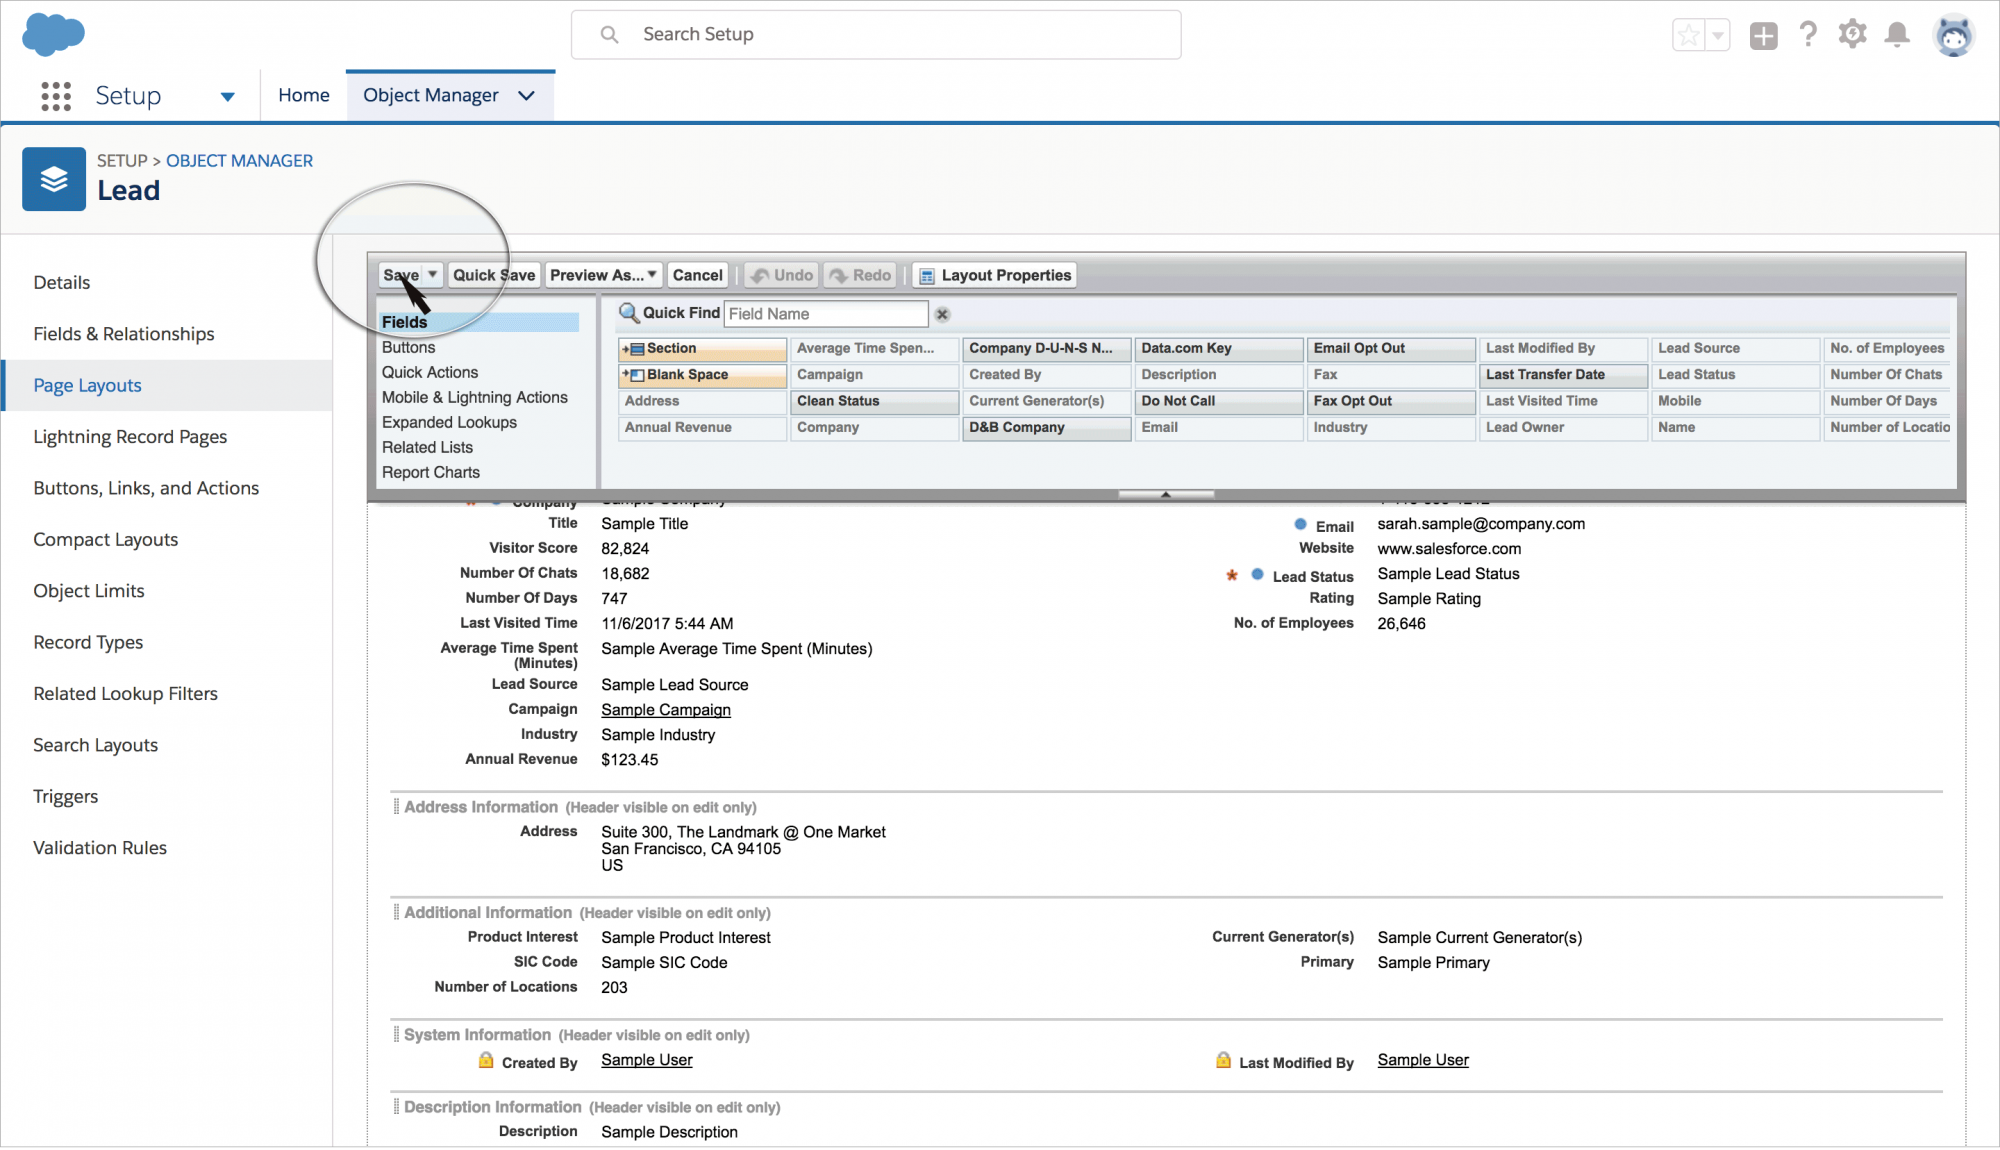
- Then click on save.
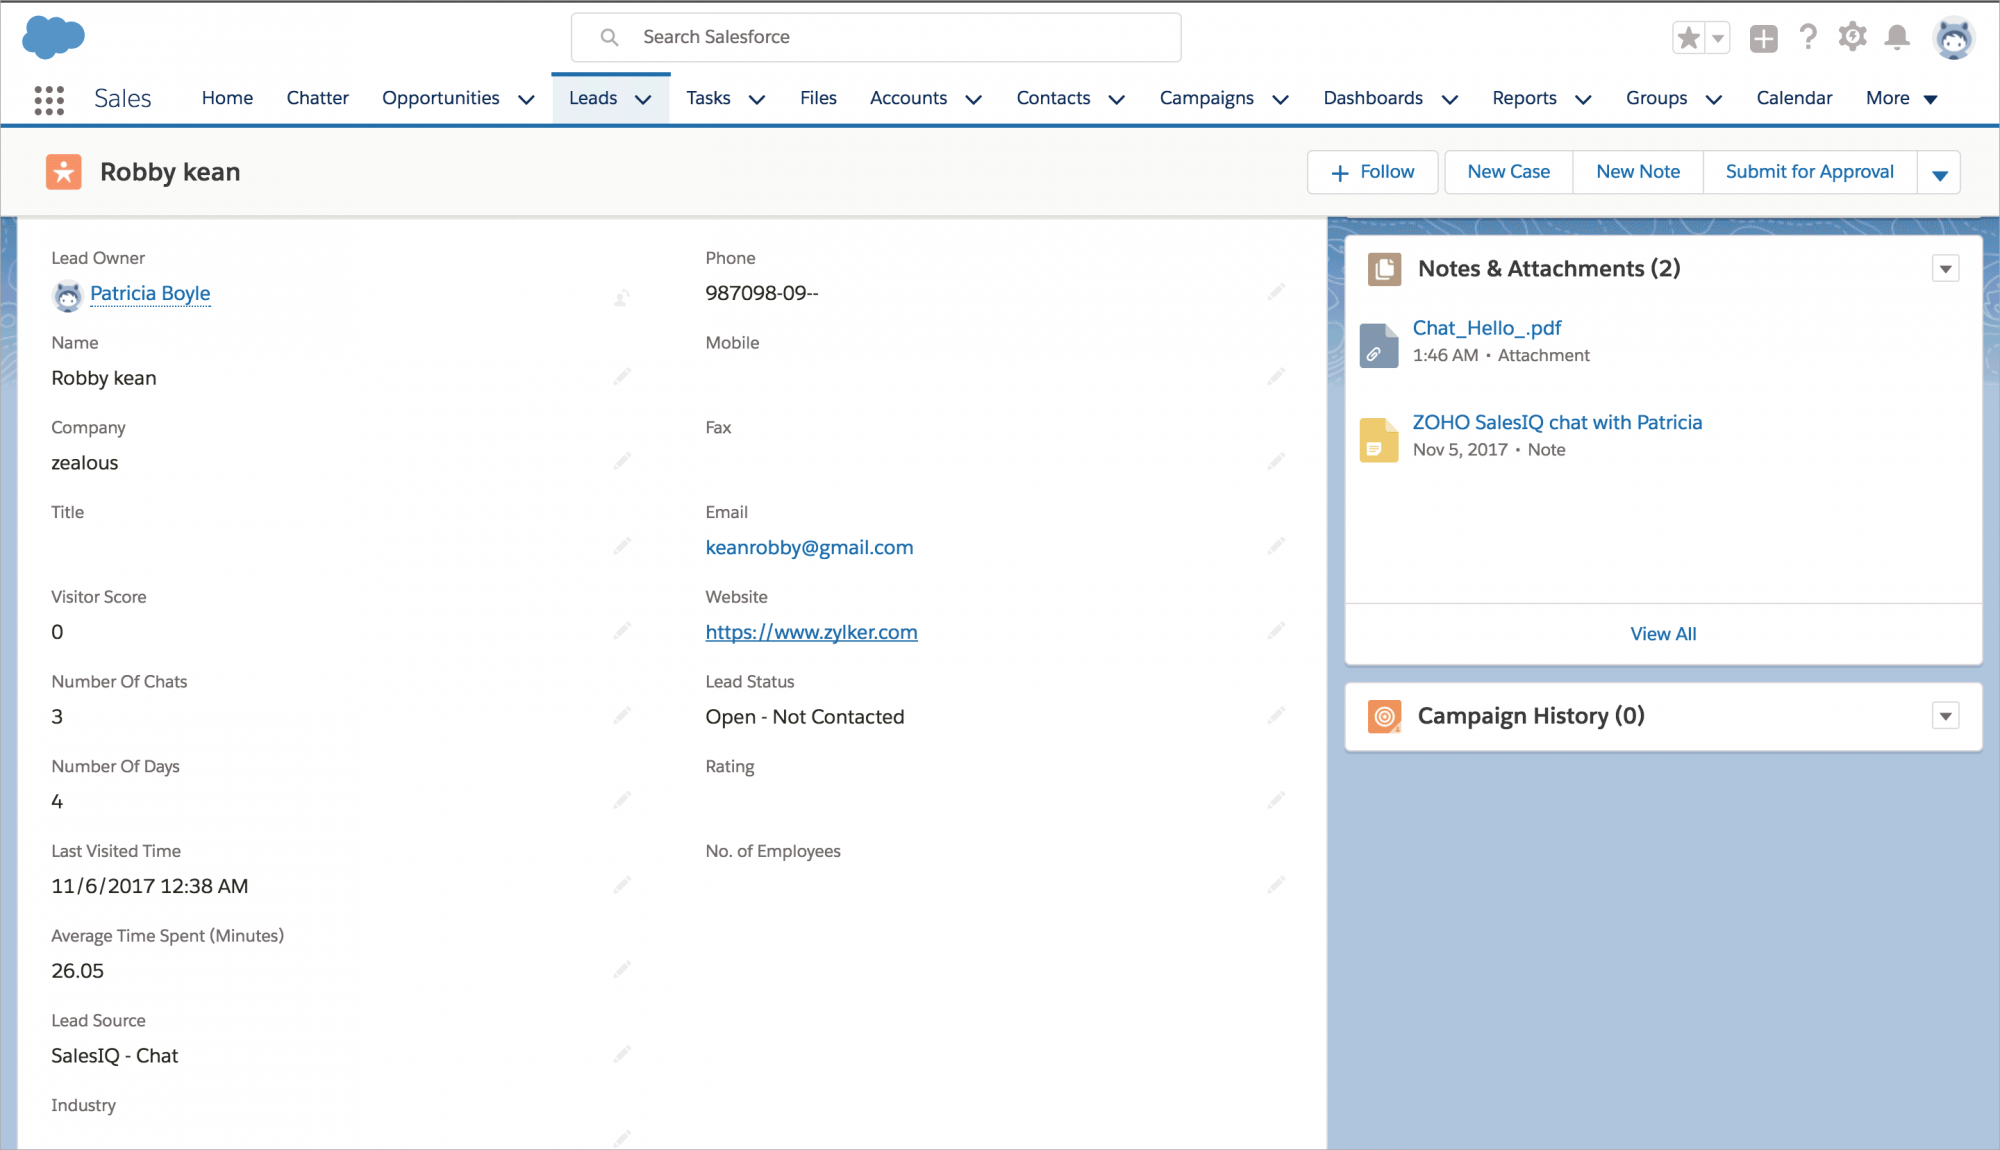
- Now you can scoot back to view the added details by clicking on a Contact or a Lead under Lead or Contact tab.
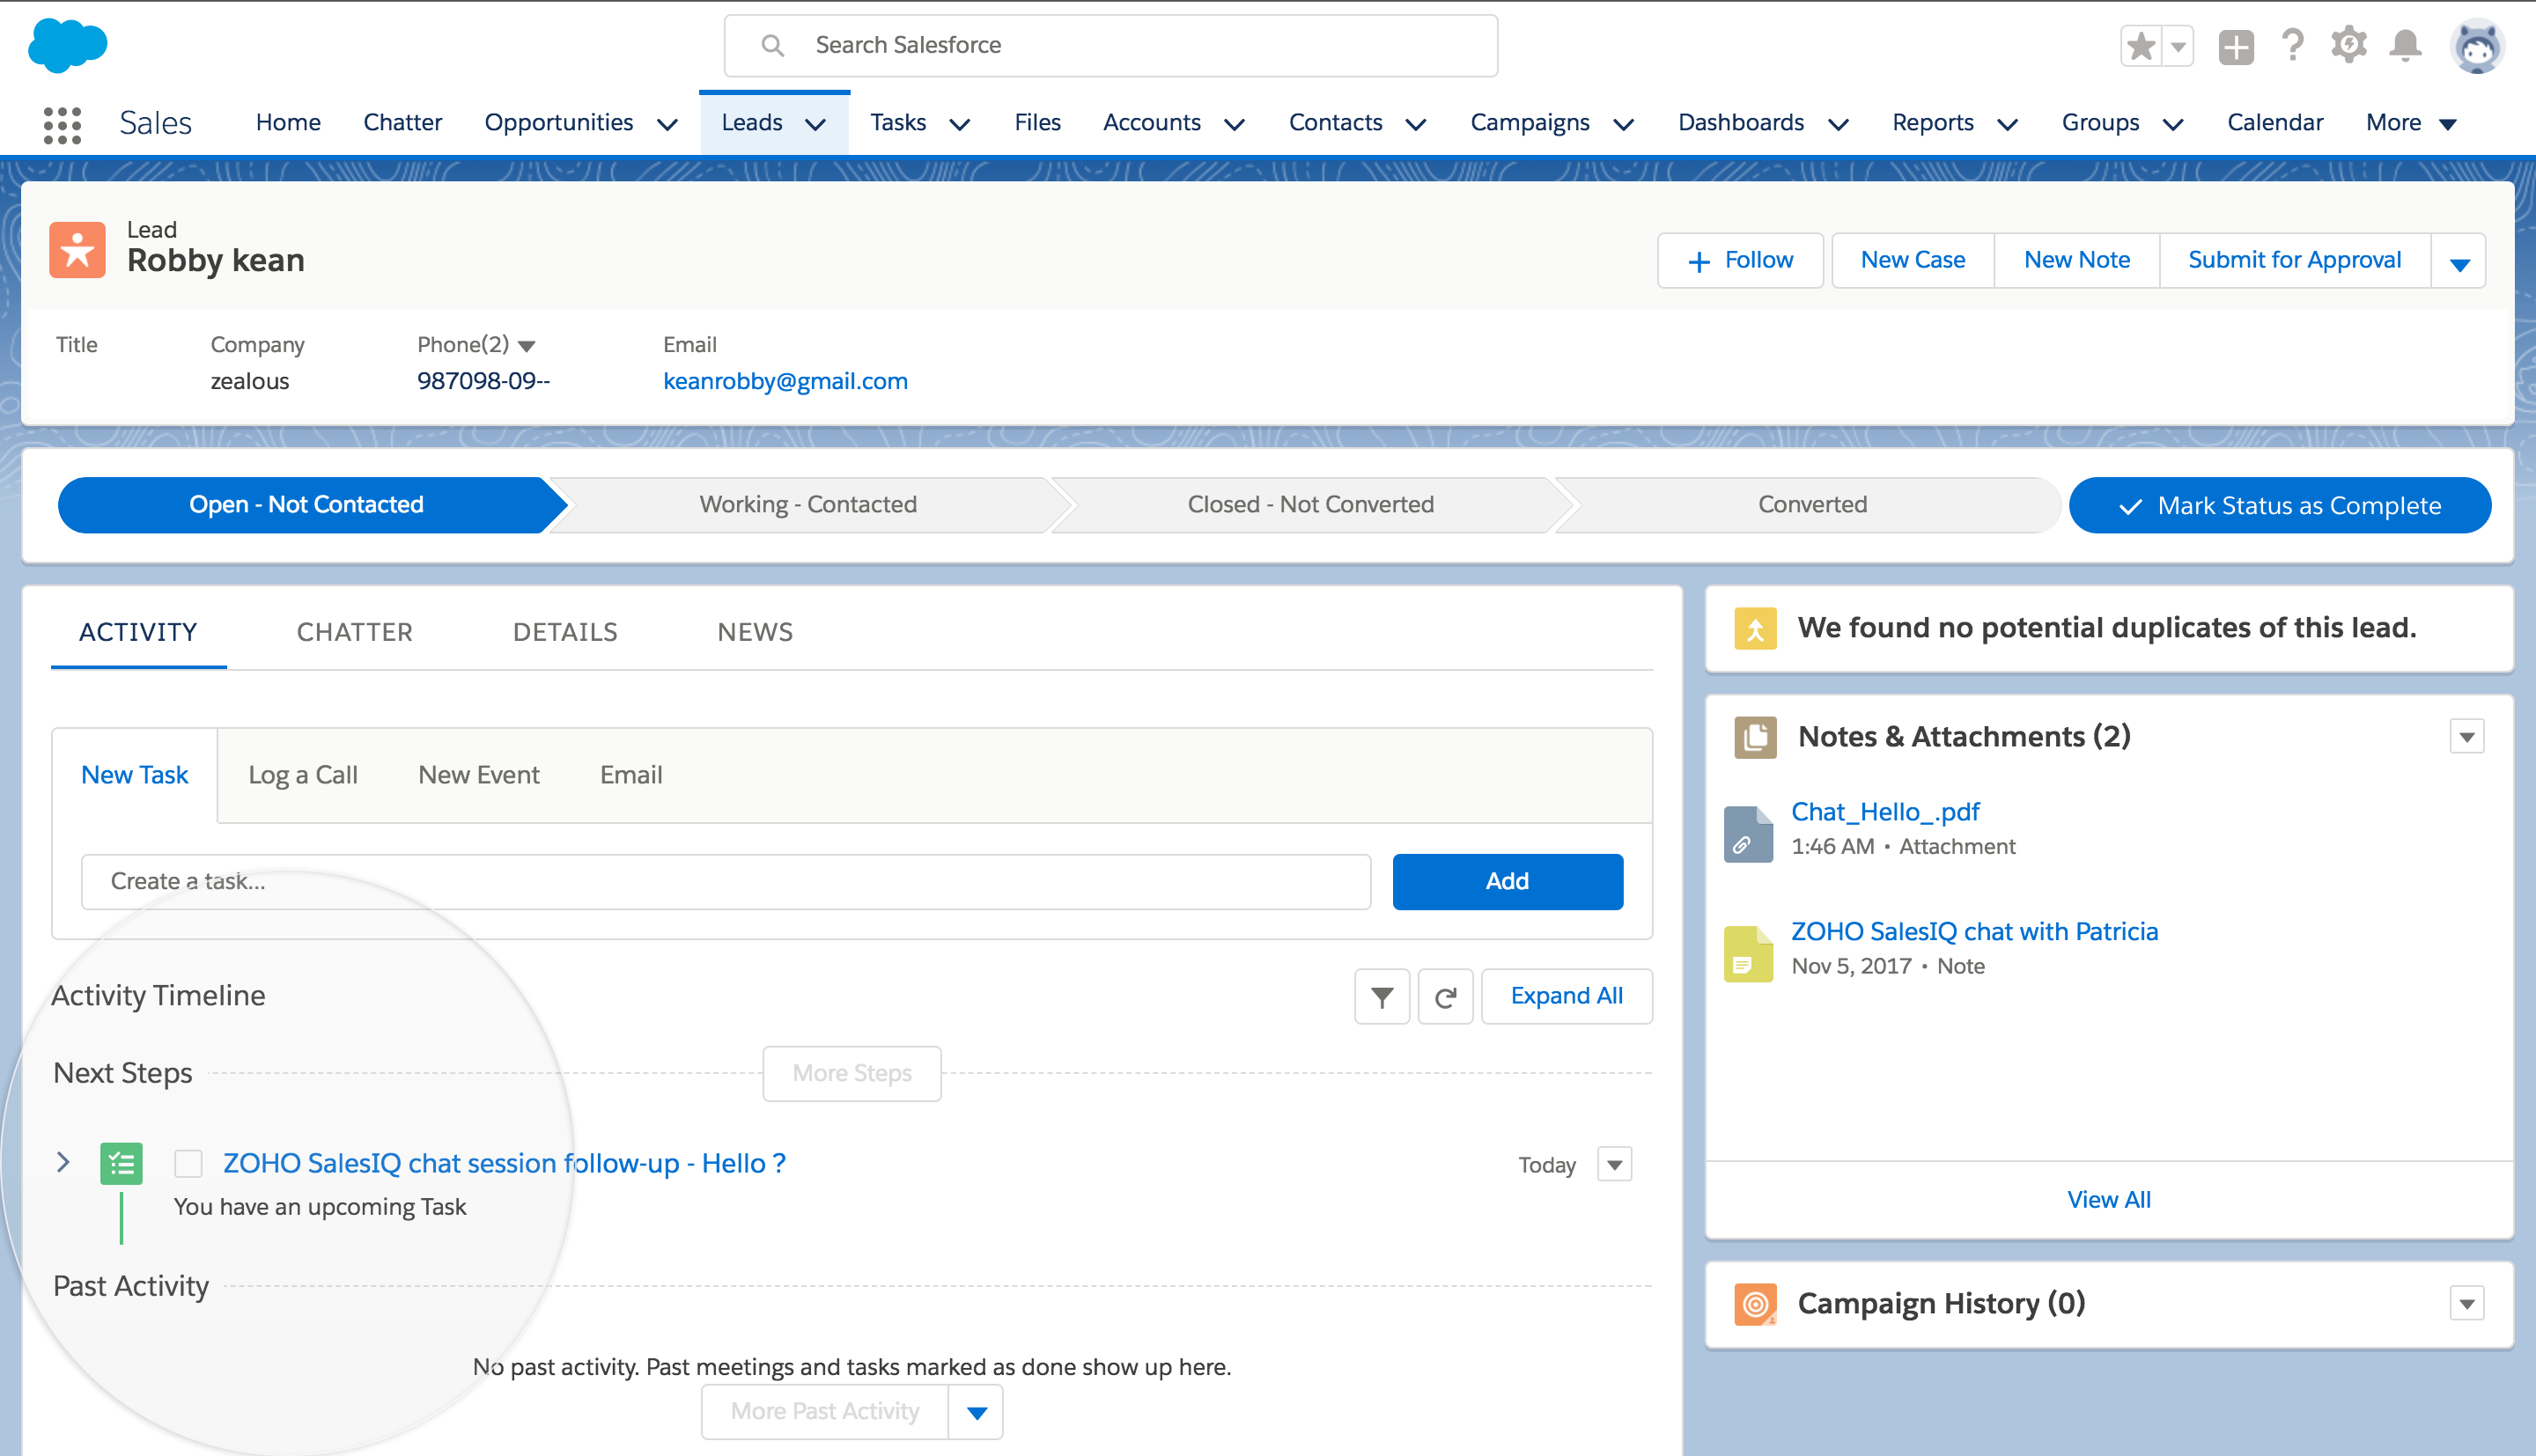
Viewing chat transcripts inside your CRM portal
If you had enabled the option for pushing in the chat transcripts from your SalesIQ account into your Salesforce CRM portal, you can access and view those chat transcripts by,
- Navigating to either Leads or Contacts tab.
- Click on any one of the visitor from the list displayed.
- In the window that appears, you can view the chat transcripts saved in PDF format with chat subjects as the file name onto your right under the label Notes & Attachments .
- Click on the desired chat transcript, to view it.
![]()
Lead Source as chat and website visit
To identify the visitors pushed into your Salesforce CRM account right away from your SalesIQ account:
- Check the Details column of a particular Lead or a Contact.
- All the entries with the value " SalesIQ- Chat" or " Website visit " for the field Lead source are those that are pushed in from your SalesIQ account.

Notes: Auto-added and manually added
Every time your users have a chat session with the visitors, SalesIQ will automatically add a note to the ones that are to be pushed into your Salesforce account automatically with the following details,
- User's name
- Visit ID
- Time frame of the chat session
- Question brought in by the particular visitor
If you had chosen the missed visitor category in the integration section earlier, then a note will be added for those visitors too while pushing them into your Salesforce account.
Salesforce also allows you to add notes manually,
- This can be done by clicking on the add notes icon, which is the first icon above the label "Visitor info".
- Add a desired note, for future reference.
- Then click on "Save".
To view these notes,
- Navigate to either Leads or Contacts tab.
- Click on any one of the visitor from the list displayed.
- In the window that appears, you can view the added notes onto your right under the label Notes & Attacments .
- Click on one, to view it.

- User's name
Follow-up tasks
Follow up tasks can be either added automatically by enabling this option in the integration section or by manually adding one right away from the users chat window. To view these tasks,
- Navigate to either the Leads or Contacts tab.
- Click on any one of the visitor from the list displayed.
- Then click on the Activity tab.
- A list of upcoming activities will be displayed below the label " Activity Timeline ". And below these activities, all your past activities will be listed down.
- Click on any one of the upcoming activity.
- Details like Assigned to, Subject, Due date, status, due date, from, to, User to whom the activity is assigned to etc., will be displayed.
- To change the status of a particular task click on the drop-down icon right beside the task name, in the options that appear choose Change status option.
- You can also avail a bunch of options for manipulating task related data under this drop down icon like edit comments, change priority, change due date etc.,
Related Articles
Setting up SalesIQ Integration
Zoho SalesIQ integration with Zoho CRM, also called as Visitor Tracking, allows you to engage with people visiting your website through chat and push their information into CRM. You can also embed a chat widget on your webpage and converse with the ...Zia with SalesIQ's Zobot
Zobot is Zoho SalesIQ's virtual chat agent that is designed to interact with website visitors conversationally. Zobot automates the process of interacting with website visitors and helps to maintain the presence of a helping hand, even when all the ...How to push Clearbit data automatically from SalesIQ to Zoho CRM?
You can map the fields in the Clearbit (Enrichment) integration section to push the Clearbit data automatically from SalesIQ to Zoho CRM. By default, a set of fields will be automatically mapped based on the module (Lead/Contact) you choose to push ...How do I set a time frame to refresh the existing Clearbit data in Zoho SalesIQ?
In Settings > Integrations > Clearbit - Reveal, scroll down until last. In Advanced Configuration, choose the frequency you would like to set to refresh the data (Weekly, every 30 days, every 90 days.) We would recommend you to set the refresh ...How to set frequency to refresh the existing Clearbit data in Zoho SalesIQ?
Set Refresh time In Settings -> Integrations -> Clearbit - Enrichment, scroll down until last. In Advanced Configuration, choose the frequency you would like to set to refresh the data (Weekly, every 30 days, every 90 days.) We would recommend you to ...