Setting up your Email Channel
Emails are the most widely used and an indispensable mode of communication for your customers to submit tickets to your Zoho Desk. The emails received from your customers are converted into tickets and assigned a unique ticket ID. All you need to do is to forward the emails received at your support mailbox to Zoho Desk.
Default Support Mailbox
When you sign up for Zoho Desk, you are provided with a default support email address that looks like support@mycompany.zohodesk.com. The mycompany part of the email address is to be replaced with the portal name of your Zoho Desk. Technically, you can share this support email address with your customers, to receive emails in Zoho Desk.
To view your default support email address:
- Click the Setup icon (
) in the top bar.
- In the Setup Landing page, click Email under Channels.
- In the Support Email Address page, you can find the default email address.
The email address is mapped with the default department and assigned with a friendly name.
Forwarding Emails from your External Email Address
You must be having a support email address ( like support@zylker.com ) for your business. The next step is to forward emails from your support (external) email address to default email address in your Zoho Desk account. Learn how to set up forwarding from various email service providers. Once you set up forwarding, you will receive a verification email at support@ zylker .zohodesk.com on behalf of your email server.
Note:
- The verification email is created as a ticket, and it can be located under the Open Tickets View in your Zoho Desk account.
While your default support email address is support@mycompany.zohodesk.com, you can create multiple aliases for different situations. For example, you can create an alias like sales@mycompany.zohodesk.com to create tickets from sales related emails in Zoho Desk. You can even create a separate department for the sales function and map it with the sales alias. This way, you can route tickets straight to your sales team. However, you must forward emails from your external email addresses to equivalent email alias in your help desk.
The following table specifies the Zoho Desk editions and the maximum number of aliases allowed under each of them.
| Zoho Desk Edition | Number of Email Aliases |
| Enterprise | Unlimited |
| Professional | 11 (Default + 10) |
| Standard | 6 (Default + 5) |
| Free | 2 (Default + 1) |
To create an alias:
- Click the Setup icon (
- In the Setup Landing page, click Email under Channels.
- In the Support Email Address page, click New Support Email Address in the upper right area.
- In the Add Support Email window, enter the Address you'd like to use for receiving support tickets.
For example, to create an alias like sales@mycompany.zohodesk.com, enter sales. - Enter a Friendly Name for your support address.
The friendly name will precede the support address. For example, Zylker Sales <sales@zylker.zohodesk.com>. - Click Save.
Follow the above steps to add multiple support email aliases and then set up forwarding from their equivalent external email address to receive support tickets.
| Support Email Address | Equivalent Zoho Desk Alias |
| support@mycompany.com | support@mycompany.zohodesk.com |
| sales@mycompany.com | sales@mycompany.zohodesk .com |
| escalation@mycompany.com | escalation@mycompany.zohodesk .com |
| billing@mycompany.com | billing@mycompany.zohodesk .com |
You can edit or delete the email aliases added in your Zoho Desk.
To delete an email alias:
- Click the Setup icon (
- In the Setup Landing page, click Email under Channels.
- In the Support Email Address page, click Delete corresponding to the alias.
- Click OK to confirm.
Note:
- There must be at least one support email address connected to your Zoho Desk.
Starting & Stopping Mail Fetch
You can at any time stop or start fetching emails for the support email aliases created in Zoho Desk.
To stop fetching emails for an alias:
- Click the Setup icon (
- In the Setup Landing page, click Email under Channels.
- In the Support Email Address page, click the toggle to OFF corresponding to a support email address.
- Click OK to confirm. From now on, the emails received at the support email alias will not convert into tickets.
To start fetching emails for an alias:
- Click the Setup icon (
- In the Setup Landing page, click Email under Channels.
- In the Support Email Address page, click the toggle to ON corresponding to a support email address.
- Click OK to confirm.
Associating Alias with Department
If you'd created multiple support email aliases, you could map them with their appropriate departments in Zoho Desk. It helps you track, manage and generate reports, for the tickets received at those email aliases. However, this option is available only when you have more than one department.
To map an alias with a department:
- Click the Setup icon (
- In the Setup Landing page, click Email under Channels.
- In the Support Email Address page, click Edit corresponding to an email alias.
- Select a department from the drop-down menu.
- Click Save.
Zoho Desk allows you to reply from another of your company's support email address instead of your default From Address. However, you must add the From Address and authenticate it in Zoho Desk. Also, when you don't add a From Address, the default support email address is used as the From Address in replies to customers.
The following table specifies the Zoho Desk editions and the maximum number of From Addresses allowed under each of them.
| Zoho Desk Edition | Number of From Addresses |
| Enterprise | Unlimited |
| Professional | 10 |
| Standard | 5 |
| Free | 1 |
To add a From Address:
- Click the Setup icon (
- In the Setup Landing page, click Email under Channels.
- In the Support Email Address page, click From Address from the left panel.
You can find that your default support email address added as the from address. - In the From Address page, click New From Address in the upper right area.
- In the Add From Address window, do the following:
- Select a Department (when you've more than one) from the drop-down menu.
- Enter the From Address to be used while replying to tickets. For example, support@zylker.com.
- Enter a Friendly Name for your From Address.
- Click Save.
Once you add a From Address, you will receive an authentication email to that email address. You must complete the authentication to be able to reply using the new From Address.
Notes:
- Didn't receive the authentication email? Check your spam folder to make sure it didn't end up there.
- You can also try re-sending the authentication email manually. To resend, go to Setup > Email > From Address and then click Resend.
- We recommend you to add the following SPF record in your domain DNS file to ensure proper delivery of your emails: v=spf1 mx include:zoho.com ~all
- When you add a custom From Address, remember to update the same in the From field of your Email Templates. To review your templates go to Setup > Templates > Email Templates.
Adding From Address with SMTP
You can choose to add the From Address by using your SMTP server details in Zoho Desk. It provides you with greater control over the delivery of emails sent from your help desk.
To add a From Address with SMTP:
- Click the Setup icon (
- In the Setup Landing page, click Email under Channels.
- In the Support Email Address page, click From Address from the left panel.
You can find that your default support email address added as the From Address. - In the From Address page, click New From Address in the upper right area.
- In the Add From Address window, do the following:
- Select a Department (when you've more than one) from the drop-down menu.
- Enter the From Address to be used while replying to tickets. For example, support@zylker.com.
- Enter a Friendly Name for your From Address.
- Check the Use my SMTP option and do the following:
- Enter your SMTP Username and Password.
- Select the Connection Type. You can choose between Plain, SSL, and TLS.
- Enter the Server Name.
- Select the Port Number for the server. You can choose between 25, 465 and 587.
- Click Save.
Note:
- You are not required to verify the From Address or add an SPF record when you use your SMTP server.
Disabling From Address
You can disable a From Address that you think will not be used anytime soon. When you disable, the From Address will not be displayed in the 'From' field when you compose a reply.
To disable a From Address:
- Click the Setup icon (
- In the Setup Landing page, click Email under Channels.
- In the Support Email Address page, click From Address from the left panel.
- In the From Address page, click Disable corresponding to a from address.
- Click OK to confirm.
Note:
- You can disable or rather delete the default From Address (support@zylker.zohodesk.com) so that it won't be displayed in the 'From' field while in the reply editor.
Deleting From Address
If you decide that you don't need a From Address anymore, you can delete it from your Zoho Desk.
To delete a From Address:
- Click the Setup icon (
- In the Setup Landing page, click Email under Channels.
- In the Support Email Address page, click From Address from the left panel.
- In the From Address page, click Delete corresponding to a From Address.
- Click OK to confirm.
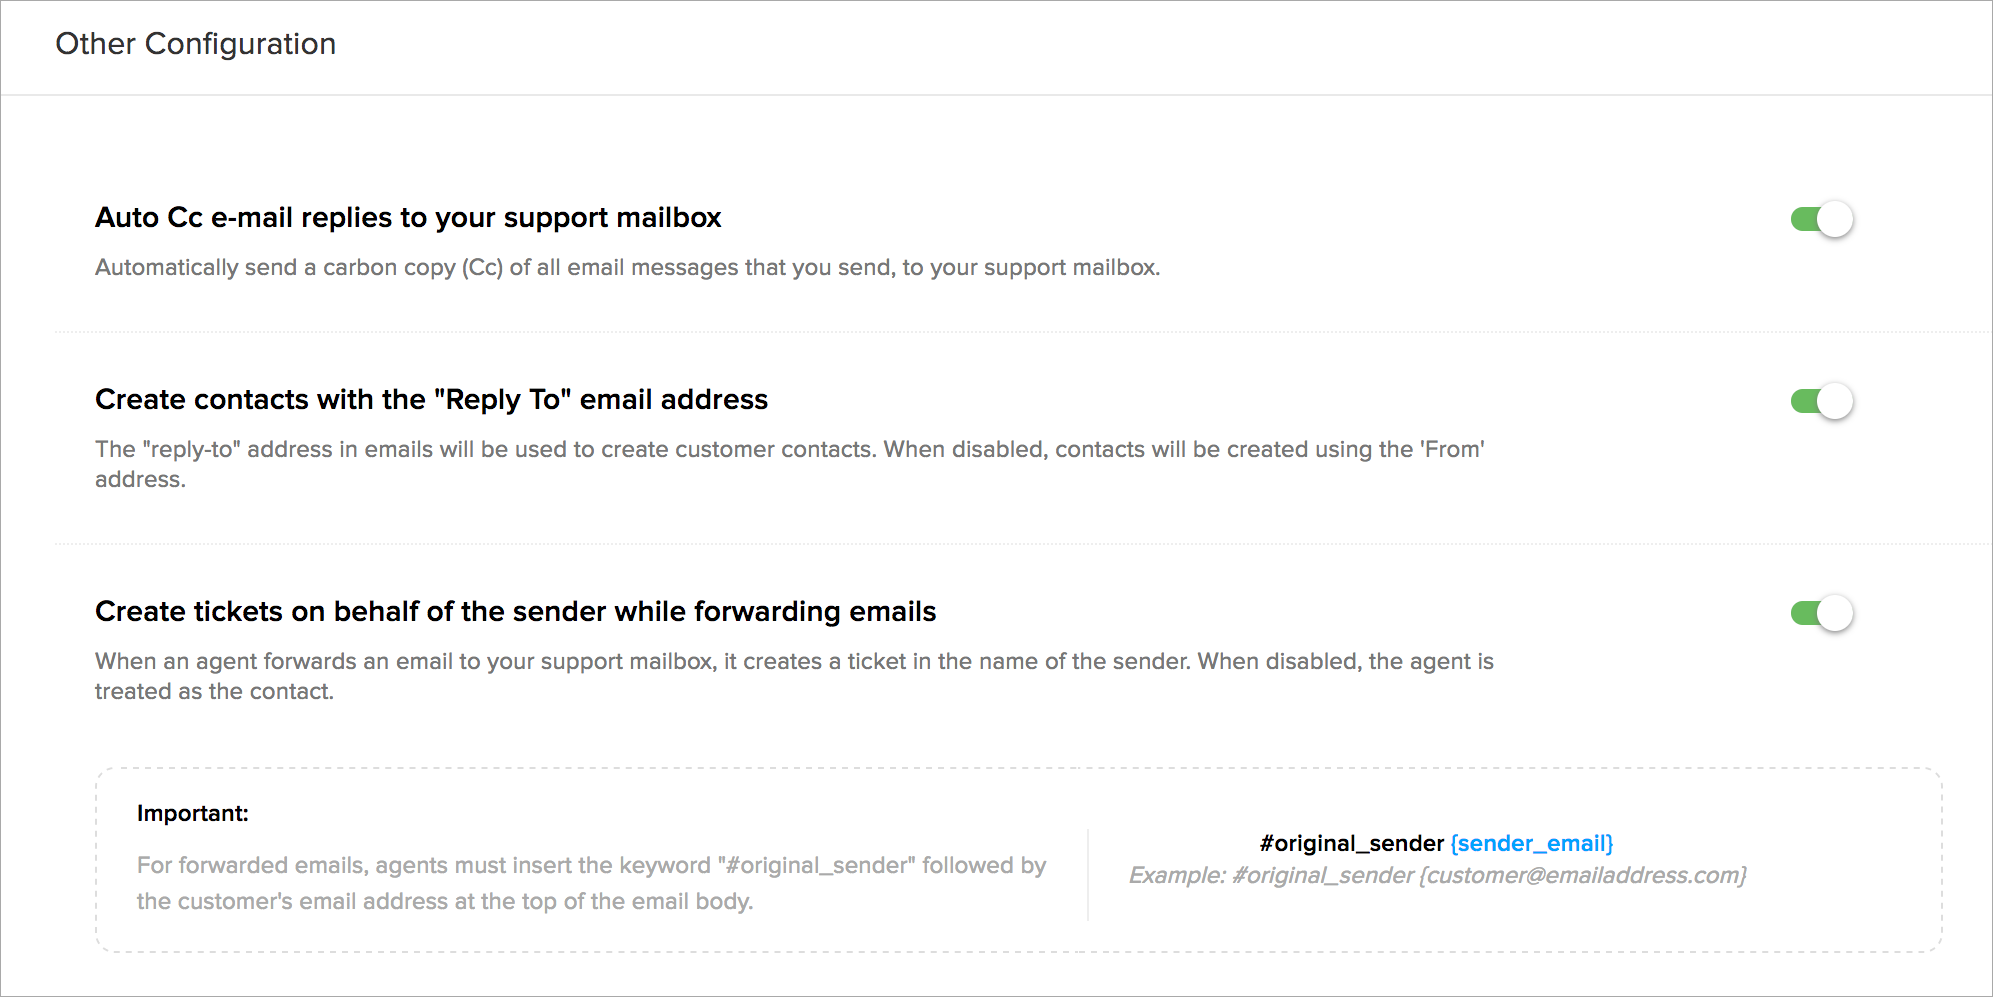
Other Configuration
The following configuration options may also be useful in determining how to manage your email channel.
Auto Cc Email Replies
Now every time that you send a reply or forward to a ticket you have received, the original support email address will automatically be added as a Cc recipient. You will not see the email address on the Cc line as you compose the message, but a copy of each response is backed up in real-time. Please note that this is an
To auto-cc email replies:
- Click the Setup icon (
- In the Setup Landing page, click Email under Channels.
- In the Support Email Address page, click Other Configuration from the left panel.
- Toggle the Auto Cc e-mail replies to your support mailbox option to On.
The Auto-Cc feature will be enabled immediately.
Note:
- This is an organization-level setting. However, you may choose to enable or disable this option for your individual departments.
Creating Contacts using Reply-to Email Address
By default, the 'From' address of the customer sending you an email is used to create the contact. You can instead, choose to create contacts with their “Reply To” email address. For example, Natalie sends an email from support@abccorp.com but wants to receive responses at a particular address say, natalie@zmail.com. By enabling this option, Natalie will be added to your contacts with the email address natalie@zmail.com instead of support@abccorp.com.
To use reply-to email address:
- Click the Setup icon (
- In the Setup Landing page, click Email under Channels.
- In the Support Email Address page, click Other Configuration from the left panel.
- Toggle the Auto Cc e-mail replies to your support mailbox option to ON.The Auto-Cc feature will be enabled immediately.
Note:
- This is an organization-level setting. However, you may choose to enable or disable this option for your individual departments.
- When there is more than one "reply-to" email address, the first reply-to email address is used to create a contact for the ticket.
Showing Agent Name in Ticket Replies
You start support conversations with a “hello,” saying “nice to meet you,” and end with a “thank you,” and “goodbye. But what if your customers find your replies land in their mailbox as "From: Zylker Support." Won’t they feel like it's another numbered ticket to be dealt with and dispatched?
Instead, add a "face" to your support tickets by displaying the name of the agent in their ticket replies. For example, "From: Brad <support@zylcares.com>." It would be adding the personal touch to each response.
To display the agent name:
- Click the Setup icon (
- In the Setup Landing page, click Email under Channels.
- In the Support Email Address page, click Other Configuration from the left panel.
- Toggle the Show agent name in ticket replies sent to customers option to On.
Zoho Desk will now display the agent's name (both first and last names) along with the support email alias in ticket replies.
Specifying the Sender while Forwarding Emails
When you forward an email to Zoho Desk, it creates a ticket in your name and not the original sender. However, you can choose to specify the original sender in the email, so that it creates a ticket in their name (i.e., the customer). All you have to do is insert the keyword "#original_sender" followed by customer's email at the top of the email body. For example, #original_sender {customer@emailaddress.com}.
To pass an email as the original sender:
- Click the Setup icon (
- In the Setup Landing page, click Email under Channels.
- In the Support Email Address page, click Other Configuration from the left panel.
- Toggle the Create tickets on behalf of the sender while forwarding emails option to ON.
Zoho Desk will now set the requestor as instructed.
Note:
- This solution works only for emails forwarded by active agents.
- This is an organization-level setting. However, you may choose to enable or disable this option for your individual departments.
Setting Ticket Replies as Private Automatically
Ticket replies are public that shows up for customers in their inbox. But, what if you want to engage with someone without the conversation ending up in your customer's inbox? The ability to reply to tickets by removing the requestor from being the recipient helps you in these situations. Such replies could be set as private automatically, so they aren't visible on the Help Center.
To enable this setting:
- Click the Setup icon (
- In the Setup Landing page, click Email under Channels.
- In the Support Email Address page, click Other Configuration from the left panel.
- Toggle the Automatically set ticket threads as private based on recipients option to ON.
Zoho Desk will now automatically set reply threads as private when the requestor is not the recipient.
Notes:
- Forwarded email threads will continue to be marked as private regardless of this setting.
- This is an organization-wide setting and applies to all of your Zoho Desk departments.
- When disabled, agents cannot set email replies as private even though the requestor is not the recipient.
Frequently Asked Questions (FAQ)
Here are some frequently asked questions and answers about setting up the email channel in Zoho Desk.
- I have setup forwarding from two of my support mailboxes to an email alias (say, support@zylker.zohodesk.com ) in a department. Can I filter the tickets by the email address they are sent to originally?
- You can filter tickets only by the email aliases you'd created in Zoho Desk. However, you can create two different email aliases in a department and set up a one-on-one forwarding, to filter by their original email addresses.
- I have more than two 'from' addresses and looks like I need to pick the right one before sending a reply. Annoying!
- Zoho Desk will automatically set the From Address, to which your customers had addressed their ticket. However, for tickets created from other channels, you are required to choose the preferred From Address.
- I'm using G Suite, and have set up domain-level routing (and not the default routing). Unfortunately, forwarding emails to Zoho Desk throws the following error - "Delivery to the following recipient failed permanently". Where did I go wrong?
- When you set up domain-level forwarding in your G Suite console, make sure that you enable the Change SMTP Envelope option. This will forward your emails to Zoho Desk with <support@mycompany.zohodesk.com> as the 'To' address.
Related Articles
Setting up your Facebook Channel
The Facebook channel in Zoho Desk allows your customers to submit their support tickets using Facebook. Your agents can view, respond or convert the Facebook Page posts into tickets from within your help desk. The agent's response is added as a ...Setting up your Twitter Channel
Monitor your Twitter accounts from inside Zoho Desk and also use it as one of the effective channels for better customer support and engagement. Zoho Desk for Twitter allows you to convert tweets to tickets and helps you keep track of the social ...Setting up Feedback Widgets
A portable version of the Advanced Web Form, the Feedback Widget can be added to your website. The widgets can be customized for their field values, language, appearance and their position. Benefits of the Feedback Widget Unlike the Advanced Web ...Setting up Live Chat using Zoho SalesIQ
Open an immediate line of communication between your support team and your customers by adding the power of live chat to Zoho Desk. It enables your agents to have real-time conversations with your customers to serve them more quickly, and to build a ...Setting up Zoho Cliq Integration
When your manager wants to have a word with you regarding a potential customer and the possibility of winning a deal, you may not always prefer to sit in a conference room and discuss the details. When you want to give a quick update about the latest ...