Tags
Tags help to reference modules in search and filters. Enable tags and associate them with projects, milestones, task lists, tasks, forums and status.
How to enable tags?
- Click
 on the top right corner of the page.
 - Select Org Settings under the Portal Configuration.
- Select Project & Budget.
- Navigate to Project Settings and toggle Enable Tags.
How to create a tag?
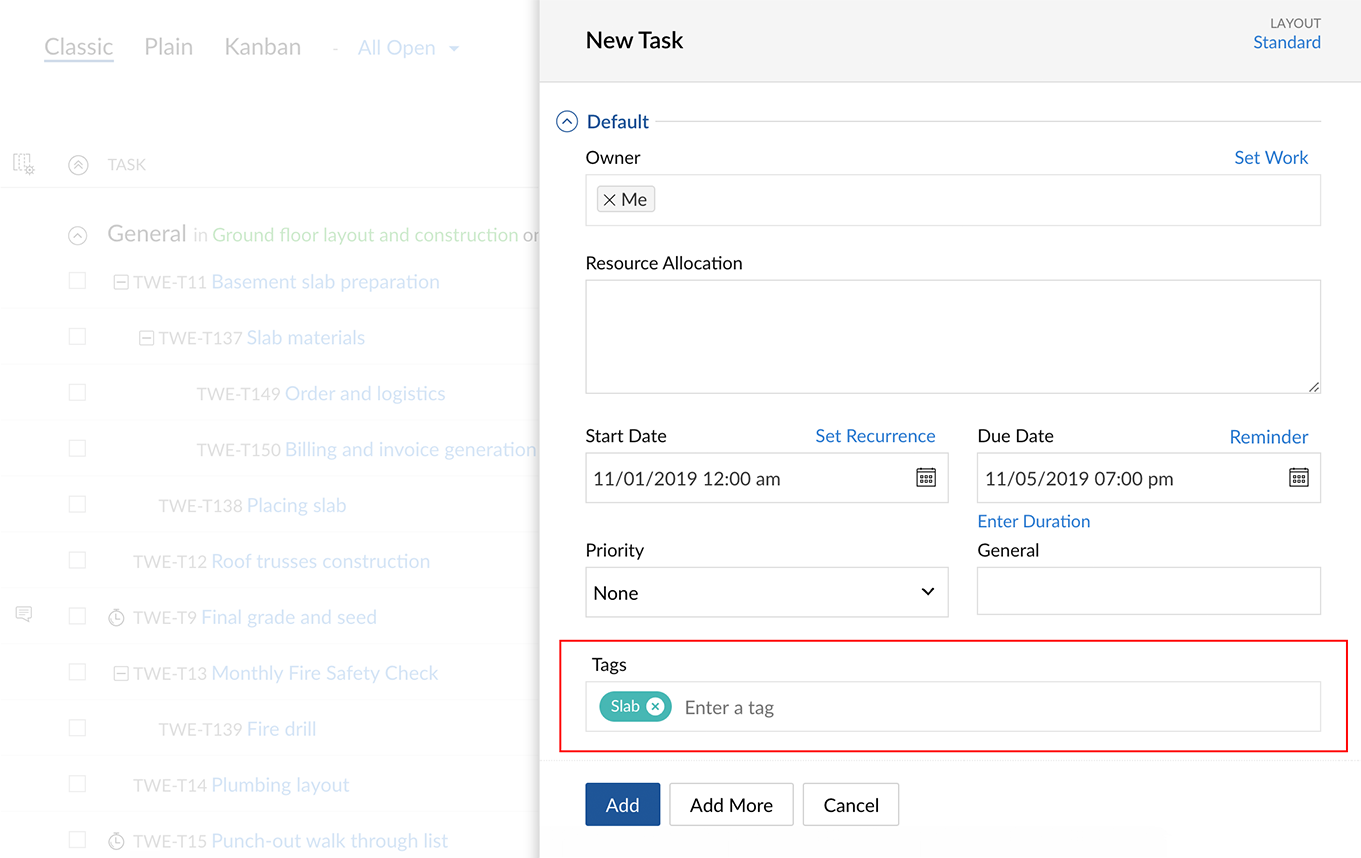
- Add a module (project, milestone, task list, task, issue, or a status).
- Navigate to Tags in the add form.
- Enter the tag name and click
 .
. - Add or submit the module from the form.
How to associate a tag?
While creating or editing a module
- Navigate to Tags.
- Enter the tag name and hit enter or return key.
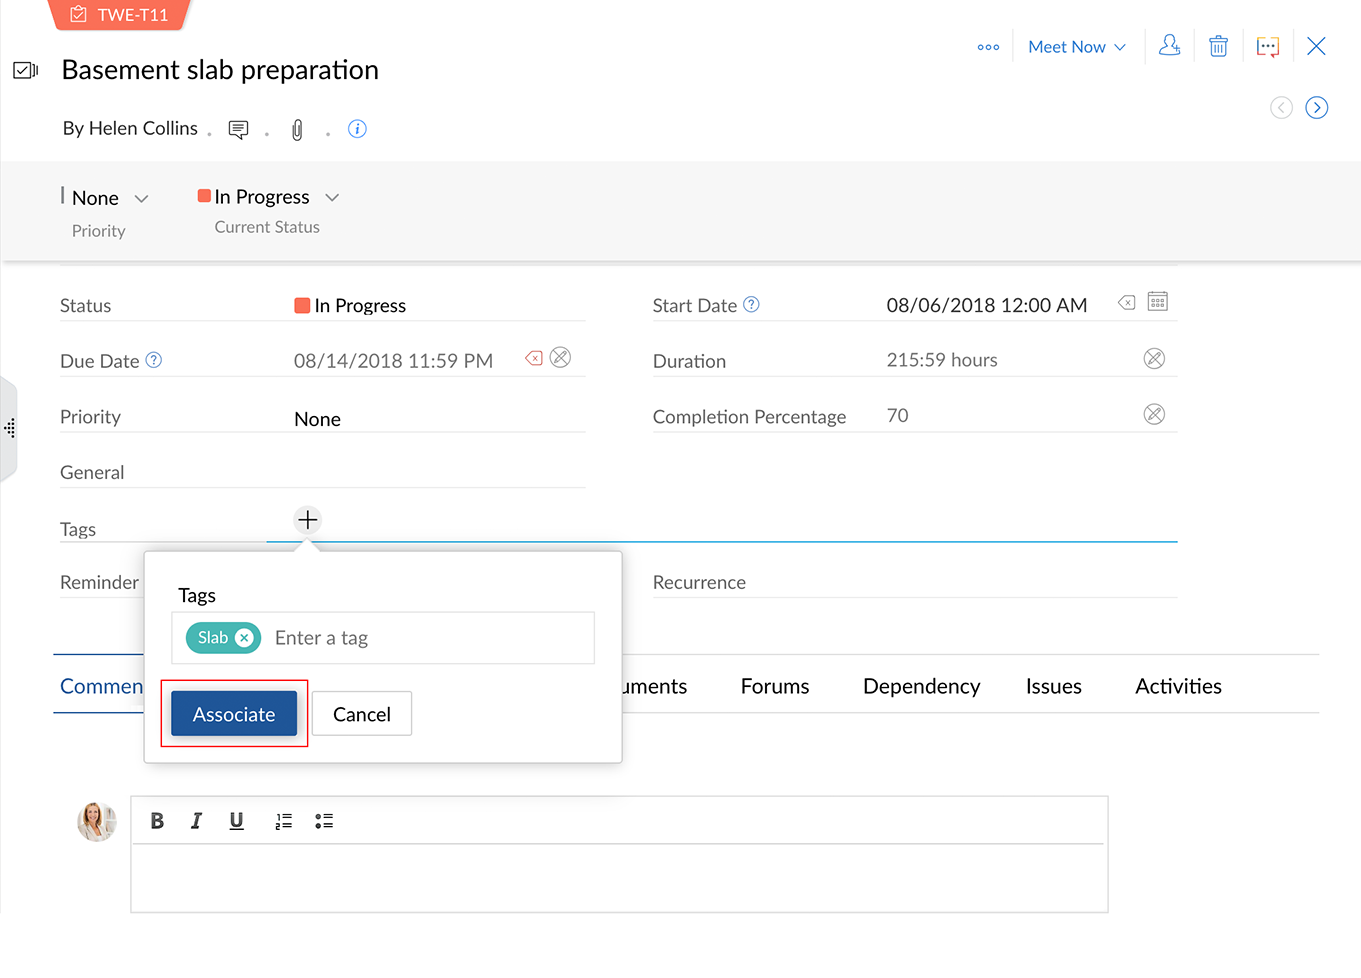
While viewing a module (list screen):
- Open the required module.
- Navigate to Tags column and click .
- Enter the tag name and click Associate.
How to dissociate a tag?
While editing a module:
- Navigate to Tags.
- Click
 to dissociate the tag.
While viewing a module (list view):
- Open the required module.
- Navigate to Tags column.
- Click the drop-down beside the tag.
- Click on the required tag.
- Click Associate.
How to edit a tag?
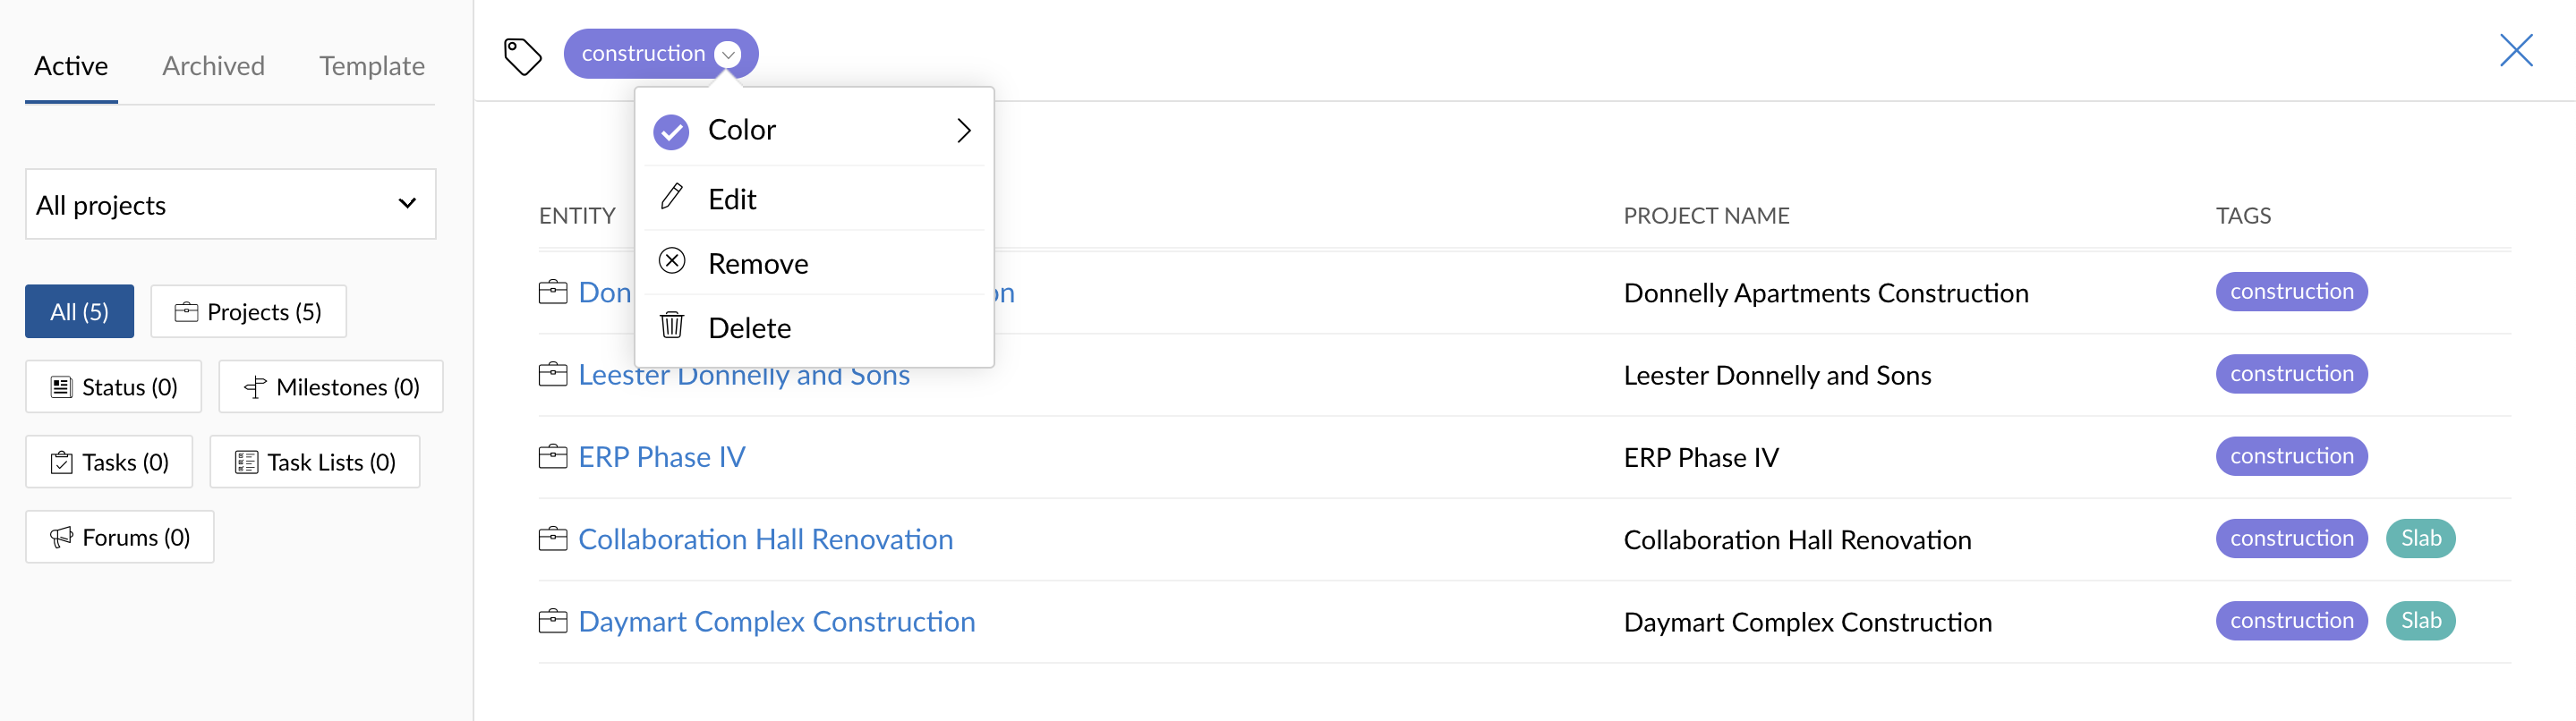
- Click on a tag (while editing a module or from a list view). It will take you to the search page.
- Click the drop-down on the tag's name in the top band.
- Select the Edit option and make the required changes.
- Click Save.
How to remove a tag?
- Click on a tag (while editing a module or from a list view). It will take you to the search page.
- Click the drop-down on the tag's name in the top band.
- Select the Remove option to clear tag from search results.
How to delete a tag?
- Click on a tag (while editing a module or from a list view). It will take you to the search page.
- Click the drop-down on the tag's name in the top band.
- Select the Delete option.
- Confirm your action.