View CRM Info
Operator chat window
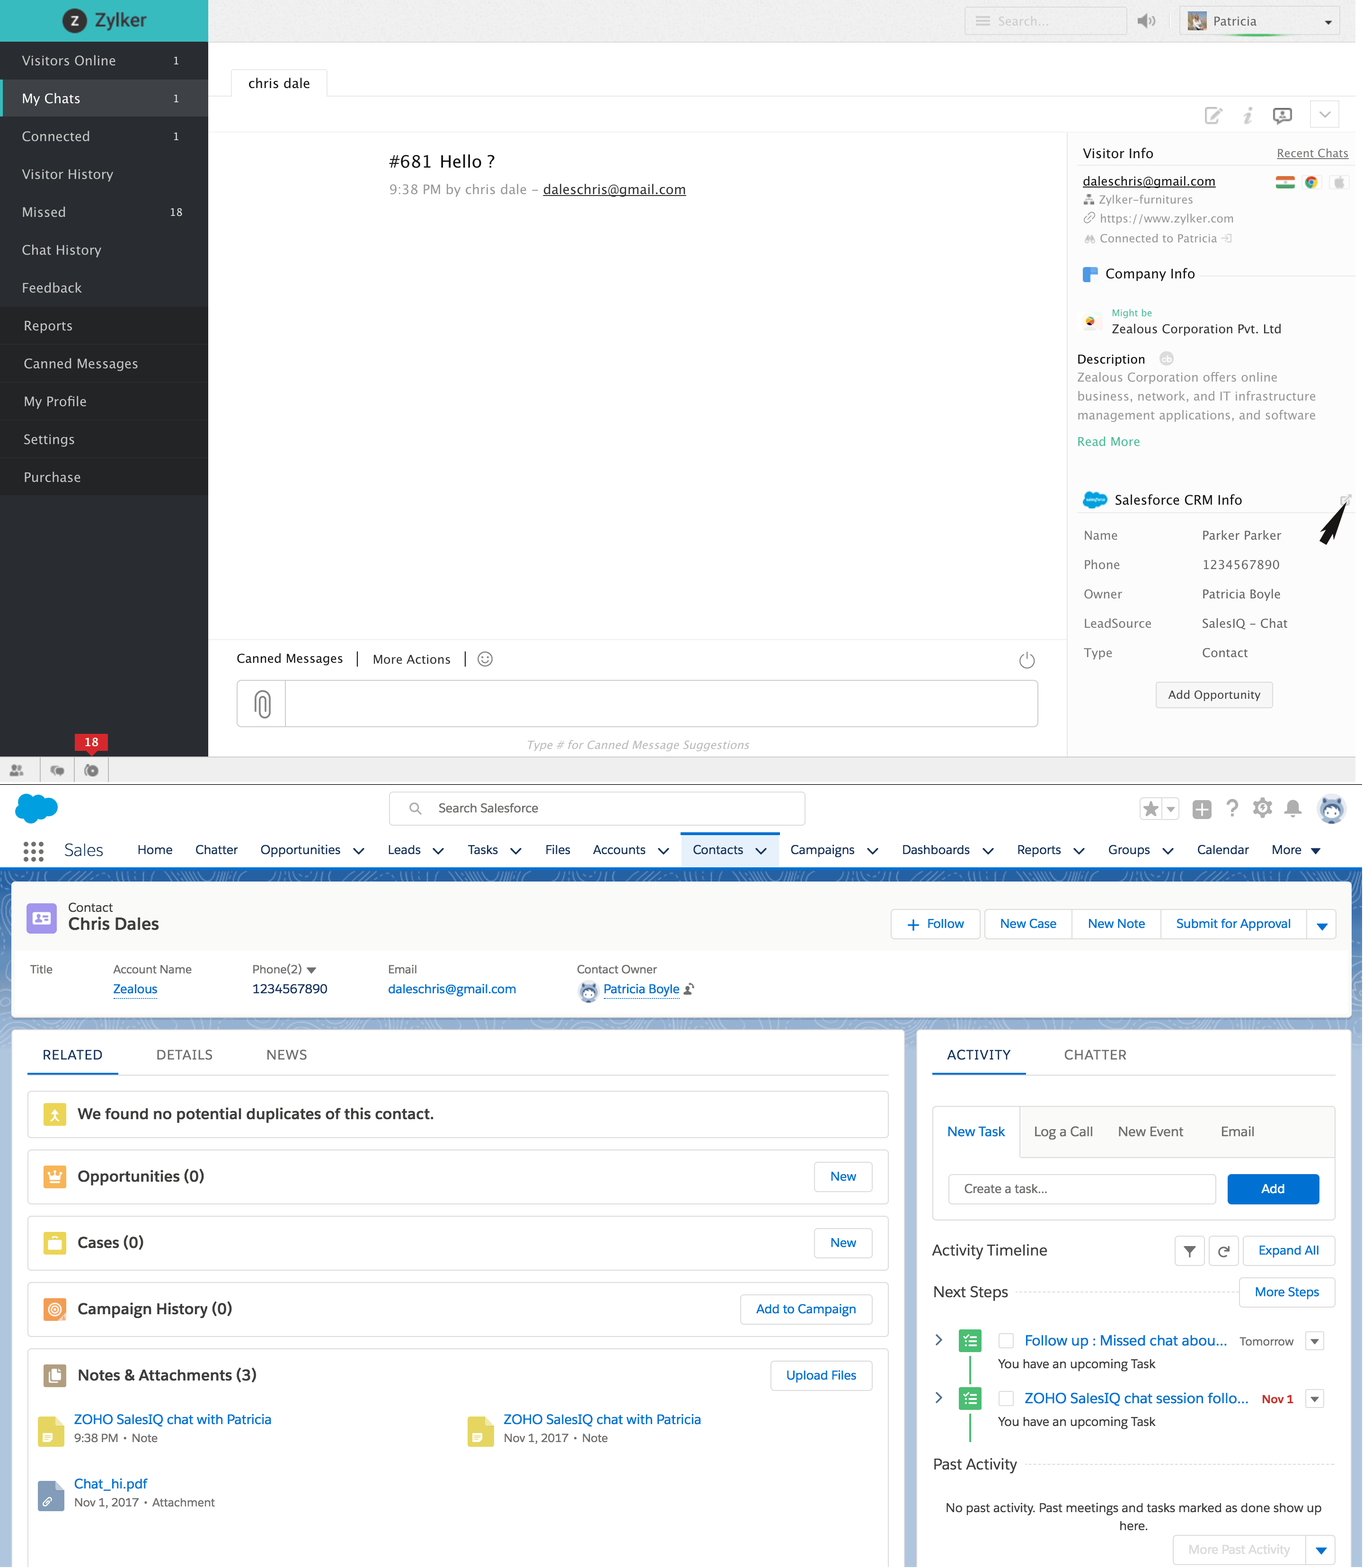
Every time you are involved in a chat session with your visitors, you can view their CRM information in the pane which you can find onto your right. If the visitor with whom you are chatting is a newbie, then the details that he/she had provided while initiating the chat will be extracted and pushed to your Salesforce account and will also be displayed in the right pane.

Viewing visitor’s details inside your Salesforce CRM account
If you would want to view detailed information about a visitor rather than just the excerpts, then click on the redirect icon which you can find in the right pane beside the label "Salesforce CRM info". Clicking on which you will be re-directed to your Salesforce account in a separate tab, where you can view and manipulate the details of that particular visitor.
Manually adding visitors to your Salesforce CRM from Zoho SalesIQ
A visitor who did not fall under the categories of visitor base that you had chosen earlier to be pushed into your Salesforce account automatically and seems to be quite prospective can be pushed in manually right away from your chat window.
- All that you have to do is click on "Push to CRM", which you can find in a pane onto your right.
- Then choose the tag of the visitor which can either be a Lead or Contact.
- Fill in the details asked for :
- Lead: Company name, status, phone number, assign a lead owner and add a follow-up task if required (Check in the checkbox).
- Contact: Account name, phone number, assign contact owner, add a follow-up task and create an opportunity for the contact if required.
- And click on "Add Lead" or "Add Contact" depending upon the tag that you chose.
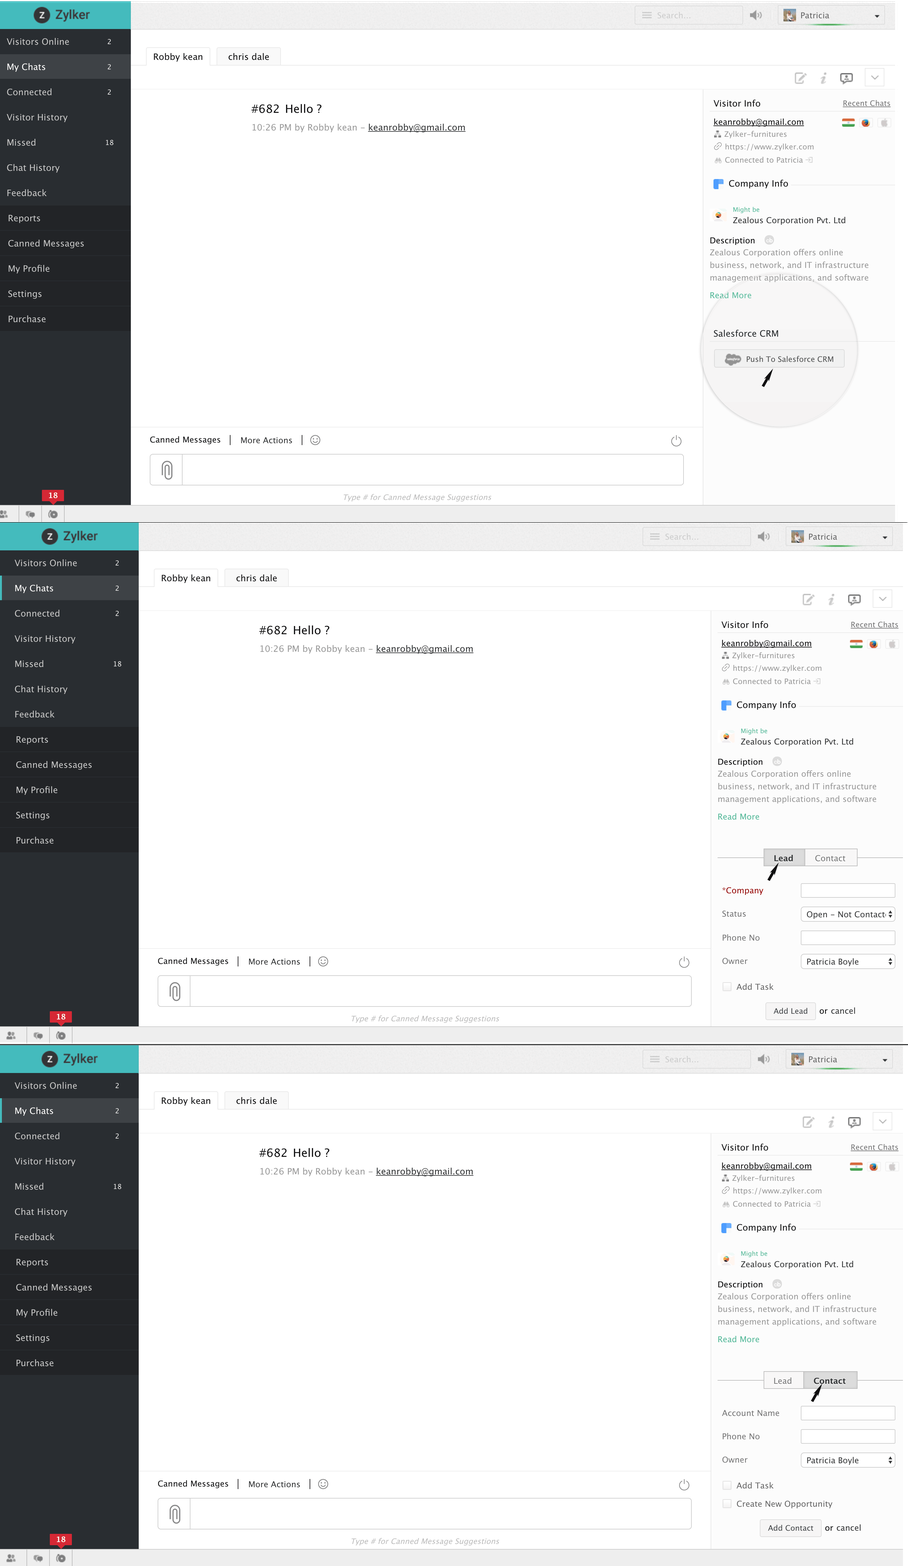

Do remember that the field "Company" under the tag Lead is mandatory. You can either use JS API .visitor.info() to set Company's name dynamically else you can use Clearbit to identify the visitor's organization/firm that he/she is from using his/her IP address.
Converting a lead into a contact
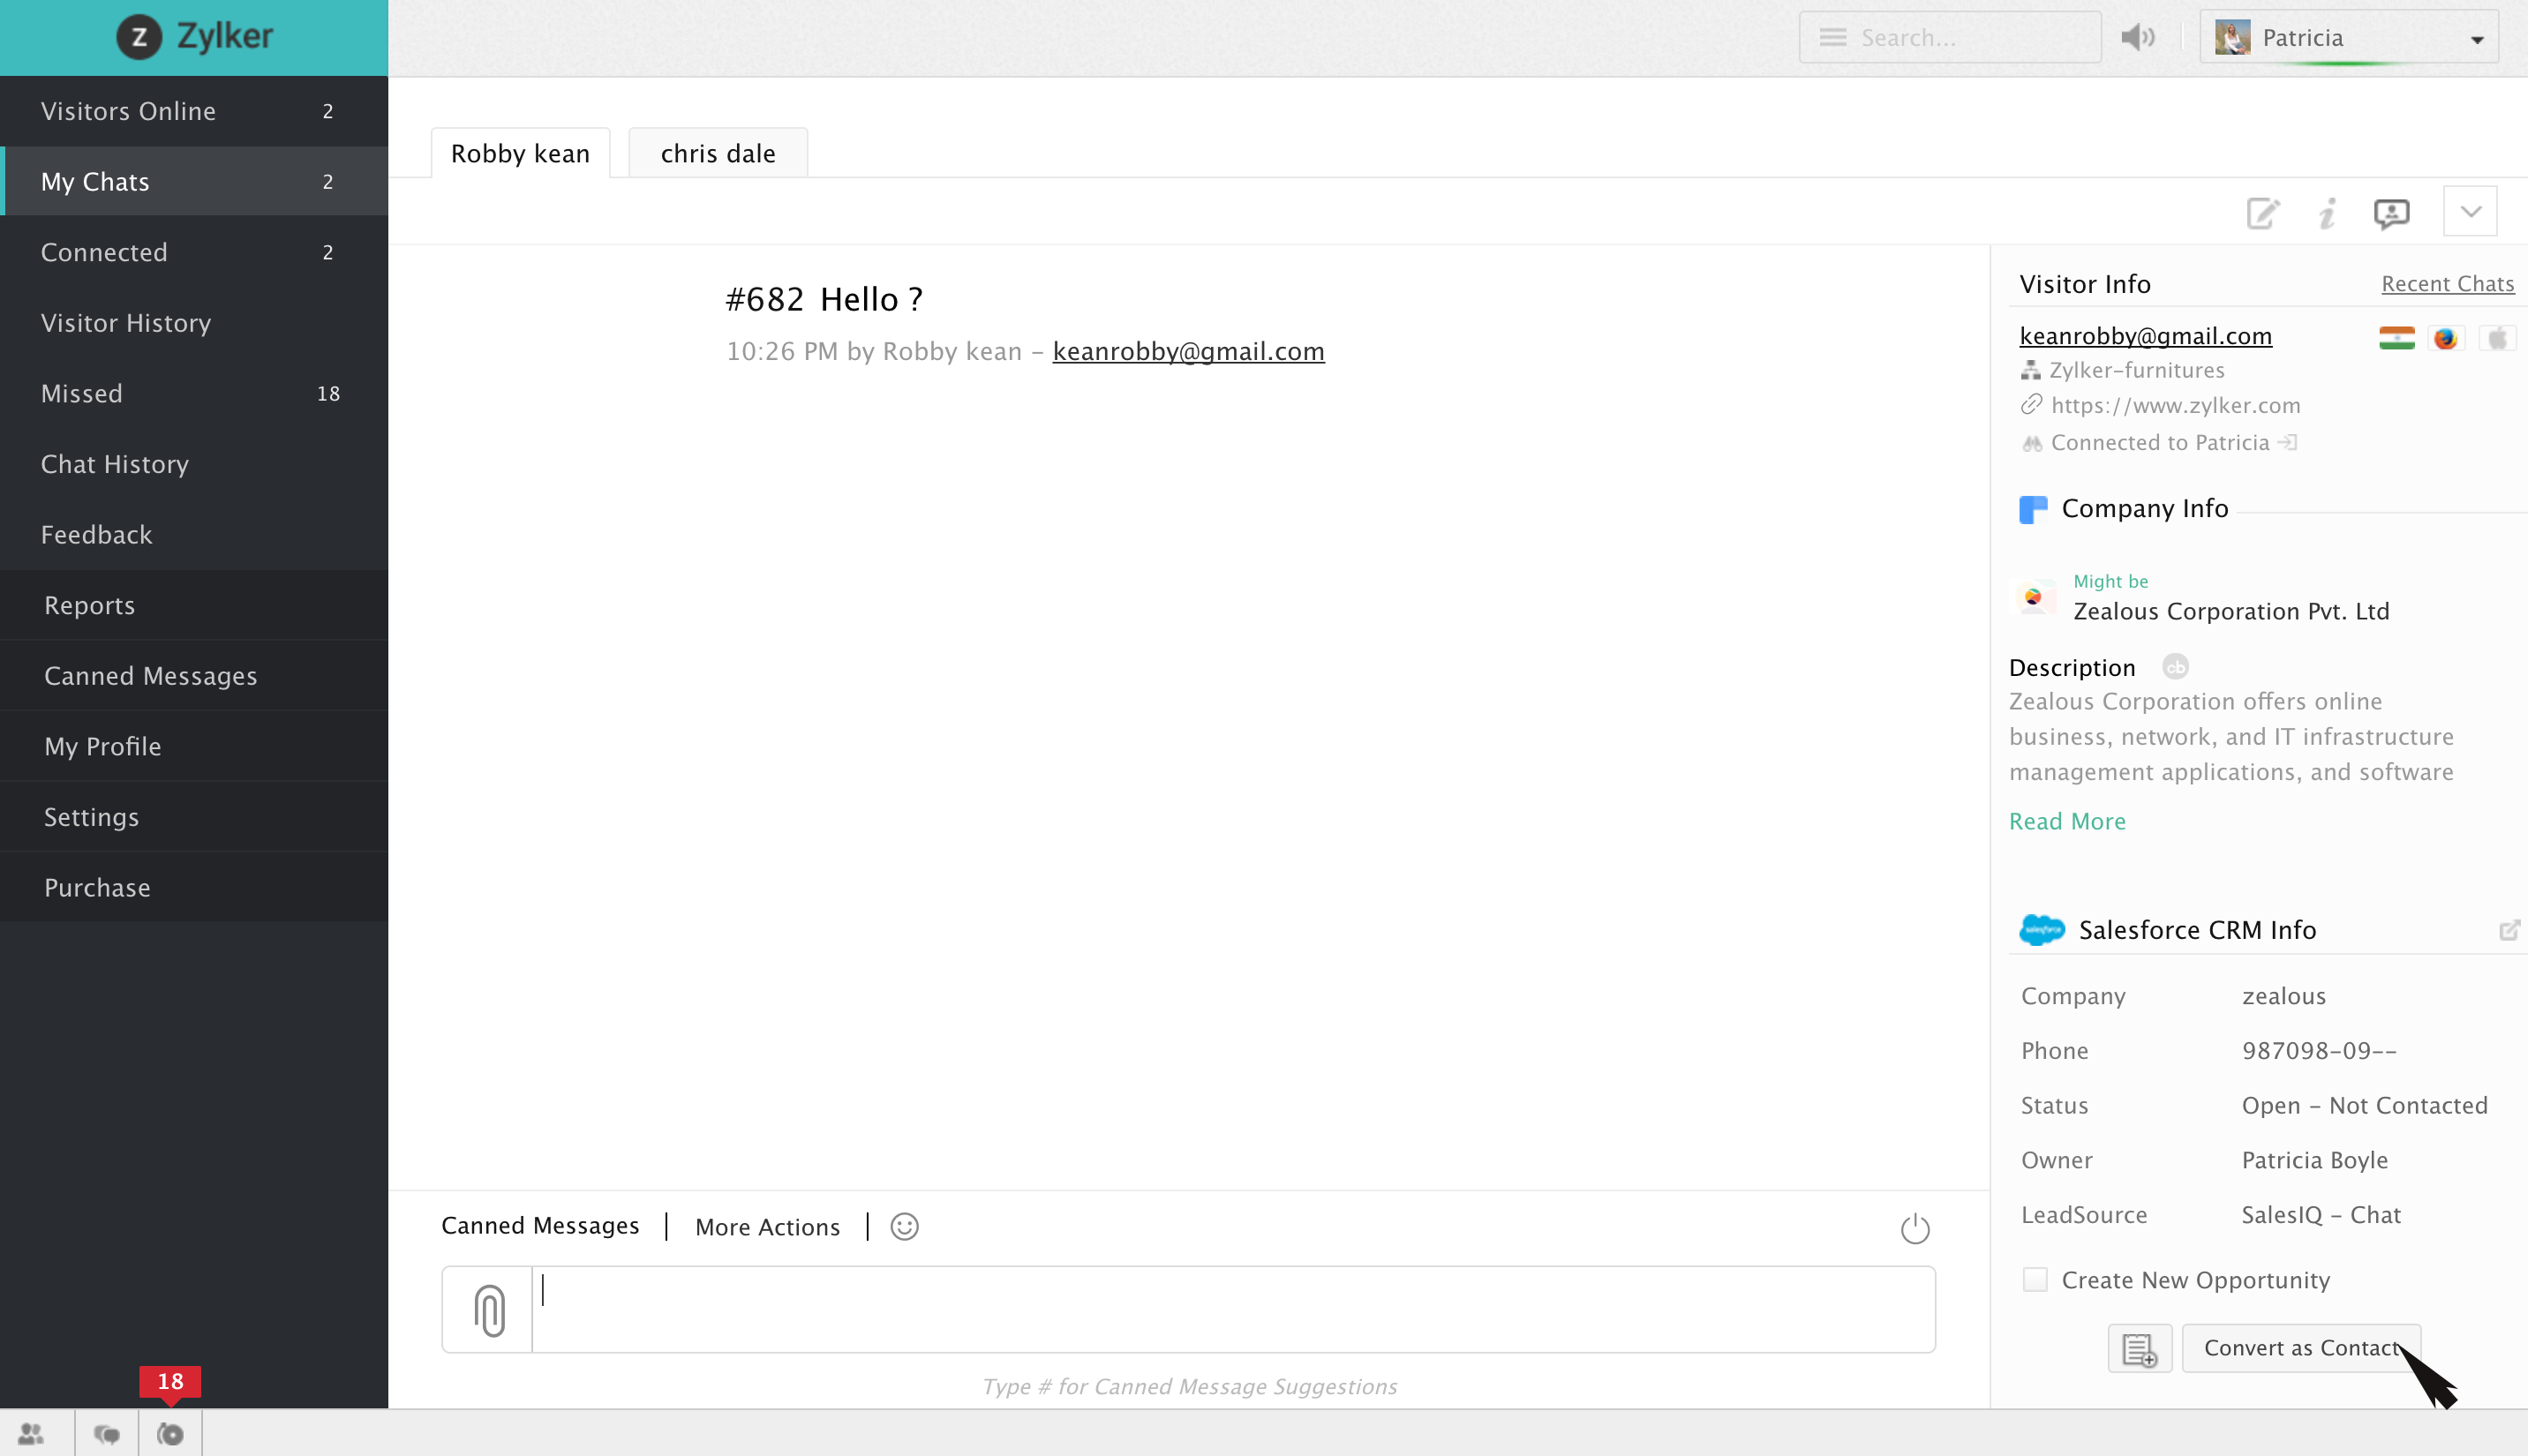
Salesforce allows you to convert a CRM Lead into a Contact right away from the chat window,
- Onto the right of the user's chat window, the particular visitor's CRM information will be displayed.
- Below which you would find a checkbox saying "Create new opportunity".
- Check in the checkbox, after which the following fields would appear,
- Opportunity name
- Opportunity stage
- Amount
- Close date
- You can add a follow-up task if required by clicking on the Add task icon right before Convert as contact button.
- Fill in these fields and click on "Convert as contact".
- If you would not want to add up an opportunity for the lead and straight away convert him/her into a Contact, then just click on "Convert as contact" without checking in the checkbox given.
Adding an Opportunity for your contact
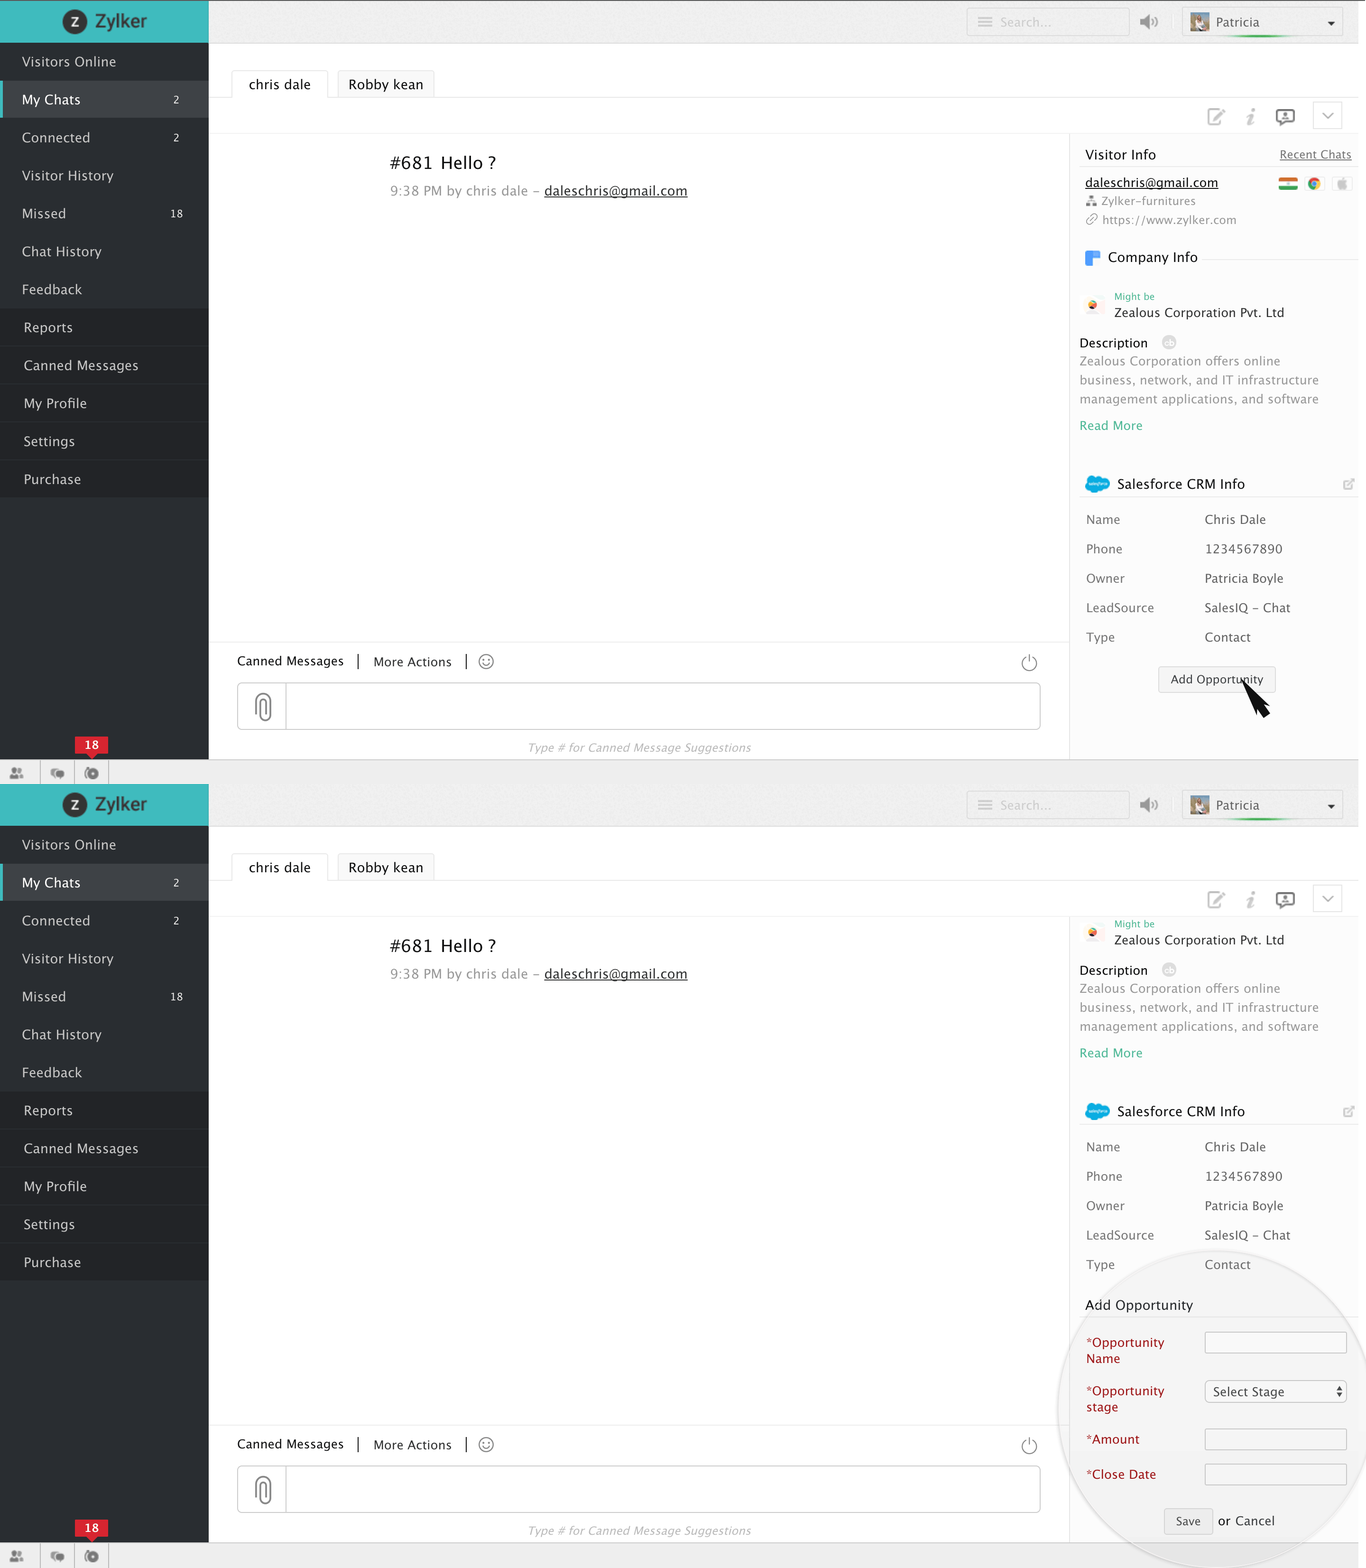
Salesforce allows you to add an Opportunity for your contacts right away from the chat window,
- Onto the right of the operator's chat window, the particular visitor's CRM information will be displayed.
- Click on "Add opportunity".
- Following fields would appear,
- Opportunity name
- Opportunity stage
- Amount
- Close date
- Fill in these fields and click on "Save".
Proactive Window
- Navigate to Visitors online tab.
- Click on a visitor, visitor tile appears.
- Onto the right, you would find a pane, in which Salesforce CRM details of that particular visitor will be displayed.
- If the visitor belongs to the tag "Lead" then following details will be displayed,
- Company
- Phone
- Lead Status
- Lead Owner
- Lead Source
- Annual Revenue
- No of Employees
- Company
- If the visitor belongs to the tag "Contact" then the following details will be displayed,
- Account Name
- Phone
- Contact Owner
- Lead source
- Number of open opportunities
- Revenue in pipeline
- Account Name
- You can also view these details in a pane, right beside the user chat window.
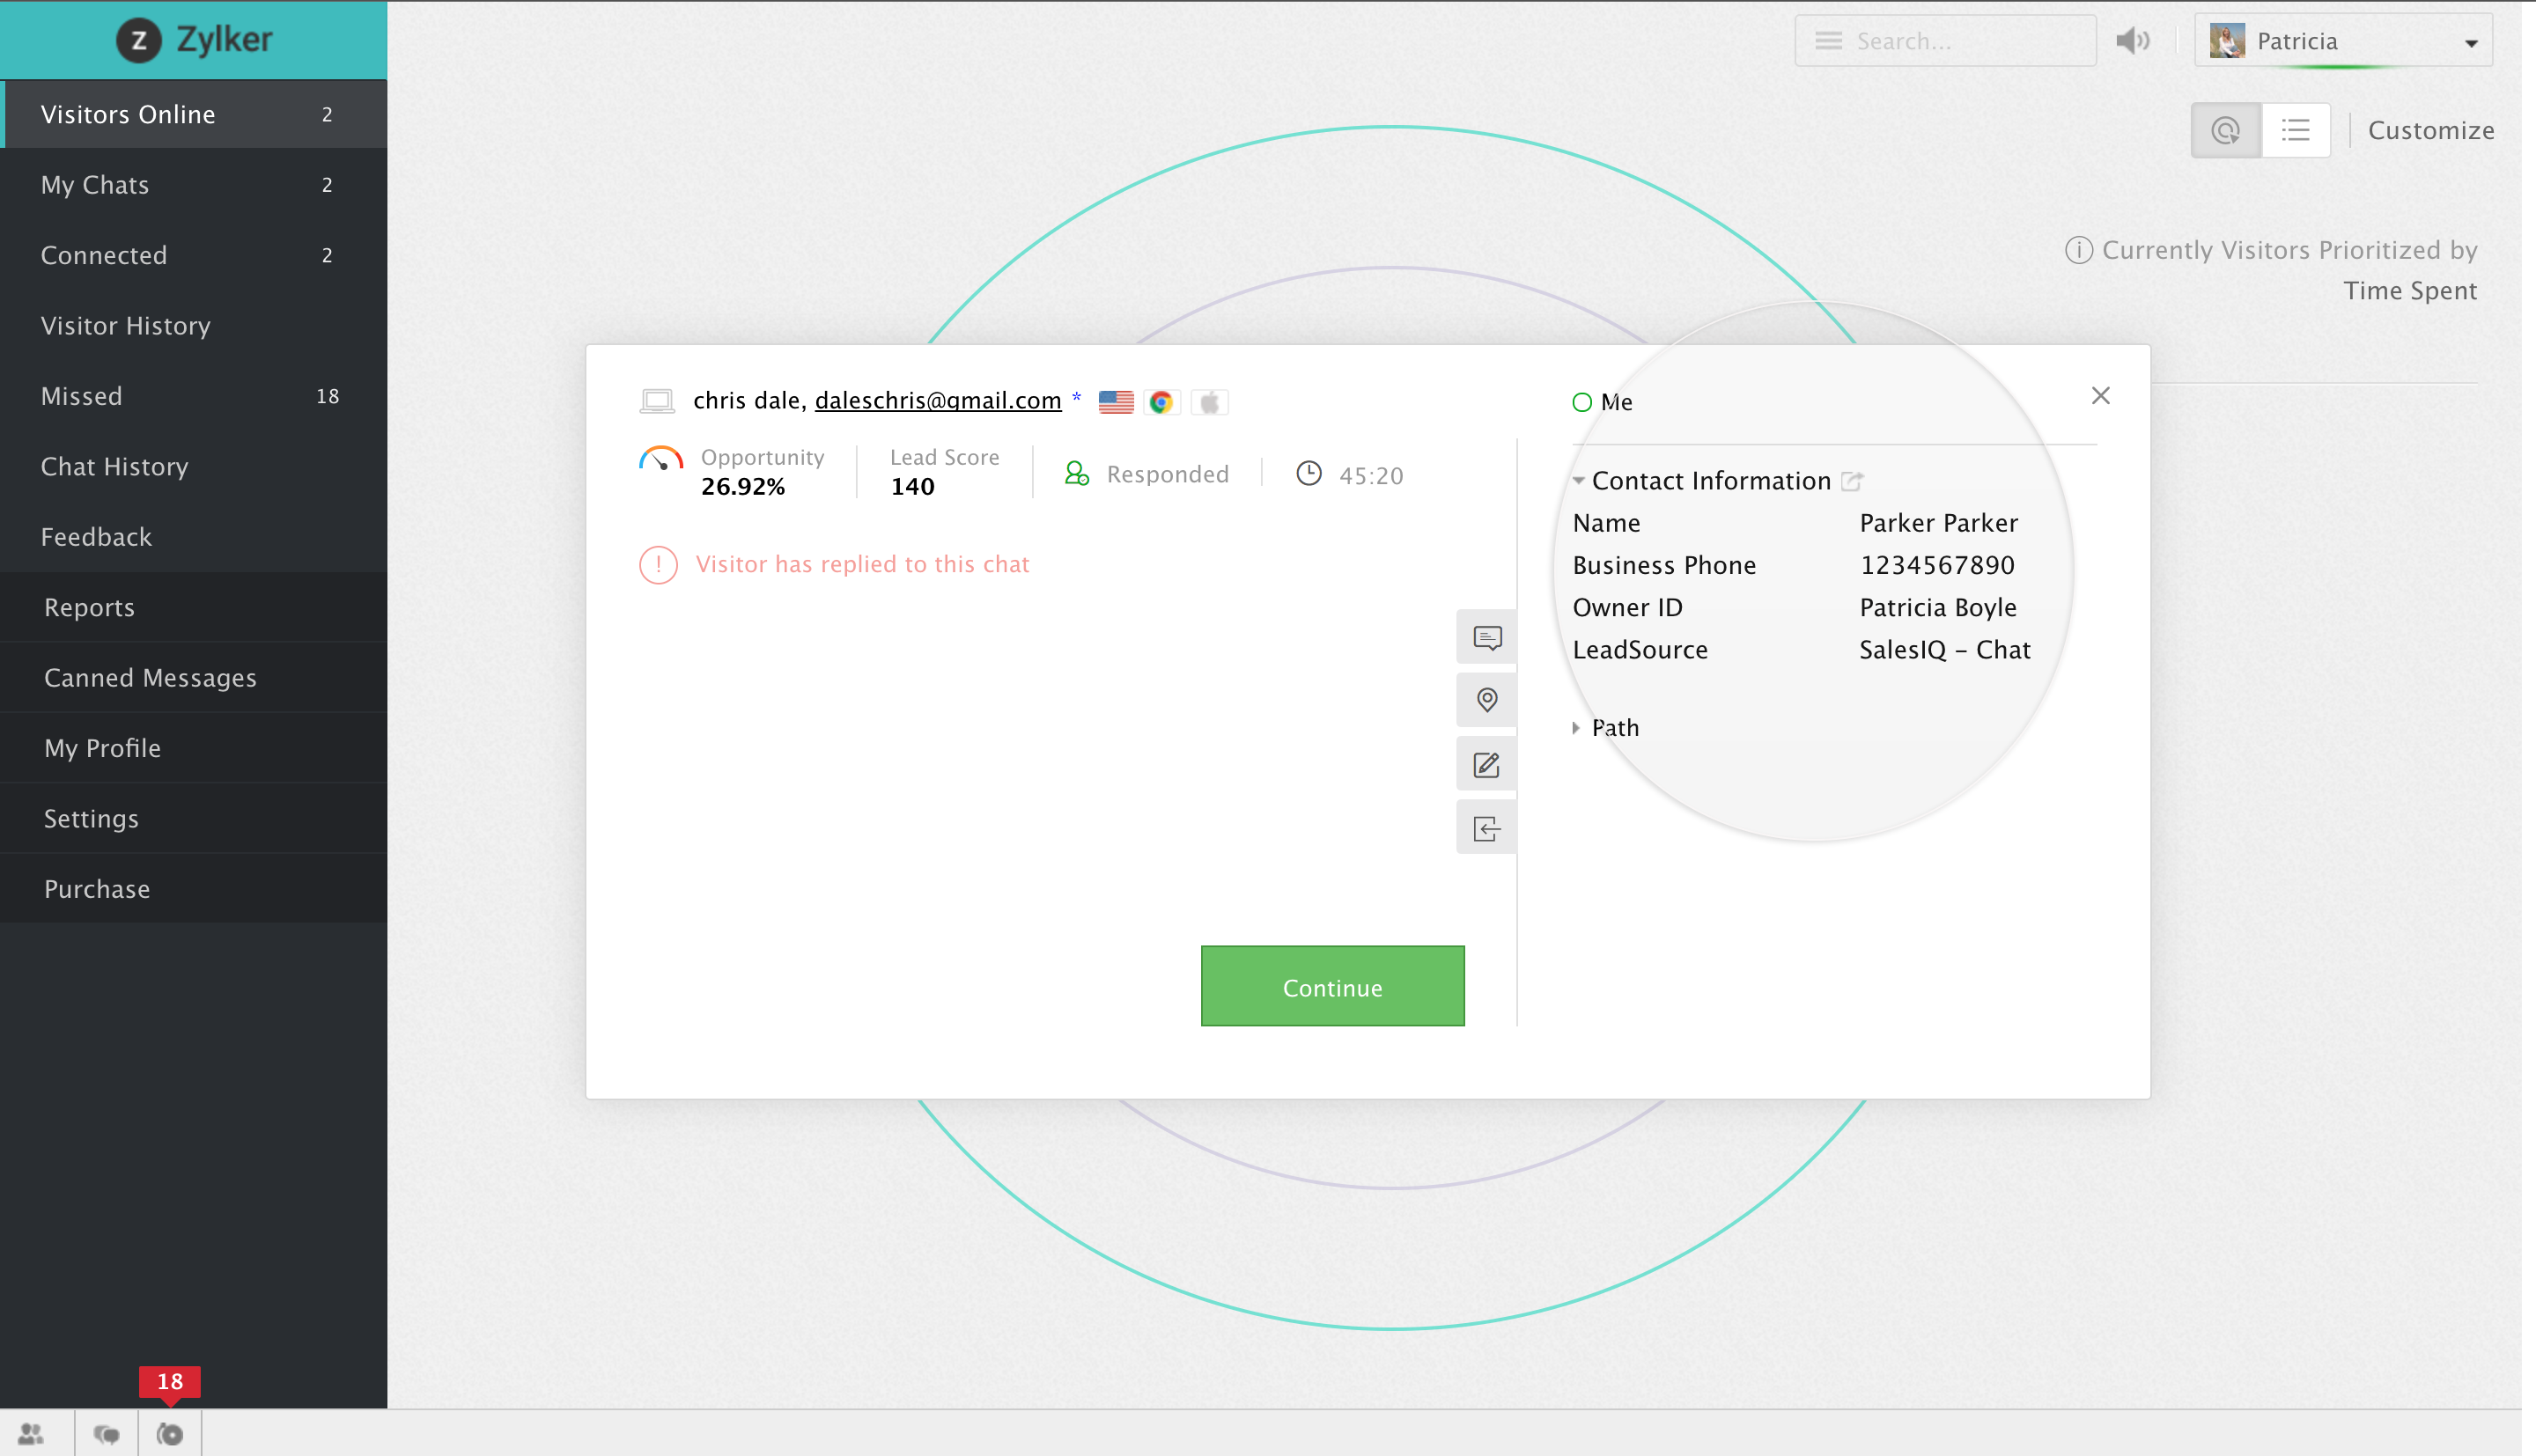

- If SalesIQ couldn't find a corresponding value for a particular field in Salesforce CRM, then those fields won't be displayed in the chat window as well as the visitor tile.
- And also only the fields that you chose in the integration section will be displayed, above specified are just the fields that Salesforce CRM generally offers.
Visitor history tab
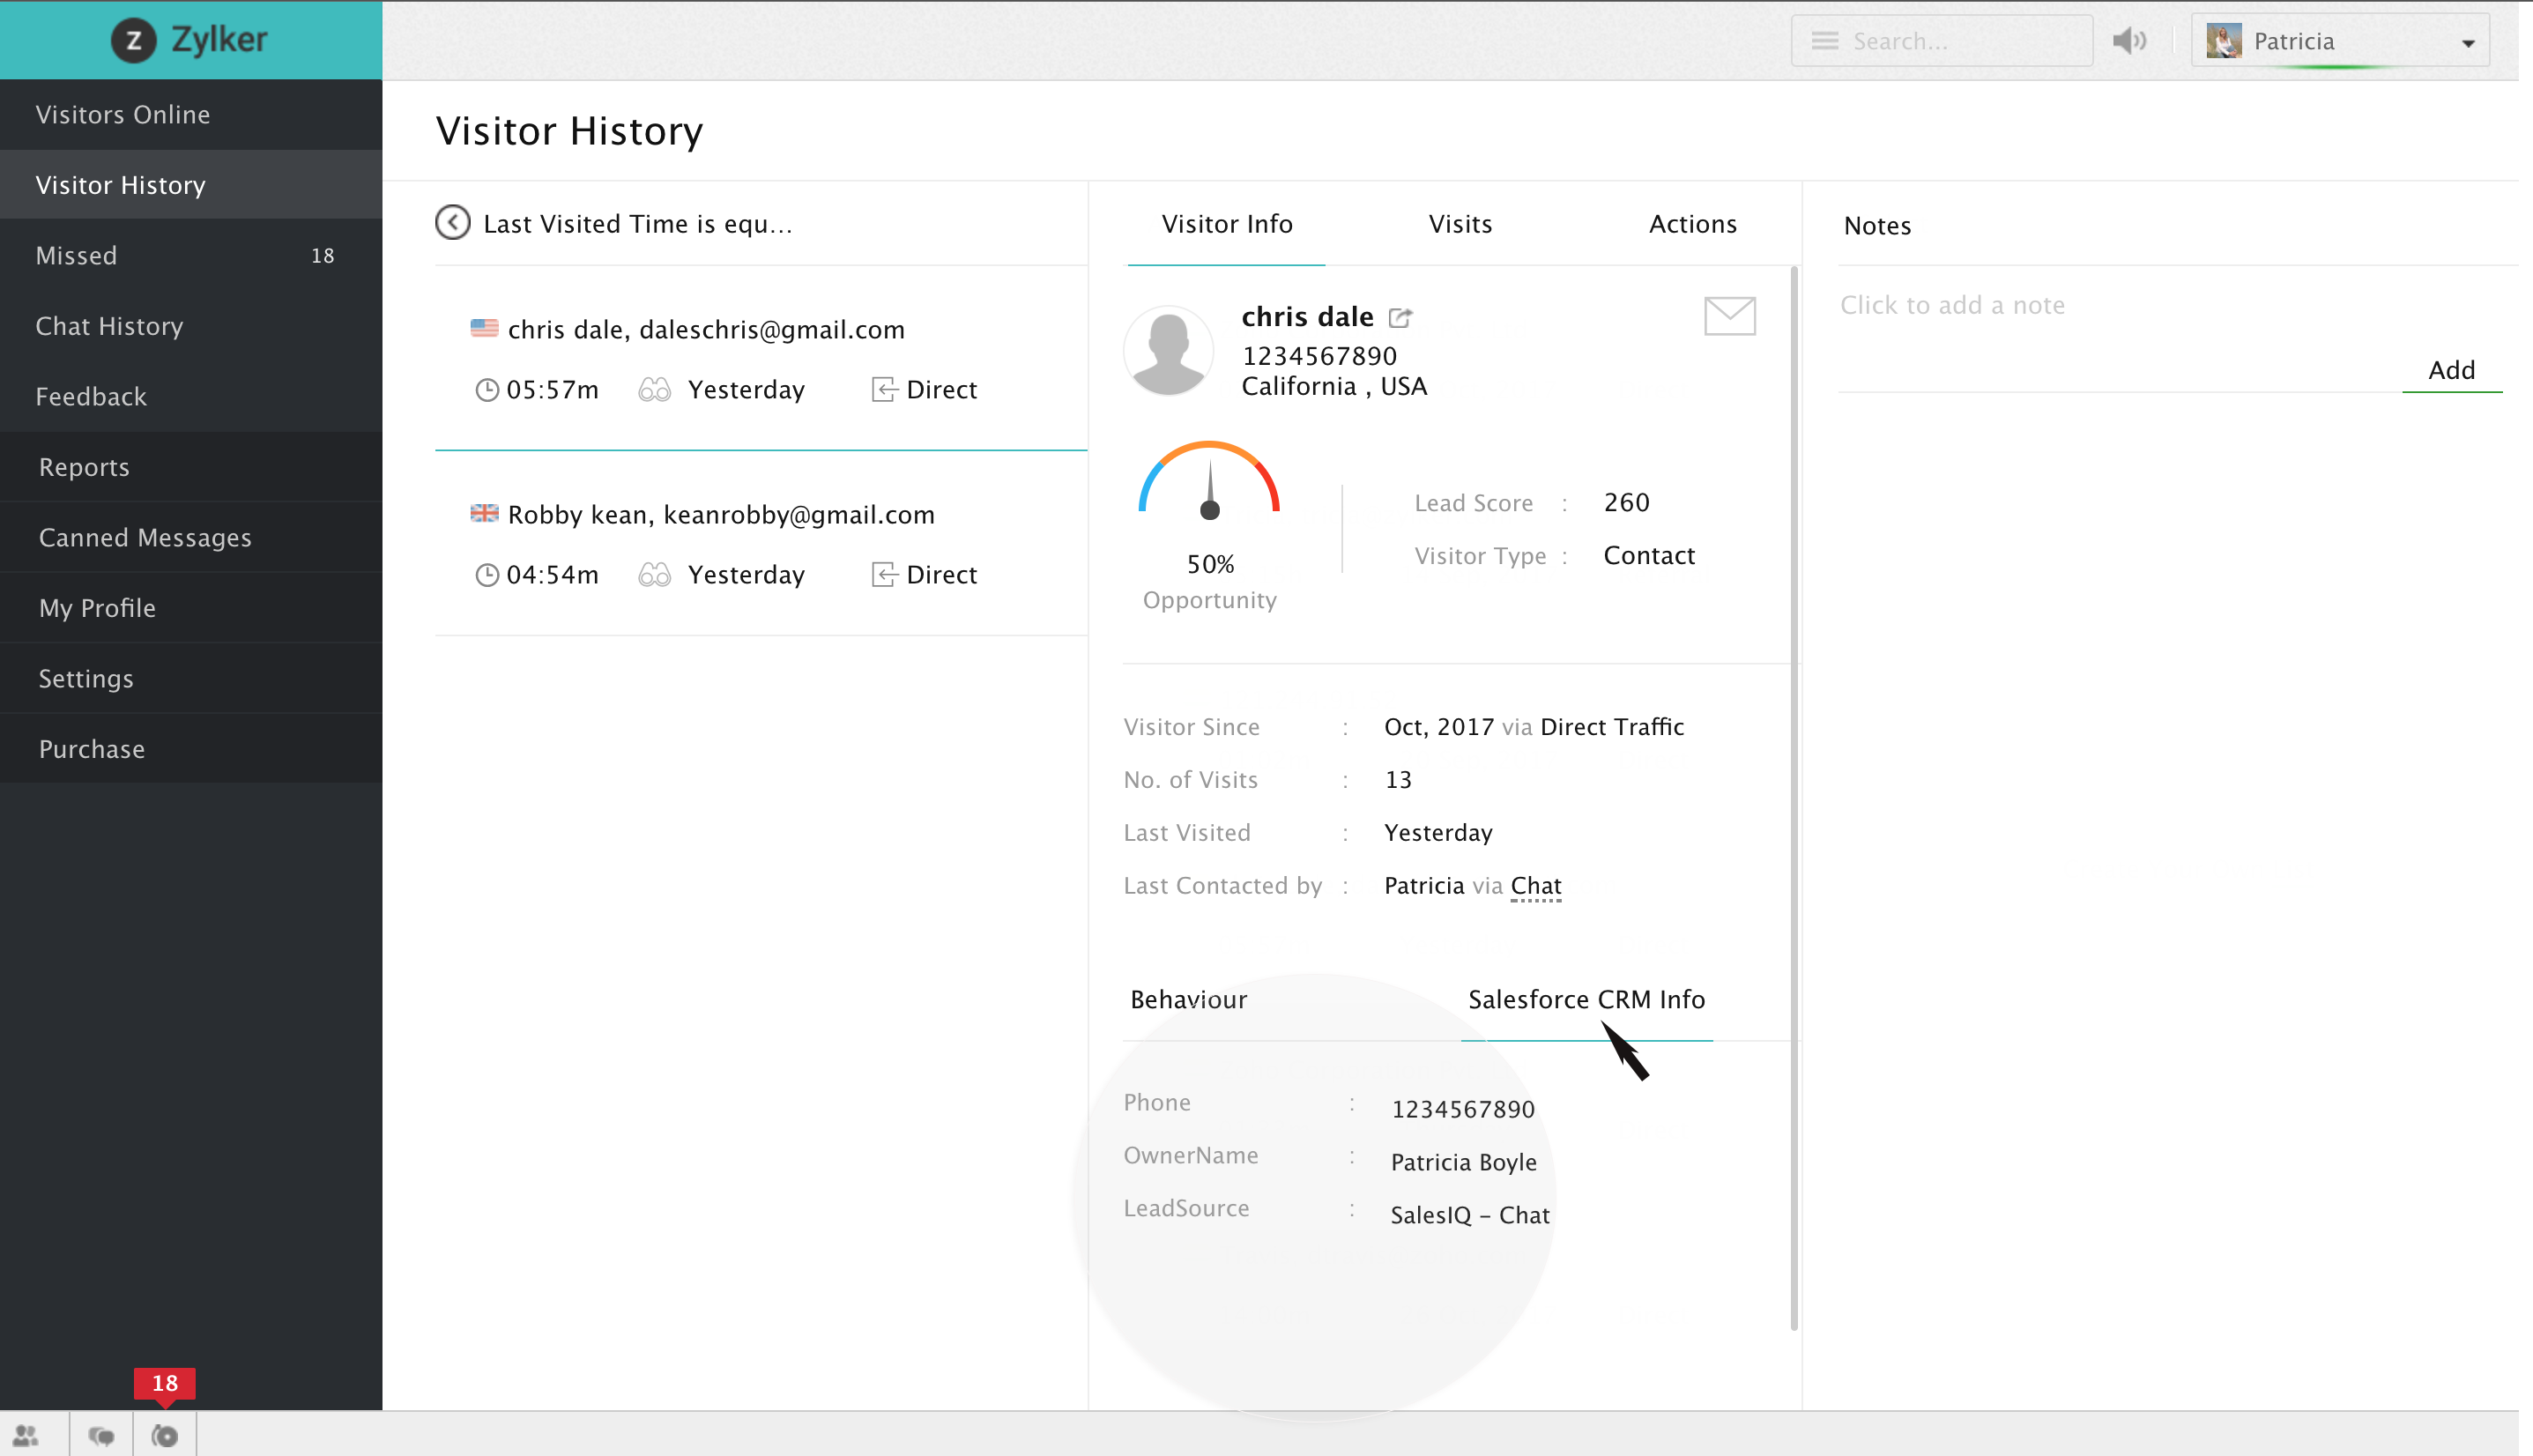
You can also view a visitor's CRM information in the visitor history tab,
- Navigate to Visitor history tab.
- Click on a particular visitor from the list displayed.
- In the window that slides in scroll through down.
- Beside the Behaviour tab, you would find a tab Salesforce CRM info.
- Click on it to view the details.
Related Articles
Using CRM View for Activities
For any sales person, a typical day at work is loaded with tasks. It could be the field work to visit a prospect for a demo, or the task to call up a prospect to discuss a deal, or to follow-up with customers after their visits to your website. There ...Zoho CRM
Overview Maximize the value of each-and-every interaction your team has with your customers, and add the ability to provide on-demand customer support through live chat. Integrate Zoho SalesIQ with Zoho CRM and organize all your customer data in one ...Zoho CRM integration
Zoho CRM is our Customer Relationship Management software that helps manage your customers and prospects effectively and further identify potential leads to achieve increased deals. With ShowTime's integration with Zoho CRM, the trainers can ...Understand your CRM Account
Key CRM Terminologies In any business environment, there are terms such as Leads, Deals, Campaigns, Invoices, etc. Following are the list of such terms and their definitions as used in Zoho CRM. You can refer to more such terms in the Zoho CRM's ...Adding CRM Leads and Contacts
When you encounter a potential Lead or Contact anywhere in Zoho Social (in your mentions, or live stream), you can add them as a CRM contact for potential sales prospects: You will be able to add them as a new Lead, or associate them with an ...