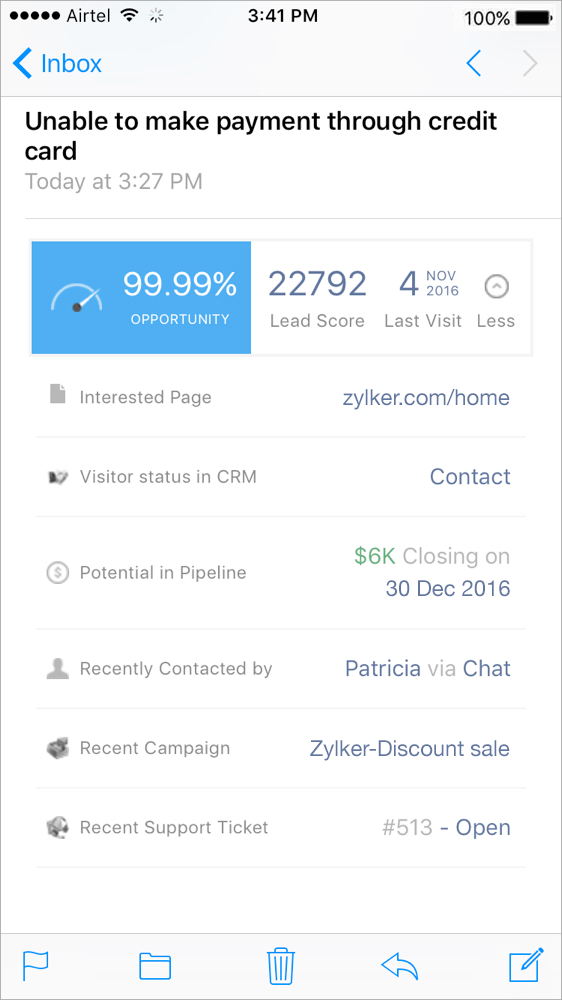
What benefit does Email Genie offer when you receive the email in the Mobile email client?
Email Genie push the important details about the visitor that is available in your SalesIQ along with the email sent by the visitor.
When you receive an email from your visitor, then SalesIQ will attach the important details required for you to reply to the visitor’s email. That is, you can reply the email without opening SalesIQ app or the SalesIQ browser window.
The details you receive about the visitor in email:
- Opportunity Percentage
- SalesIQ - Lead Score
- Last Visit
- Last Contacted by
- Visitor Interested Page
- Visitor Status in Zoho CRM
- Potential in Pipeline
- Recent Support Ticket
- Recent Campaign Sent to the Visitor

Related Articles
Email Genie
What is Email Genie? Email Genie is a magical technology that works with your favourite email client and provides more insights about the email sender. The details like Lead Score, Opportunity, CRM info, Support, and Campaign info if available in ...How to configure Email Genie on your mobile device?
On providing the email client credentials, the “Configure on your Mobile Device” page will appear. You can find the information that you have to provide on your mobile email client displayed on the screen Use your SalesIQ account Email Address and ...How to enable Email Genie integration?
Go to Settings -> Integration -> Email Genie. Click Enable Integration. Only the administrator can access the Email Genie Integration tab and provide access to other users You can also view the users available in your portal listed. By default, the ...How to Configure Email Genie in SalesIQ?
The “Configure Email Genie” tab will appear in the “My Profile” section after the administrator enables the Email Genie in the Integrations tab. Once the administrator allows email Genie integration, the Configure Email Genie tab will be visible to ...How can an admin disable the Email Genie access to an Operator?
If you wish to remove the Email Genie access of a particular operator, then navigate to the Integrations -> Email Genie -> Connect to Email Genie. And, click on the “Disable” button near each user details in the “Actions” column. The user will be ...