More
than 20 connections are available for the most familiar applications to
connect them with Zoho CRM out of the box. Also, you can write your own
connection to any application. This helps to utilize multiple services
from within Zoho, and hence, creating an environment which is much more
friendlier to use. Connections expand Zoho's third-party support.
Availability
 Profile Permission Required: Admins can access this feature.
Supported Authentication types
Since
different services have different methods of authentication for their
service, Connections are equipped with 3 different modes of
authentication.
- Basic Authentication
- OAuth 1.0
- OAuth 2.0
Once
the connections are set up, you can make use of them in functions or
widgets to execute certain actions. Some of the examples are:
Business Scenarios
- You can push an Event from CRM to your EventBrite account by setting up a connection between the two services.
- Connect
to Bomgar Remote Access service to allow your technicians take remote
control of your customer's device, in case the line of business requires
such a service.
Target Audience
- CRM Administrators who set up Integrations and configure Functions.
- Programmers with REST API and Deluge Script skills.
Zoho
offers integration support for a wide range of third-party
applications, including core Google services (Contacts, Calendar and
Google Ads) and Microsoft software (MS Office, MS Outlook, etc.).
However, there are some services that cannot be integrated directly with
your CRM, such as Dropbox, PandaDoc, and Google Drive. In these cases,
you can use a connector to expand Zoho's third-party support. Connector
uses OAuth 2.0 protocol to facilitate this integration.
Important Terminology
- Client -
The application requesting access to data stored in an external system.
While creating a connector in Zoho CRM, the clients are third-party
applications and services.
- Resource -
The application or service that the client is trying to access. In our
case, the resource is the third-party service (ex: MailChimp) you are
trying to integrate.
- Request Token URL -
This URL is used to send authorization requests to the resource server.
The resource server prompts the resource owner (user) to authorize this
request.
- Access Token URL -
Once the request is authorized by the resource owner, the server sends
an access token to the client. This token has to be exchanged every time
the clients wants to access the resource data.
- Refresh Token URL -
Some access tokens are valid only for a limited period of time. When an
access token expires, the client has to get another access token from
the resource, using the refresh token URL.
- Client ID - A unique identifier provided to every client application. This ID is provided by the resource owner (ex: MailChimp).
- Client Secret - Every client application has a secret code mapped to it. This is done to prevent unauthorized access to the resource.
- Redirect URL -
This is the URL to which the end user will be redirected, once data
access has been authorized. The client application will generate a
redirect URL automatically.
Registering a Zoho Client
Since Zoho CRM APIs are authenticated with OAuth2 standards, you should register your client app with Zoho.
To register your app:
- Visit this page https://accounts.zoho.com/developerconsole.
- Click on "Add Client ID".
- Enter Client Name and Client Domain.
- Enter the Redirect URI as "https://deluge.zoho.com/delugeauth/callback".
- Select the Client Type as Web based.
- Click "Create".
- Your Client app would have been created and displayed by now.
- The newly registered app's Client ID and Client Secret can be found by clicking Options → Edit.
(Options is the three dot icon at the right corner).

Note
Please
note that this step has to be followed for Apps which are not natively
available in 'Connections' tab. For instance, this step is required if
you want to add a "Custom Service" in Connections.
Creating a Connection
You can use the existing connections provided to set up a connection or create a connection from scratch.
To create a connector
- Go to Setup > Developer Space > Connections.
- Click +Create your First Connection.
- Click Custom Service tab.
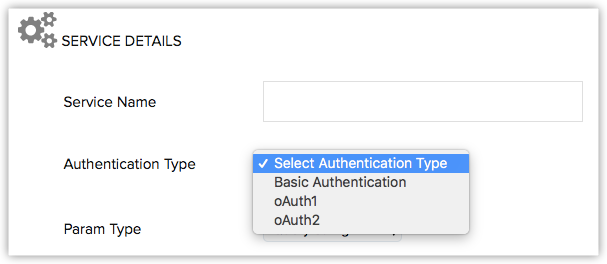
- Provide a name for the service to be connected (ex: MailChimp).
- Select the type of Authentication that is supported by the third-party application or service.
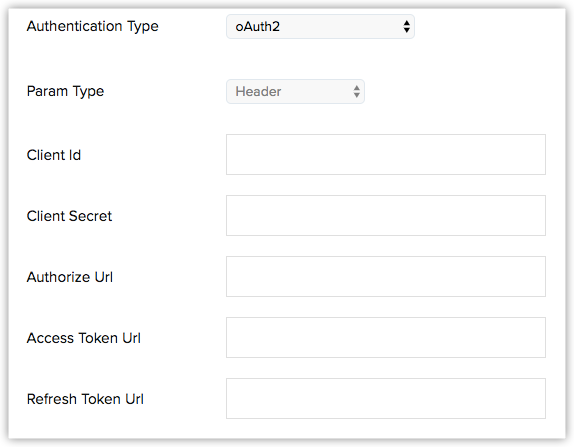
- Provide the following details about the third-party server:
- Client ID and Client Secret.
- Request Token URL: This allow the connector to request authorization to access data on the resource server.
- Access Token URL:
Once authorized, the Request Token and Token Key will be exchanged for
the Access Token, allowing the connector to draw specific information
from the third-party server.
- Refresh Token URL:
Some applications increase security by limiting the duration of time a
particular token is valid. In these cases, you will need to provide the
Refresh Token URL to allow the connector to re-authorize access.
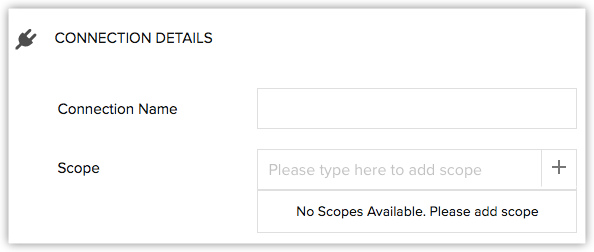
- Give a name of your choice for the Connection.
- Provide Scopes for
the connection. Scope for each connection is given by the third-party
service. Please check the help for the respective third-party service to
know about their provided scopes.
- Click Create and Connect.
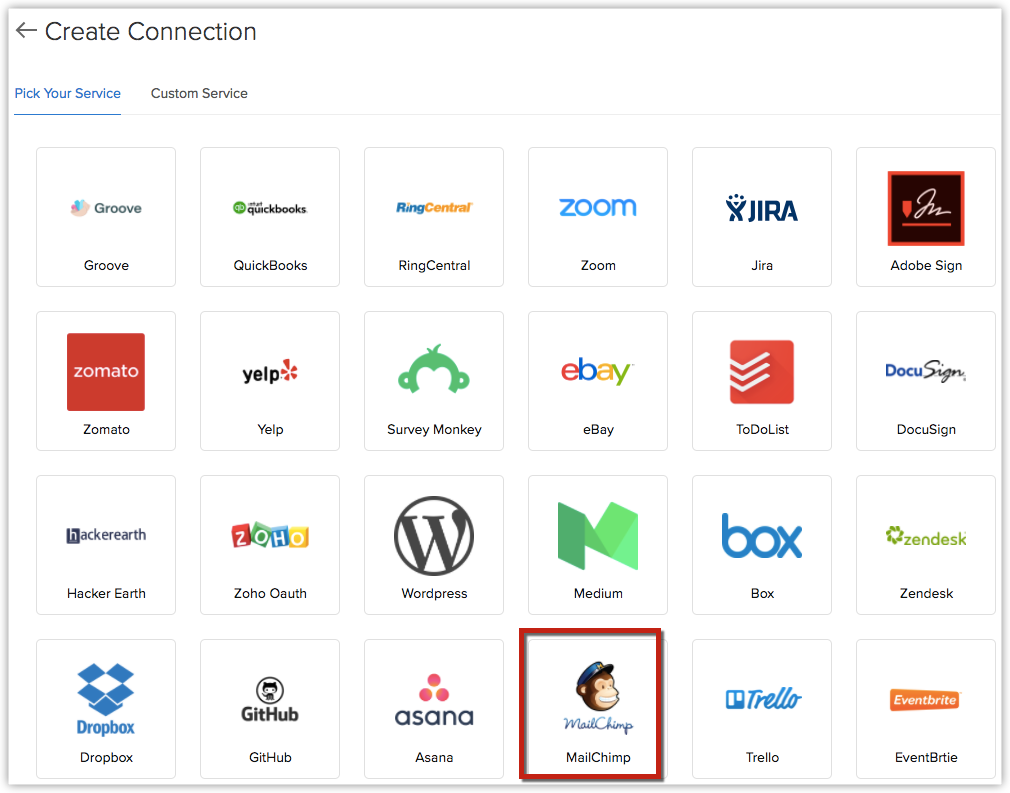
Once the connection is created, it will be available in the "Pick Your Service" tab.
About Tokens
Request
Tokens, Access Tokens and Refresh Token URLs are provided by the web
application. You can obtain these URLs from the developer space of the
web app. For example, the URLs for Google applications can be obtained
here.
For
any service, the Request Token, Access Token and Refresh Token URLs
will have multiple parameters, including scope, state, client id, and
access type. These parameters can vary from service to service. However,
three parameters are common to all the services: Redirect URL, Client
ID and Response type. These parameters will be handled by Zoho. If there
are any other mandatory parameters such as 'scope', 'state', or 'access
type', the developer will have to supply them in the format specified
by the third-party service.

Sample Google API
Using a Connection
The "Pick your Service"
tab contains the list of available connections that are ready to use.
You can select an existing connection or select the one that you created
from the "Custom Services" tab. The connections are to be used by
invoking them within functions.
Let's have a look at how to use a connection within the function
- Go to Setup > Developer Space > Connections.
- Select the required Connection from the "Pick Your Service" tab.
Provide a Connection name.
- Click Create and Connect.
- In the following page, the Link name, Service name and Status of the Connection is shown.
- Additionally, the code to be used in a function to invoke the connection is also given in a box.
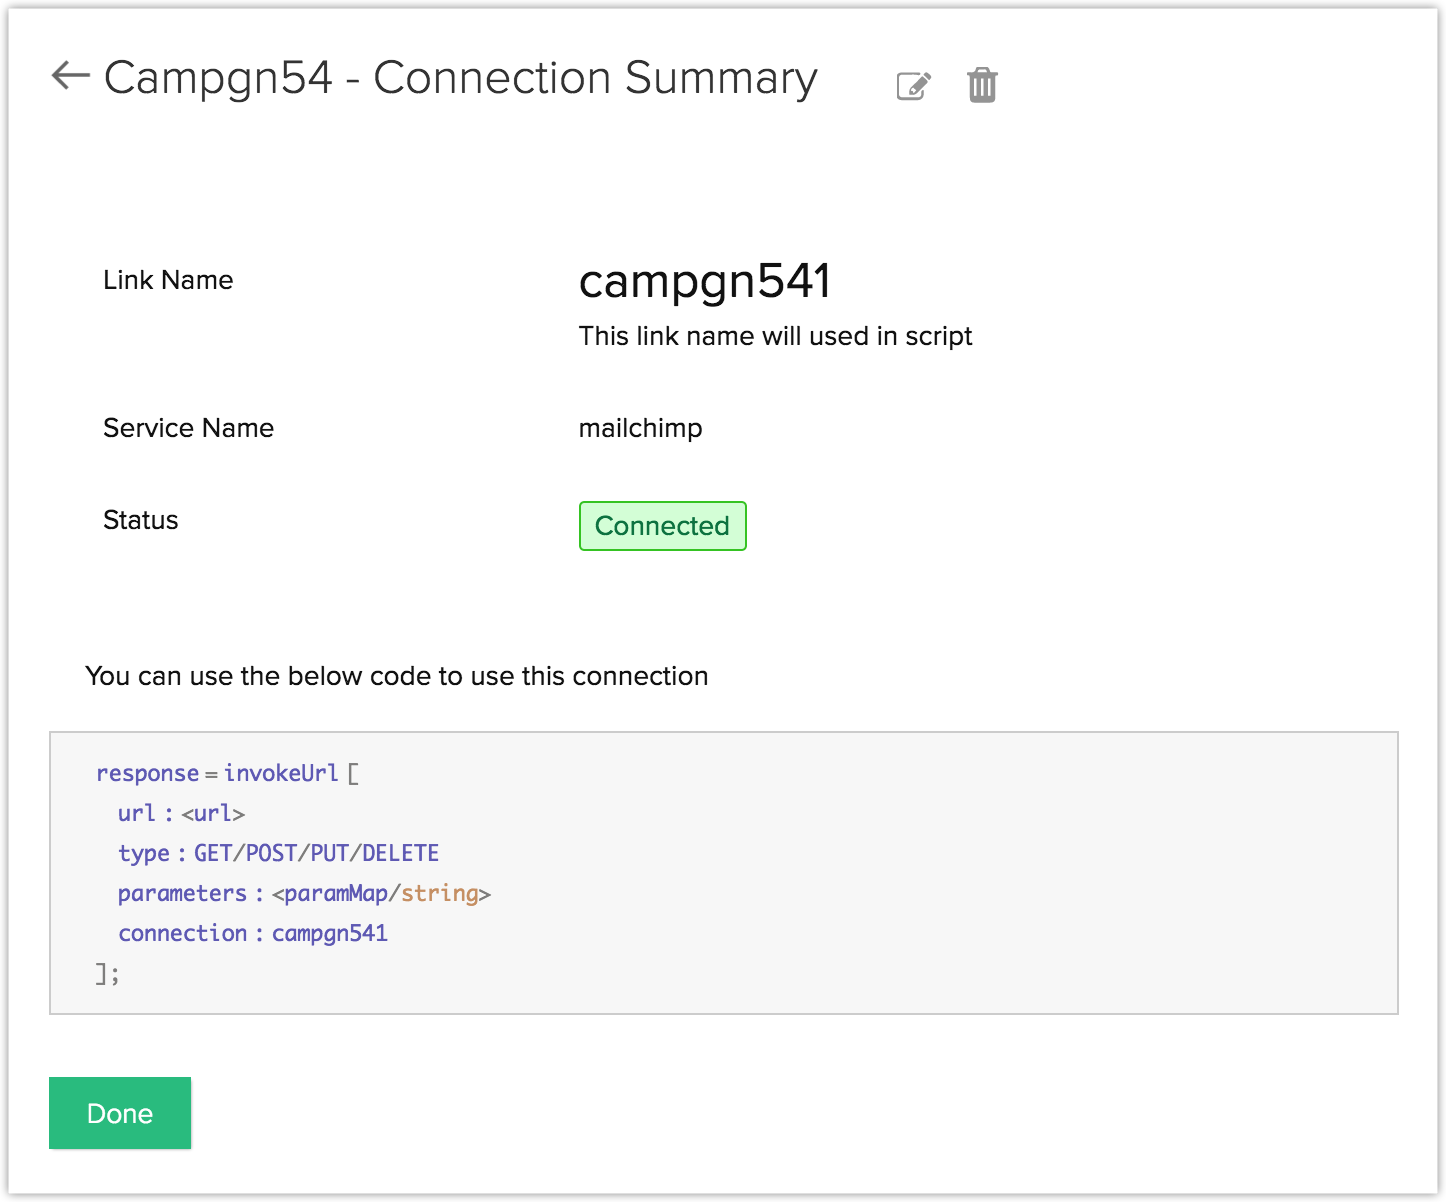
- The URL can be obtained form the third-party service.
- The Types POST, PUT, GET and DELETE are the HTTP methods that determine the type of action that request performs.
- The Parameters are
used by the function to replace dynamic values present in the API with
user-specific values. For example, if the API must fetch the lead's
details such as name, email address, contact number, etc., these values
will be represented by a dynamic value in the API. This dynamic value
can be replaced with the actual value from the Leads Details page using
the parameter function. Examples given later in this document will give
more detailed information about this function.
- The Connection in the code is the link name.
You
can use the above block of code to invoke the URL and integrate the
third-party app with Zoho CRM. To learn more on the Invoking URL Task,
click here.
Invoking the URL is usually done within Functions here.
Sample Connection
Let's
take a look at an example scenario. Suppose you want to want to learn
about the details about a Campaign from MailChimp, for instance, the
Contacts in the Campaign, the leads acquired from the campaign and more.
Although there is a Campaigns module in Zoho CRM, the finer details are
only available in MailChimp.
To
get all of those information from MailChimp into your CRM, you need to
create a connector that integrates your CRM with MailChimp and then
write a function that lets you execute this connector whenever necessary
conditions are satisfied.
Step 1: Getting Request, Access and Refresh tokens
To get going, we need to get the request token, access token and refresh token URLs from MailChimp server.
- Go to Setup > Developer Space > Connections.
- Click the "Custom Service" tab.
- Give the Service name as "MailChimp".
- Set the Authentication type as "OAuth 2".
- Provide the following information:
- Client ID : {your_client_id}
- Client Secret : {your_client_secret}
- Authorize URL : https://login.mailchimp.com/oauth2/authorize
- Access Token URL : https://login.mailchimp.com/oauth2/token
- Refresh Token URL : https://login.mailchimp.com/oauth2/token
- Give a name for the Connection.
- Provide the Scopes for the connection as specified by MailChimp.
- Click Create and Connect.
Step 2: Enabling the Connector
Once the connector is added, we need to enable it before using.
- Go to Setup > Developer Space > Connections.
- The "MailChimp" connector can be found in the "Pick Your Service" tab.
- In the MailChimp connection page, enter a name for the current connection.
- Click Create and Connect.
- The response gives you a deluge code which can be used in a Function.
- You can use that code to call the API using a function.
Step 3: Write a Custom Function to invoke a Connector
Once
the connector has been published and associated with the extension, it
can be invoked using a custom function. You can do either of these
actions.
- Post data from Zoho CRM to MailChimp.
- Getting data from MailChimp to Zoho CRM.