Zoho Expense Integration
Zoho Expense integration lets you track and manage project related day-to-day expenses of your employees.
Click to learn more about access privileges for integration with other Zoho Apps.
Benefits:
- Track expenses using Expense reports.
- View expense along with the actual cost and compare it with the project budget.
- Expenses need to be approved before they can be invoiced giving you more control over costs.
- Upload receipts and submit them for approval.
Feature availability and Access privileges
Integrate Zoho Expense
- Click
in the upper-right corner.
- Choose Zoho under Marketplace. Now, select Update in Zoho Expense.
- Click How to Generate ZSC Key? to get the ZSC key.
- If you do not have an account in Zoho Expense, you will be asked to create a new organization.
- You will be directed to Zoho Expense.
- Click the Settings icon in the upper-right corner of Zoho Expense dashboard and then click Integrations.
- Click Zoho Expense ZSC Key and then click Generate Now to get a new ZSC key.
- Copy the Email ID and ZSC key.
- Enter the copied Email ID and ZSC key in Zoho Projects.
- Select the Organization and Finance Permission.
- Select a date from when the time logs are to be invoiced. Time logs prior to this date will be marked as invoiced.
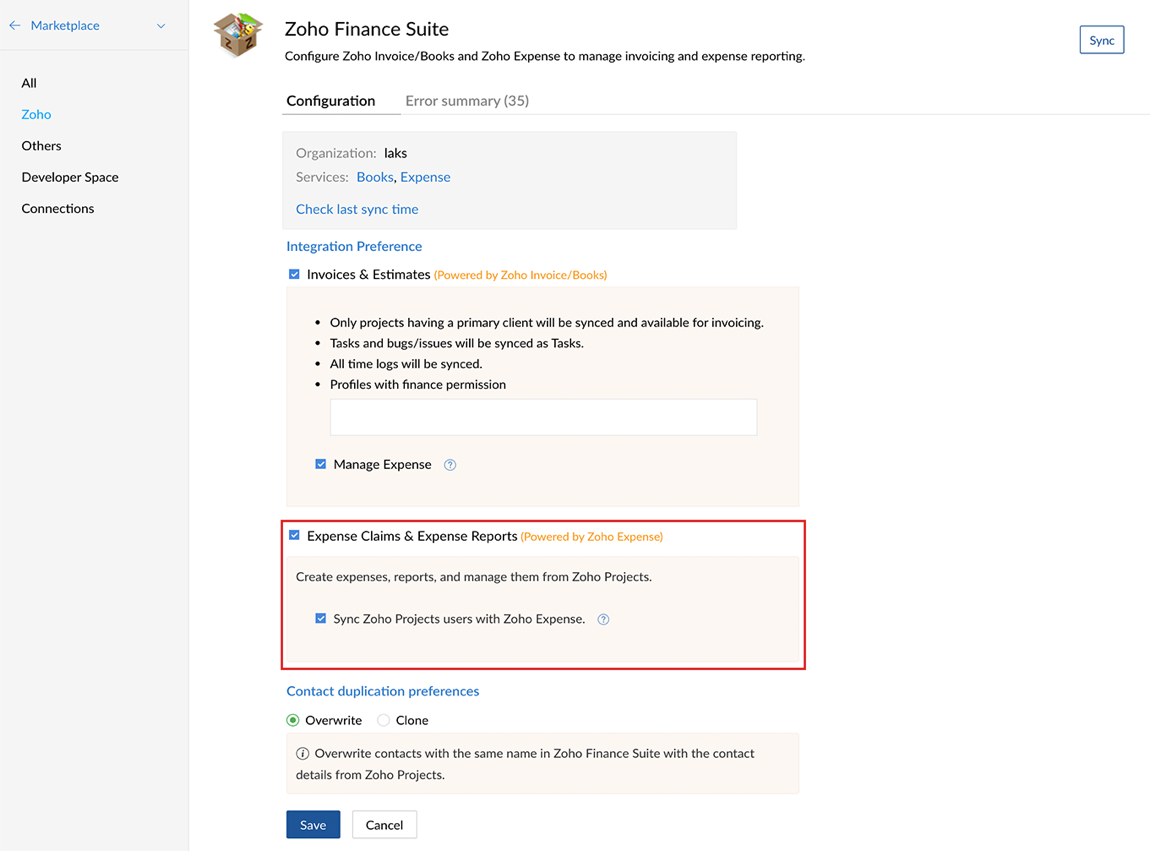
- Under Expense and Expense reports, select Manage Expense to add, edit or delete expenses.
- Click Save.

Create Expense Claims
- Navigate to your project and select Expense tab.
- Select Expense Claims and Click New Expense.
- Enter the Date and the Merchant details.
- Select the Category of the expense from the drop-down and enter the Amount.
- Enter the Description, Customer and Reference# if desired.
- Add to Report by selecting from the existing reports or by creating a new report.
- Attach receipts from your computer or cloud.
- Click Save and Close or Save and New to add a new expense.

Edit Expense Claims
- Navigate to your project and select Expense tab.
For Unreported Expenses:
- Click
and select Edit.
- Make the required changes and click Save and Close.
For All Expenses:
- Click open the required expense.
- Click
on the top right corner.
- Make the required changes and click Save and Close.
- Click
Merge Expense Claims
- Navigate to your project and select Expense tab.
- Under Expense Claims select any 2 expenses which you would like to merge.
- Click
and select Merge.
- Select a master expense and click Continue.

Delete Expense Claims
- Navigate to your project and select Expense tab.
- Under Expense Claims select the expense which you would like to delete.
- Click
and select Delete.
Create Expense Reports
- Navigate to your project and select Expense tab.
- Select Expense Reports and Click New Report.
- Enter the Report Name, Business Purpose and the Duration.
- Click Save.

Submit Expense Reports
- Navigate to your project and select Expense tab.
- Select Expense Reports.
- Click open the required report.
- Click Submit at the top-right corner.
Edit Expense Reports
- Navigate to your project and select Expense tab.
- Select Expense Reports.
- Click open the required report.
- Click
on the top right corner.
- Make the required changes and click Save.
Delete Expense Reports
- Navigate to your project and select Expense tab.
- Select Expense Reports.
- Click open the required report.
- Select the expense which you would like to delete.
- Click
and confirm your action.
Related Topics
Related Articles
Zoho Invoice integration
You can create a project budget, invoice time logs, and record expenses for all your projects by integrating Zoho Projects with Zoho Invoice or Zoho Books. Project managers can create budget to view the planned versus actual cost in real time. The ...Using Zoho Finance Suite Integration
View Zoho Books/Zoho Invoice/Zoho Expense tabs Once you have integrated Zoho Finance Suite in Zoho CRM, you will be able to do the following actions for each of the Zoho Finance application. Zoho Books The Zoho Books tab groups the ...Setting up and Configuring Zoho Finance Suite Integration
The Zoho Finance Suite integration allows you to integrate your Zoho Books, Zoho Invoice, Zoho Expense as well as Zoho Subscription accounts with Zoho CRM. As a result you can view and monitor invoices, estimates, purchase orders, sales orders, ...Linking Zoho Creator Apps with CRM
Web tabs functionality can be used to access the applications created in Zoho Creator and link with the Zoho CRM data. In order to access the Creator application within Zoho CRM, design an application in Zoho Creator, add it as a web tab inside CRM ...Zoho Sales IQ Integration
Engage your website visitors better by getting real time notifications of each visit Help guide Visitor Tracking with Zoho SalesIQ - Overview Setting up SalesIQ Integration