Zoho Forms
Zoho Forms Integration
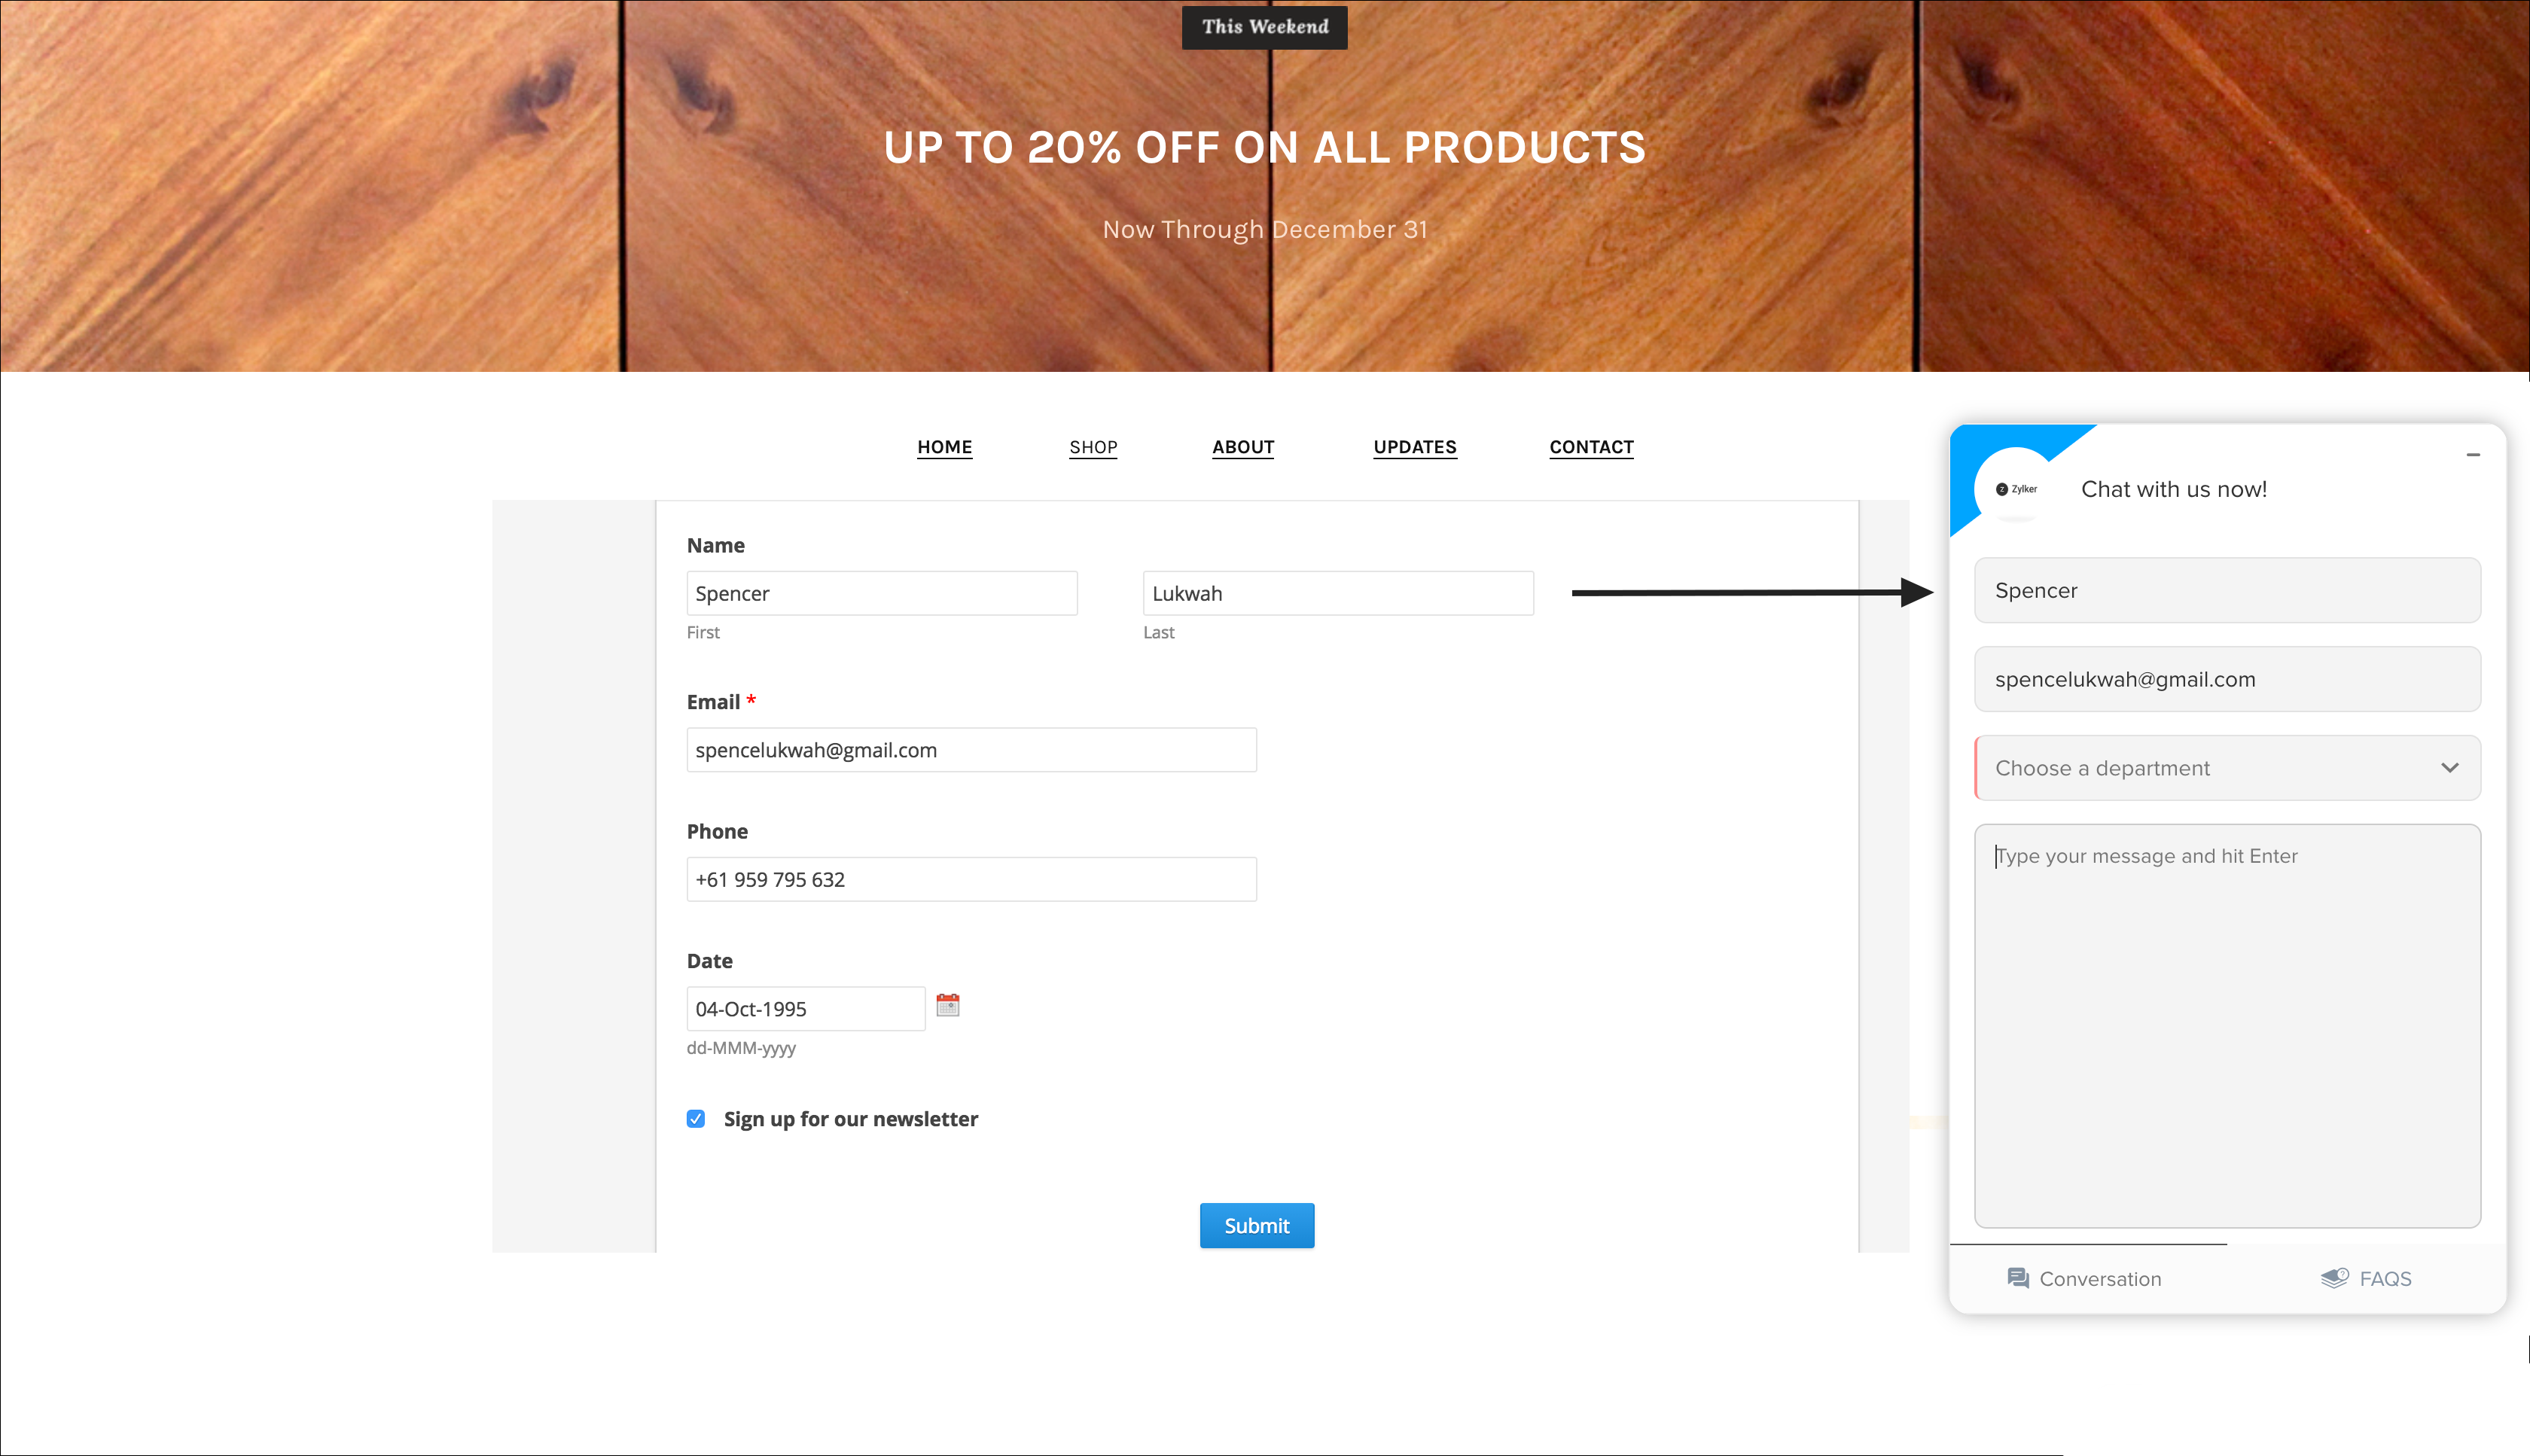
Integrate Zoho SalesIQ with Zoho Forms and ease out the process of identification of visitors hitting your site. Not just this, you will also gain the following benefits over this integration:
- Once the procured form data is passed on to Zoho SalesIQ, your visitors will never have to fill out their personal details ever again.
- Procured form data will be saved in the cookies of your visitor’s browser. Thus, every time a visitor tries to initiate a chat via your widget, SalesIQ will set the form data in the fields that you map during integration.
- Visitors who fill out your forms will be identified as they hit your site by the data passed on from Zoho Forms to SalesIQ.
More Info
You can also use Zoho SalesIQ's JS API or auto-pick mechanism to fetch data from a form and pass it on to Zoho SalesIQ. To use the auto-pick mechanism to fetch form data, you will have to add the SalesIQ attributes while creating your form. For instance, to fetch data from the 'Name' field, you will have to add the attribute - siqatrib="name". That is, <input type="text" name="name" siqatrib="name"/><br>. Similarly, you can use the following SalesIQ attributes as well,
- siqatrib="email"
- siqatrib="phone"
- siqatrib="company"
- siqatrib="firstname"
- siqatrib="lastname"

If you choose the auto-pick mechanism, the data fetched will not be considered if the field has already been assigned with a value. On the other hand, if you choose to use JS API then the existing field value will be replaced with the data fetched by the API used.
Integrating Zoho SalesIQ with Forms
To integrate Zoho SalesIQ with Forms you will have to:
- Log into your Zoho Forms account.
- Click on New Form.
- Either choose to build a form from the scratch by choosing Blank Form or choose the option Form Templates to use an available form template.
- Start building or modifying the form based on your business requirements.
- Then switch to the Integrations tab and to Zoho SalesIQ.
- Click Integrate.
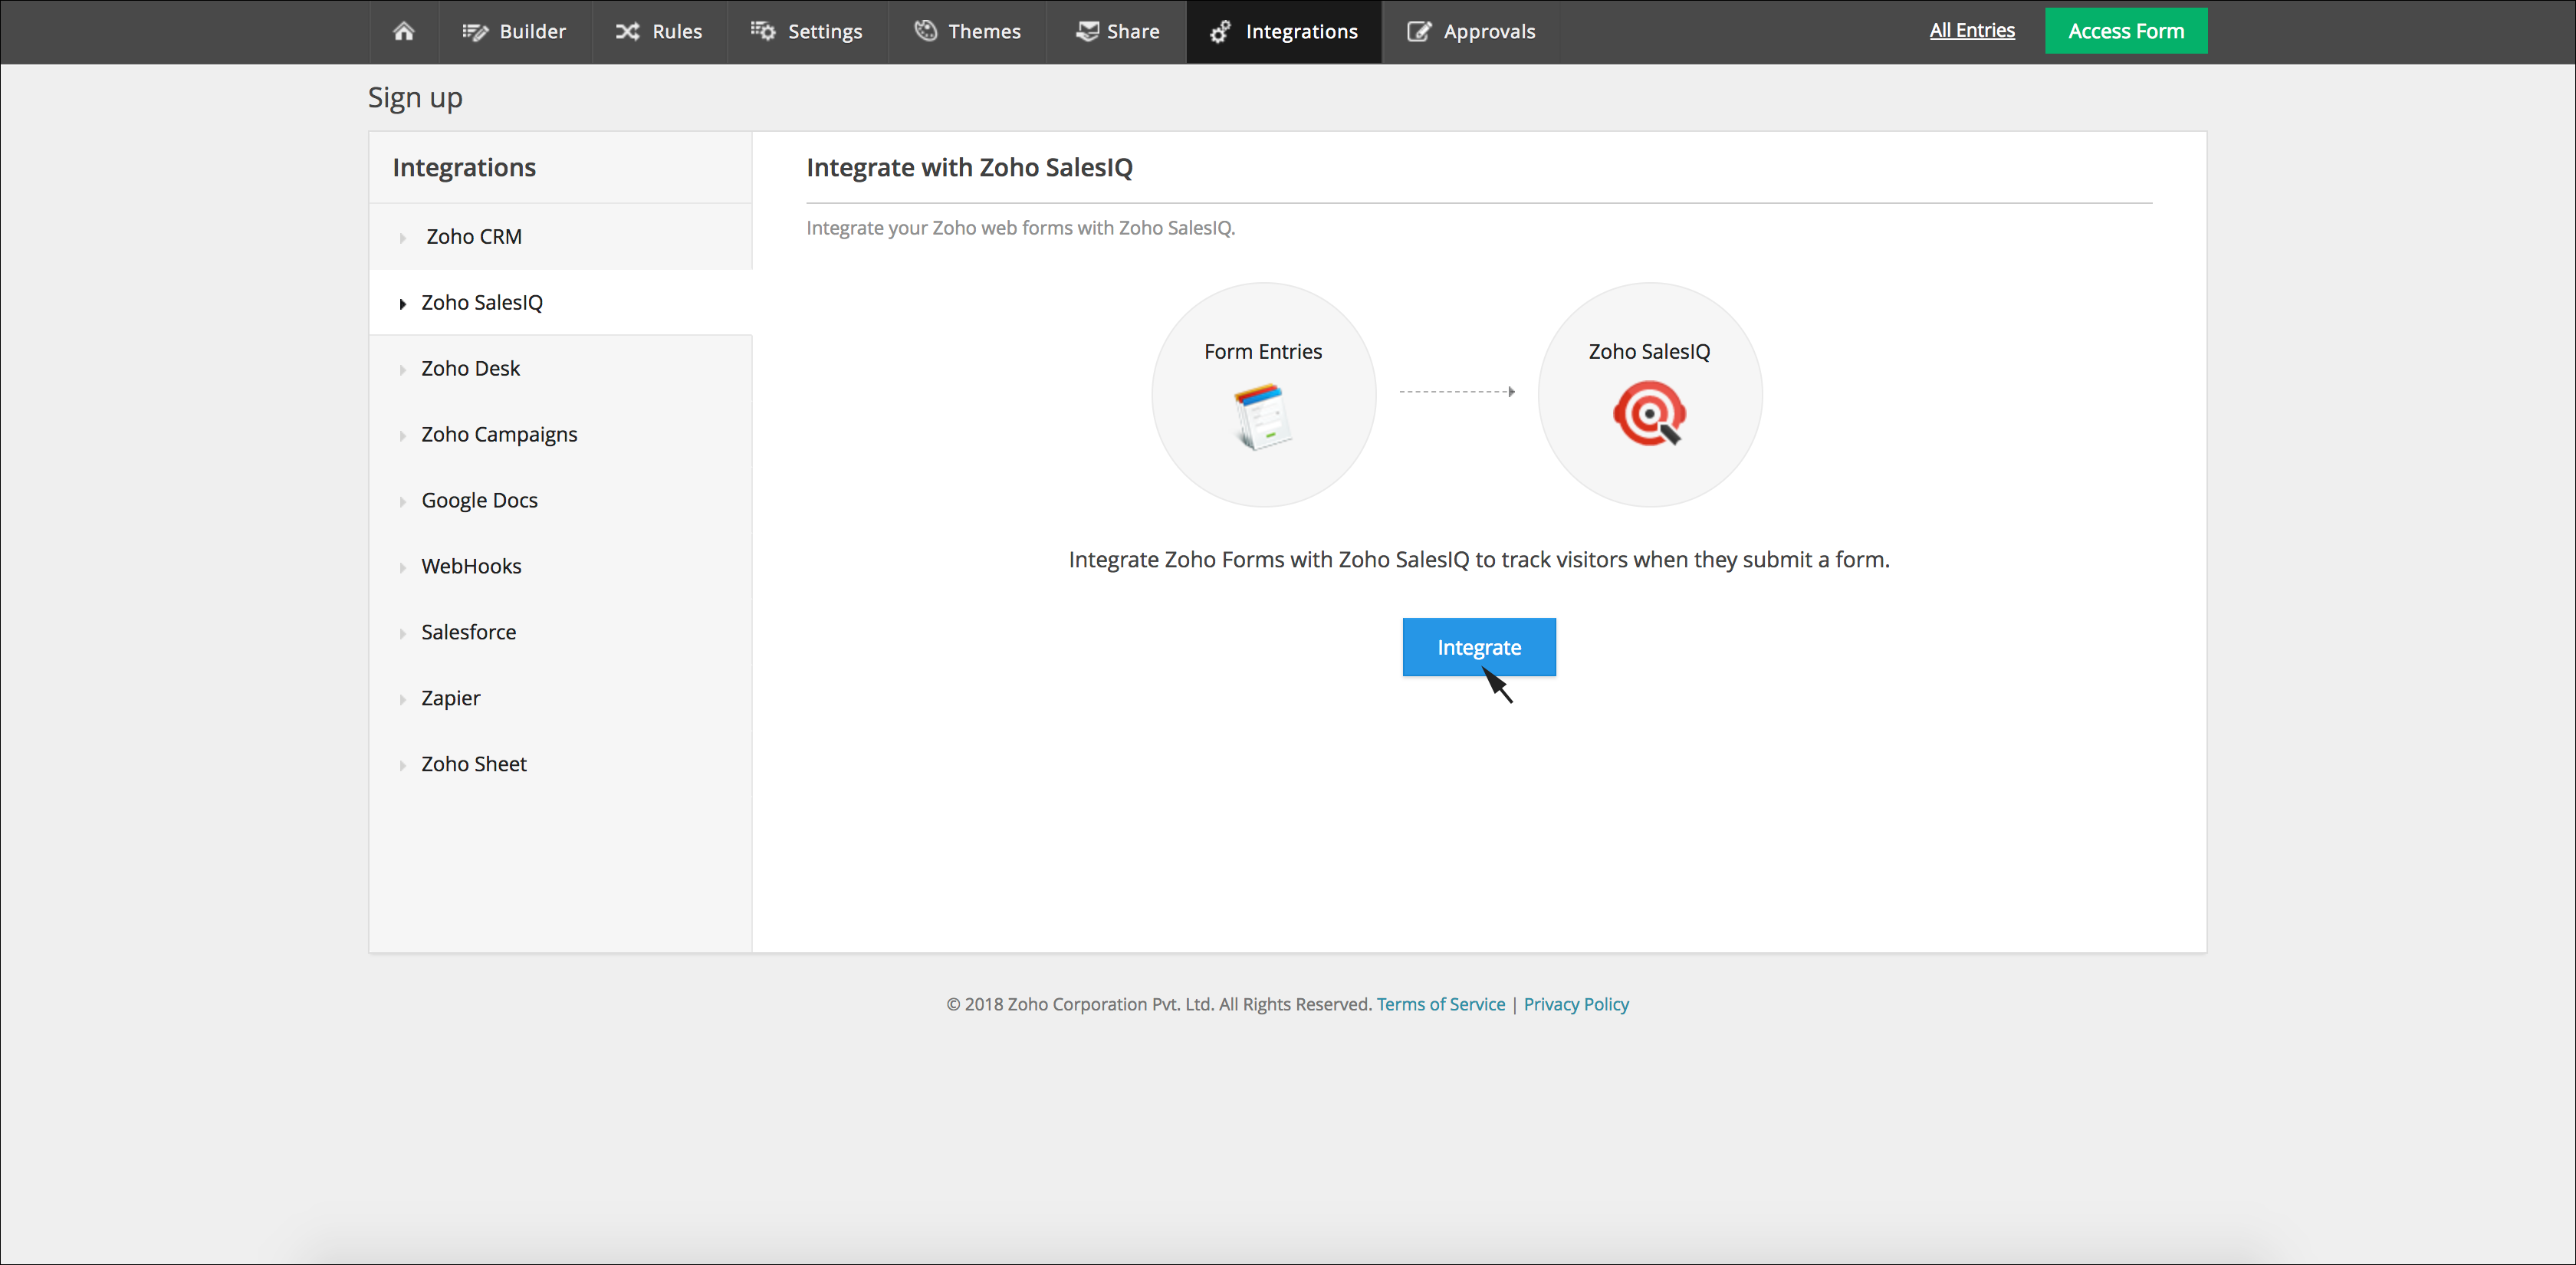
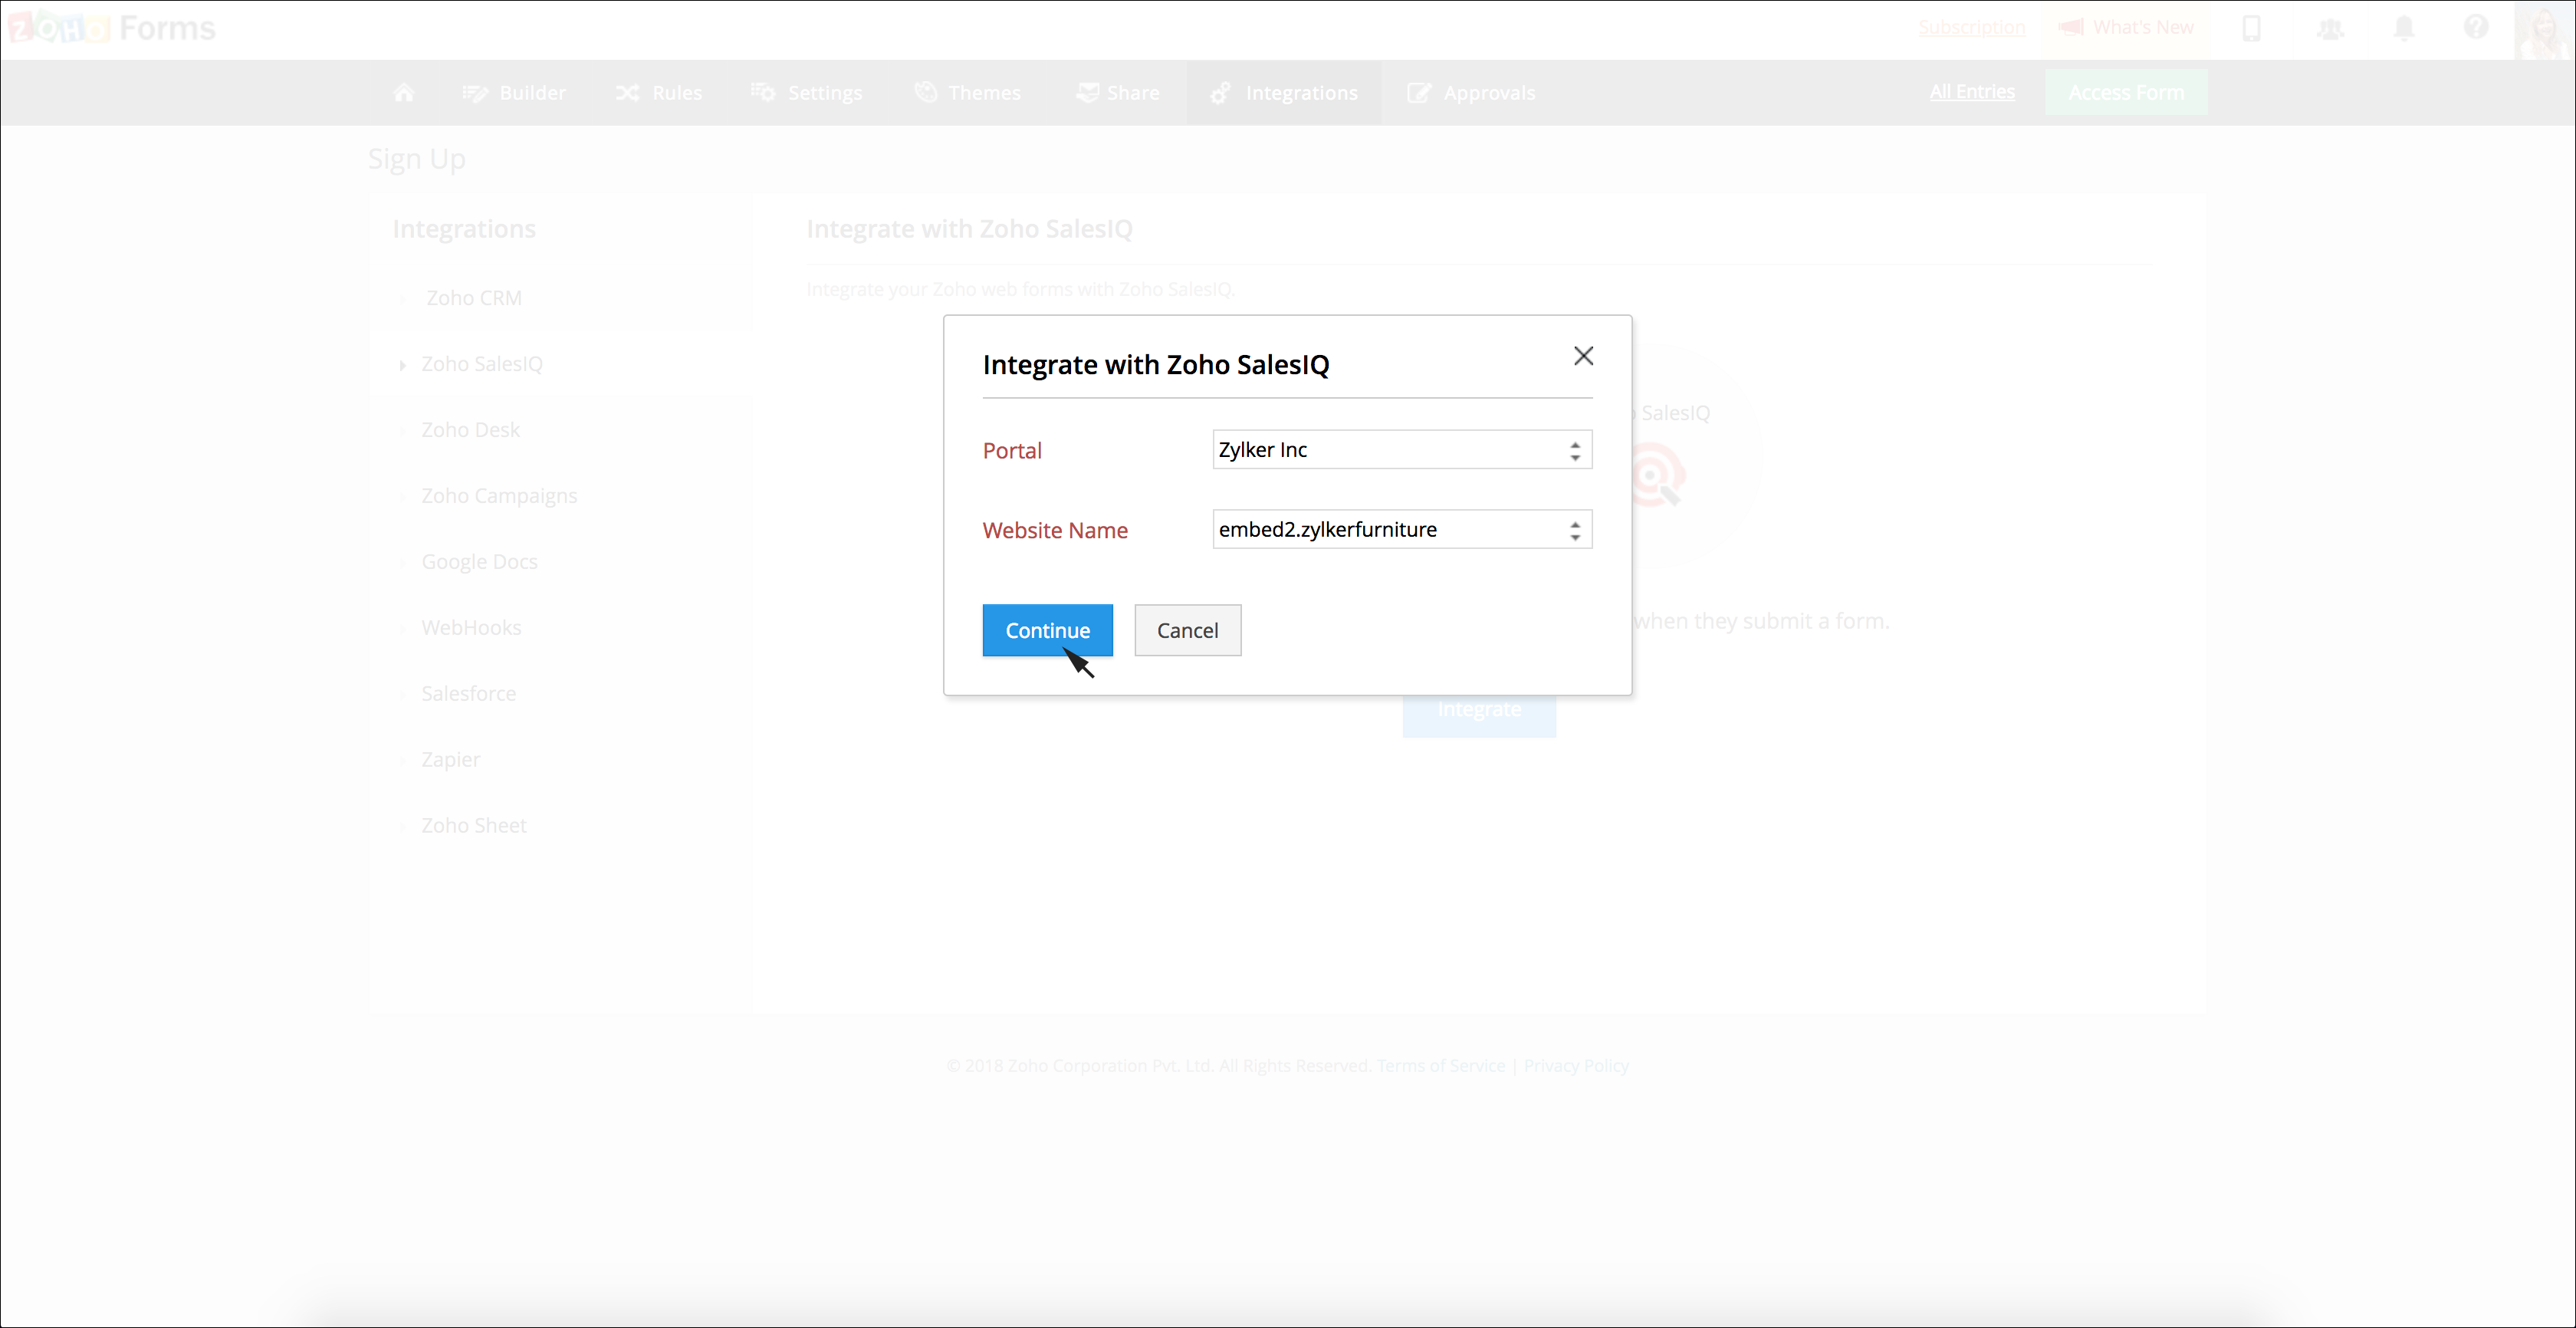
- Choose the Portal and Website from the drop-down box.
- Click Continue.
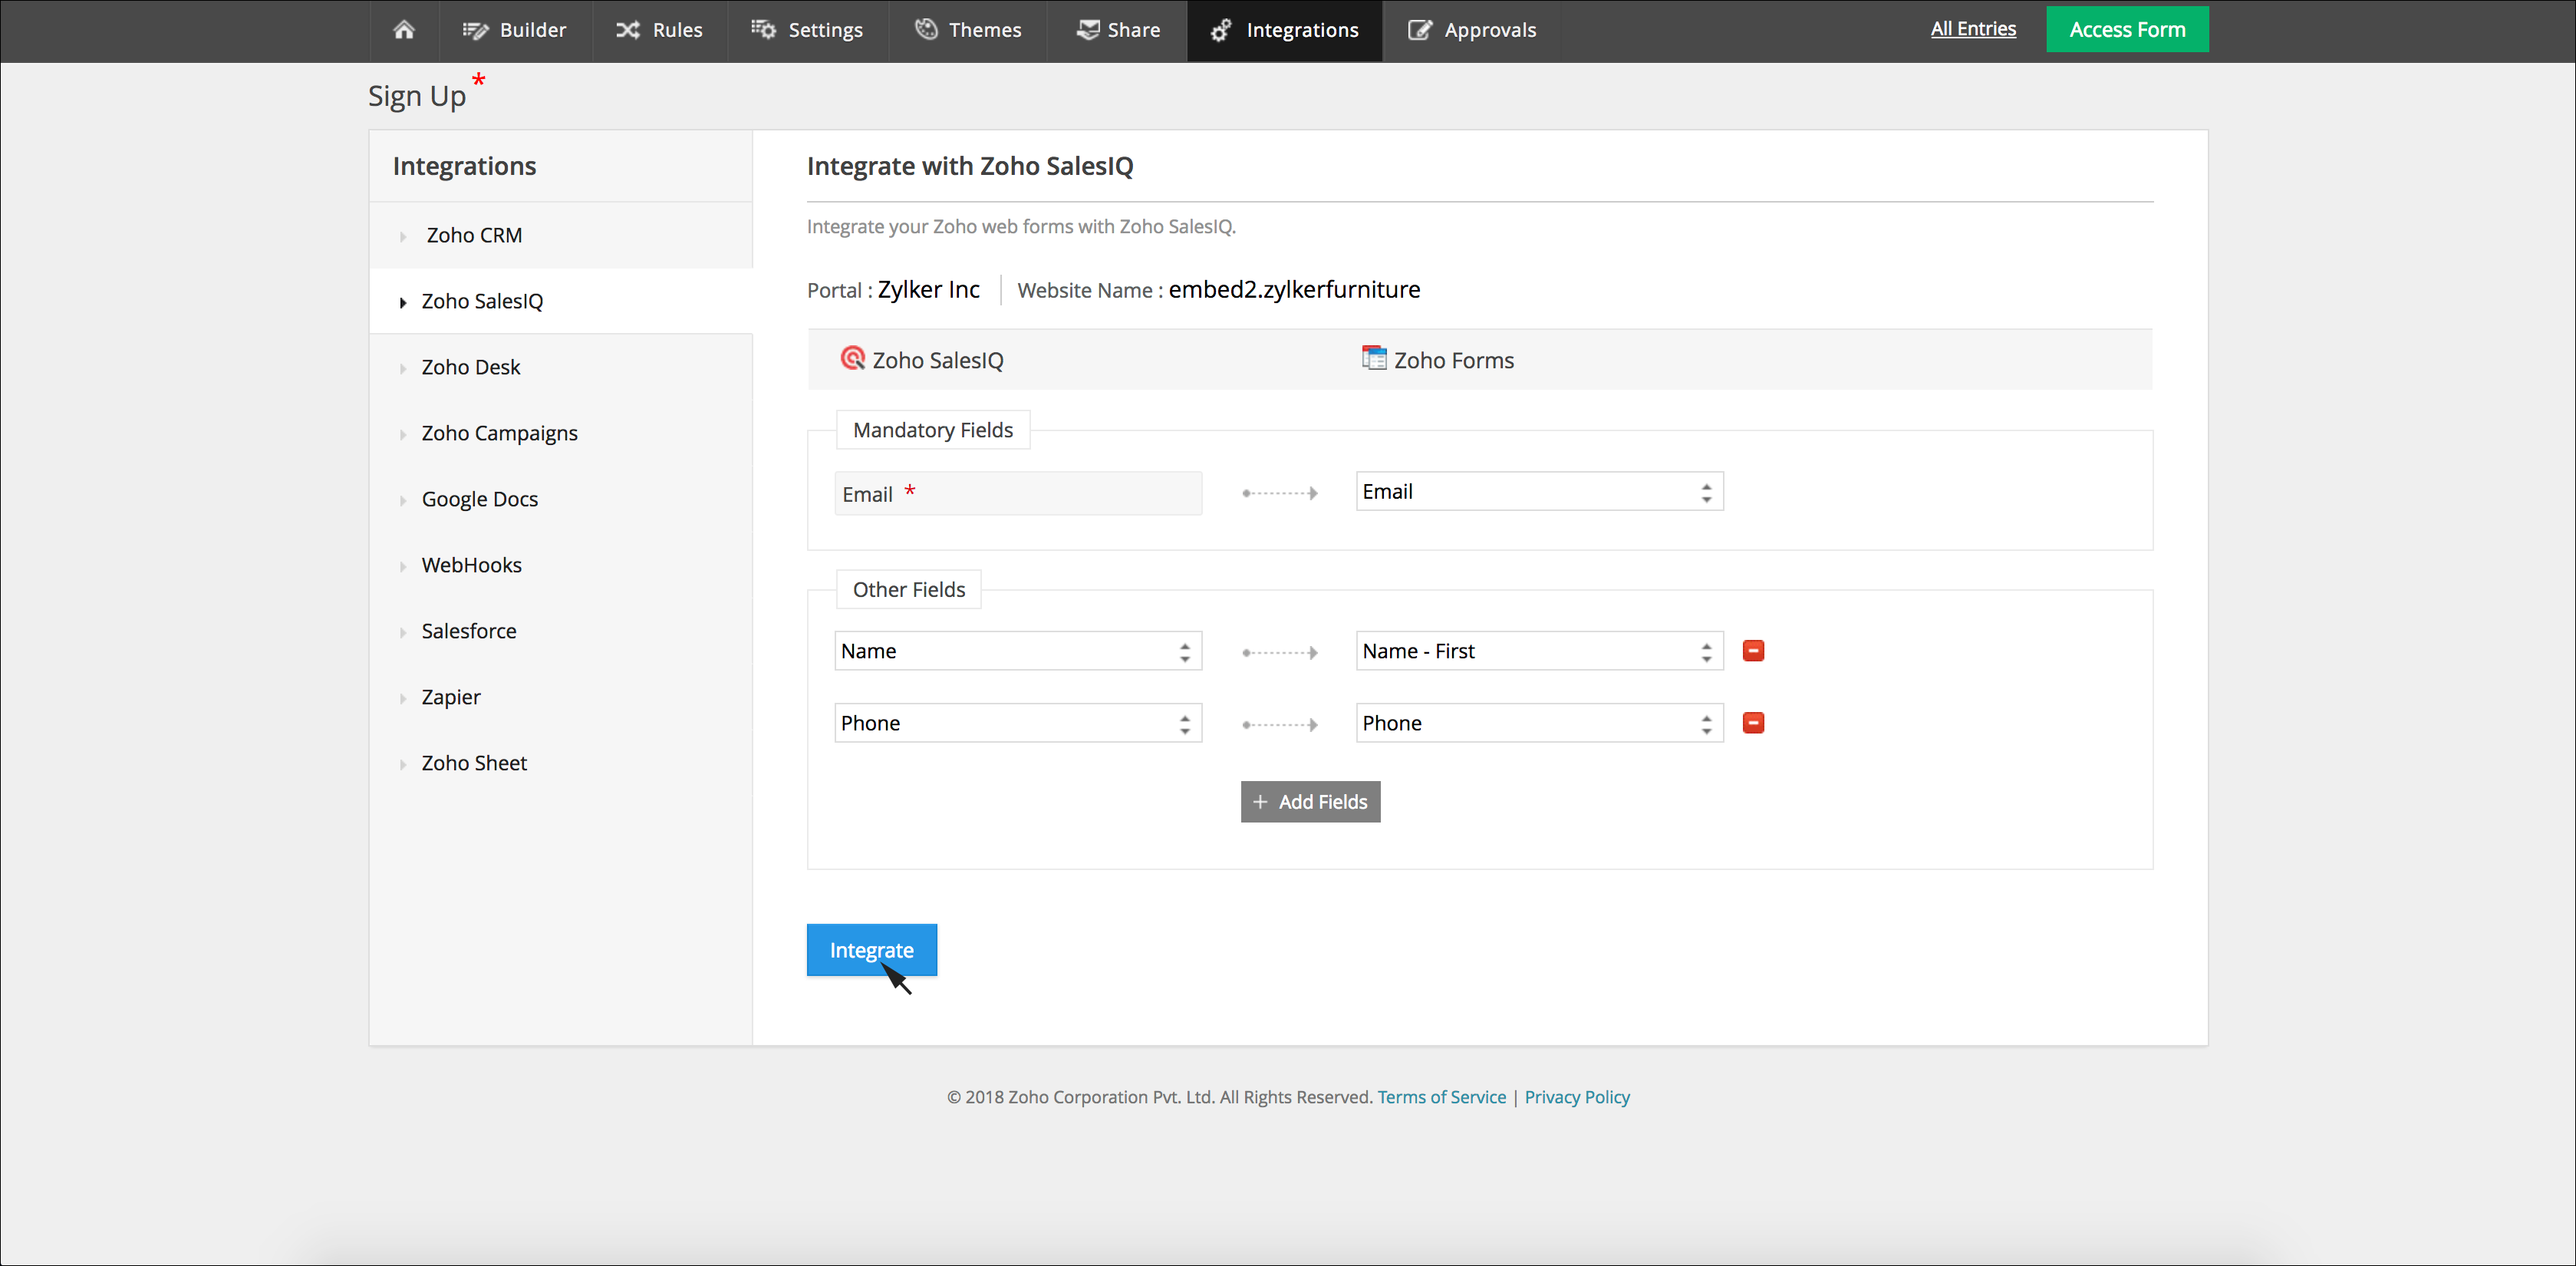
- Map the fields available in your Zoho SalesIQ with fields in the form that you just created.
- Click Integrate.
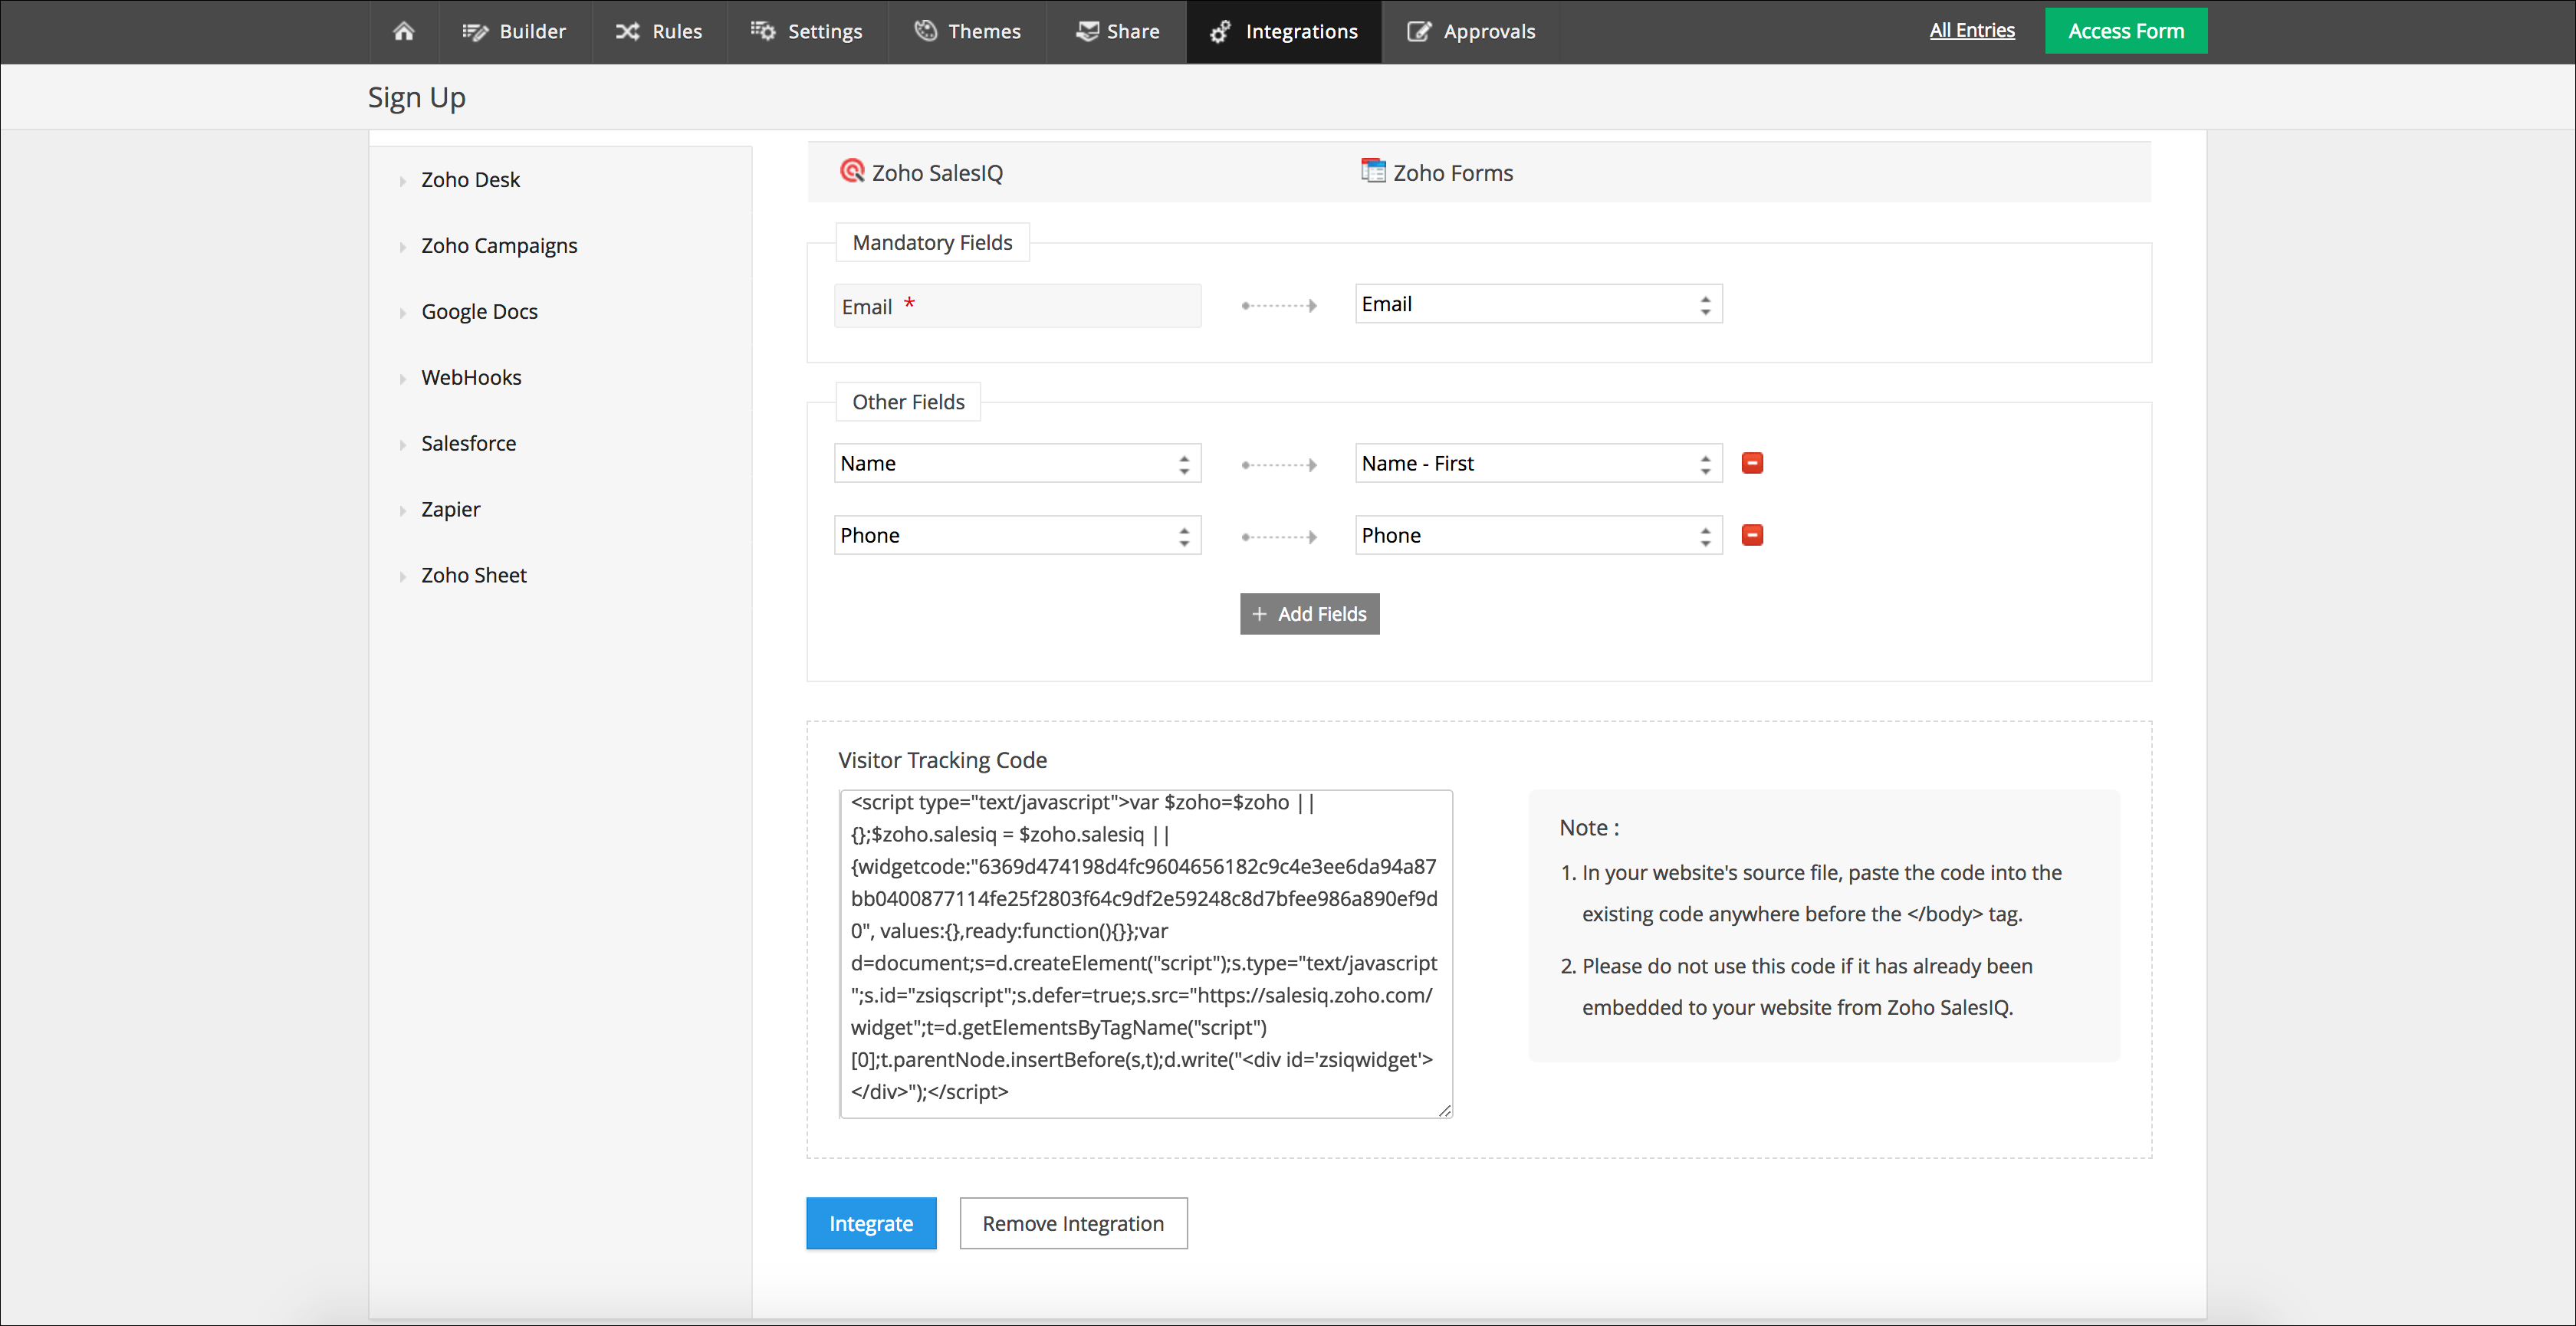
- SalesIQ live chat code generated for the chosen portal and website that you chose will be displayed.
- If you haven't pasted SalesIQ script in your site yet, you can paste it else just click Integrate
Once you are done integrating Zoho SalesIQ with Forms you can embed the form on your site, or choose to share the link of the form you have generated with your visitors. Then, the details that visitors fill in will be passed on to Zoho SalesIQ and the data will be set in the mapped visitor chat window fields every time the visitor tries to initiate a chat via chat widget embedded on your site.
Disable
Disabling Zoho SalesIQ integration
To disable the established integration, you will have to:
- Hover over the Home icon, which you can find in the top left corner beside the Builder tab.
- Choose the option Forms.
- List of all the forms built will be displayed.
- Scroll to find the form for which you would like to disable the integration.
- Hover over it.
- Click Edit.
- Switch to Integrations tab and then to Zoho SalesIQ.
- Scroll until you hit the end of the section.
- Click Remove Integration.
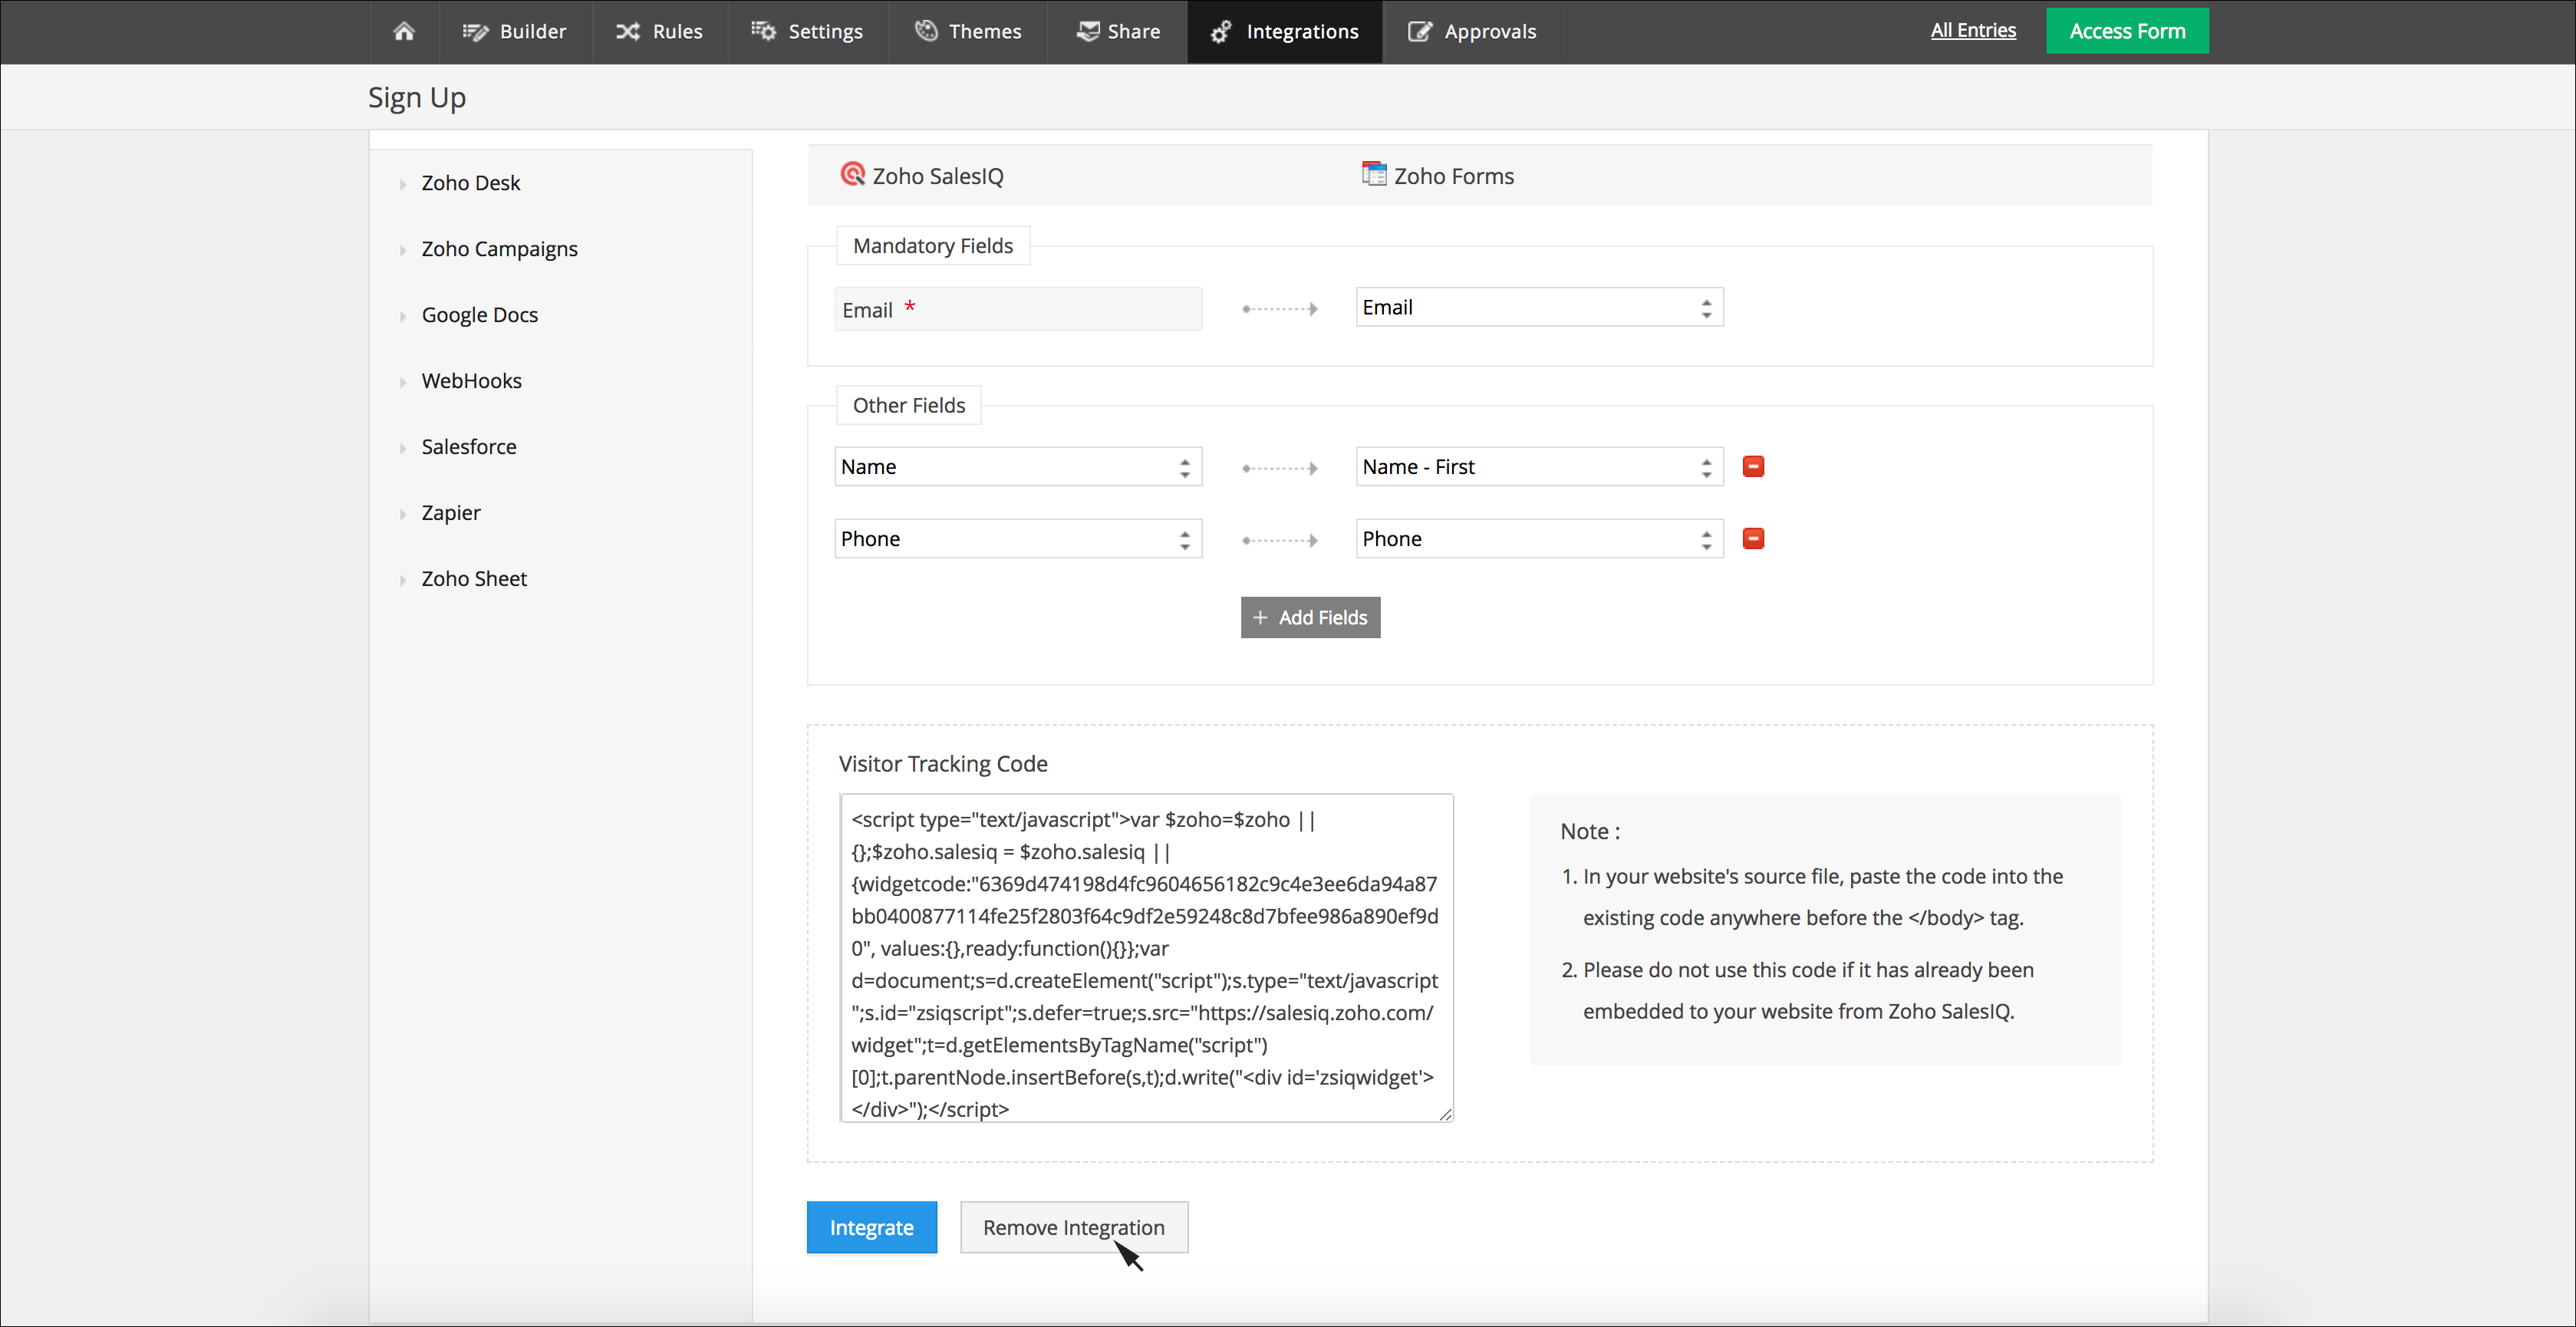
- You will get a confirmation pop-up box asking - Are you sure you want to remove the Zoho SalesIQ integration?
- Click Yes.
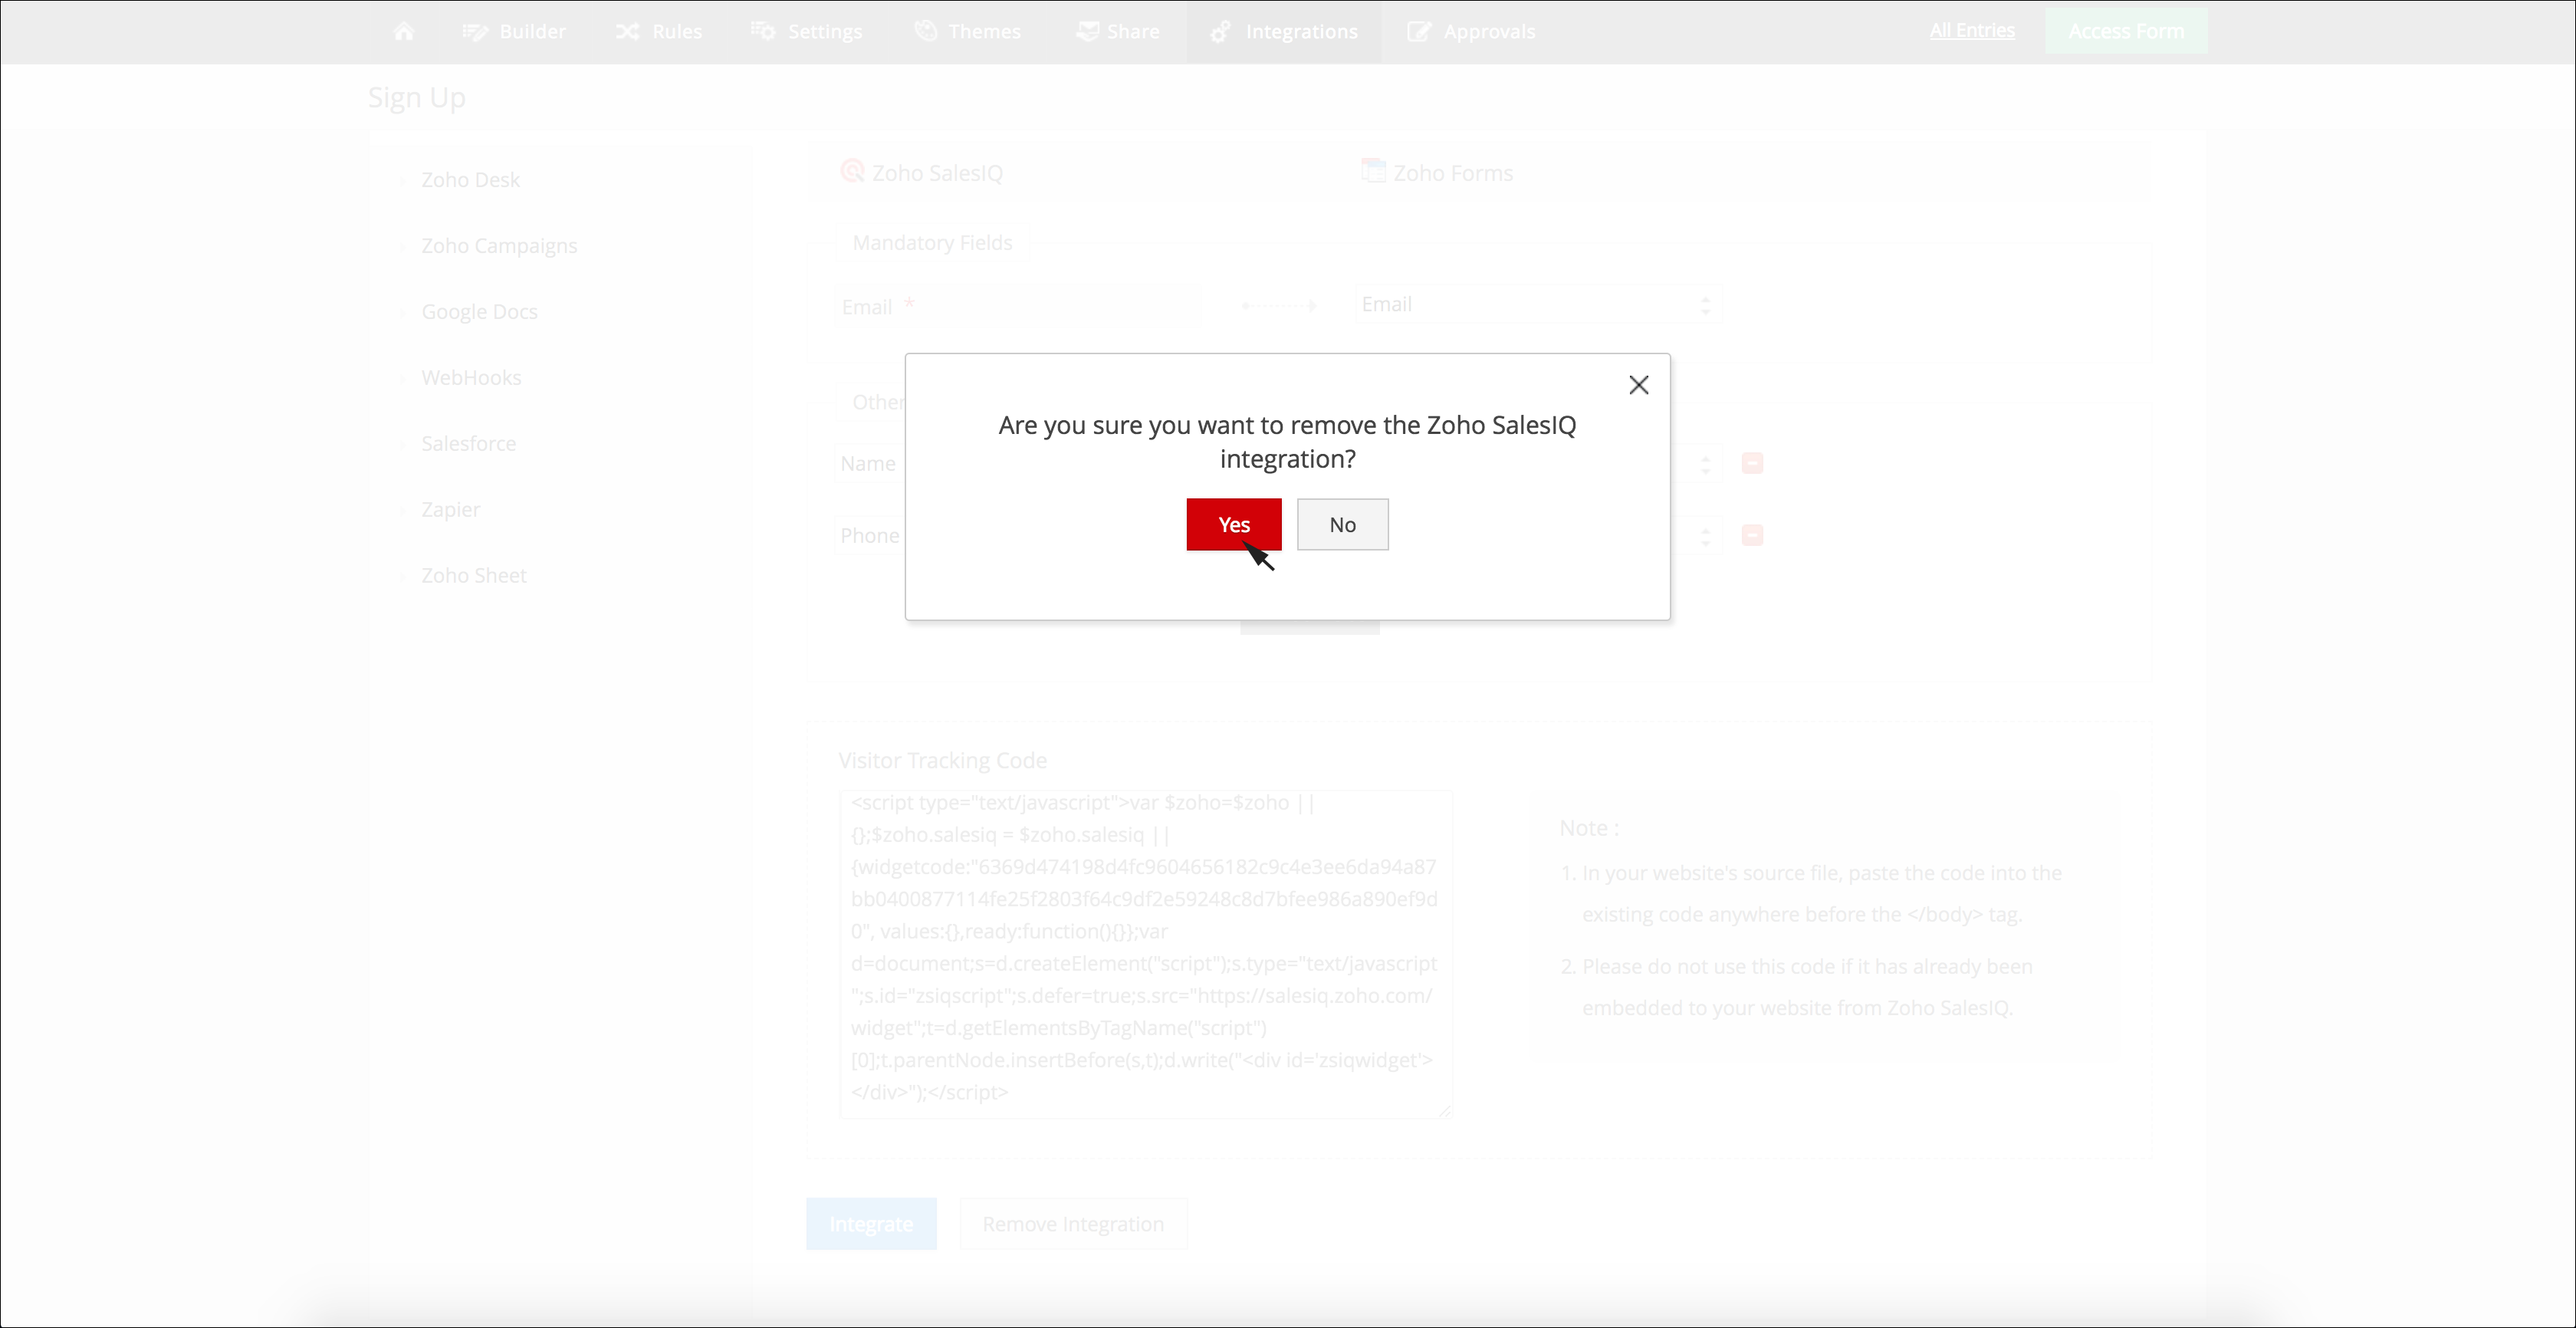

Do remember that once you choose to remove the integration, all the configurations associated with the integration will be deleted as well. If you choose to integrate Zoho SalesIQ with a form again, you will have to start configuring all the integration-related settings from the scratch.
Related Articles
Understanding forms
Form is a simple yet effective way of gathering leads and growing your mailing lists. Easy to create and host, sign up forms are the best way to grow your lists long-term. Zoho MarketingHub holds three types of signup forms to meet your ...Web Forms
Web forms simplify the process of capturing the visitor or user information from your website into your system. They are designed to automate the importing of data from websites into Zoho Workerly. Non-technical users find it easy to design and ...Zoho Forms Integration
Introduction For agencies or corporate companies, collecting and processing candidate details, key information, skill set, assessments and is definitely a challenge owing to the huge volume of resumes that come in on a regular basis. With the Zoho ...Working with Zoho Forms Integration
What is Zoho Forms? Using Zoho Forms, you can easily build an online form for all your business needs. Create and customize the form, add the required fields and send it to your customers thus facilitating data collection. It allows you to capture ...Web Forms in Zoho Desk
Web Forms simplify the process of capturing support tickets from your website into your Zoho Desk. The tickets can be from customers requesting your help or simply leaving feedback about your product. Either way, the Web Forms are easy to design and ...