Zoho Invoice integration

Integrate Zoho Books or Zoho Invoice
- Click
 in the upper-right corner.
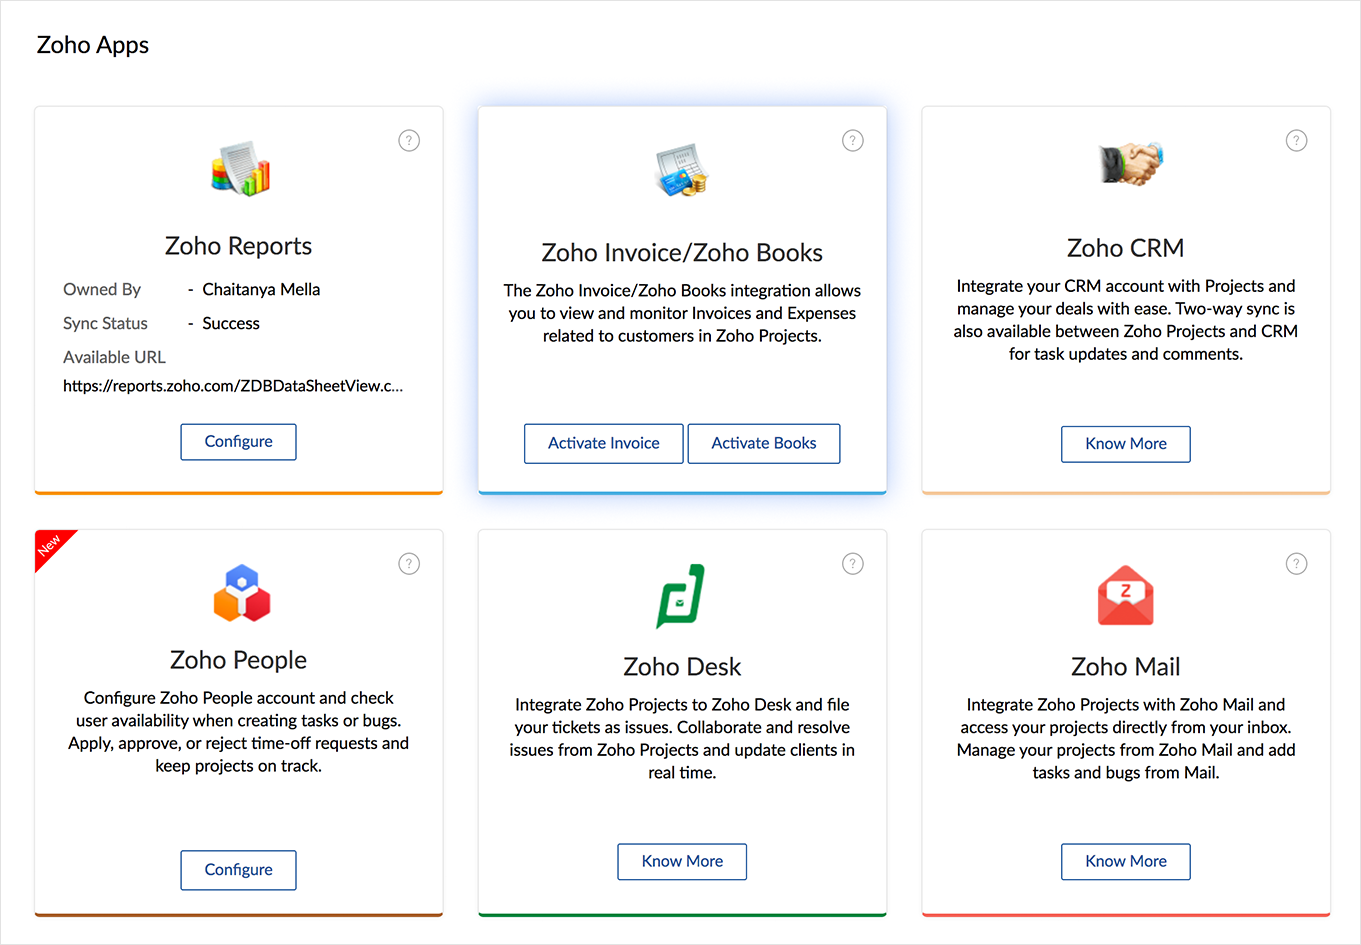
 - Choose Zoho Apps in Integration. Now, select Activate Invoice or Activate Books in Zoho Invoice/Books.
- Click How to Generate ZSC Key? to get the ZSC key.
- If you do not have a user account in Zoho Books or Zoho Invoice, you will be asked to create a new organization.
- After you have created and set up your organization, you will be directed to Zoho Invoice or Zoho Books.
- In Zoho Invoice or Zoho Books, in the Dashboard, click the Settings icon in the upper-right corner and then click Integrations.
- Click Zoho Invoice ZSC Key or Zoho Books ZSC Key and then click Generate Now to get the new ZSC key.
- Copy the Email ID and ZSC key.
- In Zoho Projects, enter the copied Email ID and ZSC key.
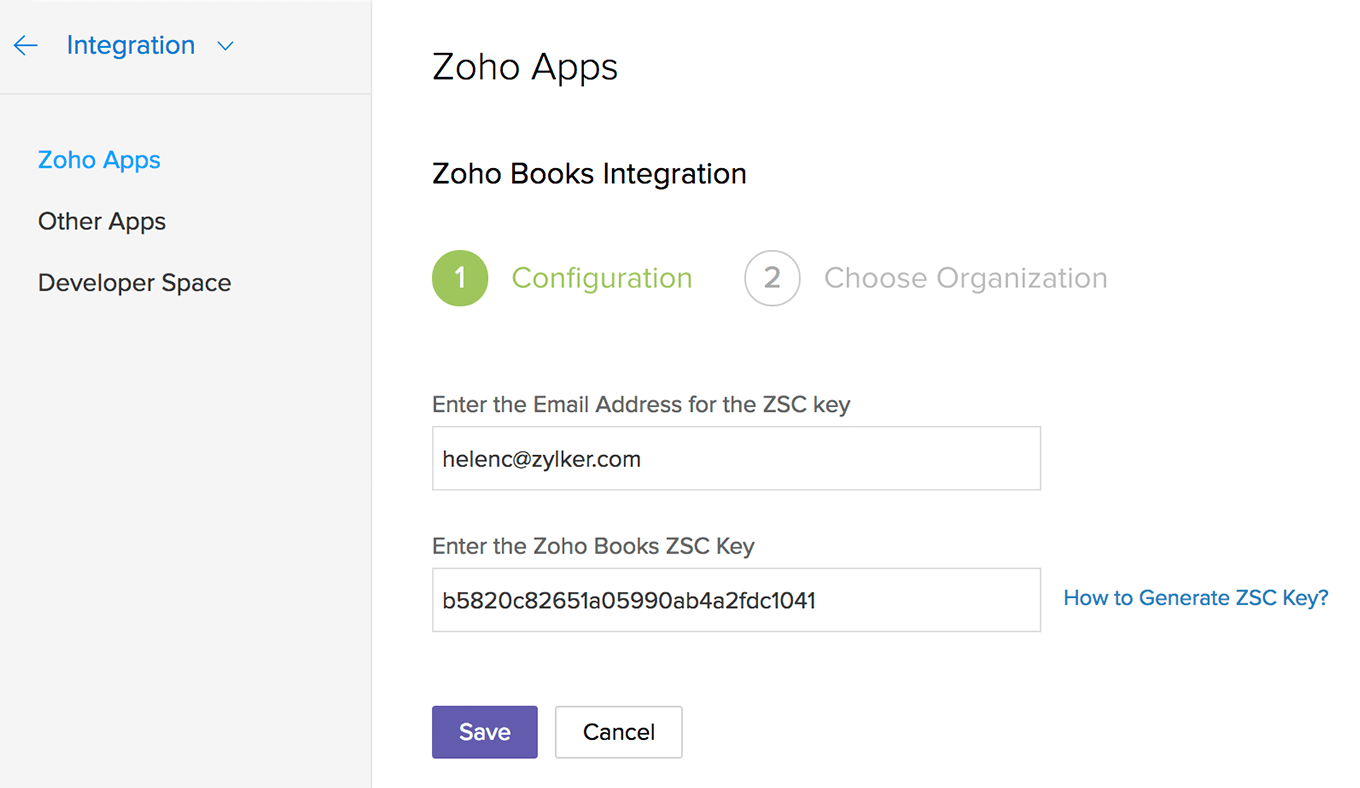
- Select the Organization, Finance Permission.
- Select a date from when the time logs are to be invoiced. Time logs prior to this date will be marked as invoiced.
- Click Save.

- Users must be given permission to view all timesheets before they can be given the permission to access Invoice.
- Navigate to > Marketplace > Zoho > Zoho Invoice/Zoho Books tile. Click Update. Profiles with view all timesheets permission will be listed under Configuration > Accessible to section. Selecting a profile will give users having the profile access to the Finance tab in Zoho Projects.
- Budget is enabled automatically for the users integrated with Zoho Books or Zoho Invoice. Click here to learn more about budget feature.
Fixed cost
Zoho Projects allows you to bill your customers based on a fixed cost and this option is available only for portals integrated with Zoho Invoice. In this option, since the invoicing is done based on a fixed cost you cannot track a budget with a varied amount. i.e Budget type based on amount is not applied.
- Navigate to projects list view and click New Project in the top right.
- Enter the project details and scroll down to Budget section.
- Select None or Based on hours from the Project Budget drop-down.
- Select Fixed cost for project under the Billing Method drop-down.
- Click Add after completing the necessary fields in the new project form.

Task and issue based invoicing
If your organization deals with different tasks/activities like mobile app development, animation, UI/UX enhancements, AI interfacing, icon designing etc. you can opt for a task based billing method for your project since every task is independent and billing is based on the service provided to their clients. Let's see how this is done in detail.
- Navigate to Projects and click New Project in the top right.
- Enter the project details and scroll down to Budget section.
- Select budget type from Project Budget drop-down.
- Select Based on Task/Issue Hours under Billing Method drop-down.
- Enter Default Rate Per Hour. This rate can be edited in tasks if they require a different rate per hour.

- Task planned cost = work hours * rate per hour.
- Task actual cost = log hours * rate per hour
Create an invoice
- Navigate to your project and select Finance.
- Click Create Invoice to create the invoice for your team.
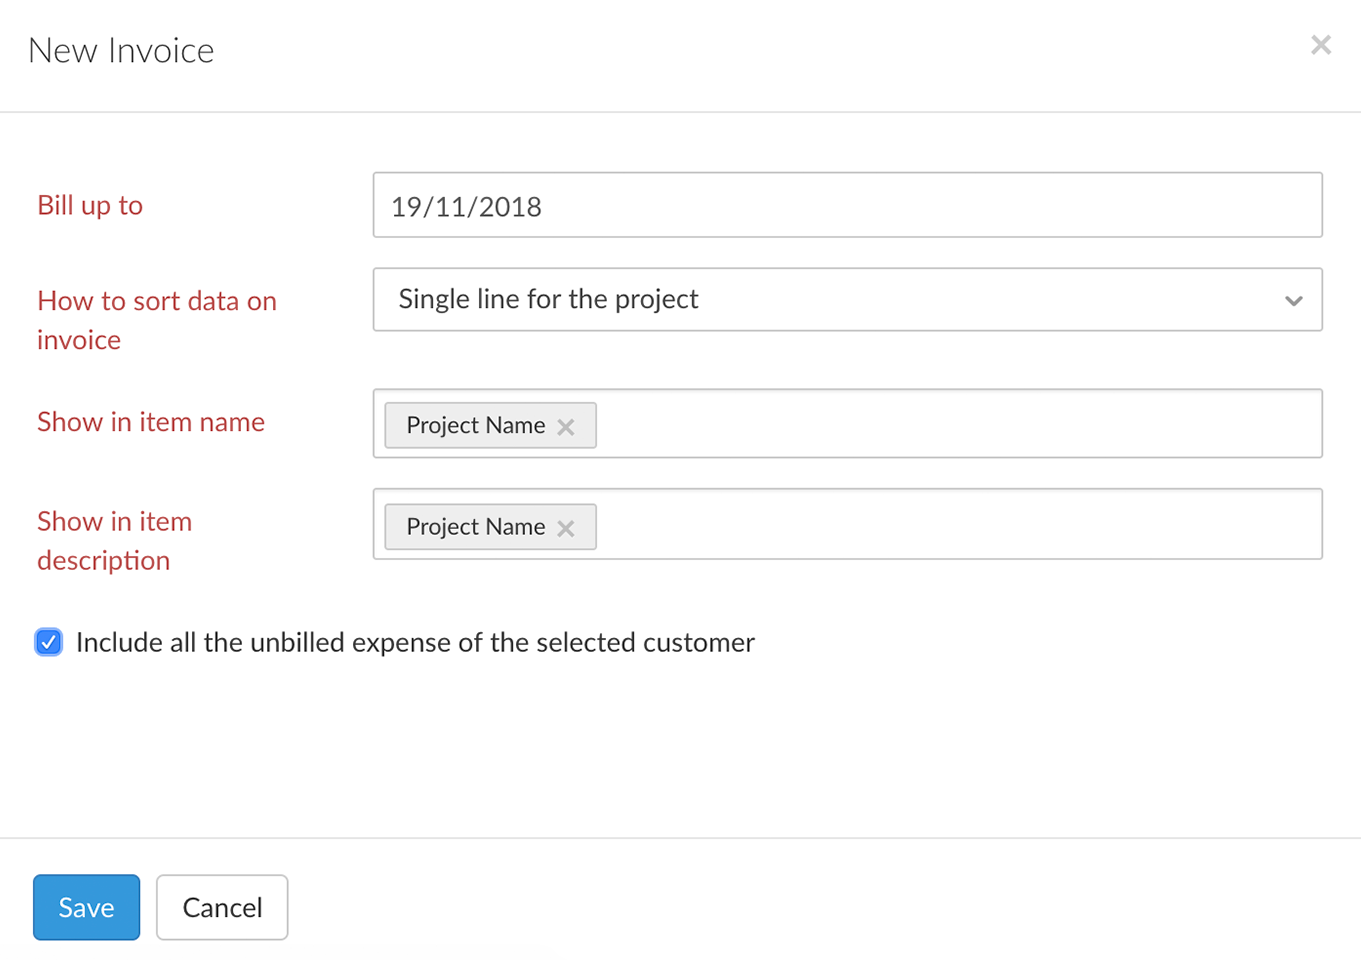
- Choose the sorting criteria for the invoice.
- Select the fields to be shown as item name and description.
- Click Save to proceed.
- Fill the details and enter the recipients in the Email To field.
- Click Save to send the invoice to customers.
- The Bill up to field is mandatory in order to generate the invoice. So, select a date if you haven't selected yet.
- You can create invoice only for billable timesheet logs based on the selected date range. Only approved time logs will be invoiced, if the "Submit with Approval" option in your Portal Configuration is selected. (To enable this: Click and navigate to Portal Configuration > Org Settings > Task & Timesheet > Timesheet Settings. Enable Submit with Approval in Timesheet Approval Process section.)
- If you have not selected the approval option, all the time logs will be invoiced.
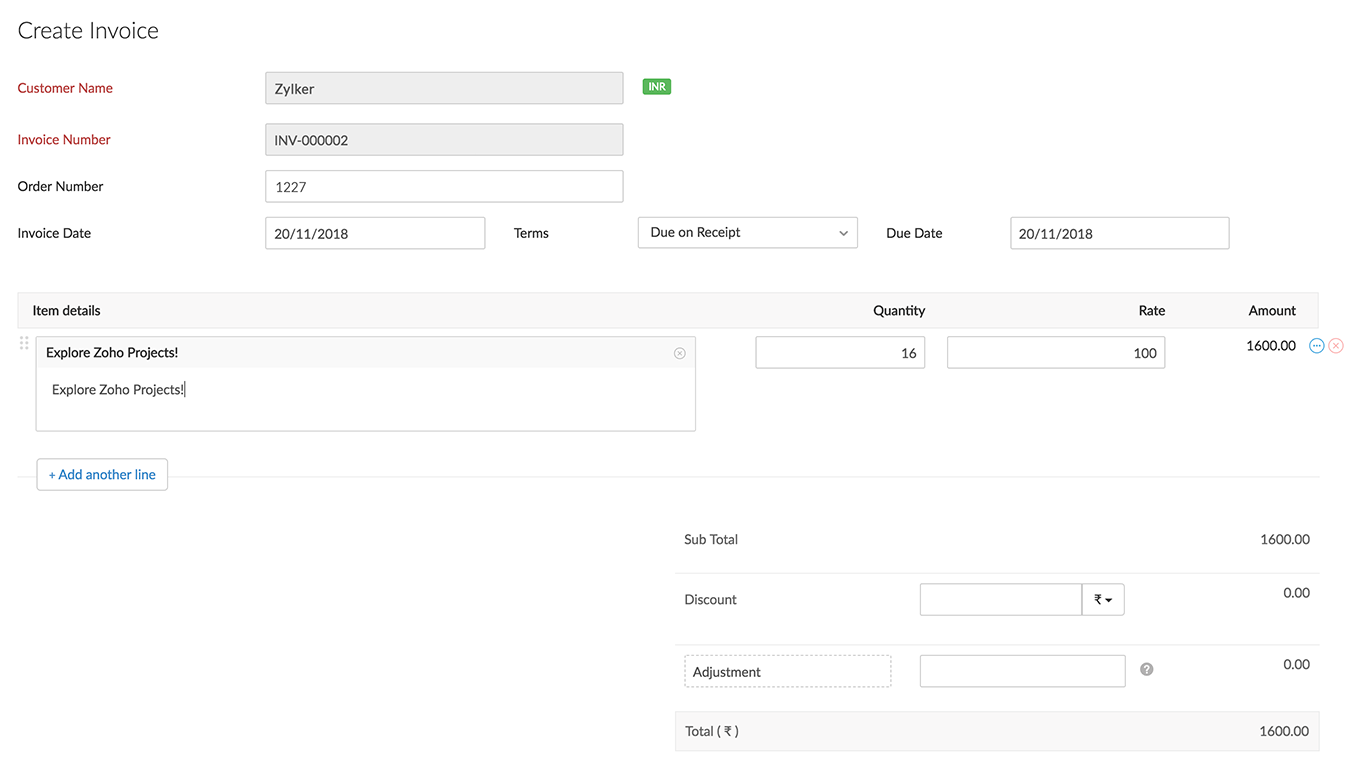
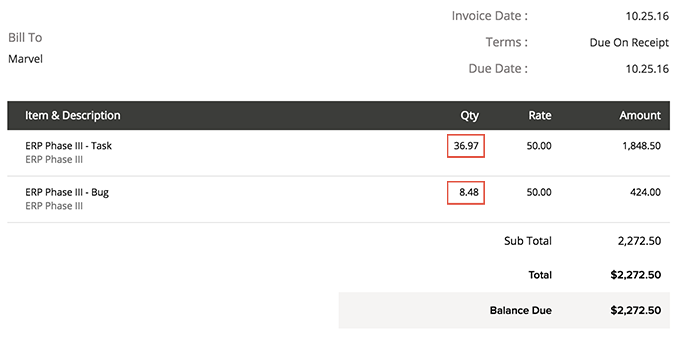
A sample invoice is shown here for your reference
Edit/ Delete an invoice
All the invoices created are saved in the Finance tab. Select the required invoice to edit or delete. Click  to edit the invoice details and then click Save to update the changes.

- You can email or print an invoice as well as export the invoice as a .pdf file.
- You can filter invoices based on different criteria like void, draft, paid, and sent invoices.
Create an estimate
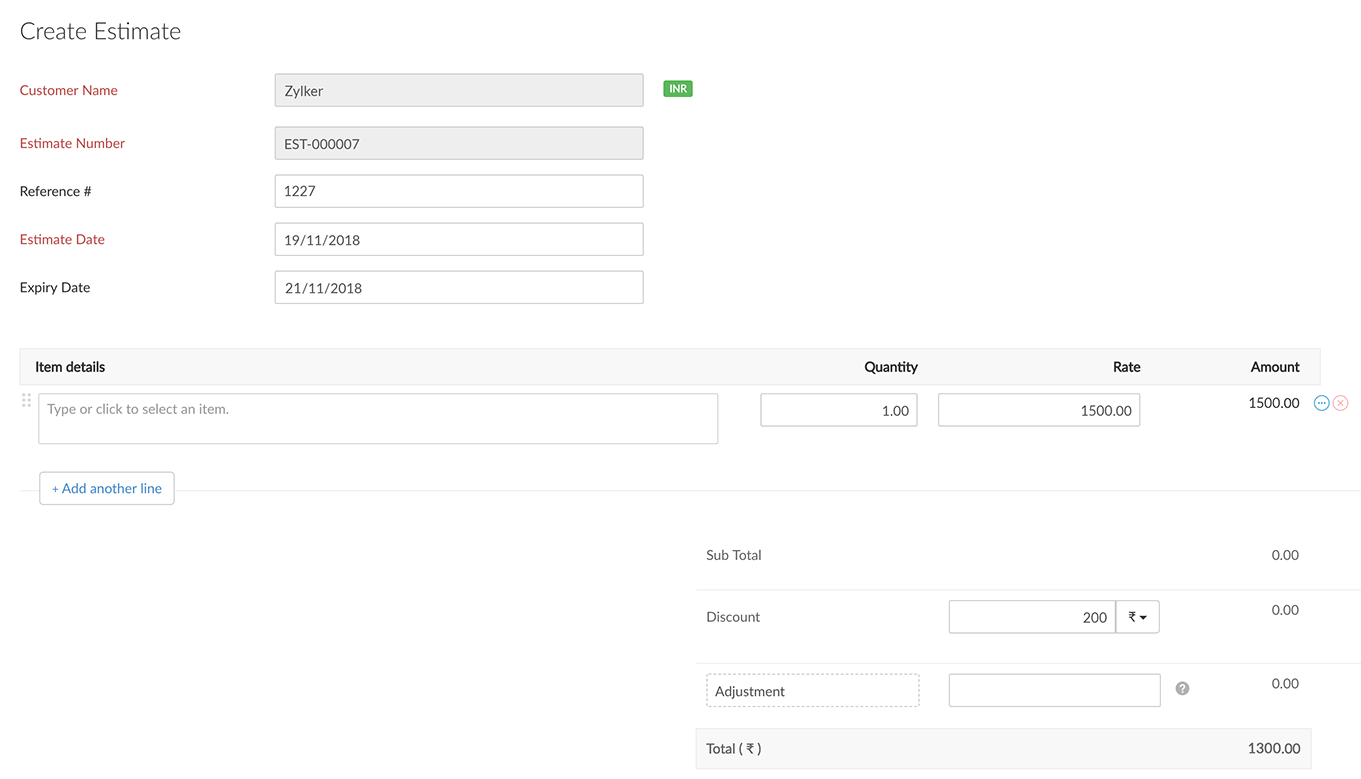
An Estimate is a proposal that you send to your customers with detailed quotation. After the customer accepts the estimate, it can be converted to a sales order or an invoice.
- Navigate to your project and select Finance.
- Choose the Estimates tab and click Create Estimate.
- Fill the details and enter the recipients in the Email To field.
- Click Save to send the estimate to customers.
Record an expense
- Click the Expenses tab in Invoice and Expenses and then click Create Expense in the upper-right corner to create a new expense record.
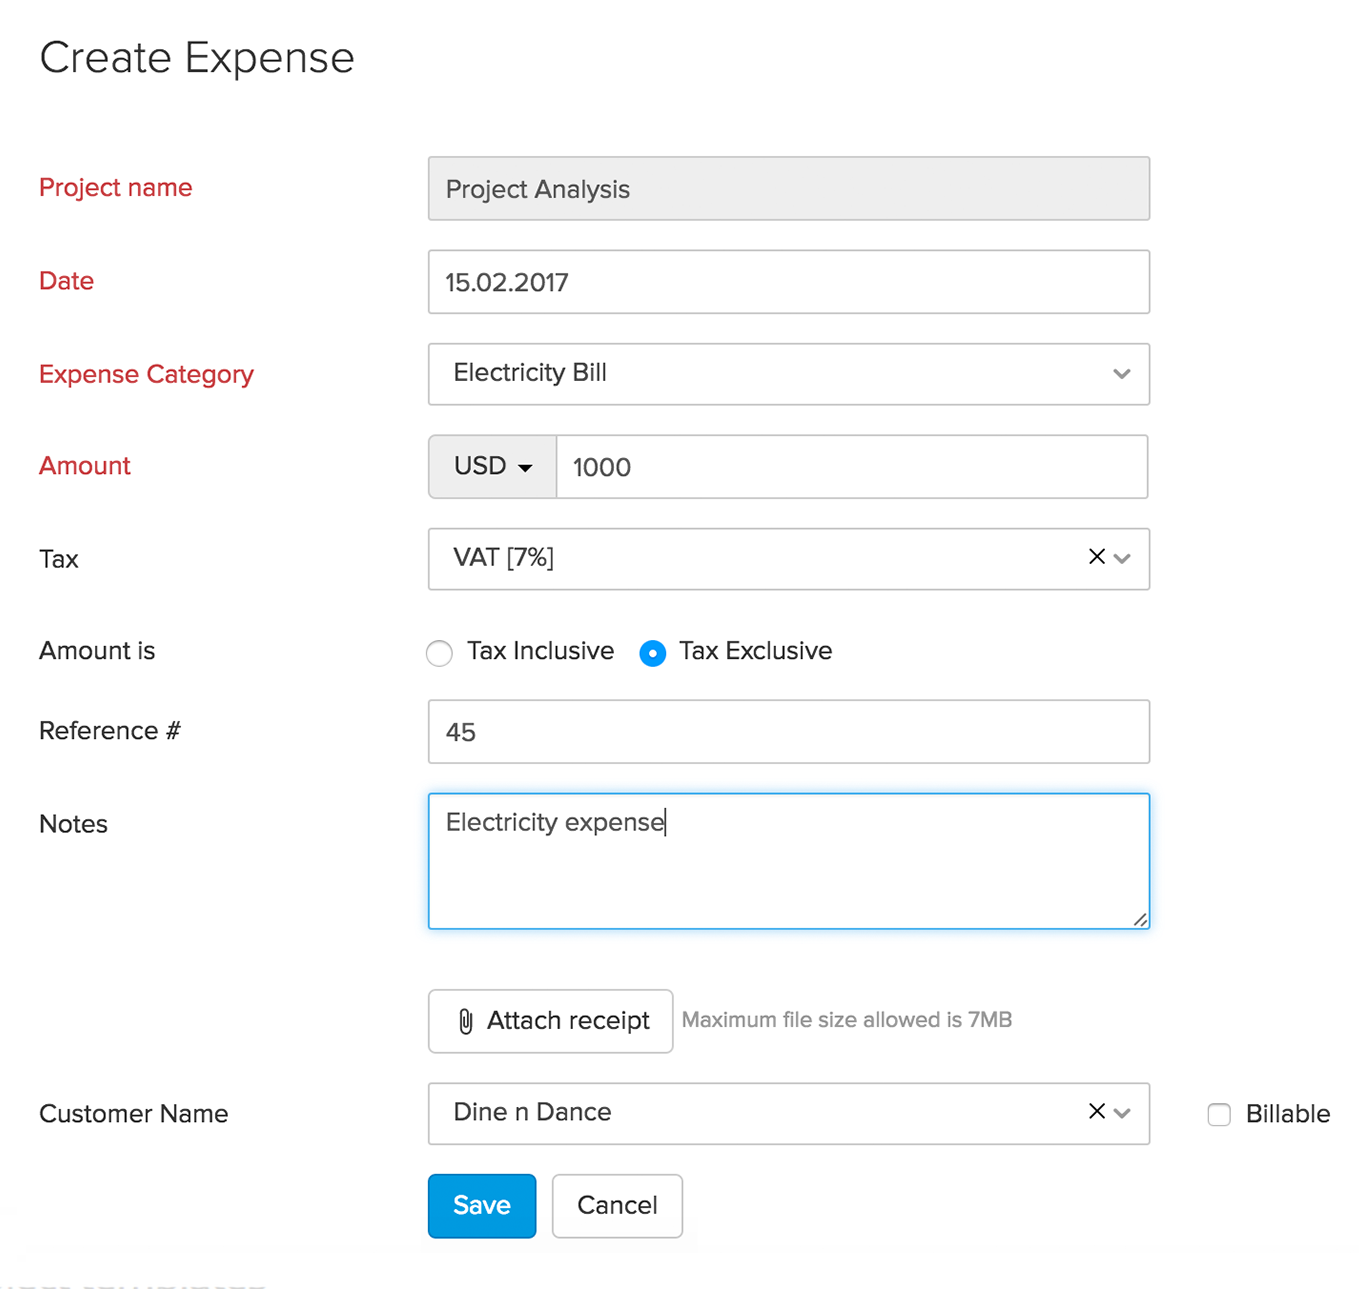
- Specify the expense details and then click Save to save the expense record.
Edit/ Delete an expense record
All the expenses recorded are saved in the Finance tab. Select the required expense to edit or delete. Click to edit the expense details and then click Save to update the changes. Plus, you can click on the attached expense receipt to download.


- You can attach, change, and delete an expense receipt.
- The invoice details are displayed in Timesheet, Tasks, and Bugs.
- Invoice created in Zoho Projects will be listed in Zoho Invoice or Zoho Books.
Profitability summary
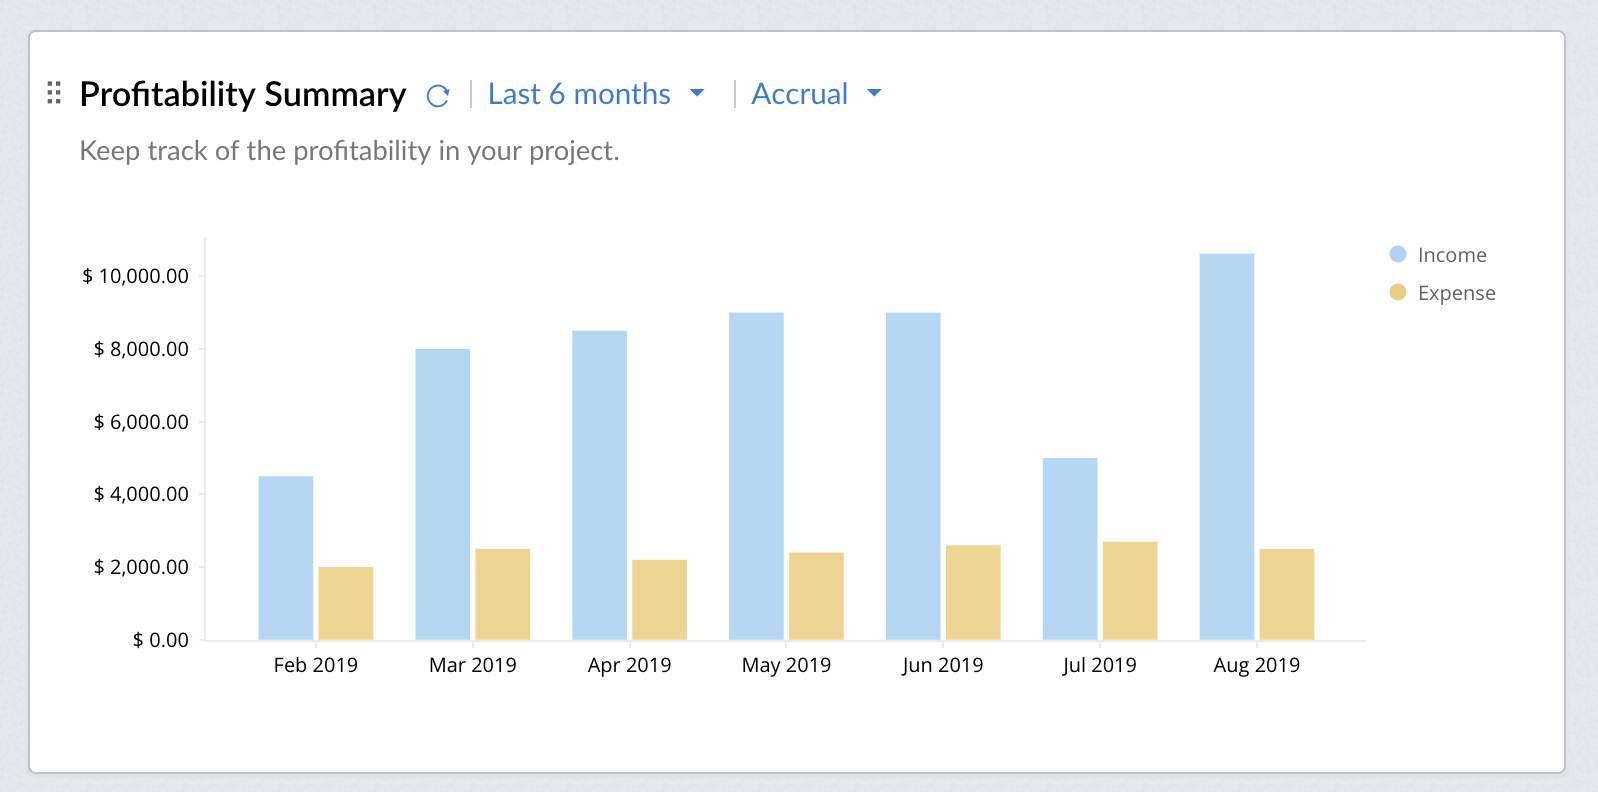
View the profitability summary of your project in the project dashboard.
- Navigate to a project and click Dashboard in the left panel.
- Gain insights about the income vs expenses recorded in your project in the Profitability Summary widget.
- Select Accrual or Cash option.
- Accrual: Shows the income that have been invoiced to the customer but payment hasn't been received yet.
- Cash: Shows the income and expenses after the invoices have been paid.
- View data for current fiscal, previous fiscal, last 12 months, or the last 6 months.
Migrate from old to new integration
With the new integration, your Zoho Projects data will be synced to the time tracking module in Zoho Invoice/ Books. You can perform all finance related transactions via Finance tab in Zoho Projects. You can also configure the contact preferences (either overwrite or clone contacts for a primary client) in Zoho Invoice/ Books.
- Navigate to
 > Marketplace > Zoho > Zoho Invoice/Zoho Books tile> Update.
 - Select Migrate.

- Once you are done reading the changes in migration, click Proceed.

- Set primary client in the next screen. The best practice is to mark a client as primary and then migrate. Note that the primary client is necessary to generate invoices. But you can skip this step if you don't want to set one for now.
- Click Migrate.

- Check the Error Summary tab for any errors in migration.
Related Articles
Sync leads from Zoho Invoice
Zoho MarketingHub integrates with Zoho Invoice to help you build your mailing lists. The integration lets you import contacts from Zoho Invoice as leads in Zoho MarketingHub. You can map custom fields in Zoho Invoice to Zoho MarketingHub to maintain ...Zoho Books Integration
With the Zoho Books integration, you can send professional invoices to your clients and accept payments online. Set-up Zoho Books Getting started with setting up your books integration with your account has three initial criteria to be considered. ...Zoho Projects Integration
No matter how many projects you have on your list or teams to coordinate, managing everything in the right way matters most. There are many different project management methodologies, but every team is bound to follow a standard process. That is why ...Using Zoho Finance Suite Integration
View Zoho Books/Zoho Invoice/Zoho Expense tabs Once you have integrated Zoho Finance Suite in Zoho CRM, you will be able to do the following actions for each of the Zoho Finance application. Zoho Books The Zoho Books tab groups the ...Configuring Google Ads Integration in Zoho CRM
Set up Google Ads Integration Users with administrator profile need to enable the Google Ads Integration in Zoho CRM. Setting up Zoho CRM for Google Ads comprises of these steps: Step 1: Authentication - Enable this feature and authorize your Zoho ...